
Installing the Android Plug-in for Eclipse
The Eclipse IDE supports numerous programming languages and technologies, but all of them are not supported right away. The IDE is enhanced with plug-ins that provide the functionality you need.
Eclipse needs a plug-in to integrate the IDE with the Android SDK. The plug-in adds menu commands to the IDE interface related to Android and makes it possible to create and manage Android apps.
Follow these steps:
1. Launch Eclipse by using the shortcut you created or opening the folder where it was installed and running the executable application. The program loads with several windows and a menu bar and toolbar running across the top.
2. Select the menu command Help, Install New Software. The Install Wizard opens, which enables you to find and install plug-ins for Eclipse. The plug-ins are downloaded from software repositories, but Eclipse must know the location of a repository before it can find plug-ins there.
3. Click the Add button. The Add Repository dialog opens.
4. Leave the Name field blank. In the Location field, enter the web address http://dl-ssl.google.com/android/eclipse/ and click OK. A Developer Tools item should appear in the Install window, as shown in Figure D.1.
5. Expand this item by clicking the arrow next to it. You see several subitems for Android-related tools you can add to Eclipse, as shown in Figure D.1.
Figure D.1. Adding new plug-ins to Eclipse.
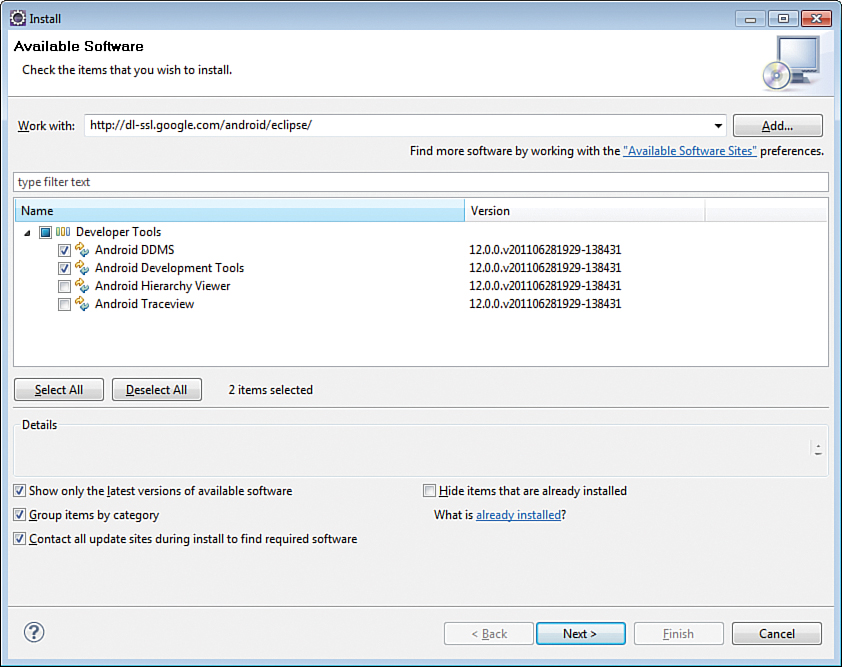
6. Select the checkboxes for Android DDMS and Android Development Tools. (You also can add the other tools such as the Android Hierarchy Viewer, but you won’t see them at the start of your Android programming.)
7. Click Next to review the licensing agreement and check whether anything else needs to be installed. When you reach the end of the wizard, click Finish.
After the plug-in has been installed, close Eclipse and run it again.
Your preferences in Eclipse must be checked to make sure the IDE can find the Android SDK.
To check this, undertake the following:
1. Choose the menu command Window, Preferences. The Preferences dialog opens with a list of categories running along the left side.
2. Click Android to see the general Android preferences.
3. Make sure the SDK Location field contains the folder where the Android SDK was installed. If it doesn’t, click Browse to navigate to that folder and choose it with a file folder dialog.
4. After the SDK has been located, you see a table with a list of SDK targets, as depicted in Figure D.2.
Figure D.2. Setting Android preferences in Eclipse.
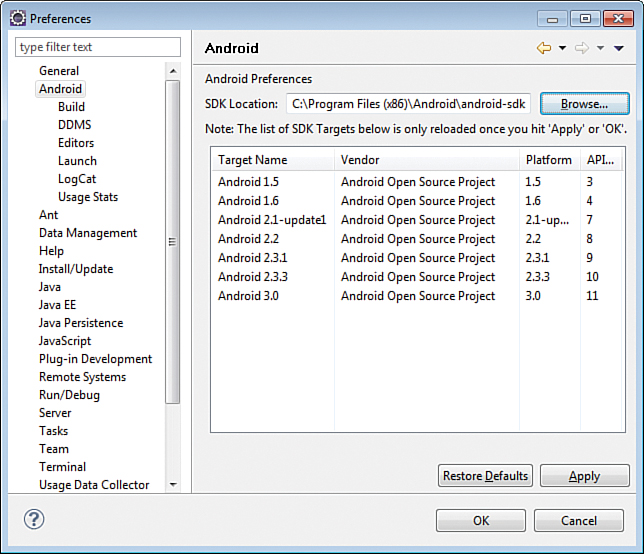
These targets are the versions of Android you can create apps for with the SDK. Android apps must designate the earliest version of Android they are created to work on.
Click OK to close the dialog and save your preferences.
With the Android plug-in installed and the SDK located properly, you should find new menu commands in Eclipse. One of them is Window, Android SDK, and AVD Manager.
If this command is absent, close Eclipse and restart it.
You can use the manager to keep the SDK up to date. Choose Window, Android SDK, and AVD Manager. The manager opens.
Click Installed Packages in the left pane to see which SDK components are installed on your computer.
Click Available Packages to see what else is available that hasn’t been installed yet.
Check a box for one of the packages. Eclipse checks the contents of that package and presents check boxes for the specific things you need to install, as shown in Figure D.3.
Figure D.3. Installing new packages for the Android SDK.
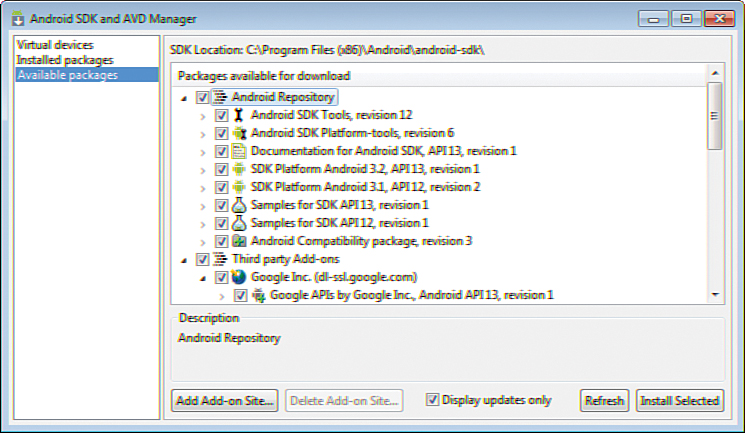
When you have checked the boxes for packages you want and have unchecked the ones you don’t, click Install Selected.
You should periodically check for new updates. Android is being developed at a furious pace as new phones and other devices hit the market and the SDK must support them.