
HOUR 2
Installing SharePoint Foundation 2010
What You’ll Learn in This Hour
![]() Making some amendments to the operating system
Making some amendments to the operating system
![]() Installing SPF 2010 in the simplest possible way
Installing SPF 2010 in the simplest possible way
For those of you without access to SharePoint Foundation 2010 (or SharePoint Server 2010) systems to work through this book, this hour shows how to install SharePoint Foundation 2010 (SPF 2010).
You can, for instance, use a regular portable running Windows 7 if you have one that preferably has 4GB of main memory. You can install in that VM Workstation to keep the SPF 2010 system completely separate from your normal usage of that portable.
Those of you with access to SPF 2010/SPS 2010 might still prefer to set up your own machine because that will ensure that you can follow the sections that require Administrator permissions, which some of you won’t have in your company systems.
Knowing Which Computer Type You Need to Install SharePoint Foundation 2010
As explained in Hour 1, “Introducing SharePoint Foundation 2010,” SPF 2010 installs only in a 64-bit machine running a 64-bit operating system. That operating system can either be a 64-bit version of Windows 7 (any version including Home Premium) or a particular 64-bit version of Windows Server 2008. (The choices are Windows Server 2008 including Service Pack 1 or Windows Server 2008 R2.)
The operating system can either be run native or in a VM. If run in a VM, the VM software must support the installation of a 64-bit operating system.
SPF 2010 requires much less memory than SPS 2010. It can easily install in 1GB and can run reasonably in that amount of memory. If running in a VM on a portable that has 2GB memory, don’t assign much more than 1GB to the VM. If running in a VM on a portable with 4GB memory, you can assign 2GB to SPF 2010. Much more memory than 2GB probably won’t have much effect on the basic test installation created in this hour.
Client systems can, within reason, be anything. Most Windows operating systems from XPPro upward (Vista and Windows 7 at the time of this writing) work fine. Intel Macs also work, but you cannot apply any of the chapters on the interaction between Office and SPF 2010 (or the hours on SPD 2010 and SPF 2010) unless you have a second VM running under the Mac alongside the VM running SPF 2010 (or unless you add all the client software to that single SPF 2010 VM, which isn’t a good idea).
Amendments to Windows Server 2008 R2
Because this book is about a SharePoint product, I won’t spend time on actually installing Windows Server 2008 R2. I assume that you can do that and, if you use a VM system, you know how to create a virtual machine and install an operating system in it.
Here are a few notes on what you should do after you install Windows Server 2008 R2. After installation, you see a screen similar to Figure 2.1.
The screen in Figure 2.1 is the result of making the following amendments to the operating system as installed:
![]() Activating the operating system (line one)
Activating the operating system (line one)
FIGURE 2.1 Initial configuration tasks
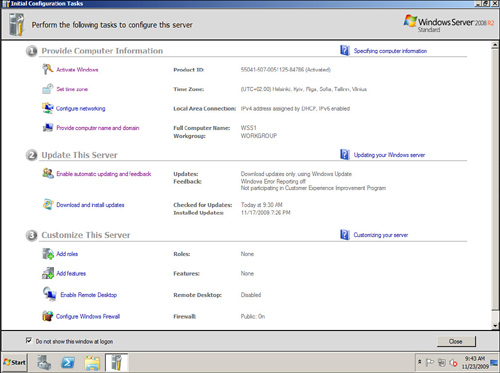
![]() Giving the computer a short name (here, “SPF1”) and making it part of a workgroup
Giving the computer a short name (here, “SPF1”) and making it part of a workgroup
![]() Specifying that updates are downloaded but not automatically installed
Specifying that updates are downloaded but not automatically installed
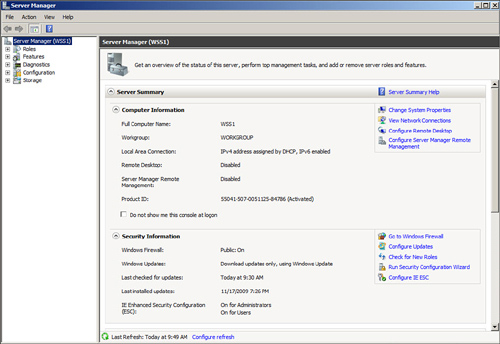
At the moment, the Internet Enhanced Security Configuration is enabled (see Figure 2.2). This is a nuisance for a test installation, so you need to turn it off. Do so by going to Administrator Tools > Server Manager. The Server Manager function starts (see Figure 2.3).
Select Configure IE ESC, which appears in the Security Information section on the right side, and turn it off for administrators and users.
Make sure to note the password for Administrator. Now, it’s time to install SharePoint Foundation 2010.
Installing SharePoint Foundation 2010
To install SharePoint Foundation 2010 (SPF 2010), you must first download a copy of the latest version of SPF 2010 from the Microsoft site. Because the application is free to use, it is available to everyone as a free full version; there’s no need to select either a trial version or get a nontrial version from MSDN or TechNet.
FIGURE 2.2 Internet Explorer Enhanced Security Configuration dialog
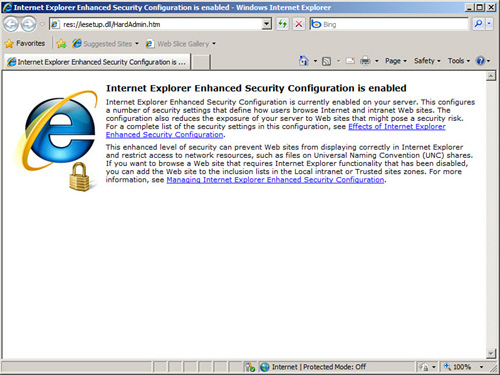
FIGURE 2.3 Security Manager dialog
To ensure that you get the most recent version (which might, by the time you read this book, include Service Pack 1 or 2), go to the Microsoft Downloads page (http://www.microsoft.com/downloads) and search for “SharePoint Foundation 2010.” This search yields the page shown in Figure 2.4 (at the time of writing).
FIGURE 2.4 Download Page for SharePoint Foundation 2010
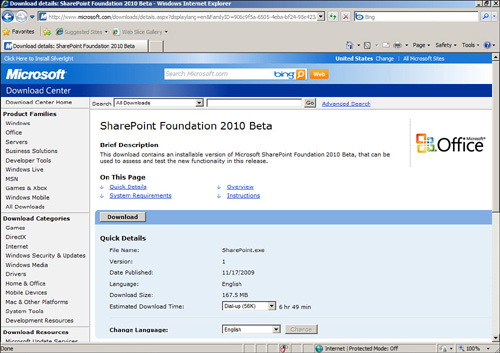
Because SPF 2010 is a free product, you do not have to note or acquire a Product Key. You just need to download the product (when in the VM) and run it when you are prompted to run or save the install. (Use Save if you want to keep a copy of the .exe file and then double-click the file).
The first SPF 2010 installation screen is a greatly improved version of the equivalent 2007 installation screen (see Figure 2.5).
FIGURE 2.5 Installation screen for SPF 2010
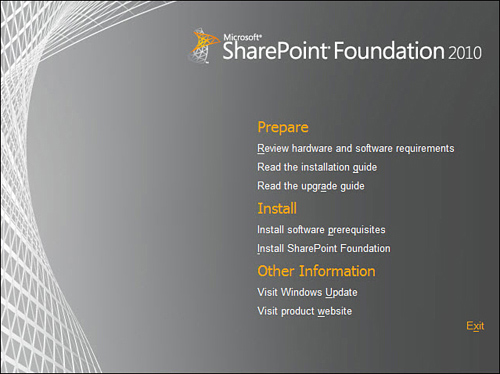
Note that the software prerequisites are the first option in the Install section. You no longer need to hunt for documentation that tells you what you need to install before you install SPF 2010.
At this point, follow these steps to install SPF 2010:
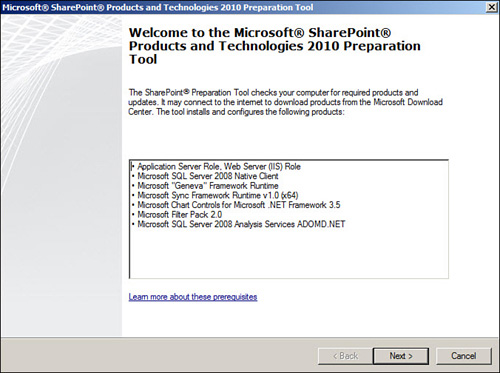
1. Select Install Software Prerequisites, which starts a routine that first tells you what will install and then installs them (see Figure 2.6).
FIGURE 2.6 The Prerequisites Screen
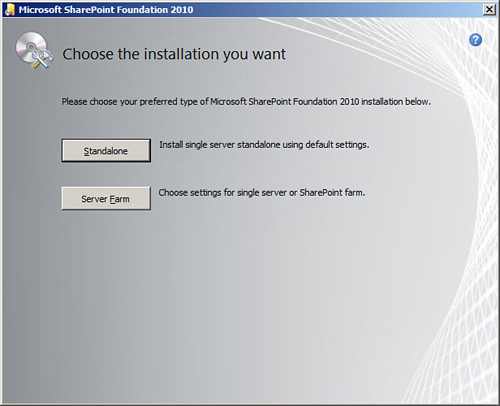
2. At the end of the prerequisites phase, select Finish. Figure 2.7 appears, a key page for most Installations. Rather than just jumping into the Basic Installation (the Standalone option), which is what you will use (the simplest installation), here are the main differences between the two installation types:
![]() Standalone installs everything on a single server, which includes the installation of a copy of SQL Server 2008 Express.
Standalone installs everything on a single server, which includes the installation of a copy of SQL Server 2008 Express.
![]() Server Farm gives you more options:
Server Farm gives you more options:
![]() Standalone enables you to specify the location of the search index files, but otherwise the installation is the same as a Standalone Installation and also like that installs SQL Server 2008 Express. (SPF 2010, unlike WSS 3.0, actually says so on the page-progress!)
Standalone enables you to specify the location of the search index files, but otherwise the installation is the same as a Standalone Installation and also like that installs SQL Server 2008 Express. (SPF 2010, unlike WSS 3.0, actually says so on the page-progress!)
FIGURE 2.7 Choosing the Installation type
![]() Complete installs the full SPF 2010 product on the server, but it does not install SQL Server 2008 Express. Also, it enables you to say on which server your database system is. (Because of this, your database system should already be installed if you use this option.)
Complete installs the full SPF 2010 product on the server, but it does not install SQL Server 2008 Express. Also, it enables you to say on which server your database system is. (Because of this, your database system should already be installed if you use this option.)
Here in the original screen (Figure 2.7), select Standalone.
3. After the files have been copied to the server by the installation routine, the Run Configuration Wizard screen appears (see Figure 2.8). When you get here, select Close. Doing so starts a lengthy process of installing the software on the server, so go grab a cup of coffee.
FIGURE 2.8 Run Configuration Wizard
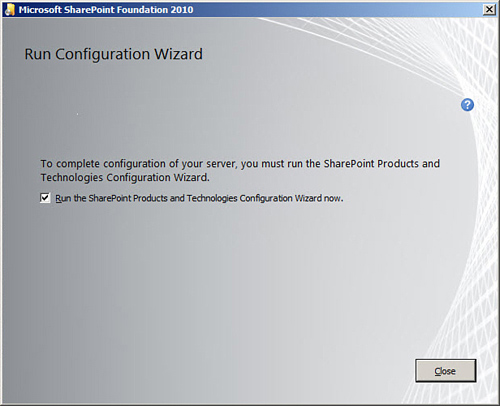
As the software is installed on the server, a screen advises you that several services (such as IIS) need to be stopped and started as part of the process. Then, there is a long process of 10 configuration steps; patience is required particularly on steps 2 and 8. Progress is shown, though.
4. Finally, a Configuration Successful screen appears, and the installation and configuration are complete.
Before the default website can be opened, the user needs to log in (see Figure 2.9).
FIGURE 2.9 Connecting to SPF1
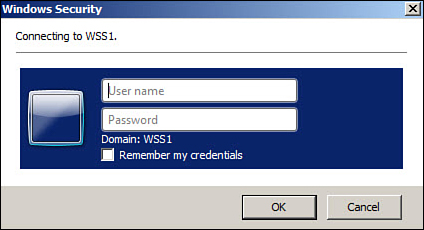
The only user we have available at the moment is the Administrator. Enter both Administrator and the password, and you see the website (see Figure 2.10).
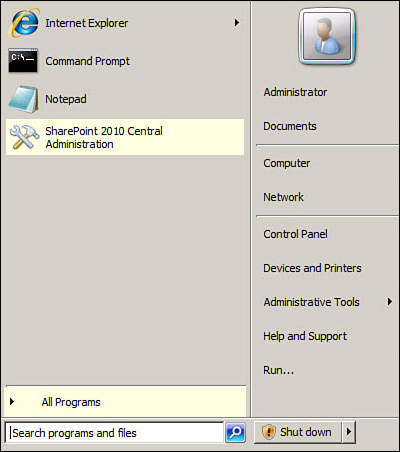
You need to check one final thing: Make sure that you have an Administration Site. To do this, follow these steps:
1. Go to Start and select SharePoint 2010 Central Administration (see Figure 2.11).
FIGURE 2.10 The SPF 2010 default site
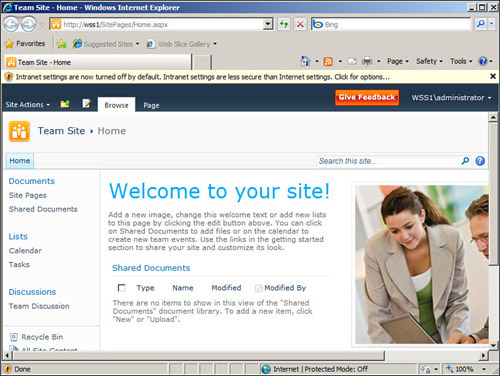
FIGURE 2.11 SharePoint 2010 Central Administration in Start
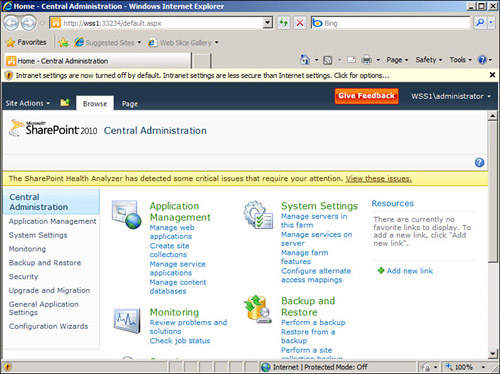
2. After the inevitable request for you to sign in with Administrator and Password, you see Figure 2.12.
3. You can now visually verify that you have a Central Administration site. With that, installation is complete.
Note, however, the port used by Central Administration (in this case, 41170) because you can’t always access the server’s Start button (or Administration Tools) and access it from there. Also add this address (http://SPF1:41170 for this example, but for you, the address you see in your system!) to your Favorites list in your browser.
FIGURE 2.12 SharePoint 2010 Central Administration
Summary
This hour suggested a few amendments after you installed the operating system and then showed you how to install a basic installation of SharePoint Foundation 2010.
Q&A
Q. How do I install SPF 2010 so that I can use an existing copy of SQL Server 2008?
A. Do not select the initial Standalone option. When you then select the Server farm option, do not select the Standalone option.
(Even if you already have a full copy of SQL Server 2008 installed on the single server, it will still not be used for the SPF 2010 databases).
Q. The 2007 products contained differences between the (basic installation) database system installed by WSS 3.0 and by MOSS 2007. Is that still the case?
A. In the 2007 products, the database systems installed by Basic Installations were different versions of SQL Server 2005 Express. The main difference was that the WSS 3.0 version had no database size limit, whereas the MOSS 2007 version had a 4GB size limit. In the 2010 products, both SPF 2010 and SPS 2010 use the same version of SQL Server 2008 Express, and both have a 4GB database size limit.
Workshop
Quiz
1. Why should you change the VM default selection of memory before the installation phase?
2. Which part of the entire installation process of SPF 2010 takes the longest time?
Answers
1. More memory means that the installation phase is noticeably quicker (provided you don’t grab too much memory from the VM’s host system).