
HOUR 3
Adding Users and Giving Them Rights
What You’ll Learn in This Hour
![]() Different default accounts used to access a SPF 2010 site
Different default accounts used to access a SPF 2010 site
![]() Creating local users (on the server)
Creating local users (on the server)
![]() Creating SharePoint groups and the benefits of having them
Creating SharePoint groups and the benefits of having them
![]() Creating a new SharePoint group with additional permissions
Creating a new SharePoint group with additional permissions
![]() Using an AD group: advantages and disadvantages
Using an AD group: advantages and disadvantages
At the moment, the only way to access the site created in Hour 2, “Installing Share-Point Foundation 2010,” is to use the administrator name and the password specified for it when the operating system was installed.
The (server) Administrator account is used throughout this book unless specified otherwise; however, you need to be aware of the rights that other (nonadministrator) users can have in SPF 2010 websites. In this hour, you create more users and give them different rights to access sites.
Getting to Know the Different Account Types
Normally, an SPF 2010 server in a company is part of an Active Directory (AD) setup, and each prospective internal user of the SPF 2010 site would already have a name in the form of domain<username> and password.
In Hour 2, you created the simplest standalone server installation—one that when following most of this book you will never perhaps connect to a network—so you need to create users on the server, because these users can then always be available. You then give those users rights to access the site.
Normally, this method would be used only by the administrator of a company system to give him the ability to simulate users with different rights than his normal domainusername gives him so that he can support users with (typically) less rights than himself.
Creating a Single User
To create a single user to your SPF 2010 website, follow these steps to create a user called MyAdmin. These steps will be repeated for several other users. The list of those users is below the steps needed to create one user.
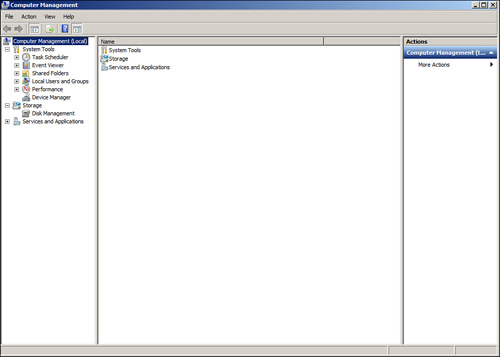
1. Go to Start > Administrative Tools > Computer Management. Figure 3.1 shows the Computer Management page.
FIGURE 3.1 The Computer Management page
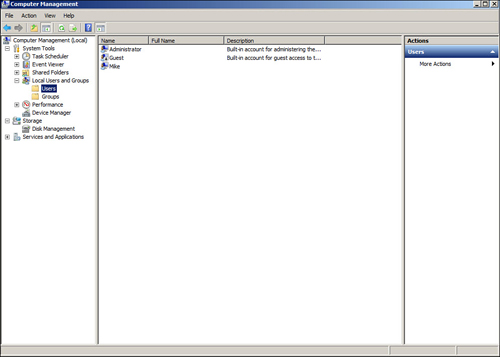
2. Select Local Users and Groups, and then select Users (see Figure 3.2).
FIGURE 3.2 A list of users on the Computer Management page
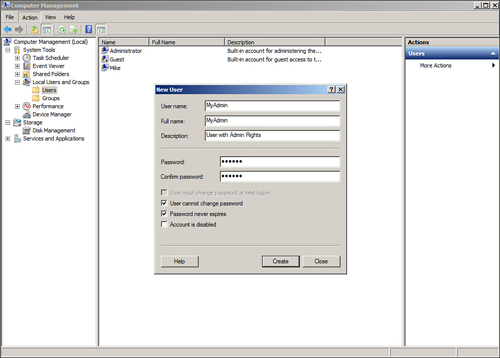
3. Under Actions, select User > New User. Figure 3.3 shows the completed New User dialog with the text required to add the MyAdmin user. To select User Cannot Change Password and Password Never Expires, you first need to deselect “User must change password at next login.”
FIGURE 3.3 Creating a new user
4. Click Create to return to the empty version of Figure 3.3. From here, you can directly enter the next user from the list below.
Repeat the above steps for the following users:
![]() MyContrib
MyContrib
![]() MyDocLib
MyDocLib
![]() MyReader
MyReader
![]() MyReaderPlus1
MyReaderPlus1
![]() MyReaderPlus2
MyReaderPlus2
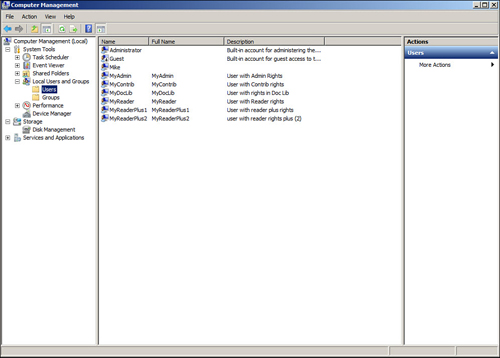
5. After you enter all the users in the above list, click Create and then Close. Figure 3.4 appears.
Giving Users Rights to Access the Site
After the users are created, the SPF 2010 system needs to be told that these particular users can access the SPF 2010 sites and what rights these users have when they access them. To achieve this, follow these steps:
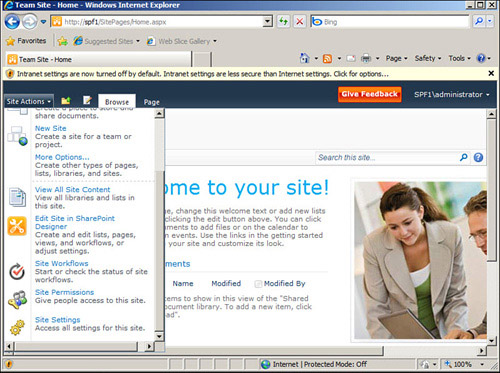
1. While still in the virtual machine (VM) or on the server, open Internet Explorer and enter http://SPF1. After a brief delay (and perhaps the need to sign in as Administrator again), you see the default site. (Refer to Figure 2.10 in Hour 2.)
FIGURE 3.4 List of users after adding several new ones
2. From the Site Actions drop-down menu, select Site Settings (see Figure 3.5). The Site Settings page appears (see Figure 3.6).
FIGURE 3.5 Site Actions and Site Settings
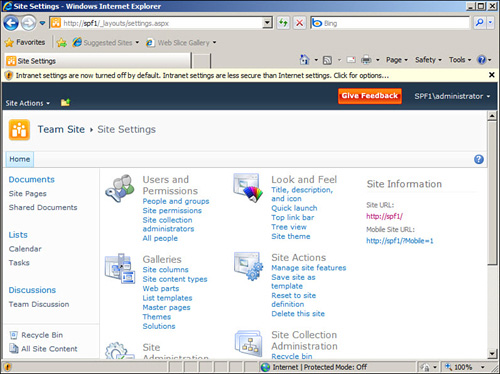
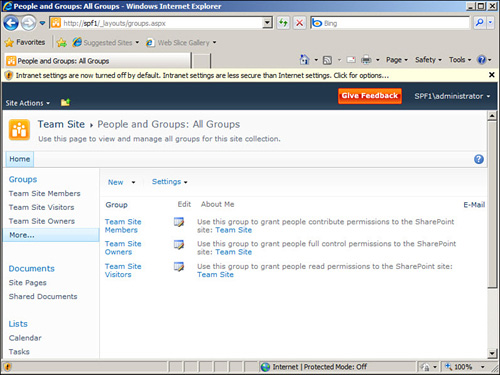
3. Select People and Groups from the section Users and Permissions. The People and Groups page appears (see Figure 3.7).
FIGURE 3.7 The People and Groups default page
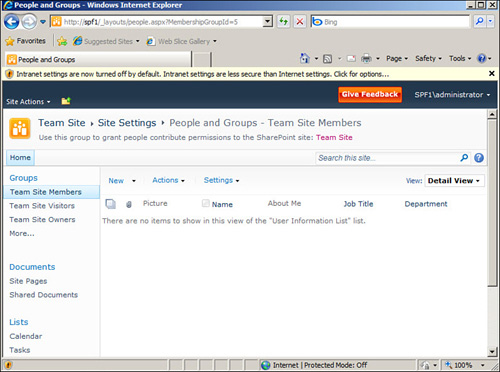
4. In the New drop-down menu, select Add Users. An empty Grant Permissions window appears (see Figure 3.8). This group of Team Site Members is described as being able to Grant People Contribute Permissions (refer to Figure 3.7). This is where we add the MyContrib and MyDocLib users.
FIGURE 3.8 The Grant Permissions window
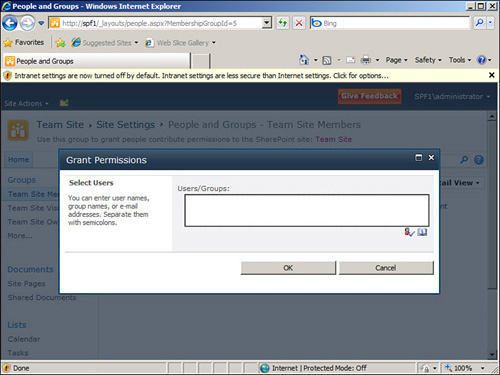
5. Write MyContrib; MyDocLib in the User/Groups box shown in Figure 3.8 and click OK.
Figure 3.9 (on the following page) shows what happens: Users MyContrib and MyDocLib are now listed as the members of the Team Site Members list.
The next actions are to go to Team Site Visitors and add MyReader, and to go to Team Site Owners and add MyAdmin. You do this in exactly the same way described above for the Team Site Members group.
Getting Familiar with SharePoint Groups
SharePoint groups are made available to solve the administration problem of not wanting to enter every single users’ name every time access to something (a Site or a List, for instance) is granted to that user. (Another solution to the same problem is grouping users by the use of an Active Directory group; for more on this, see the end of this hour.)
Imagine if we could not group users. At first, for a small company, everything would be okay. Say that 50 users are given the rights to access a SPF 2010 site by entering the username of each user. But what happens if, one month later, another site is created? And, during this time, two users have left and three new users have arrived in the meantime. We would need to give all 51 users rights to the new site again by entering the names of all 51 users. Add more sites and the manual effort increases.
FIGURE 3.9 The list of Team Site Members

You might be thinking, that’s only manual effort and adding a new site doesn’t happen that often. That’s true, but when you add 50 users are you going to make a manual error and miss one of them, and if you do, what will be the result? Probably several weeks later, a user will call the hotline saying that she can access sites 1, 2 and 3, but not 4. The other problem is that, when a new user arrives at the company, you need to know which sites to add him to, and you need to go into each site to do so.
Wouldn’t it be much easier if you had just one list of users no matter how many sites you have?
That is the main reason for a SharePoint group: It’s a place to put users who share the same access rights to one or more SPF 2010 sites. (This is not restricted to sites only, as you will see later.) Now whenever a new site is created, the appropriate SharePoint groups are given access rights to it and not a list of tens (or hundreds) of users individually. If a new user arrives, he is added to the appropriate SharePoint group(s) for her job description.
I sneaked it past you earlier, but you already added users to SharePoint groups when creating users in the “Giving Users Access Rights to the Site” section. Team Site Members, Team Site Visitors, and Team Site Owners are three SharePoint groups created automatically as part of the installation process.
Only Team Site Owners was initially given a member (Administrator) as part of the installation, but all three of these groups were also given (different) access rights to the default site created in the SPF 2010 installation.
In the next section, you will create an additional SharePoint group similar to the Team Site Visitors SharePoint group but with slightly amended rights. When that SharePoint group has been created and given access rights to a particular site, you can add to it the two users we haven’t so far added: MyReaderPlus1 and MyReaderPlus2.
Creating a New SharePoint Group
In this section, you create a SharePoint group called ReadPlus. To do so, follow these steps:
1. In the Team Site Members page (refer to Figure 3.9), click the Groups heading. All the current groups are listed, including a brief description of their rights (see Figure 3.10).
FIGURE 3.10 Listing of All Groups
2. Click New and, in an empty version of the Create Group page (see Figure 3.11), you can fill out the details for the new SharePoint group called ReadPlus. (We are creating a new SharePoint group because we don’t want to use one of the standard SharePoint groups–Team Site Members, Team Site Visitors, and Team Site Owners–for one of our users.)
FIGURE 3.11 The top half of the Add Share-Point Groups page
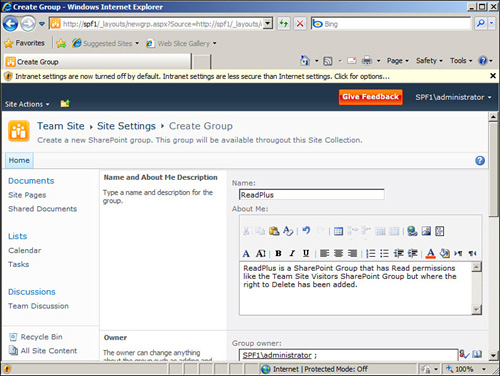
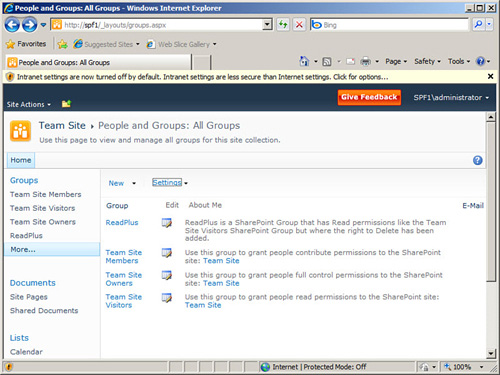
3. For our purposes, leave the default values as they are in the second half of the screen and click Create. The group ReadPlus is now listed with the previously created groups (see Figure 3.12). Success!
FIGURE 3.12 A List of All Groups including ReadPlus
Specifying the Permissions of a SharePoint Group
Currently, you haven’t chosen the access rights for the members of this new Reader-Plus SharePoint group. Here’s how to do that:
1. At the Team Site Start page, click the Site Actions drop-down menus (near the top-left) and select Site Permissions. The Permissions: Team Site page appears (see Figure 3.13).
FIGURE 3.13 The Site Permissions screen

2. Select Permission Levels. This shows a list of the present (default) Permissions Levels: Full Control, Design, Collaborate; Read and Limited Access.
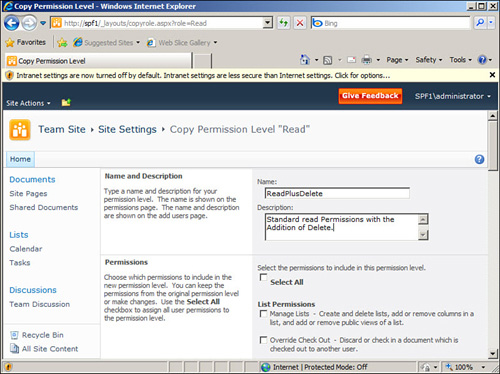
3. Select Read. At the bottom of the page that appears, select Copy Permission Level. The Copy Permission Level page appears (see Figure 3.14).
4. Fill out the Copy Permission Level “Read” screen, as shown in Figure 3.14.
5. Scroll down the page and select a Delete option (Delete Items or Delete Versions). Then, scroll to the bottom of the page and click Create. Now there is a screen listing six different Permission Levels. The final step is to assign the new ReadPlusDelete permission level to the ReadPlus SharePoint Group and give it rights to access the default site.
FIGURE 3.14 Copying the Read Permission Level
6. Click Team Site. This takes you back to the default site again.
7. Click Site Actions > Site Permissions again, and then click Grant Permissions.
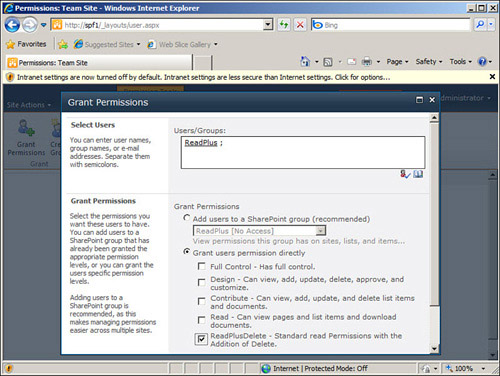
8. The Grant Permissions screen appears, as shown in Figure 3.15.
Fill out the Grant Permissions page as necessary:
![]() Type ReadPlus in the box.
Type ReadPlus in the box.
![]() Click the arrow next to the person image. (ReadPlus becomes ReadPlus;)
Click the arrow next to the person image. (ReadPlus becomes ReadPlus;)
![]() Select the Grant Users Permission Directly radio button.
Select the Grant Users Permission Directly radio button.
![]() Select ReadPlusDelete.
Select ReadPlusDelete.
9. Scroll down and click OK.
There’s now a new list of those SharePoint groups that can access the Team Site. In addition to those listed in Figure 3.13, there’s also the ReadPlus SharePoint group listed with the information that it has the ReadPlusDelete Permission Level.
There’s one final thing to do and that is to add the two users MyReaderPlus1 and MyReaderPlus2 to the ReadPlus SharePoint group. I’ll leave you alone to do that because Grant Permissions followed by adding the two users and selecting the correct SharePoint group is close to what we previously did earlier in this hour.
FIGURE 3.15 Grant Permissions
What About Active Directory Groups?
You can use Active Directory (AD) groups instead of SharePoint groups to provide a way of assigning rights to a number of users at one time. At first glance, their use seems to be the obvious choice for a company environment where AD groups are already in use, and deciding whether to use an AD group or a SharePoint group often depends on how the AD support people operate and their relationship with the Share-Point administrator.
The best example of using an AD group is when a suitable AD group already exists. Let’s say that there already is an AD group for the members of the Personnel department. In that case, you can use that AD group to restrict access to a SharePoint site (or something else such as a List) to members of the Personnel department thus avoiding the need to also create a SharePoint group for the same set of people.
Usually, that is a clear-cut situation, but what happens, for instance, if the AD team put the boss of the Personnel group in her own AD group (because she has more powers than her staff) and doesn’t tell the SharePoint Administrator? Then, unless they have also left her in the standard Personnel AD group, she will no longer have access to the SharePoint sites her people can still access.
A worse example is the case in which an AD group doesn’t exist. Then the Share-Point Administrator needs to inform the AD team that he wants a new AD group to be created. The AD team might create groups only on a weekly basis, so the SP Administrator needs to wait patiently until that happens, in the meantime, no doubt receiving emails saying, “Why haven’t you done this yet?” The SP Administrator can only give access rights to the SharePoint site when the AD group is available, so he either has to waste time checking if it’s there or wait for an email from the AD team saying they’ve done it.
A similar situation is if a user needs to be given rights to the site. The SP administrator knows which group or groups to add the user to but the AD team might not. Again the process goes from the user’s boss to the SP administrator who needs to contact the AD team, and so on.
Faced with this kind of time delays and additional bureaucracy, it’s often the case that the SharePoint Administrator will create a SharePoint group to solve the problem.
Rather than having a mixture of SharePoint groups and AD groups used for the same SharePoint site, it might well be advisable to always use SharePoint groups for all SharePoint access rights and let the AD team take care of access rights to network systems. However, a final decision on this needs to be based on the internal routines of a company (and also invariably on how well the SP administrator and the AD people work together). Here, we use only SharePoint groups.
Summary
This hour looked at the rights users have when they access sites and how these rights can be specified. We created users local to the server, assigned these to existing SharePoint groups, and then created a new SharePoint group with a different set of permissions.
Q&A
Q. Can you specify two (or more) permissions for the same SharePoint group?
A. You wouldn’t normally because you would have SharePoint groups that overlap permissions with other SharePoint groups. That is, one set of permissions includes all the individual permissions of another set of permissions.
However, there is nothing to stop you from having a set of permissions that covers only most of the permissions in another set of permissions, yet also includes one additional permission. In that case, some of the users might need to belong to the sum of those permissions, and the SharePoint group those users are in would need both sets of permissions.
Q. Is it possible to create a new set of permissions (called DeleteOnly) in which only the Delete permission is selected? Then it would be possible to specify the normal Read set of permissions and the DeleteOnly set and have the same effect as the method you used.
A. Yes, in SharePoint, you can often obtain the same result in many different ways. In this case, I prefer the approach I took, but it’s really just up to your preference.
Workshop
Quiz
1. What are the four main users to whom you can give access rights to a site?
2. What is the principal advantage in giving a SharePoint group access rights to a site compared to giving such rights directly to a user?
Answers
1. Local users on the server, individual domain users, SharePoint groups, and AD groups.
2. The main advantage is that it’s common for the same set of users to be given access rights to the same sites. By using SharePoint groups, this becomes less of an administrative nightmare.