
Hour 22. Mobile Development
What You’ll Learn in This Hour:
► How to prepare for mobile development
► How to use a device’s accelerometer
► How to use a device’s touch display
Mobile devices such as phones and tablets are becoming common gaming devices. In this hour, you’ll learn about mobile development with Unity for Android and iOS devices. You’ll begin by looking at the requirements for mobile development. From there, you’ll learn how to accept special inputs from a device’s accelerometer. Finally, you’ll learn about touch interface input.
Preparing for Mobile
Unity makes developing games for mobile devices easy. You will also be happy to know that developing for mobile platforms is almost identical to developing for other platforms. The biggest difference to account for is that mobile platforms have different input (no keyboard or mouse, usually). If you approach your development with this in mind, however, you can build a game once and deploy it everywhere. There is no longer any reason you can’t build your games for every major platform. This level of cross-platform capability is unprecedented. Before you can begin working with mobile devices in Unity, however, you need to get your computer set up and configured to do it.
Setting Up Your Environment
Before even opening Unity to make a game, you need to set up your development environment. The specifics of this differ depending on your target device and what you are trying to do, but the general steps are as follows:
1. Install the software development kit (SDK) of the device you are targeting.
2. Install the target build platform for your Unity version in the Unity Hub.
3. Ensure that your computer recognizes and can work with that device (though this is important only if you want to test on the device).
4. For Android only, tell Unity where to find the SDK.
If these steps seem a bit cryptic to you, don’t worry. Plenty of resources are available to assist you with these steps. The best place to start is with Unity’s own documentation, which is available at http://docs.unity3d.com. This site contains living documentation about all facets of Unity.
As you can see in Figure 22.1, the Unity documentation has guides to assist you in setting up both the iOS and the Android environments. These documents are updated as the steps to set up the environments change. If you’re not planning on following along with a device, continue on to the next section. If you are planning on following along with a device, complete the steps in the Unity documentation to configure your development environment before continuing on to the next section.
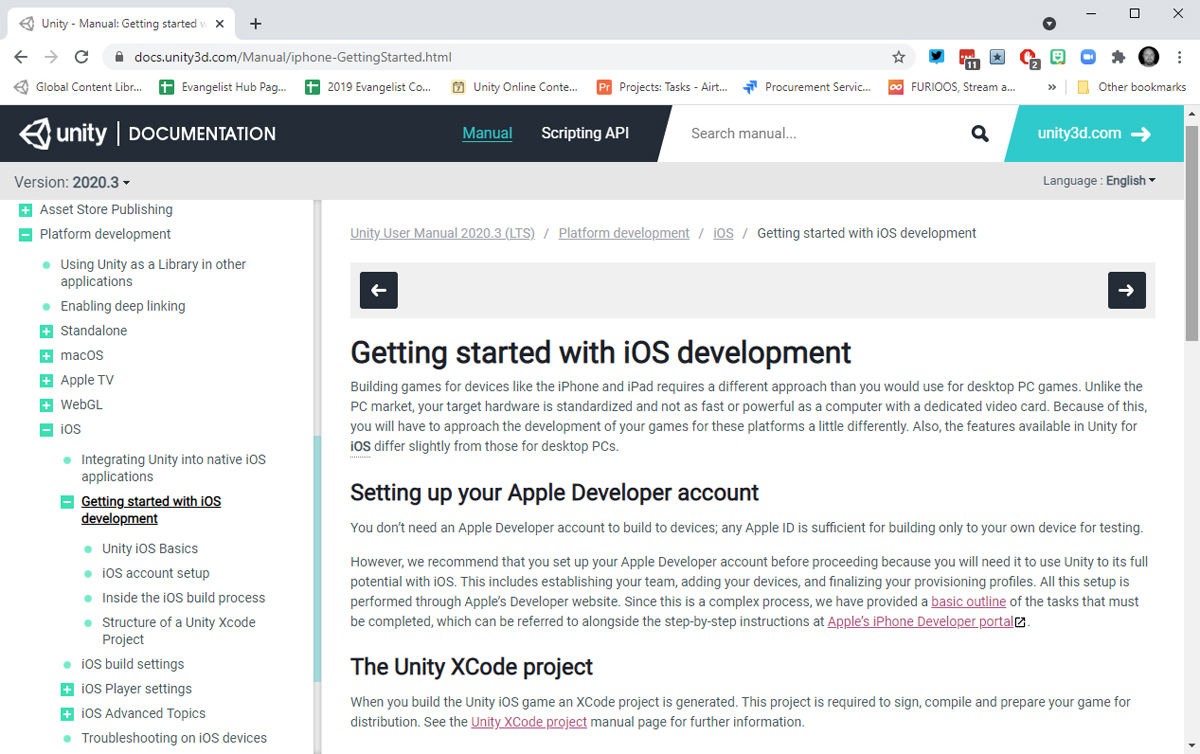
FIGURE 22.1
Platform-specific documentation.
Try it Yourself
Installing Mobile Platform Modules
This exercise walks you through adding the mobile platform of your choice to your Unity installs through the Hub. In order to enable mobile development with Unity, follow these steps:
1. Open up the Unity Hub and select Installs.
2. Click the three vertical dots on the install of your choice (see Figure 22.2). In the pop up menu, select Add Modules.
3. In the Add Modules dialog, click the check box next to Android Build Support or iOS Build Support (or both if you plan to develop for both). Note that you must be using Unity on a “Mac” device (OSX) in order to develop for iOS.
4. Click Done and the modules will begin to install. When they are complete you will know that they are properly added by the icon that now appears on the Unity version in the Hub (see Figure 22.2 again).
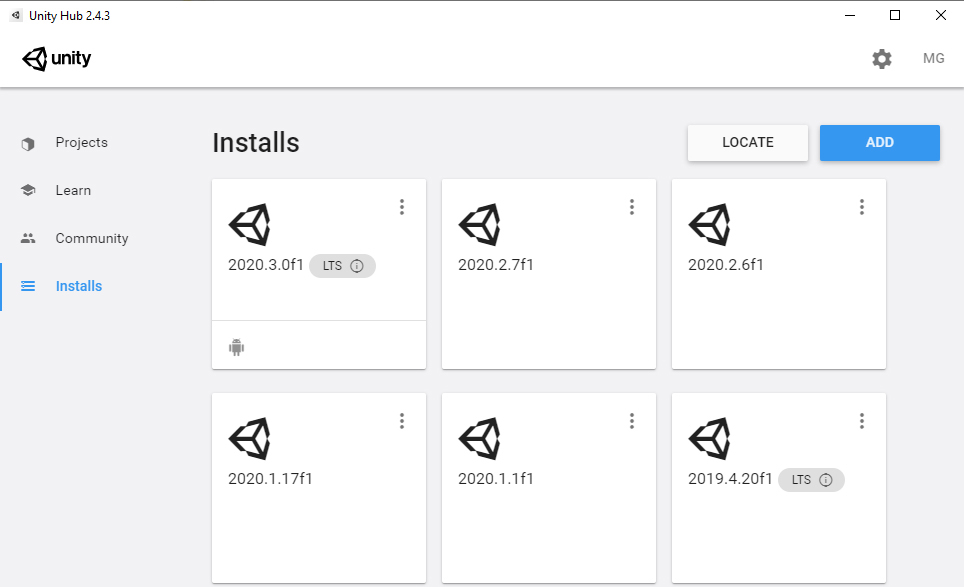
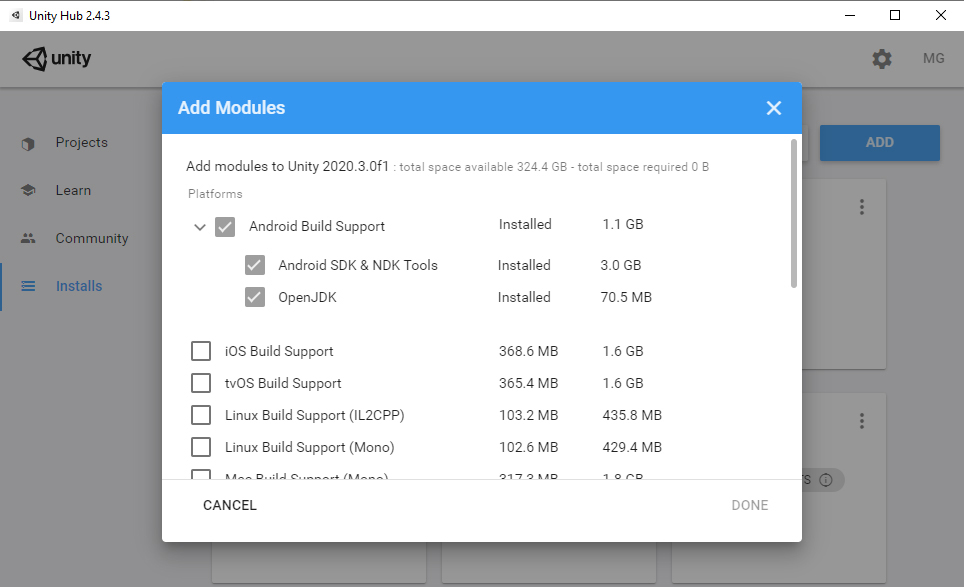
FIGURE 22.2
Installing platform modules in the Hub.
Unity Remote
The most basic way to test your games on a device is to build your projects, put the resulting files on the device, and then run your game. This can be a cumbersome system and one you’re sure to tire of quickly. Another way to test your games is to build a project and then run it through an iOS or Android emulator. Again, this requires quite a few steps and involves configuring and running an emulator. These systems can be useful if you are doing extensive testing on performance, rendering, and other advanced processes. For basic testing, though, there is a much better way: Use Unity Remote.
Unity Remote is an app you can obtain from your mobile device’s application store that enables you to test your projects on your mobile device while it is running in the Unity editor. In a nutshell, this means you can experience your game running on a device in real time, alongside development, and use the device to send device inputs back to your game. You can find more information about Unity Remote at https://docs.unity3d.com/Manual/UnityRemote5.html.
To find the Unity Remote application, search for the term Unity Remote in your device’s application store. From there, you can download and install it just as you would any other application (see Figure 22.3).
Once installed, Unity Remote acts as both a display for your game and a controller. You will be able to use it to send click information, accelerometer information, and multi-touch input back to Unity. It is especially effective because it gives you the ability to test your game (minimally) without installing any mobile SDKs or specialized developer accounts.
FIGURE 22.3
Unity Remote on the Google Play store.
Accelerometers
Most modern mobile devices come with built-in accelerometers. An accelerometer relays information about the physical orientation of the device. It can tell whether the device is moving, tilted, or flat. It can also detect these things in all three axes. Figure 22.4 shows a mobile device’s accelerometer axes and how they are oriented in portrait orientation.
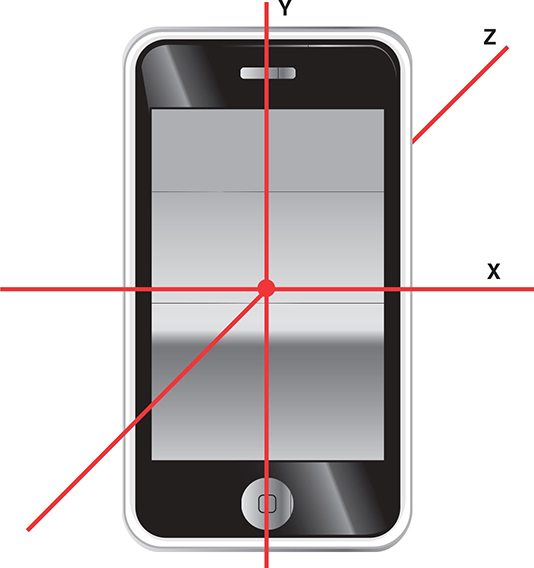
FIGURE 22.4
Accelerometer axes.
As you can see in Figure 22.4, the default axes of a device align with the 3D axes in Unity while the device is being held upright in portrait orientation directly in front of you. If you turn the device to use it in a different orientation, you need to convert the accelerometer data to the correct axis. For example, if you were using the phone pictured in Figure 22.4 in landscape orientation (on its side), you would use the X axis from the phone’s accelerometer to represent the Y axis in Unity.
Designing for the Accelerometer
You need to keep in mind a few things when designing a game to use a mobile device’s accelerometer. The first is that you can only ever reliably use two of the accelerometer’s axes at any given time. The reason for this is that no matter the orientation of the device, one axis will always be actively engaged by gravity. Consider the orientation of the device in Figure 22.4. You can see that while the x and z axes can be manipulated by tilting the device, the y axis is currently reading negative values, as gravity is pulling it down. If you were to turn the phone so that it rested flat on a surface, face up, you would only be able to use the x and y axes. In that case, the z axis would be actively engaged.
Another thing to consider when designing for an accelerometer is that the input is not extremely accurate. Mobile devices do not read from their accelerometers at a set interval, and they often have to approximate values. As a result, the inputs read from an accelerometer can be jerky and uneven. A common practice, therefore, is to smoothly move objects with accelerometer inputs or to take an average of the inputs over time. Also, accelerometers give input values from -1 to +1, with full 180-degree rotation of the device. No one plays games while fully tilting a devices, though, so input values are generally less than their keyboard counterparts (for example, -.5 to .5).
Using the Accelerometer
Reading accelerometer input is done just like reading any other form of user input: via scripts. All you need to do is read from the Vector3 variable named acceleration, which is a part of the Input object. Therefore, you could access the x, y, and z axis data by writing the following:
Input.acceleration.x;
Input.acceleration.y;
Input.acceleration.z;
Using these values, you can manipulate your game objects accordingly.
Multi-Touch Input
Mobile devices tend to be controlled largely through the use of their touch-capacitive screens. These screens can detect when and where a user touches them. They usually can track multiple touches at a time. The exact number of touches varies based on the device.
Touching the screen doesn’t just give the device a simple touch location. In fact, there is quite a bit of information stored about each individual touch. In Unity, each screen touch is stored in a Touch variable. This means that every time you touch a screen, a Touch variable is generated. That Touch variable will exist as long as your finger remains on the screen. If you drag your finger along the screen, the Touch variable tracks that. The Touch variables are stored together in a collection called touches, which is part of the Input object. If there is currently nothing touching the screen, then this collection of touches is empty. To access this collection, you could enter the following:
Input.touches;
By using the touches collection, you could iterate through each Touch variable to process its data. Doing so would look something like this:
foreach(Touch touch in Input.touches)
{
    // Do something
}
As mentioned earlier in this hour, each touch contains more information than the simple screen data where the touch occurred. Table 22.1 lists all the properties of the Touch variable type.
TABLE 22.1 Touch Variable Properties

These properties are useful for managing complex interactions between the user and game objects.
Try it Yourself
Tracking Touches
In this exercise, you’ll track finger touches and output their data to the screen. Obviously, to complete this exercise, you need a configured and attached mobile device with multi-touch support. Follow these steps:
1. Create a new project or scene.
2. Create a new script called TouchScript and attach it to the Main Camera. Put the following code in the script:
void OnGUI()
{
     foreach (Touch touch in Input.touches)
     {
        string message = “”;
        message += “ID: “ +touch.fingerId + “
”;
        message += “Phase: “ +touch.phase.ToString() + “
”;
        message += “TapCount: “ +touch.tapCount + “
”;
        message += “Pos X: “ +touch.position.x + “
”;
        message += “Pos Y: “ +touch.position.y + “
”;

        int num = touch.fingerId;
        GUI.Label(new Rect(0 + 130 * num, 0, 120, 100), message);
     }
}
3. Ensure that your mobile device is plugged in to your computer. Run the scene. Touch the screen with your finger and notice the information that appears (see Figure 22.5). Move your finger and see how the data changes. Now touch with more fingers simultaneously. Move them about and take them off the screen randomly. See how it tracks each touch independently? How many touches can you get on your screen at a time?

FIGURE 22.5
Touch output on the screen.
Summary
In this hour, you’ve learned about using Unity to develop games for mobile devices. You started by learning how to configure your development environment to work with Android and iOS. From there, you learned how to work with a device’s accelerometer. You finished up the hour by experimenting with Unity’s touch-tracking system.
Q&A
Q. Can I really build a game once and deploy it to all major platforms, mobile included?
A. Absolutely! The only thing to consider is that mobile devices generally don’t have as much processing power as desktops. Therefore, mobile device users might experience some performance issues if your game has a lot of heavy processing or effects. You will need to ensure that your game is running efficiently if you plan to also deploy it on mobile platforms.
Q. What are the differences between iOS and Android devices?
A. From a Unity point of view, there isn’t much difference between these two operating systems. They are both treated as mobile devices. Be aware, though, that there are some device differences (such as processing power, battery life, and phone OS) that can affect your games.
Workshop
Take some time to work through the questions here to ensure that you have a firm grasp of the material.
Quiz
1. What tool allows you to send live device input data to Unity while it is running a scene?
2. How many axes on the accelerometer can you realistically use at a time?
3. How many touches can a device have at once?
Answers
1. The Unity Remote app
2. Two axes. The third is always engaged by gravity, depending on how you are holding the device.
3. It depends entirely on the device. The last time I tested an iOS device, I was able to track 21 touches. That’s enough for all your fingers and toes, plus 1 from a friend!
Exercise
In this exercise, you’ll move objects about a scene based on touch input from a mobile device. Obviously, to complete this exercise, you need a configured and attached mobile device with multi-touch support. If you do not have that, you can still read along to get the basic idea.
1. Create a new project or scene. Select Edit > Project Settings > Editor and set the Device property to recognize your Unity Remote app.
2. Add three cubes to the scene and name them Cube1, Cube2, and Cube3 (the names are important). Position them at (-3, 1, -5), (0, 1, -5), and (3, 1, -5), respectively.
3. Create a new folder named Scripts. Create a new script called InputScript in the Scripts folder and attach it to the three cubes.
4. Add the following code to the Update() method of the script:
foreach (Touch touch in Input.touches)
{
     float xMove = touch.deltaPosition.x * 0.05f;
     float yMove = touch.deltaPosition.y * 0.05f;

     if (touch.fingerId == 0 && gameObject.name == “Cube1”)
         transform.Translate(xMove, yMove, 0F);

     if (touch.fingerId == 1 && gameObject.name == “Cube2”)
         transform.Translate(xMove, yMove, 0F);

     if (touch.fingerId == 2 && gameObject.name == “Cube3”)
         transform.Translate(xMove, yMove, 0F);
}
5. Run the scene and touch the screen with up to three fingers. Notice that you can move the three cubes independently. Also notice that lifting one finger does not cause the other fingers to lose their cubes or their place.