
What You’ll Learn in This Hour:
Model-View-Controller and Model-View-Presenter
Solution organization
Designing the Contact Manager
Data and other application dependencies
Hour 12 represents a milestone in your WPF learning. Previously we have focused solely on the technical aspects of WPF. But now you have sufficient mastery of the basics, and we are free to move into more interesting topics. In the upcoming hours we will begin to use more advanced techniques—techniques that are central to building real applications. We also dig into architectural issues and offer WPF-based, practical solutions that can be used in most of the situations you will encounter.
We chose the idea of a contact manager because it is an example of a typical business application that a developer might be called on to build. It presents many of the challenges that are common to building business applications and is a great place to explore best practices and demonstrate common design patterns. Although we’ll be keeping the list of features small in this application, we still have to deal with the same issues larger projects face, and we will present a consistent architecture that works well for average projects and can be easily evolved to handle more complex scenarios. The Contact Manager will have the following features:
New, Edit, Save, Delete of contacts.
Search contacts by last and first names.
Use a tabbed interface to allow editing of multiple contacts simultaneously.
View contacts as Contact Cards or in a list view.
Allow the tabbed region of the interface to scale for easier reading.
Apply a consistent look and feel throughout.
In addition to these high-level features, there are several architectural practices we would like to adhere to:
Base the application architecture on the Model-View-Presenter pattern.
Make healthy use of user controls to break up complex interfaces.
Employ the principle of Separation of Concerns to prevent “different types of code” from being intermingled.
Use WPF Resources and Styles to build a more maintainable and flexible solution.
Dozens of books, articles, blogs, and other resources discuss how to architect an interactive application. Within them you are likely to discover a variety of patterns and practices that people employ to make their software more manageable, but one pattern seems to appear consistently: Model-View-Controller (MVC). MVC, despite its popularity, is commonly misunderstood. This may be because it tends to manifest itself differently in different scenarios—that is, web versus desktop applications. Regardless, the spirit of the pattern is the same. In MVC there are three types of objects in communication:
Model objects represent the business concerns that are specific to the application being built. In our contact manager, a Contact would be an example of a model object.
Views are the actual visible components of an application. They are most likely represented by WPF controls.
Controllers traditionally functioned as mediators between the human and the application by handling user input from the mouse or keyboard.
One major problem exists with the preceding descriptions. Controller doesn’t seem to fit exactly with modern UI toolkits like WPF. Very rarely would one need to write code to manually handle user input. These tasks are now handled by the various controls themselves. What is really needed is an application-centric component that can mediate between the View and the Model. This component would be capable of responding to View interactions and translating those into application commands. In the context of a contact manager, these commands would be actions like SaveContact, DeleteContact, Search, and the like.
The mismatch between the MVC pattern and modern UI frameworks has been recognized by many people. Over time a new pattern called Model-View-Presenter has evolved from MVC. The MVP pattern addresses the preceding issues and functions in a way that is more harmonious with WPF’s advanced controls and data binding. For this reason, we will be using MVP to develop the Contact Manager.
As projects increase in complexity, more care should be taken to keep things organized. Let’s begin by putting together the basic structure of our Contact Manager solution.
Open Visual Studio and create a new WPF Application called
ContactManager.Add the following folders to the solution:
Model,Presenters,Resources,UserControlsandViews. This will help us keep the different types of classes organized.Add two user controls to the
UserControlsfolder. Call themSideBar.xamlandSearchBar.xaml.Remove the hardcoded height and width from the XAML files of each of the user controls.
Rename
Window1toShell. Don’t forget to update theApp.xamlfile with the changes.Use the code in Listing 12.1 to implement the XAML for
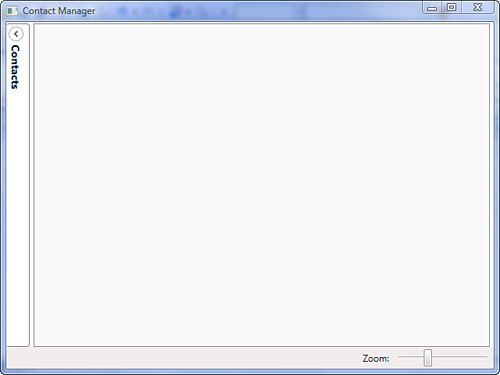
Shell.xaml.Run the application to see the beginning of the Contact Manager shell. You can see the results in Figure 12.1.
Example 12.1. Shell.xaml
<Window x:Class="ContactManager.Shell"
        xmlns="http://schemas.microsoft.com/winfx/2006/xaml/presentation"
        xmlns:x="http://schemas.microsoft.com/winfx/2006/xaml"
        xmlns:uc="clr-namespace:ContactManager.UserControls"
        Title="Contact Manager"
        Height="600"
        Width="800">
    <DockPanel>

        <uc:SearchBar DockPanel.Dock="Top" />

        <StatusBar DockPanel.Dock="Bottom">
            <StatusBarItem DockPanel.Dock="Right">
                <Slider x:Name="zoomSlider"
                        Width="125"
                        Value="1"
                        Minimum=".5"
                        Maximum="2" />
            </StatusBarItem>

            <StatusBarItem DockPanel.Dock="Right">
                <TextBlock>Zoom:</TextBlock>
            </StatusBarItem>

            <StatusBarItem>
                <TextBlock Text="{Binding StatusText}" />
            </StatusBarItem>
        </StatusBar>

        <Expander DockPanel.Dock="Left"
                  ExpandDirection="Right"
                  IsExpanded="True"
                  BorderThickness="0 1 1 1"
                  BorderBrush="Gray"
                  Margin="0 2 0 0"
                  Padding="2">
            <Expander.Header>
                <TextBlock Text="Contacts"
                           FontSize="14"
                           FontWeight="Bold">
                  <TextBlock.LayoutTransform>
                    <RotateTransform Angle="90" />
                  </TextBlock.LayoutTransform>
                </TextBlock>
            </Expander.Header>

            <uc:SideBar />

        </Expander>

        <TabControl x:Name="tabs"
                    Grid.Column="2"
                    Margin="5 0">
            <TabControl.LayoutTransform>
                <ScaleTransform ScaleX="{Binding ElementName=zoomSlider, Path=Value}"
                                ScaleY="{Binding ElementName=zoomSlider, Path=Value}" />
            </TabControl.LayoutTransform>
        </TabControl>

    </DockPanel>
</Window>
The application looks empty because we haven’t created our Model or any Views to display it. We’ll get to that shortly. In the meantime, there are some important things to study in the shell. First, we started with the canonical DockPanel as our root layout decision. We docked our two user controls to the top and left sides, added a status bar to the bottom, and left the remaining space to be filled with our tabbed views. We will build out the user controls later. For now, let’s take a look at the new controls that have been introduced in the shell.
The Expander is a simple control whose primary purpose is to allow the user to collapse or expand a named region of the interface. A developer can use the Header property to label the region. This property is of type object, so it can be filled with a simple string or with any type of UI. (Notice how we used a RotateTransform to ensure that the header text looks natural. We’ll discuss this more later.) The IsExpanded property can be used to get or set the current state of the Expander, and the ExpandDirection property determines to which side the control expands when the toggle button is clicked.
A Slider allows the selection of a double value by dragging a “handle” between a Minimum and Maximum value. Besides setting the range of the control, you can use properties like Interval, SmallChange, and LargeChange to affect how dramatically dragging the slider updates the Value property.
A tabbed interface is common in many applications, and WPF’s TabControl enables the Contact Manager to achieve this same functionality without too much hassle. TabControl inherits from ItemsControl, so it has many of the properties and events of previously mentioned controls, such as ListBox and ComboBox. We’ll discuss this family of controls in detail in Hour 16, “Visualizing Lists.” The most common use for a TabControl is to display a collection of TabItem controls. The Contact Manager will do just this, by adding tabs dynamically based on what the user needs to do. Additionally, the TabControl can be scaled to the user’s preference via the data binding between the ScaleTransform and the Slider.
Because the basics of a contact manager are fairly well known, we can dive directly into building the model. The model is made up of several classes. We’ll begin by building the entities and value objects:
Add a new class to the solution called
Notifier.cs. Make sure to add this directly under the solution because it will be used by several aspects of the application.Use the following code to implement the
Notifier:using System; using System.ComponentModel; namespace ContactManager { [Serializable] public abstract class Notifier : INotifyPropertyChanged { [field: NonSerialized] public event PropertyChangedEventHandler PropertyChanged; protected virtual void OnPropertyChanged(string propertyName) { if (PropertyChanged != null) { PropertyChanged( this, new PropertyChangedEventArgs(propertyName) ); } } } }
Under the
Modelfolder, create a new class namedAddress.cs. Use the code in Listing 12.2 to implement the class.Also under the
Modelfolder, create a class namedContact.cs. Implement this class with the code found in Listing 12.3.
Example 12.2. Address.cs
using System;

namespace ContactManager.Model
{
    [Serializable]
    public class Address : Notifier
    {
        private string _city;
        private string _country;
        private string _line1;
        private string _line2;
        private string _state;
        private string _zip;

        public string City
        {
            get { return _city; }
            set
            {
                _city = value;
                OnPropertyChanged("City");
            }
        }

        public string Country
        {
            get { return _country; }
            set
            {
                _country = value;
                OnPropertyChanged("Country");
            }
        }

        public string Line1
        {
            get { return _line1; }
            set
            {
                _line1 = value;
                OnPropertyChanged("Line1");
            }
        }

        public string Line2
        {
            get { return _line2; }
            set
            {
                _line2 = value;
                OnPropertyChanged("Line2");
            }
        }

        public string State
        {
            get { return _state; }
            set
            {
                _state = value;
                OnPropertyChanged("State");
            }
        }

        public string Zip
        {
            get { return _zip; }
            set
            {
                _zip = value;
                OnPropertyChanged("Zip");
            }
        }
    }
}
using System;

namespace ContactManager.Model
{
    [Serializable]
    public class Contact : Notifier
    {
        private Address _address = new Address();
        private string _cellPhone;
        private string _firstName;
        private string _homePhone;
        private Guid _id = Guid.Empty;
        private string _imagePath;
        private string _jobTitle;
        private string _lastName;
        private string _officePhone;
        private string _organization;
        private string _primaryEmail;
        private string _secondaryEmail;

        public Guid Id
        {
            get { return _id; }
            set
            {
                _id = value;
                OnPropertyChanged("Id");
            }
        }

        public string ImagePath
        {
            get { return _imagePath; }
            set
            {
                _imagePath = value;
                OnPropertyChanged("ImagePath");
            }
        }

        public string FirstName
        {
            get { return _firstName; }
            set
            {
                _firstName = value;
                OnPropertyChanged("FirstName");
                OnPropertyChanged("LookupName");
            }
        }

        public string LastName
        {
            get { return _lastName; }
            set
            {
                _lastName = value;
                OnPropertyChanged("LastName");
                OnPropertyChanged("LookupName");
            }
        }

        public string Organization
        {
            get { return _organization; }
            set
            {
                _organization = value;
                OnPropertyChanged("Organization");
            }
        }
        public string JobTitle
        {
            get { return _jobTitle; }
            set
            {
                _jobTitle = value;
                OnPropertyChanged("JobTitle");
            }
        }

        public string OfficePhone
        {
            get { return _officePhone; }
            set
            {
                _officePhone = value;
                OnPropertyChanged("OfficePhone");
            }
        }

        public string CellPhone
        {
            get { return _cellPhone; }
            set
            {
                _cellPhone = value;
                OnPropertyChanged("CellPhone");
            }
        }

        public string HomePhone
        {
            get { return _homePhone; }
            set
            {
                _homePhone = value;
                OnPropertyChanged("HomePhone");
            }
        }

        public string PrimaryEmail
        {
            get { return _primaryEmail; }
            set
            {
                _primaryEmail = value;
                OnPropertyChanged("PrimaryEmail");
            }
        }

        public string SecondaryEmail
        {
            get { return _secondaryEmail; }
            set
            {
                _secondaryEmail = value;
                OnPropertyChanged("SecondaryEmail");
            }
        }

        public Address Address
        {
            get { return _address; }
            set
            {
                _address = value;
                OnPropertyChanged("Address");
            }
        }

        public string LookupName
        {
            get { return string.Format("{0}, {1}", _lastName, _firstName); }
        }

        public override string ToString()
        {
            return LookupName;
        }

        public override bool Equals(object obj)
        {
            Contact other = obj as Contact;
            return other != null && other.Id == Id;
        }
    }
}
So far the model code is pretty straightforward. It is composed of two classes that collectively make up a contact aggregate. These classes are the home of the basic properties we want to track. Each class, as well as the base Notifier class, is decorated with the [Serializable] attribute. A production quality application would probably save its contacts in some sort of database. Because we are striving to keep this example free of unnecessary complexity, we will be serializing them to disk. .NET requires the [Serializable] attribute in order to do this.
An important supporting class that is also part of the model is found in Listing 12.4.
Add a new class to the
Modelfolder calledStates.cs.Use the code in Listing 12.4 to implement this class.
Example 12.4. States.cs
using System.Collections.Generic;

namespace ContactManager.Model
{
    public static class States
    {
        private static readonly List<string> _names;

        static States()
        {
            _names = new List<string>(50);

            _names.Add("Alabama");
            _names.Add("Alaska");
            _names.Add("Arizona");
            _names.Add("Arkansas");
            _names.Add("California");
            ... Continue with state names ...
        }

        public static IList<string> GetNames()
        {
            return _names;
        }
    }
}
Almost every business application has some sort of data store that it uses to persist important information across application restarts. In most cases a database is used, but sometimes XML or flat files are used instead. For simplicity’s sake, the Contact Manager will use a binary encoded flat file to persist contact data. Regardless of what the underlying data store is, every well-architected solution hides this technicality from the rest of the application. A common pattern is to execute all data-related activity through a repository class:
Add a new class to the
Modelfolder calledContactRepository.cs.Use the code in Listing 12.5 to implement this class.
Example 12.5. ContactRepository.cs
using System;
using System.Collections.Generic;
using System.IO;
using System.Linq;
using System.Runtime.Serialization.Formatters.Binary;
namespace ContactManager.Model
{
    public class ContactRepository
    {
        private List<Contact> _contactStore;
        private readonly string _stateFile;

        public ContactRepository()
        {
            _stateFile = Path.Combine(
                AppDomain.CurrentDomain.BaseDirectory,
                "ContactManager.state"
                );

            Deserialize();
        }

        public void Save(Contact contact)
        {
            if (contact.Id == Guid.Empty)
                contact.Id = Guid.NewGuid();

            if (!_contactStore.Contains(contact))
                _contactStore.Add(contact);

            Serialize();
        }

        public void Delete(Contact contact)
        {
            _contactStore.Remove(contact);
            Serialize();
        }

        public List<Contact> FindByLookup(string lookupName)
        {
            IEnumerable<Contact> found =
                from c in _contactStore
                where c.LookupName.StartsWith(
                    lookupName,
                    StringComparison.OrdinalIgnoreCase
                    )
                select c;

            return found.ToList();
        }

        public List<Contact> FindAll()
        {
            return new List<Contact>(_contactStore);
        }

        private void Serialize()
        {
            using (FileStream stream =
                File.Open(_stateFile, FileMode.OpenOrCreate))
            {
                BinaryFormatter formatter = new BinaryFormatter();
                formatter.Serialize(stream, _contactStore);
            }
        }

        private void Deserialize()
        {
            if (File.Exists(_stateFile))
            {
                using (FileStream stream =
                    File.Open(_stateFile, FileMode.Open))
                {
                    BinaryFormatter formatter = new BinaryFormatter();

                    _contactStore =
                        (List<Contact>)formatter.Deserialize(stream);
                }
            }
            else _contactStore = new List<Contact>();
        }
    }
}
The important part of a repository is that it abstracts away the actual data store so that other parts of the application are able to work with a high-level API and not concern themselves with how the data is stored. They care only that the data is stored. If the underlying infrastructure needs to be changed or optimized at some point in the future, a developer needs to change only the internals of the repository; no other code need be affected. You may want to run the application, but you will see no extra behavior as a result of our model definition, even though it contains all the code necessary to meet the “business need.” For our application to become useful, we still need to create the other two parts of the MVP triad: Views and Presenters.
In this hour we took a deep dive into the subject of WPF application architecture. It is an important topic for those who want to use their WPF skills in building any but the most trivial of applications. We’ve examined the MVC pattern and discussed how an evolution of this pattern, MVP, works well with WPF. We built out the complete Model (the M in MVP) and cleanly organized it within an overall solution structure. The pieces put into place here will lay a strong foundation for everything that will be built on top in the next few hours.