
What You’ll Learn in This Hour:
Application level presenters
Screen-level presenters
Presenter/View communication
Dependency injection
With the Model we built in Hour 12 and an understanding of the MVP pattern, it’s time to complete the triad by building the first presenters and views of our application. Presenters are the home of application logic, and they often mediate between the View and the Model. Therefore, presenters are a core piece of the Contact Manager. They receive special attention this hour along with the patterns that enable them to communicate with views.
In the process of developing this application, we will build several presenters for managing various aspects of the Contact Manager. There are a couple of things that all these presenters will have in common. These features make View/Presenter collaboration easier and will enable various aspects of the shell infrastructure that we are going to build. Let’s create a base class to implement the common presenter features:
In the Contact Manager solution, create a new class in the
Presentersfolder calledPresenterBase.cs.Use the code in Listing 13.1 to implement the class.
Build the application to confirm that you have entered the code correctly.
Example 13.1. PresenterBase.cs
namespace ContactManager.Presenters
{
    public class PresenterBase<T> : Notifier
    {
        private readonly string _tabHeaderPath;
        private readonly T _view;

        public PresenterBase(T view)
        {
            _view = view;
        }

        public PresenterBase(T view, string tabHeaderPath)
        {
            _view = view;
            _tabHeaderPath = tabHeaderPath;
        }

        public T View
        {
            get { return _view; }
        }

        public string TabHeaderPath
        {
            get { return _tabHeaderPath; }
        }
    }
}
We have chosen to inherit our base class from Notifier. Recall from Hour 12, “Building a Contact Manager,” that this class gives us a basic implementation of INotifyPropertyChanged, which enables more powerful data binding in WPF. Besides data binding, presenters often need additional mechanisms to request information from the view or tell it to display something. The generic property T allows each presenter to talk to its associated view as necessary. Finally, the TabHeaderPath exists to support the tabbed UI infrastructure we are building. This property provides the data binding property path to bind to the Tab’s header.
We began developing the tabbed UI in Hour 12 by implementing the basic XAML in the Shell.xaml file. Before we can fully use it, we need to add a bit of “intelligence” to it. Let’s do that now.
Open
Shell.xaml.csin the code editor.Add the following method to enable adding presenter-based views to the shell:
public void AddTab<T>(PresenterBase<T> presenter)
{
    TabItem newTab = null;

    for(int i = 0; i < tabs.Items.Count; i++)
    {
        TabItem existingTab = (TabItem) tabs.Items[i];

        if(existingTab.DataContext.Equals(presenter))
        {
            tabs.Items.Remove(existingTab);
            newTab = existingTab;
            break;
        }
    }

    if(newTab == null)
    {
        newTab = new TabItem();

        Binding headerBinding = new Binding(presenter.TabHeaderPath);
        BindingOperations.SetBinding(
            newTab,
            TabItem.HeaderProperty,
            headerBinding
            );

        newTab.DataContext = presenter;
        newTab.Content = presenter.View;
    }

    tabs.Items.Insert(0, newTab);
    newTab.Focus();
}
Add the following method to enable removing presenter-based views from the shell:
public void RemoveTab<T>(PresenterBase<T> presenter)
{
    for (int i = 0; i < tabs.Items.Count; i++)
    {
        TabItem item = (TabItem)tabs.Items[i];

        if (item.DataContext.Equals(presenter))
        {
            tabs.Items.Remove(item);
            break;
        }
    }
}
Make sure you include the following
usingstatement at the top of theShell.cs:using ContactManager.Presenters;Compile the application.
The AddTab method loops through the existing tabs to make sure that one is not already present for the given presenter. If no existing tab is found, one is created and a binding is set on the tab’s header using the TabHeaderPath. The new tab’s DataContext is set to the presenter and its Content is set to the associated view. Finally, the new or existing tab is inserted into the beginning of the list and given focus.
RemoveTab is quite simple. To remove a presenter’s tab, it searched through the list of tab items, comparing each DataContext (previously set in AddTab) to the presenter. When a match is found, the tab is removed.
In a typical application, there is a need for an Application Controller or Application Presenter. This special type of presenter provides common application-level functionality to other presenters and manages various other cross-presenter issues. We’ll build this now so that its capabilities will be available for future use:
Add a new class to the
Presentersfolder calledApplicationPresenter.cs.Use the code in Listing 13.2 to implement this class.
Open
Shell.xaml.csand change the constructor to the match the following:public Shell() { InitializeComponent(); DataContext = new ApplicationPresenter(this, new ContactRepository()); }
Make sure to include the following
usingstatement at the top ofShell.cs:using ContactManager.Model;Compile the application.
Example 13.2. ApplicationPresenter.cs
using System;
using System.Collections.ObjectModel;
using ContactManager.Model;

namespace ContactManager.Presenters
{
    public class ApplicationPresenter : PresenterBase<Shell>
    {
        private readonly ContactRepository _contactRepository;
        private ObservableCollection<Contact> _currentContacts;
        private string _statusText;

        public ApplicationPresenter(
            Shell view,
            ContactRepository contactRepository)
            : base(view)
        {
            _contactRepository = contactRepository;

            _currentContacts = new ObservableCollection<Contact>(
                _contactRepository.FindAll()
                );
        }

        public ObservableCollection<Contact> CurrentContacts
        {
            get { return _currentContacts; }
            set
            {
                _currentContacts = value;
                OnPropertyChanged("CurrentContacts");
            }
        }

        public string StatusText
        {
            get { return _statusText; }
            set
            {
                _statusText = value;
                OnPropertyChanged("StatusText");
            }
        }

        public void Search(string criteria)
        {
            if (!string.IsNullOrEmpty(criteria) && criteria.Length > 2)
            {
                CurrentContacts = new ObservableCollection<Contact>(
                    _contactRepository.FindByLookup(criteria)
                    );

                StatusText = string.Format(
                    "{0} contacts found.",
                    CurrentContacts.Count
                    );
            }
            else
            {
                CurrentContacts = new ObservableCollection<Contact>(
                    _contactRepository.FindAll()
                    );

                StatusText = "Displaying all contacts.";
            }
        }

        public void NewContact()
        {
            OpenContact(new Contact());
        }

        public void SaveContact(Contact contact)
        {
            if (!CurrentContacts.Contains(contact))
                CurrentContacts.Add(contact);

            _contactRepository.Save(contact);

            StatusText = string.Format(
                "Contact '{0}' was saved.",
                contact.LookupName
                );
        }

        public void DeleteContact(Contact contact)
        {
            if (CurrentContacts.Contains(contact))
                CurrentContacts.Remove(contact);

            _contactRepository.Delete(contact);

            StatusText = string.Format(
                "Contact '{0}' was deleted.",
                contact.LookupName
                );
        }

        public void CloseTab<T>(PresenterBase<T> presenter)
        {
            View.RemoveTab(presenter);
        }

        public void OpenContact(Contact contact)
        {
            throw new NotImplementedException();
        }

        public void DisplayAllContacts()
        {
            throw new NotImplementedException();
        }
    }
}
The ApplicationPresenter exposes the necessary functionality that several components (views and other presenters) will need to get their work done. Notice that the method names on the presenter mostly reflect the features we said we would support at the beginning of Hour 12. These features include things such as searching contacts and creating, saving, and deleting contacts. The CloseTab method will be used by other presenters as well as the OpenContact method.
Some important architectural decisions were made in the implementation of this class and how it works into the overall application design. Let’s mention a few:
Notice that the constructor is dependent on two other classes: an instance of
Shelland an instance ofContactRepository. This technique is known as constructor injection and is a specific type of dependency injection. DI is a technique that is commonly used to help enforce the principle of Separation of Concerns (SoC), which we have mentioned on several occasions. Dependency injection allows the presenter to worry about application-level functionality and to easily interact with other classes to accomplish complex tasks.Examine the
Searchmethod. This is a great example of how theApplicationPresenteradds application-level logic to the low-level search capabilities of the repository. The presenter should not know the details of how search is accomplished, but it is responsible for determining under what conditions it should occur.The new, save, and delete methods follow the same pattern as
Search. They are concerned only with the application-level issues surrounding the given command. For all other issues, they delegate to the repository.The
CloseTabmethod on this presenter allows other child presenters to close themselves by user request. Notice how theApplicationPresenterforwards this request on to theView. The presenter, essentially, does not care how the view removes the tab; this is a view’s responsibility. It simply asks for it to be done.Finally, we instantiate the presenter and set it to the
DataContextproperty on theShell. This enables data binding for theCurrentContactscollection and theStatusTextproperty. Additionally, this presenter will be available to the user controlsSideBarandSearchBarbecause they will automatically inherit theDataContextvalue from their parent.
Now that we have some application functionality brewing, we need a way to access it through the user interface. In Hour 12 we created two stub user controls that we plugged into the Shell. Let’s build out one of them a little more now:
Open
SideBar.xamland alter the markup to match the following:<UserControl x:Class="ContactManager.UserControls.SideBar" xmlns="http://schemas.microsoft.com/winfx/2006/xaml/presentation" xmlns:x="http://schemas.microsoft.com/winfx/2006/xaml"> <DockPanel> <StackPanel DockPanel.Dock="Bottom" Margin="4"> <Button Content="New Contact" Click="New_Click" /> <Button Content="View All" Click="ViewAll_Click" /> </StackPanel> <ScrollViewer VerticalScrollBarVisibility="Auto"> <ItemsControl Width="250" VerticalAlignment="Stretch" BorderThickness="0" ItemsSource="{Binding CurrentContacts}"> </ItemsControl> </ScrollViewer> </DockPanel> </UserControl>
Open
SideBar.xaml.csand alter its code according to the listing that follows:using System.Windows; using System.Windows.Controls; using ContactManager.Presenters; namespace ContactManager.UserControls { public partial class SideBar : UserControl { public SideBar() { InitializeComponent(); } public ApplicationPresenter Presenter { get { return DataContext as ApplicationPresenter; } } private void New_Click(object sender, RoutedEventArgs e) { Presenter.NewContact(); } private void ViewAll_Click(object sender, RoutedEventArgs e) { Presenter.DisplayAllContacts(); } } }
We mentioned in the previous section that the ApplicationPresenter would be inherited through the DataContext property. We are taking advantage of that here. Because of our application architecture, the view’s button clicks can delegate to the presenter for appropriate action.
The SideBar uses a ScrollViewer control to create a scrollable region inside the view. ScrollViewer is a ContentControl. It is capable of providing a scrollable interface for anything set to its Content property. This control provides several special properties. Two that are most commonly used are VerticalScrollBarVisibility and HorizontalScrollBarVisibility. These properties allow you to define when the scrollbars will become visible. Setting the value to Auto keeps the scrollbars hidden until the Content is too large for the display area and requires scrolling.
The ItemsControl used in the preceding markup has been mentioned at several points in previous hours. It is the base class for more complex list controls such as ListBox, ComboBox, and TabControl. An ItemsControl implements the minimum code necessary to display a list of items. We’ll discuss this control and its inheritors in great detail in Hour 16, “Visualizing Lists.”
Running the Contact Manager and clicking New Contact will result in an exception being thrown because we haven’t implemented the edit contact screen. Implementing this piece requires creating a presenter, view, and making some minor additions to the ApplicationPresenter. Let’s get to work:
Create a new
UserControlcalledEditContactView.xamlin theViewsfolder.Use the markup in Listing 13.3 to implement this view.
Add a new class to the
Presentersfolder calledEditContactPresenter.cs.Use the code in Listing 13.4 to implement this class.
Open the
EditContactView.xaml.csand make it match the code in Listing 13.5.Open the
ApplicationPresenterand change theOpenContactmethod to the following:public void OpenContact(Contact contact) { if (contact == null) return; View.AddTab( new EditContactPresenter( this, new EditContactView(), contact ) ); }
Run the application. Click New Contact. Enter some contact details and save. Try using the zoom slider. You should be able to see the effects more clearly than before.
Example 13.3. EditContactView.xaml
<UserControl x:Class="ContactManager.Views.EditContactView"
             xmlns="http://schemas.microsoft.com/winfx/2006/xaml/presentation"
             xmlns:x="http://schemas.microsoft.com/winfx/2006/xaml">
    <DockPanel Margin="5">
        <Border DockPanel.Dock="Top">
            <DockPanel LastChildFill="False">
                <TextBlock DockPanel.Dock="Left"
                           Text="{Binding Contact.LastName}" />
                <TextBlock DockPanel.Dock="Left"
                           Text=", " />
                <TextBlock DockPanel.Dock="Left"
                           Text="{Binding Contact.FirstName}" />
                <TextBlock DockPanel.Dock="Right"
                           Text="{Binding Contact.Organization}" />
            </DockPanel>
        </Border>

        <StackPanel DockPanel.Dock="Bottom">
            <Button Content="Save"
                    Click="Save_Click" />
            <Button Content="Delete"
                    Click="Delete_Click" />
            <Button Content="Close"
                    Click="Close_Click" />
        </StackPanel>
        <WrapPanel>
            <GroupBox>
                <GroupBox.Header>
                    <Border>
                        <TextBlock Text="General" />
                    </Border>
                </GroupBox.Header>

                <Grid>
                    <Grid.ColumnDefinitions>
                        <ColumnDefinition Width="100" />
                        <ColumnDefinition Width="Auto" />
                        <ColumnDefinition Width="175" />
                    </Grid.ColumnDefinitions>
                    <Grid.RowDefinitions>
                        <RowDefinition Height="Auto" />
                        <RowDefinition Height="Auto" />
                        <RowDefinition Height="Auto" />
                        <RowDefinition Height="Auto" />
                    </Grid.RowDefinitions>

                    <Grid Grid.RowSpan="4">
                        <Border Background="Gray"
                                CornerRadius="6"
                                Margin="2 2 0 0"
                                Opacity=".5" />
                        <Border Margin="2 2 4 4"
                                Background="White" />
                        <Viewbox Margin="2 2 4 4">
                            <Image Source="{Binding Contact.ImagePath}" />
                        </Viewbox>
                        <Border BorderThickness="2"
                                Background="Transparent"
                                CornerRadius="6"
                                Margin="0 0 2 2" />
                        <Button Background="White"
                                Click="SelectImage_Click" />
                    </Grid>

                    <Label Grid.Column="1"
                           Content="_First Name:"
                           Target="{Binding ElementName=firstName}" />
                    <TextBox x:Name="firstName"
                             Grid.Column="2"
                             Text="{Binding Contact.FirstName}" />

                    <Label Grid.Row="1"
                           Grid.Column="1"
                           Content="_Last Name:"
                           Target="{Binding ElementName=lastName}" />
                    <TextBox x:Name="lastName"
                             Grid.Row="1"
                             Grid.Column="2"
                             Text="{Binding Contact.LastName}" />
                    <Label Grid.Row="2"
                           Grid.Column="1"
                           Content="Or_ganization:"
                           Target="{Binding ElementName=organization}" />
                    <TextBox x:Name="organization"
                             Grid.Row="2"
                             Grid.Column="2"
                             Text="{Binding Contact.Organization}" />

                    <Label Grid.Row="3"
                           Grid.Column="1"
                           Content="_Job Title:"
                           Target="{Binding ElementName=jobTitle}" />
                    <TextBox x:Name="jobTitle"
                             Grid.Row="3"
                             Grid.Column="2"
                             Text="{Binding Contact.JobTitle}" />
                </Grid>
            </GroupBox>
        </WrapPanel>
    </DockPanel>
</UserControl>
Example 13.4. EditContactPresenter.cs
using ContactManager.Model;
using ContactManager.Views;

namespace ContactManager.Presenters
{
    public class EditContactPresenter : PresenterBase<EditContactView>
    {
        private readonly ApplicationPresenter _applicationPresenter;
        private readonly Contact _contact;

        public EditContactPresenter(
            ApplicationPresenter applicationPresenter,
            EditContactView view,
            Contact contact)
            : base(view, "Contact.LookupName")
        {
            _applicationPresenter = applicationPresenter;
            _contact = contact;
        }

        public Contact Contact
        {
            get { return _contact; }
        }

        public void SelectImage()
        {
            string imagePath = View.AskUserForImagePath();
            if (!string.IsNullOrEmpty(imagePath))
                Contact.ImagePath = imagePath;
        }

        public void Save()
        {
            _applicationPresenter.SaveContact(Contact);
        }

        public void Delete()
        {
            _applicationPresenter.CloseTab(this);
            _applicationPresenter.DeleteContact(Contact);
        }

        public void Close()
        {
            _applicationPresenter.CloseTab(this);
        }

        public override bool Equals(object obj)
        {
            EditContactPresenter presenter = obj as EditContactPresenter;
            return presenter != null && presenter.Contact.Equals(Contact);
        }
    }
}
Example 13.5. EditContactView.xaml.cs
using System.Windows;
using System.Windows.Controls;
using ContactManager.Presenters;
using Microsoft.Win32;

namespace ContactManager.Views
{
    public partial class EditContactView : UserControl
    {
        public EditContactView()
        {
            InitializeComponent();
        }

        public EditContactPresenter Presenter
        {
            get { return DataContext as EditContactPresenter; }
        }

        private void Save_Click(object sender, RoutedEventArgs e)
        {
            Presenter.Save();
        }
        private void Delete_Click(object sender, RoutedEventArgs e)
        {
            Presenter.Delete();
        }

        private void Close_Click(object sender, RoutedEventArgs e)
        {
            Presenter.Close();
        }

        private void SelectImage_Click(object sender, RoutedEventArgs e)
        {
            Presenter.SelectImage();
        }

        public string AskUserForImagePath()
        {
            OpenFileDialog dlg = new OpenFileDialog();
            dlg.ShowDialog();
            return dlg.FileName;
        }
    }
}
Although the Contact Manager doesn’t look very attractive (see Figure 13.1), it is now functioning and supported by a solid architecture.
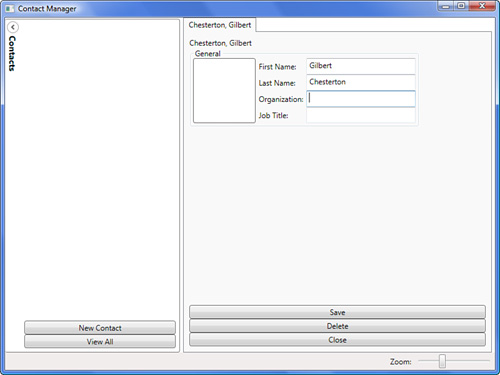
We’ve introduced a lot of code and markup in the previous section, but most of it is pretty straightforward. Looking at the EditContactView.xaml, you will find pretty typical markup compared to what we’ve been working with in previous chapters. In the next hour, we are going to make some changes to this markup that greatly beautify it. For now, it works.
EditContactPresenter follows similar patterns as ApplicationPresenter does. Notice how it takes an instance of the application presenter in its constructor. This is essential to this particular implementation of the MVP pattern. Much of what the presenter does is delegated to the application presenter; the rest, such as determining a filename, is delegated to the view. Pay special attention to the override of Equals. Our tab infrastructure requires this to prevent multiple copies of the same contact being open at the same time.
Did you Know?
When you compile this application, you may get several compiler warnings, depending on your Visual Studio settings. These warnings are related to the overriding of the Equals method on several classes. In a real-world application, you would want to override GetHashCode, the == operator, and the != operator anytime you override Equals. Because it is not necessary for our example, we have left these implementations out for the purpose of simplification.
When it comes to the EditContactView.xaml.cs code-behind, we have followed the same pattern as in previous examples. The one interesting thing to take note of is the AskUserForImagePath method. This allows the presenter to ask the view for this information without needing to be concerned with how it is done. In this case, the view uses an OpenFileDialog to locate an image, but it could have used any number of means.
This hour has introduced the final important pieces into our solution; presenters and views. We’ve looked at a lot of code and markup, but we’ve seen how a well-thought-out architecture can keep code simple and isolated. Separation of Concerns has played a key role in our design, enabling repository logic to be separated from application-wide logic, which in turn is separated from screen-specific logic.
Research “Martin Fowler,” if you have not already. Browse his website and read up on some common UI related patterns.
Extract interfaces for the existing views and presenters. Alter the constructors of the presenters to depend on interfaces rather than concrete classes. In a real-world application, all code would work against interfaces rather than concrete classes. This enables further decoupling and ease of testing throughout the application.
Spend some time on the Internet researching “dependency injection” and the related term “inversion of control.” Several open source frameworks ease the use of these techniques: StructureMap, Windsor, and Spring.net. You may find it valuable to investigate these tools because they are likely to be of great use on any medium or large projects you may develop.