
You make a phone call to your bank to update your mailing address. You are greeted by the online phone system and wait patiently for the last of eight options, which is boldly announced as, "Please press 0 if you would like to speak with an account representative." You press 0. "Using the numbers on your touchtone phone, please enter your account number," directs the automated voice system. Impressed by this latest technological advance implemented by your bank, you gladly enter your account number. A cheerful bank representative picks up the phone and says, "Hello, my name is Betty. Can I have your account number please?" "But I just entered it," you respond. Betty replies, "I’m sorry, but my system does not show me that information."
Don’t you hate being asked for the same thing twice? So do your users. Being faced with multiple logon screens can be just as frustrating and annoying as that call to your bank. If your users have already logged on to a Windows NT domain, you can avoid making users provide credentials again by taking advantage of the Windows logon information that the user has already provided. The user has already dealt with the Windows logon dialog box once, why make them deal with another logon dialog box for your application?
In many cases, you do not need to show your own logon dialog box to capture a user name and password. In addition, your application doesn’t need to store a list of users and their roles in a database. This information is already stored in your company’s system—in the form of logon accounts and the groups they belong to. This information is available to Visual Basic .NET applications, which means you can get the logged-on user’s user name and use it to query Active Directory to obtain a list of roles for that user as demonstrated by the following exercise.
Use Windows integrated security
In this exercise, you’ll create an application that gets your Windows user name and then uses it to query Active Directory to get the list of roles your user account belongs to. Please note that this exercise requires you to be logged on to a Windows NT domain. Using the technique described in the exercise, you can implement role-based security without having to maintain a list of roles and users within the system—these lists can be administered instead by the network system administrator.
In Visual Basic .NET, create a new console application named WinTrustApp; or open the practice solution file CH02_RoleBasedWinTrustAppWinTrustApp.sln provided with the practice files from this book’s Web site.
In SolutionExplorer, add a reference to the .NET Assembly System.DirectoryServices.dll.
In Module1.vb, add the following imports at the top of the file:
Imports System.DirectoryServices
Imports System.Threading.Thread
Imports System.Security.Principal
Add the following function to the module:
Public Function GetRoles(ByVal strUsername As String, _
                         ByVal strDomain As String) As String()
  Dim dirSearch As DirectorySearcher = _
      New DirectorySearcher("DC=" & strDomain)
  dirSearch.Filter = "(SAMAccountName=" & strUsername & ")"
  dirSearch.PropertiesToLoad.Add("memberOf")
  Dim res As SearchResult = dirSearch.FindOne()
  Dim strFullyQualifiedRoleName As String
  Dim strRoleName As String
  Dim intTotalCount As Integer = res.Properties("memberOf").Count
  Dim idxEquals, idxComma, intCount As Integer
  Dim strRoles(intTotalCount - 1) As String
  For intCount = 0 To intTotalCount - 1
    strFullyQualifiedRoleName = _
        CStr(res.Properties("memberOf")(intCount))
    idxEquals = strFullyQualifiedRoleName.IndexOf("=", 1)
    idxComma = strFullyQualifiedRoleName.IndexOf(",", 1)
    If (idxEquals <> -1) Then
      strRoleName = strFullyQualifiedRoleName.Substring(( _
                         idxEquals + 1), (idxComma - idxEquals) - 1)
      strRoles(intCount) = strRoleName
    End If
  Next
  Return strRoles
End Function
Add the following code to Sub Main():
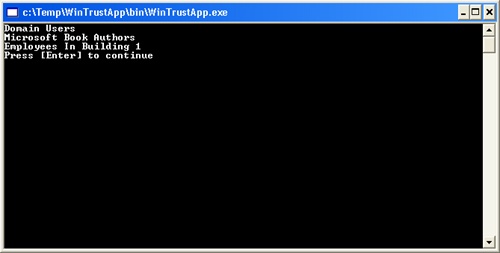
Sub Main()
  Dim strFullUsername, strUsername, strDomain As String
  Dim intIndex As Integer
  strFullUsername = WindowsIdentity.GetCurrent.Name
  intIndex = strFullUsername.LastIndexOf("")
  strUsername = strFullUsername.Substring(intIndex + 1)
  strDomain = strFullUsername.Substring(0, intIndex)
  Dim strRoles() As String = GetRoles(strUsername, strDomain)
  Dim i As Integer
  For i = 0 To strRoles.Length - 1
    Console.WriteLine(strRoles(i))
  Next
  Console.WriteLine("Press [Enter] to continue")
  Console.ReadLine()
End Sub
Press F5 to run the application. Your output will look similar to the following illustration:
You can use the GetRoles function shown in this example in place of the GetRoles function you created in the employee management system to change the employee management system to be based on Windows integrated security.
Note that these are the groups set up in Active Directory for your domain; they might or might not have the same name as security groups. For example, you can have an e-mail distribution alias set up in Active Directory named WingTipToysDevGroup that contains the e-mail names of everyone in the software development group without having a corresponding Windows NT domain account named WingTipToysDevGroup. You can send e-mail to the WingTipToysDevGroup, but you can’t assign the WingTipToysDevGroup Windows NT–directory or network-share permissions; nor could you assign WingTipToysDevGroup to Windows NT security groups such as Administrators or Power Users.