
80 Part 2: Start Sewing
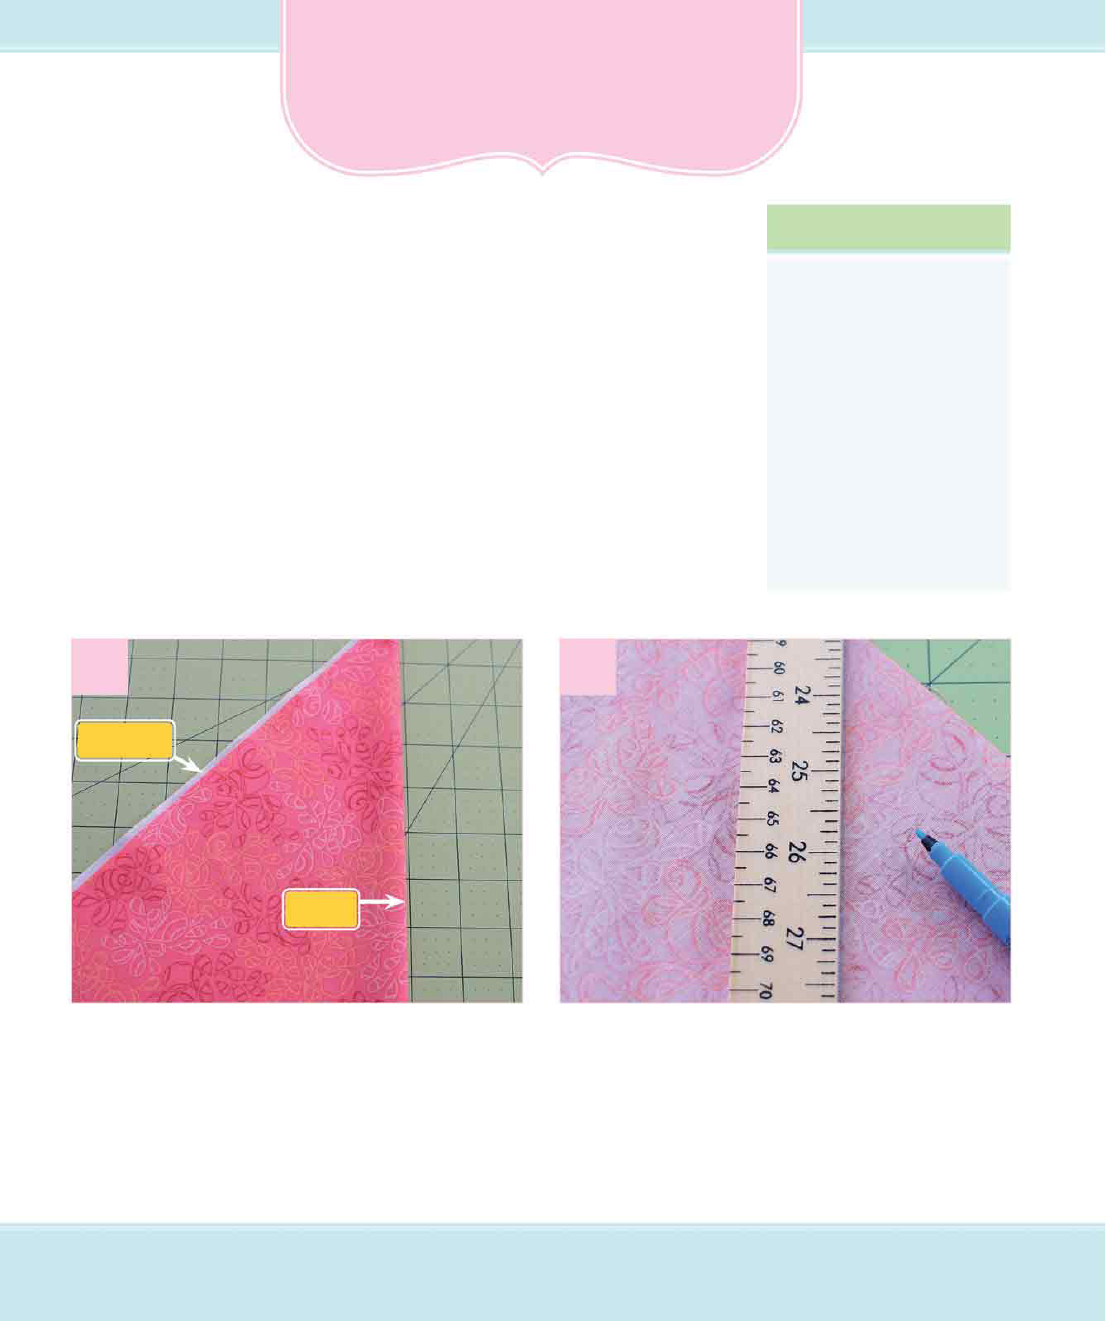
Fold the fabric with the wrong sides together, so
the cut edge lines up with the selvage. Press along
the fold to create a crease that runs along the bias
of the fabric grain. Open the fabric and lay it flat,
with the wrong side up.
Create parallel lines at the measurement you
want for your bias tape with your fabric marking
pen and ruler, using the crease as a starting point
(for this example, it is a 2-inch-wide [5 cm] strip).
Sure, you can buy prepackaged, prefolded bias tape at
the store, but why not make your own? It’s pretty simple,
and you can choose any color or print you like. Now you
can give your projects a truly unique look!
Making Your Own Bias Tape
What You Need
• Cotton fabric
• Plastic or metal ruler
• Fabric marking pen
• Rotary cutter
• Iron
• Scissors
• Bias tape maker tool
(optional)
Binding Edges
1 2
Selvage
Bias
iiCH6_Sewing.indd 80 5/23/13 3:37 PM

81Chapter 6: Trims and Finishes
Repeat marking lines across the rest of the fabric
on both sides of the center crease.
Use a rotary cutter along the edge of your ruler to
cut all the strips of fabric.
Trim the angles off the ends of the fabric pieces
to make them square.
With the right sides together, layer the strips,
making sure to match up the right angles. Place
the ruler across the corner and line up with the
edges of the strips.
3
4
5 6
Crease Marked line
iiCH6_Sewing.indd 81 5/23/13 3:37 PM

82 Part 2: Start Sewing
The connecting seams will be sewn diagonally
across the strip. Continue to sew all the strips
together.
Fold the strip in half, and press it to create the
center line. Open and fold the raw edges in
toward the center, and press.
Draw a diagonal line, and straight stitch along the
line. Trim the seam to about
1
⁄
4
inch (.6 cm).
Open up the fabric, and press the seam open.
Trim off the edges if they extend past the sides.
7
8
9 10
The right side of the
strip is shown.
iiCH6_Sewing.indd 82 5/23/13 3:37 PM

83Chapter 6: Trims and Finishes
Feed the fabric into the bias tape maker tool.
As you pull the fabric out, the tool will begin to
fold the edges in toward the center.
As the fabric is pulled out, press it to create
creased folds. Once it is all the way out, fold it in
half and press the center fold.
Types of Bias Tape
Bias tape comes in a variety of sizes designed for different
types of projects:
• Single fold simply has the two long edges folded under.
Like ribbon, it is stitched along both edges. It comes in two
widths and is used for casings, facings, or trim.
• Double fold is similar to single fold but it’s folded in half at
the center, too. It comes in several widths and is used to finish
edges or as drawstring ties that slide into a casing.
• Quilt binding is a larger version of extra-wide double fold.
It is used for the edges of quilts or thick blankets.
• Blanket binding has the largest finished size. It’s usually
made in satin and is just folded in half. It fits right over
the edge of a blanket and is straight stitched or zigzagged
along the edge.
1
2
Variation Using a Bias Tape Maker
Pull back on the
handle, and pull
the fabric forward.
iiCH6_Sewing.indd 83 5/23/13 3:37 PM
..................Content has been hidden....................
You can't read the all page of ebook, please click here login for view all page.