
Now that we have illustrated what Spring Batch is, we are going to implement the payroll file processing use case (as defined in the previous section) through the following steps:
- Coding a process that imports payroll data from a CSV spreadsheet
- Transforming the file tuples with a business class
- Storing the results in a database
The following diagram illustrates our implementation:

First, we are going to create a new, clean project, using the Spring initializer (https://start.spring.io), as we did in the previous section:

Don't forget to add a database driver as a dependency in the pom.xml file. For testing purposes, we are going to use HSQL (http://hsqldb.org/), as follows:
<dependency>
   <groupId>org.hsqldb</groupId>
   <artifactId>hsqldb</artifactId>
   <scope>runtime</scope>
</dependency>
Now, we will create input data as a file and the output structure as a database table, as you can see in the following diagram:

We are going to add a CSV file to our resource folder (src/main/resources/payroll-data.csv), with the following content:
0401343844,USD,1582.66,SAVING,3550891500,PAYROLL MARCH 2018,JAIME PRADO
1713430133,USD,941.21,SAVING,2200993002,PAYROLL MARCH 2018,CAROLINA SARANGO
1104447619,USD,725.20,SAVING,2203128508,PAYROLL MARCH 2018,MADALAINE RODRIGUEZ
0805676117,USD,433.79,SAVING,5464013600,PAYROLL MARCH 2018,BELEN CALERO
1717654933,USD,1269.10,SAVING,5497217100,PAYROLL MARCH 2018,MARIA VALVERDE
1102362626,USD,1087.80,SAVING,2200376305,PAYROLL MARCH 2018,VANESSA ARMIJOS
1718735793,USD,906.50,SAVING,6048977500,PAYROLL MARCH 2018,IGNACIO BERRAZUETA
1345644970,USD,494.90,SAVING,6099018000,PAYROLL MARCH 2018,ALBERTO SALAZAR
0604444602,USD,1676.40,SAVING,5524707700,PAYROLL MARCH 2018,XIMENA JARA
1577777593,USD,3229.75,SAVING,3033235300,PAYROLL MARCH 2018,HYUN WOO
1777705472,USD,2061.27,SAVING,3125662300,PAYROLL MARCH 2018,CARLOS QUIROLA
1999353121,USD,906.50,SAVING,2203118265,PAYROLL MARCH 2018,PAUL VARELA
1878363820,USD,1838.30,SAVING,4837838200,PAYROLL MARCH 2018,LEONARDO VASQUEZ
The structure of our project will look as follows:

We will now create the database structure where we will store the results processed by the payroll. We will add this to our resource folder (src/main/resources/schema-all.sql) with the following content:
DROP TABLE PAYROLL IF EXISTS;

CREATE TABLE PAYROLL  (
    transaction_id BIGINT IDENTITY NOT NULL PRIMARY KEY,
    person_identification VARCHAR(20),
    currency VARCHAR(20),
    tx_ammount DOUBLE,
    account_type VARCHAR(20),
    account_id VARCHAR(20),
    tx_description VARCHAR(20),
    first_last_name VARCHAR(20)
);
Up until this point, we have created the input data as a .csv file, as well as the output repository where it is going to store our complete payroll process. Consequently, we are now going to create the filters and use the default pipes that bring us Spring Batch.
First, we are going to create a class that represents our business data, with all of the fields that we are going to receive. We will name this PayRollTo.java (Payroll Transfer Object):
package com.packpub.payrollprocess;

public class PayrollTo {

    private Integer identification;

    private String currency;

    private Double ammount;

    private String accountType;

    private String accountNumber;

    private String description;

    private String firstLastName;

    public PayrollTo() {
    }

    public PayrollTo(Integer identification, String currency, Double ammount, String accountType, String accountNumber, String description, String firstLastName) {
        this.identification = identification;
        this.currency = currency;
        this.ammount = ammount;
        this.accountType = accountType;
        this.accountNumber = accountNumber;
        this.description = description;
        this.firstLastName = firstLastName;
    }

    // getters and setters

    @Override
    public String toString() {
        return "PayrollTo{" +
                "identification=" + identification +
                ", currency='" + currency + ''' +
                ", ammount=" + ammount +
                ", accountType='" + accountType + ''' +
                ", accountNumber='" + accountNumber + ''' +
                ", description='" + description + ''' +
                ", firstLastName='" + firstLastName + ''' +
                '}';
    }
}
Now, we will create our filters, which are represented as processors in Spring Batch. Similar to how the framework gives us out-of-the-box behavior, we are first going to concentrate on translating our business classes that are intended to transform the input data, as shown in the following diagram:

After including a representation of our file as a PayrollTo class on each row, we are going to need a filter that will transform each of our data files into uppercase. Using Spring Batch, we will create a processor that will transform the data files and then send the data to the following step. So, let's create a PayRollItemProcessor.java object that implements the org.springframework.batch.item.ItemProcessor<InputObject, OutputObjet> interface, as follows:
package com.packpub.payrollprocess;

import org.slf4j.Logger;
import org.slf4j.LoggerFactory;
import org.springframework.batch.item.ItemProcessor;

public class PayRollItemProcessor implements
                    ItemProcessor<PayrollTo, PayrollTo> {

    private static final Logger log = LoggerFactory
                    .getLogger(PayRollItemProcessor.class);

    @Override
    public PayrollTo process(PayrollTo payrollTo) throws Exception {

        final PayrollTo resultTransformation = new PayrollTo();
        resultTransformation.setFirstLastName
            (payrollTo.getFirstLastName().toUpperCase());
        resultTransformation.setDescription
            (payrollTo.getDescription().toUpperCase());
        resultTransformation.setAccountNumber
            (payrollTo.getAccountNumber());
        resultTransformation.setAccountType(payrollTo.getAccountType());
        resultTransformation.setCurrency(payrollTo.getCurrency());
        resultTransformation.setIdentification
            (payrollTo.getIdentification());

        // Data Type Transform
        final double ammountAsNumber = payrollTo.getAmmount()
                                                    .doubleValue();
        resultTransformation.setAmmount(ammountAsNumber);

        log.info
            ("Transforming (" + payrollTo + ") into ("
                                + resultTransformation + ")");
        return resultTransformation;
    }
}
According to the API interface, we will receive an incoming PayrollTo object, after which we will transform it to an uppercase PayrollTo for the firstLastName and description properties.
Now, we are going to create our Batch job and use some Spring Batch out-of-the-box features. For example, the ItemReader has a useful API to process files, and the ItemWriter can be used to specify how to store the produced data:

Finally, we are going to connect all of our flow data using a job.
Using Spring Batch, we need to concentrate on our business (like we did in the PayRollItemProcessor.java class), and then connect all of the pieces together, as follows:
@Configuration
@EnableBatchProcessing
public class BatchConfig {

    @Autowired
    public JobBuilderFactory jobBuilderFactory;

    @Autowired
    public StepBuilderFactory stepBuilderFactory;

    // READ THE INPUT DATA
    @Bean
    public FlatFileItemReader<PayrollTo> reader() {
        return new FlatFileItemReaderBuilder<PayrollTo>()
                .name("payrollItemReader")
                .resource(new ClassPathResource("payroll-data.csv"))
                .delimited()
                .names(
                    new String[]{
                        "identification", "currency", "ammount",
                        "accountType", "accountNumber", "description",
                        "firstLastName"})
                .fieldSetMapper(
                    new BeanWrapperFieldSetMapper<PayrollTo>() {{
                    setTargetType(PayrollTo.class);
                }})
                .build();
    }

    // PROCESS THE DATA
    @Bean
    public PayRollItemProcessor processor() {
        return new PayRollItemProcessor();
    }

    // WRITE THE PRODUCED DATA
    @Bean
    public JdbcBatchItemWriter<PayrollTo> writer(DataSource dataSource) {
        return new JdbcBatchItemWriterBuilder<PayrollTo>()
                .itemSqlParameterSourceProvider(
                    new BeanPropertyItemSqlParameterSourceProvider<>())
                .sql(
                    "INSERT INTO PAYROLL (PERSON_IDENTIFICATION,
                        CURRENCY, TX_AMMOUNT, ACCOUNT_TYPE, ACCOUNT_ID,
                        TX_DESCRIPTION, FIRST_LAST_NAME) VALUES
                    (:identification,:currenxcy,:ammount,:accountType,
                     :accountNumber, :description, :firstLastName)")
                .dataSource(dataSource)
                .build();
    }

    @Bean
    public Job importPayRollJob(JobCompletionPayRollListener listener, Step step1) {
        return jobBuilderFactory.get("importPayRollJob")
                .incrementer(new RunIdIncrementer())
                .listener(listener)
                .flow(step1)
                .end()
                .build();
    }

    @Bean
    public Step step1(JdbcBatchItemWriter<PayrollTo> writer) {
        return stepBuilderFactory.get("step1")
                .<PayrollTo, PayrollTo> chunk(10)
                .reader(reader())
                .processor(processor())
                .writer(writer)
                .build();
    }
}
Let's review how the Step bean works, as follows:
@Bean
    public Step step1(JdbcBatchItemWriter<PayrollTo> writer)
 {
        return stepBuilderFactory.get("step1")
                .<PayrollTo, PayrollTo> chunk(10)
                .reader(reader())
                .processor(processor())
                .writer(writer)
                .build();
 }
First, it configures the step to read the data in chunks of 10 records, and after that, the step is configured with the corresponding reader, processor, and writer objects.
We have now implemented all of the pipes and filters that we planned, as shown in the following diagram:

Finally, we are going to add a listener, in order to check our processed payroll data. To do this, we will create a JobCompletionPayRollListener.java class that extends the class JobExecutionListenerSupport and implement the afterJob(JobExecution jobExecution) method.
Now, we will review how many insert operations we process from our processed data:
@Component
public class JobCompletionPayRollListener
            extends JobExecutionListenerSupport {

    private static final Logger log =
        LoggerFactory.getLogger(JobCompletionPayRollListener.class);

    private final JdbcTemplate jdbcTemplate;

    @Autowired
    public JobCompletionPayRollListener(JdbcTemplate jdbcTemplate) {
        this.jdbcTemplate = jdbcTemplate;
    }

    @Override
    public void afterJob(JobExecution jobExecution) {
        if (jobExecution.getStatus() == BatchStatus.COMPLETED) {
            log.info(">>>>> PAY ROLL JOB FINISHED! ");

            jdbcTemplate
            .query(
                "SELECT PERSON_IDENTIFICATION, CURRENCY, TX_AMMOUNT,                          ACCOUNT_TYPE, ACCOUNT_ID, TX_DESCRIPTION,
                        FIRST_LAST_NAME FROM PAYROLL",
                    (rs, row) -> new PayrollTo(
                            rs.getInt(1),
                            rs.getString(2),
                            rs.getDouble(3),
                            rs.getString(4),
                            rs.getString(5),
                            rs.getString(6),
                            rs.getString(7))
            ).forEach(payroll ->
                log.info("Found <" + payroll + "> in the database.")
                );
        }
    }
}
In order to check that everything is okay, we are going to execute the application, using the following command:
$ mvn spring-boot:run
Alternatively, we could build the application using maven, as follows:
$ mvn install
Next, we will run the recently built jar on the Terminal:
$ java -jar target/payroll-process-0.0.1-SNAPSHOT.jar
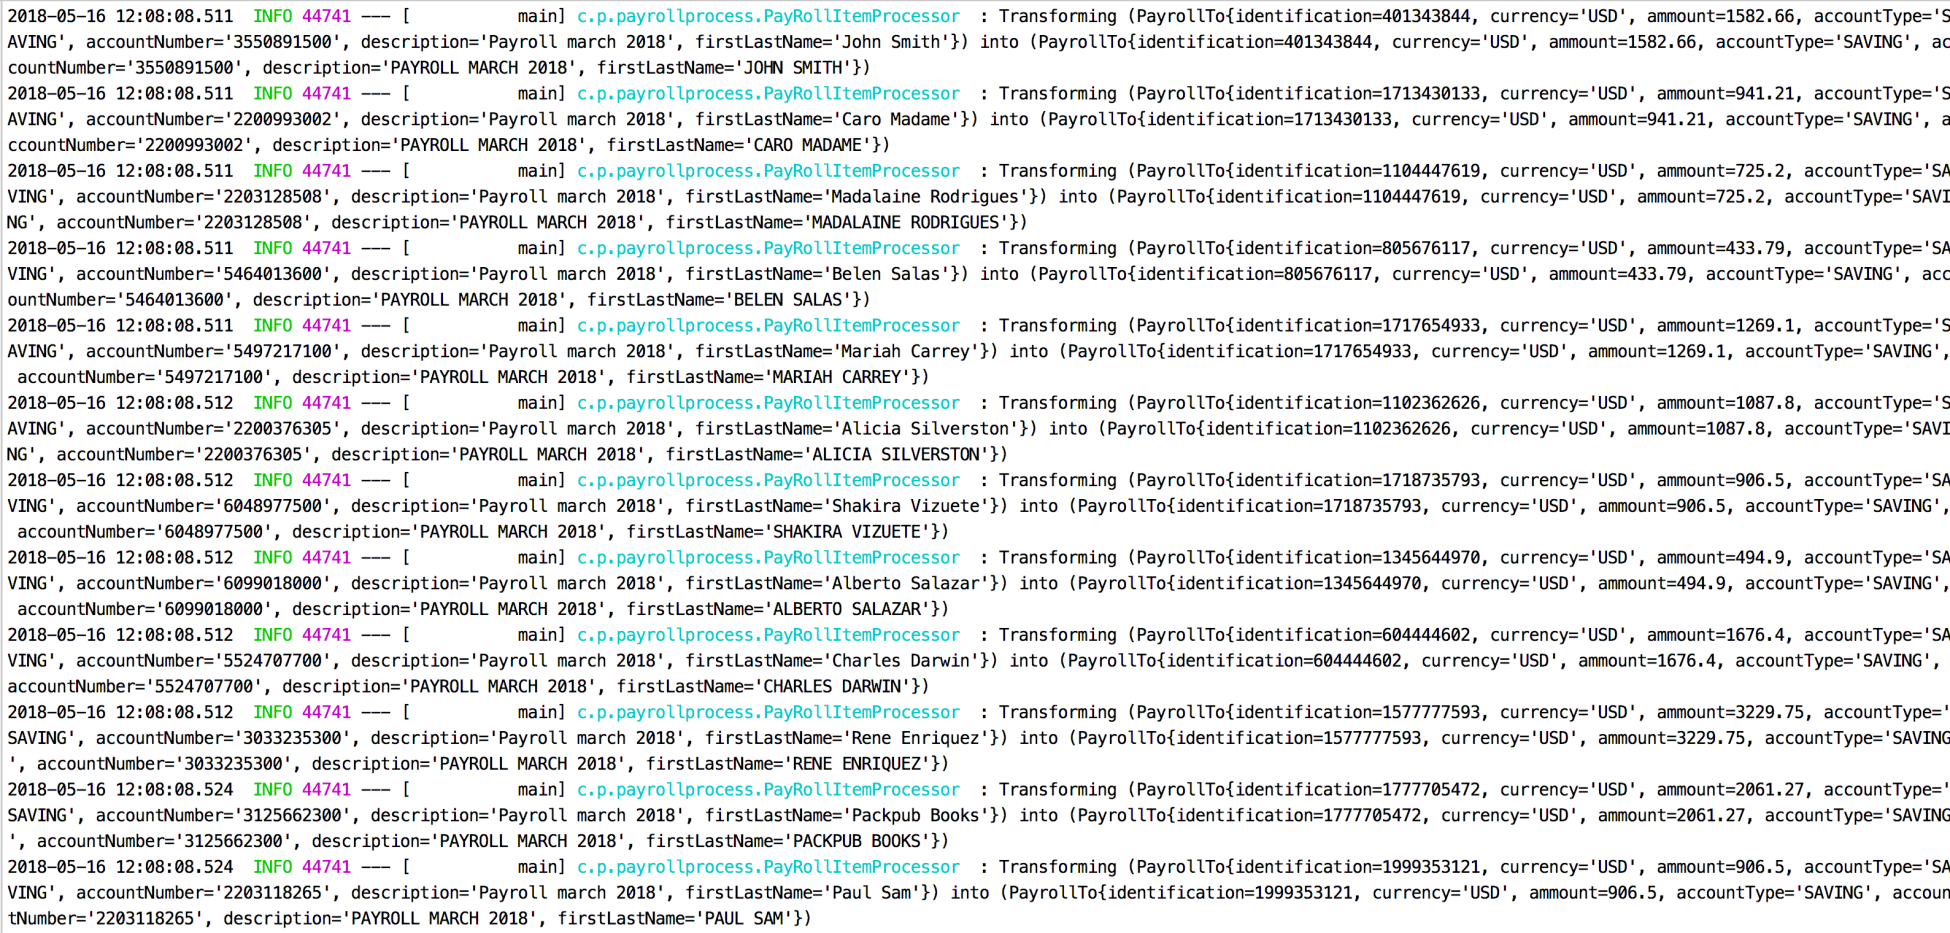
Finally, we will see the following output on our console. This output represents the filter that has been implemented as an ItemProcessor that transforms the data:
We can also see the verification of our process via the listener, implemented as a JobExecutionListenerSupport, which prints the results stored in the database:
