
Chapter 11. Creating Division-Based Layouts
In this chapter, you will:
Until a few years ago, tables were a popular way of structuring a webpage. You’ll learn about tables and their formatting in Chapter 12 and Chapter 13, in case that’s the route you want to go with your site’s design. However, as Web designers move increasingly toward separating style and content, division-based layouts are becoming more appealing.
A division-based layout defines the area of a page with <div> tags, or some of the new HTML5 semantic tags such as <article> and <aside>, and then applies formatting to each area using styles. One big advantage of division-based layouts is that you can place the styles in an external style sheet and then make style changes to several pages at once simply by modifying the style sheet. For example, relocating the navigation bar from the left side of the page to the right on a dozen different pages is easy with a division-based layout that uses an external style sheet, but it’s a huge chore with a table-based layout. Another advantage is that division-based layouts reduce the number of lines of code needed to produce a page. Division-based layouts are also much more accessibility-friendly than table-based layouts because they are more easily interpreted by screen-reading programs and other accessibility tools. In this chapter, you will learn how to create a separate area of a page (a division) in a document and how to control division and element positions on-screen. Then you’ll learn how to format a division (which is mostly a matter of applying the same formatting styles that you’ve learned about in previous chapters) and how to overcome any problems introduced by the formatting.
Important
Before you can use the practice files provided for this chapter, you need to install them from the book’s companion content page to their default locations. See Code Samples in the beginning of this book for more information.
Understanding HTML5 Semantic Tags
HTML5 adds some semantic tags to define layouts in more intuitive ways than the generic <div> tag is capable of. A semantic tag is one in which the name of a tag reflects its purpose.
Here are the major semantic tags you should know:
<header> Defines the masthead or other header information on the page. Typically the header is repeated on every page of a site, although that is not required.
<footer> Defines the text at the bottom of a page, such as the copyright or contact information. Again, it is typically repeated on every page of the site.
<article> Defines a block of text that represents a single article, story, or message. An article can be distinguished from other text in that it can logically stand alone. For example, on a news site, each news story is an article.
<aside> Defines a block of text that is tangential to the main discussion, such as a note, tip, or caution. An aside can be distinguished from other text in that it could be pulled out and discarded without disrupting the main document in which it appears.
<section> Defines a generic content or application section. Examples of sections would be book chapters or the numbered sections of a thesis; a site’s home page could be split into sections such as Introduction, News, and Contact Info. A section begins with a heading such as <h1> followed by other content. A general rule is to use <section> if the area being defined would be included in an outline of the document or page.
Note
The <section> tag might sound similar to the <div> tag, but the HTML5 standard differentiates them, saying that <section> should not be used merely to define formatting. A section defines a particular type of meaningful content, not just a block of contiguous text that should be formatted the same way.
If you use semantic tags to structure your page and someone views it with a browser that doesn’t support HTML5, the page might not look the way you want it to; the browser will ignore the tags it doesn’t understand. That’s why, for the time being, creating the page structure using <div> tags is the safest way to go. However, it’s important that you learn the HTML5 semantic tags too, for future reference.
In this chapter, you’ll learn to mark up a document both ways: with generic <div> tags that are readable in any browser and with the new HTML5 semantic tags.
Beginning to Think in Divisions
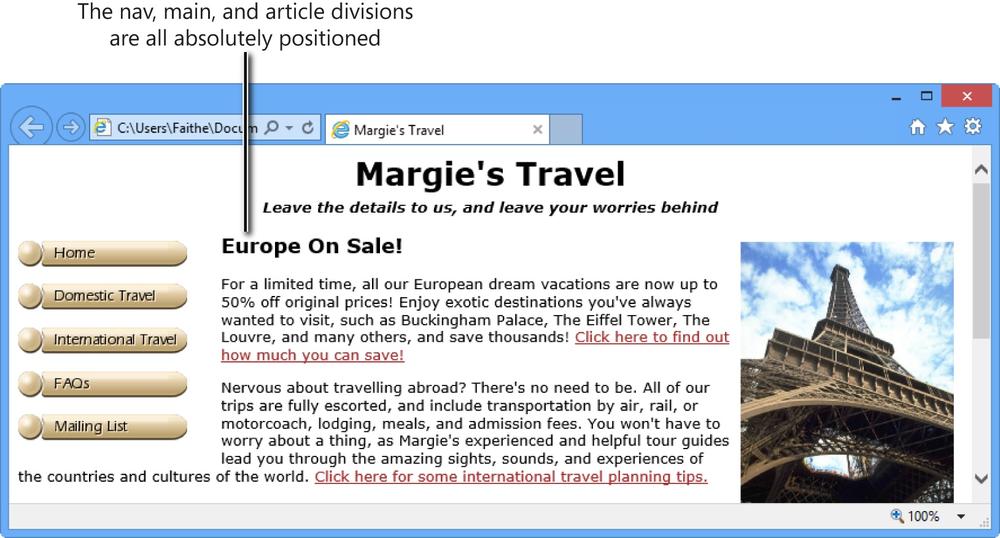
In an effective division-based layout, each part of the page you want to format separately should be a division. For now, don’t think about whether the division will be a vertical or horizontal area on the page or how large or small it will be; just think about the content. For example, look at Figure 11-1. How many natural divisions do you see here?
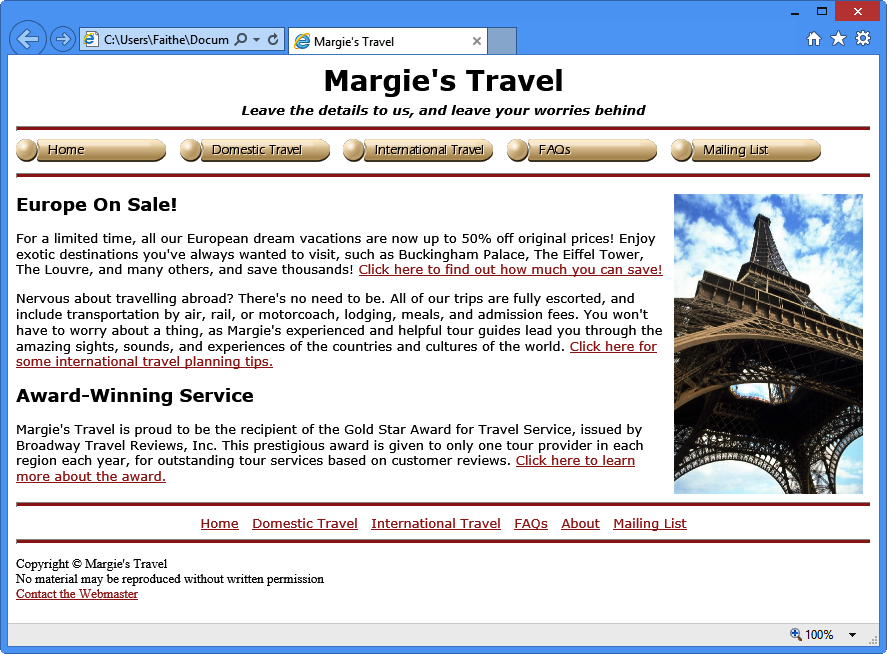
If you were designing with <div> tags, you might divide the page like this: the masthead, the top navigation bar, the body text, the bottom navigation bar, and the copyright notice.
If you were designing with HTML5 semantic tags, you might divide it like this: <header> for the masthead, <nav> for the navigation bars, and <footer> for the copyright notice. Formatting each paragraph in the body with its own <article> tag might be overkill for this page, but in a page with more content, you might use <article>, <aside>, or <section> to divide it into manageable chunks.
Creating Divisions
To give a name to a division, use an id attribute:
<div id="masthead">
Each ID must be unique within the document, but multiple documents can use the same division names. Such reuse is good, in fact, because it lets you define the formatting of multiple documents with a single style sheet.
In the following exercise, you will create divisions within a page. Then in later exercises, you will position and format those divisions.
Create Divisions
Create Divisions
In Notepad and Internet Explorer, open the index.htm file located in the DocumentsMicrosoft PressHTML5 Start Here11DivisionsCreatingDivisions folder.
Enclose the company name and tagline in a <div> tag and then name the tag masthead:
<div id="masthead"><h1 style="text-align: center; margin: 3px">Margie's Travel</h1> <i><h5 style="text-align: center; margin: 5px">Leave the details to us, and leave your worries behind</h5></i></div>Enclose the top navigation bar in a <div> tag and then name the tag topnav:
<div id="topnav"><hr style="clear: left"> <p style="margin:0px"> <a href="index.htm"><img src="images/home.png" style="border:none"></a> <a href="domestic.htm"><img src="images/domestic.png" style="border:none"> </a> <a href="international.htm"><img src="images/international.png" style="border:none"></a> <a href="faqs.htm"><img src="images/faqs.png" style="border:none"></a> <a href="mailing.htm"><img src="images/mailing.png" style="border:none"></a> </p> <hr></div>Note
As you learned in Chapter 10, the <nav> tag is an HTML5 semantic tag that serves the same purpose as defining a <div> tag, but it is intended for a navigation bar. You’ll use <nav> in the next exercise, where you apply HTML5 semantic tags.
Enclose the body paragraphs in a <div> tag and then name the tag main:
<div id="main"><img src="images/eiffel.jpg" style="margin: 8px; float: right" height=300px> <h2>Europe On Sale!</h2> <p>For a limited time, all our European dream vacations are now up to 50% off original prices! Enjoy exotic destinations you've always wanted to visit, such as Buckingham Palace, The Eiffel Tower, The Louvre, and many others, and save thousands! <a href="sale.htm">Click here to find out how much you can save! </a></p> <p>Nervous about travelling abroad? There's no need to be. All of our trips are fully escorted, and include transportation by air, rail, or motorcoach, lodging, meals, and admission fees. You won't have to worry about a thing, as Margie's experienced and helpful tour guides lead you through the amazing sights, sounds, and experiences of the countries and cultures of the world. <a href="international-faqs.htm">Click here for some international travel planning tips.</a></p> <h2>Award-Winning Service</h2> <p>Margie's Travel is proud to be the recipient of the Gold Star Award for Travel Service, issued by Broadway Travel Reviews, Inc. This prestigious award is given to only one tour provider in each region each year, for outstanding tour services based on customer reviews. <a href="award.htm">Click here to learn more about the award.</ha></div>Enclose the bottom navigation bar in a <div> tag and then name the tag bottomnav:
<div id="bottomnav"><hr style="clear: right"> <p style="margin:0px; text-align:center"> <a href="index.htm">Home</a> <a href="domestic.htm">Domestic Travel</a> <a href="international.htm">International Travel</a> <a href="faqs.htm">FAQs</a> <a href="about.htm">About</a> <a href="mailing.htm">Mailing List</a></p> <hr></div>Enclose the copyright notice in a <div> tag and then name the tag copy:
<div id="copy"><p class="copyright"> Copyright © Margie's Travel<br> No material may be reproduced without written permission<br> <a href="mailto:[email protected]" style="color: white"> Contact the Webmaster</a></p></div>Save the file and then refresh Internet Explorer.
Close Notepad and Internet Explorer.
Creating an HTML5 Semantic Layout
If you prefer to use the HTML5 semantic tags to create your layout, you choose the appropriate tags based on the purpose of the text. It’s conceptually very much the same as using a <div> tag with an id attribute, but the tag itself provides the context. For example, instead of using the <div id=“masthead> tag, you would use the <header> tag. It is also okay to have both in place simultaneously; a browser that can’t use the HTML5 semantic tags can fall back upon the standard <div> tags. (Just make sure you style the equivalent tags in the same way, so there is no formatting confusion.)
In the following exercise, you will change a division-based document to one that uses semantic tags to define the layout.
Create an HTML5 Semantic Layout
Create an HTML5 Semantic Layout
In Notepad and Internet Explorer, open the index2.htm file located in the Documents Microsoft PressHTML5 Start Here11DivisionsCreatingSemantic folder.
Replace the <div id=“masthead”> tag with <header>, and change its closing </div> tag to </header>:
<body>
<header><h1 style="text-align: center; margin: 3px">Margie's Travel</h1> <i><h5 style="text-align: center; margin: 5px">Leave the details to us, and leave your worries behind</h5></i></header>Replace the <div id=“topnav”> tag with <nav> and then change its closing </div> tag to </nav>:
<nav><hr style="clear: left"> <p style="margin:0px"> <a href="index.htm"><img src="images/home.png" style="border:none"></a> <a href="domestic.htm"><img src="images/domestic.png" style="border:none"></a> <a href="international.htm"><img src="images/international.png" style="border:none"></a> <a href="faqs.htm"><img src="images/faqs.png" style="border:none"></a> <a href="mailing.htm"><img src="images/mailing.png" style="border:none"></a></p> <hr></nav>Delete the <div id=“main”> tag and its closing </div> tag.
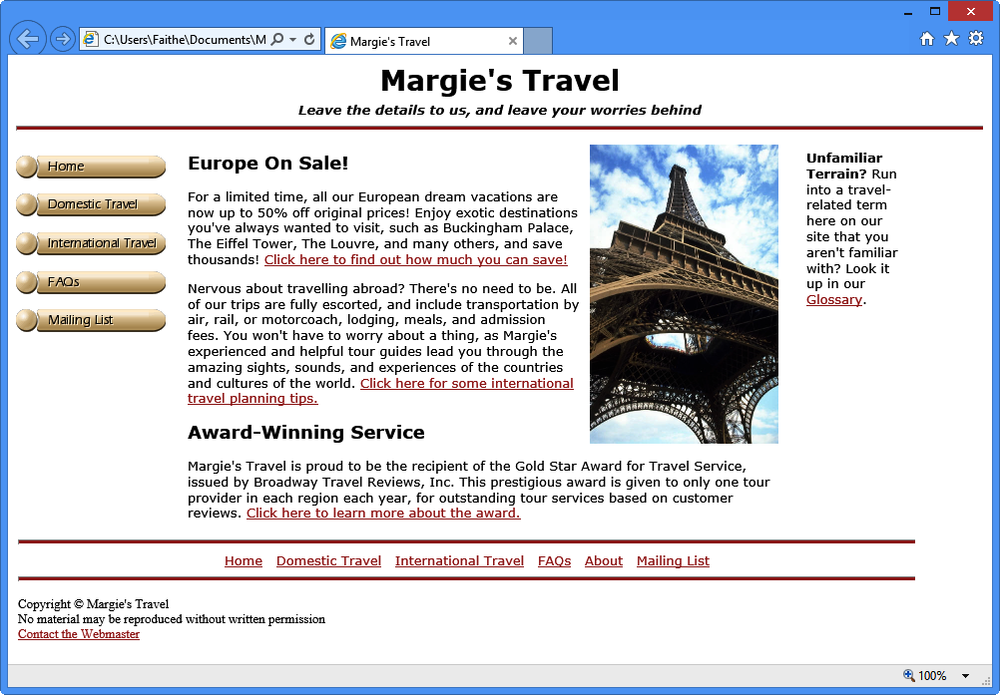
Enclose the Europe On Sale! heading and the two paragraphs that follow it in an <article> tag:
<article><h2>Europe On Sale!</h2> <p>For a limited time, all our European dream vacations are now up to 50% off original prices! Enjoy exotic destinations you've always wanted to visit, such as Buckingham Palace, The Eiffel Tower, The Louvre, and many others, and save thousands! <a href="sale.htm">Click here to find out how much you can save!</a></p> <p>Nervous about travelling abroad? There's no need to be. All of our trips are fully escorted, and include transportation by air, rail, or motorcoach, lodging, meals, and admission fees. You won't have to worry about a thing, as Margie's experienced and helpful tour guides lead you through the amazing sights, sounds, and experiences of the countries and cultures of the world. <a href="international-faqs.htm">Click here for some international travel planning tips.</a></p> </article>Enclose the Award-Winning Service heading and the paragraph that follows it in an <article> tag:
<article><h2>Award-Winning Service</h2> <p>Margie's Travel is proud to be the recipient of the Gold Star Award for Travel Service, issued by Broadway Travel Reviews, Inc. This prestigious award is given to only one tour provider in each region each year, for outstanding tour services based on customer reviews. <a href="award.htm">Click here to learn more about the award.</a></article>Beneath the second article, add this new section, which uses an <aside> tag:
<aside><p><b>Unfamiliar Terrain?</b> Run into a travel-related term here on oursite that you aren't familiar with? Look it up in our <a href="glossary.htm"target="_blank">Glossary</a>.</p></aside>Leave the bottom navigation bar’s <div> tag as is.
Replace the <div id=“copy”> tag with <footer> and then change its closing </div> tag to </footer>:
<footer><p class="copyright"> Copyright © Margie's Travel<br> No material may be reproduced without written permission<br> <a href="mailto:[email protected]" style="color: white"> Contact the Webmaster</a></p></footer>Save the file and then refresh Internet Explorer to check your work.
Close Notepad and Internet Explorer.
Positioning Divisions
There are two ways of positioning a division (or equivalent semantic-tagged block): you can use the float style rule, as you did with pictures in Chapter 9, or you can use the position style rule. The following sections explain each method.
Note
In the rest of this chapter, for simplicity, I use the term division generically to mean both the <div> tag and the HTML5 semantic tags. In most cases, browsers handle the formatting and positioning the same way.
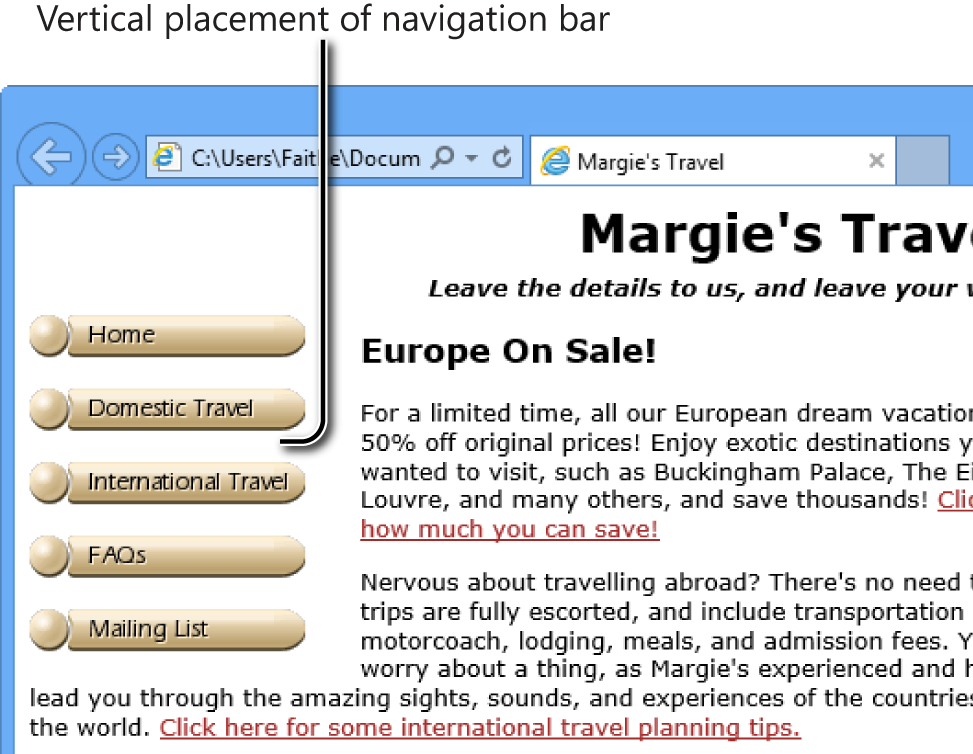
Floating a Division to the Right or Left
The easiest way to place one division beside another is to use the float style rule. For example, to make a navigation bar that floats to the left of the main body text, you can set the navigation bar’s division to a certain width (perhaps 180 pixels or so), and then float it like this, with the line height increased to create a bit of extra space vertically between the buttons:
<div id="topnav" style="width: 180px; float: left; line-height: 250%">
If you were using the <nav> tag for the navigation bar, it would look like this (see Figure 11-2):
<nav style="width: 180px; float: left; line-height: 250%">
Because the main advantage of using divisions is to promote consistency across documents, you would probably want to set up the style rule in an external style sheet rather than in the individual division tag or an internal style sheet.
In a style sheet, you precede the names of unique elements (such as divisions) with a pound sign (#), as shown in the following:
#topnav {width: 180px; float: left; line-height: 250%}Alternatively, if you were using the <nav> tag for the navigation bar, the style rule in the style sheet would look like this:
nav {width: 180px; float: left; line-height: 250%}Positioning a Division on the Page
If you need a division to be in a specific spot on the page, use the position style rule, which has three possible values:
position: absolute This value specifies a fixed position with respect to the parent element. Unless the element is within some other tag, the parent element is generally the <body> tag; in this case, the element would have a fixed position relative to the upper-left corner of the page.
position: relative This value specifies an offset from the element’s natural position. Other elements on the page are not affected, even if the new position causes elements to overlap.
position: fixed This value specifies a fixed position within the browser window that doesn’t change even when the display is scrolled up or down.
Caution
Absolute positioning is not very accessibility-friendly; it can cause problems for users who have special visual needs. For example, if the user requires exceptionally large fonts to see the page, using absolute positioning can hide some content from view.
You must use each of these values in conjunction with a top, right, bottom, and/or left style rule that specifies the location to which the position rule refers. For example, to position a division called main exactly 100 pixels from the top of the page and 200 pixels from the left side, create this style rule in the style sheet:
#main {position: absolute; top: 100px; left: 200px; line-height: 250%}Note
When using semantic tags, you won’t have one that defines the entire main body of the page content, so you might want to create a division for that purpose if you want to specify an exact position for all the body text on the page. As the previous example illustrates, it’s okay to mix semantic tags with <div> tags in your work. The <div> tag is not deprecated in HTML5; it’s still perfectly valid.
You can combine positioning with a width specification to position each division in a precise rectangular area on the screen. For example, to place the top navigation bar exactly 100 pixels from the top of the page and make it 180 pixels wide, use the following:
#topnav {position: absolute; top: 100px; width: 180px; line-height: 250%}Or, if you are using the <nav> tag instead, use this:
nav {position: absolute; top: 100px; width: 180px; line-height: 250%}The position style rule results in positioning that does not take into regard other elements on the page. This can get you in trouble because elements can potentially overlap unattractively, but it can also be used to intentionally create overlapping elements. For example, you can use this feature to overlay text on a photo.
In the following exercise, you will specify a size and position for several divisions by creating rules that refer to those divisions in an external style sheet.
Position Divisions
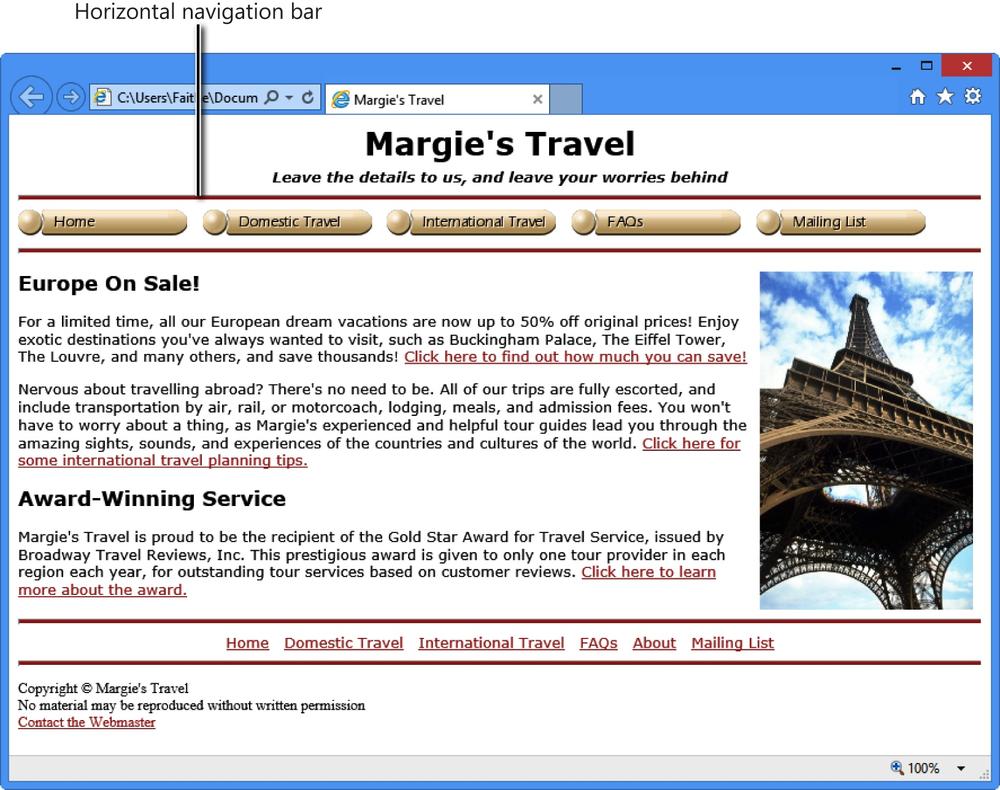
Open index3.htm in Internet Explorer and then open default.css in Notepad. The files for this exercise are located in the DocumentsMicrosoft PressHTML5 Start Here11DivisionsPositioningDivisions folder.
In Internet Explorer, note the position of the top navigation bar.
In Notepad, in the default.css file, add the following style rule:
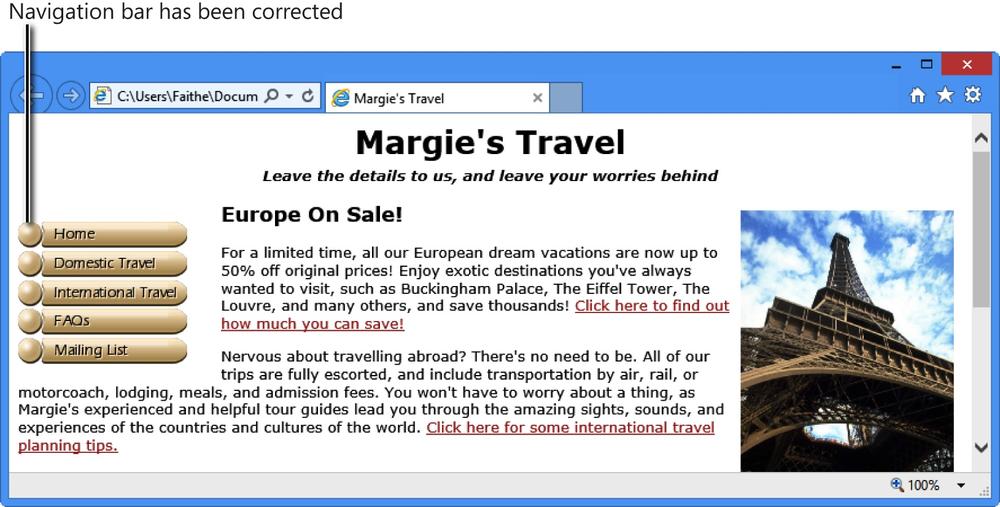
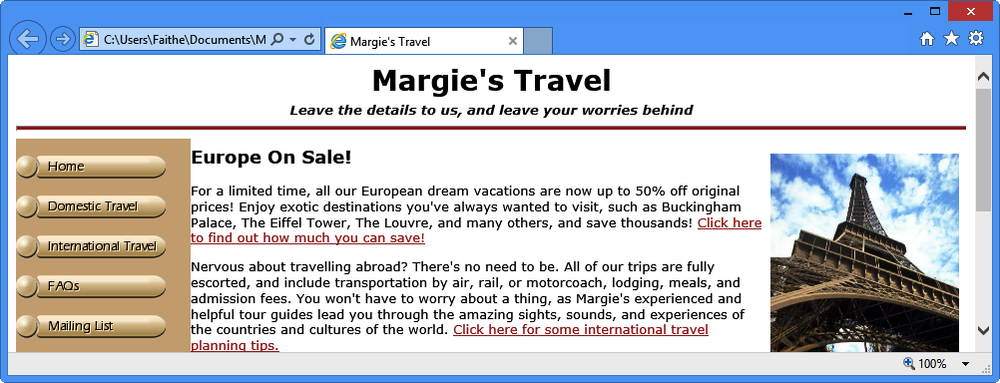
nav {float: left; width: 150px; padding-top: 15px; padding-right: 30px}Save the file and then refresh Internet Explorer.
The navigation bar now displays at the left side of the page.
Note
Notice that there are a few problems with the layout. For one thing, when the navigation bar is laid out vertically, the horizontal rule below it looks awkward and there is not enough vertical space between the buttons. Another issue is that in some browsers, the Home button is not indented as much as the other buttons; that’s because of the characters between the buttons.
In Notepad, open index3.htm, remove the <hr> tags for the <nav> division, and then replace the characters in the <nav> division with <br> tags (for line breaks):
<nav> <p style="margin:0px"> <a href="index.htm"><img src="images/home.png" style="border:none"></a>
<br><a href="domestic.htm"><img src="images/domestic.png" style="border:none"></ a><br><a href="international.htm"><img src="images/international.png" style="border:none"></a><br><a href="faqs.htm"><img src="images/faqs.png" style="border:none"></a><br><a href="mailing.htm"><img src="images/mailing.png" style="border:none"></a></p> </nav>Save your work and then refresh Internet Explorer to view your changes.
The navigation bar looks better now, but there is still not enough vertical space between the buttons.
There are several ways to correct this problem. You could make each button its own paragraph, for example, or you could add an extra <br> tag after each button so that it not only line-breaks but also includes an extra line’s worth of spacing. You could also add a line-height style attribute to the <p> tag that contains the buttons or add it to the nav division’s style in css. That last option is what we’ll do next.
In the default.css file, add a line-height attribute of 250% to the nav tag’s style definition:
nav {float: left; width: 150px; padding-top: 15px;line-height: 250%;padding-right: 30px}Notice that without the navigation bar at the top of the page, the masthead gets a little bit lost. Let’s add a horizontal rule back in.
In index3.htm, add an <hr> tag immediately above the </header> tag:
<header> <h1 style="text-align: center; margin: 3px">Margie's Travel</h1> <i><h5 style="text-align: center; margin: 5px">Leave the details to us, and leave your worries behind</h5></i>
<hr></header>Save the file and then refresh Internet Explorer.
In Notepad, reopen default.css if necessary and then add a style rule that limits the width of the main division to 600 pixels:
#main {width: 600px}Save the file, refresh Internet Explorer, and then close index3.htm in Notepad. The rest of the edits will be done in default.css.
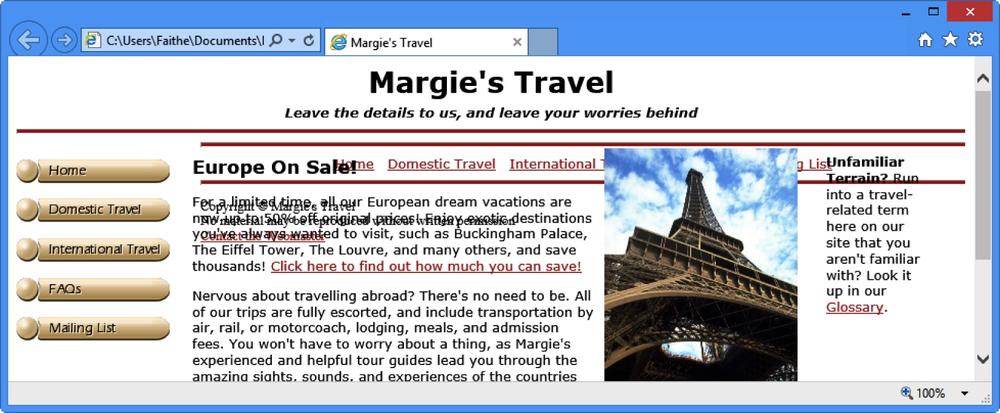
In default.css, specify an absolute position for the top of the main division that is 82 pixels from the top and 180 pixels from the left:
#main {width: 600px;position: absolute; top: 82px; left: 180px}Specify an absolute position for the top of the aside division so that it is 82 pixels from the top and 800 pixels from the left:
aside {width: 100px; position: absolute; top: 82px; left: 800px}Save the file and then refresh Internet Explorer.
As shown in the figure, the footer and the bottom navigation bar are now bunched up at the top, behind the main section. This isn’t acceptable, of course.
In default.css, add absolute positions for the footer and the bottom navigation bar that place them at 10px from the left and 10px and 75px from the bottom, respectively:
footer {position: fixed; bottom: 10px; left: 10px}#bottomnav {width: 900px; position: fixed; bottom: 75px; left: 10px}Save the file and then refresh Internet Explorer.
Drag the bottom of the browser window up and down to change the vertical size of the window. Notice how the bottom navigation bar moves in relation to the bottom of the window, but the rest of the page doesn’t move.
Close Notepad and Internet Explorer.

Note
The resulting page from this exercise is not something you would actually publish on a real website; it contains a hodge-podge of different techniques for positioning divisions, some of which might cause problems with each other if used on the same page, depending on the screen size. For example, placing elements relative to the browser window can interfere with absolute placement, and assuming a certain minimum screen width can cause problems for people viewing the page on low-resolution screens like smartphones. In the upcoming exercises, you’ll go back to using example files that use simpler, less restrictive layouts.
Formatting Divisions
You format divisions as you would any other elements. You can use styles to specify the font family, font style, font weight, alignment, color, and everything else covered so far in this book.
You can change the background color of a division with the background-color style rule. For example, to add a khaki-colored background to the navigation bar, use the following:
nav {float: left; width: 175px; padding-top: 15px; line-height: 250%; background-
color: tan}
When you do that, however, you might find some underlying problems that you need to correct. For example, when everything has a white background on the page, you don’t notice spacing issues, but when one element is shaded, they become apparent. For example, in Figure 11-3, the tan color is too close to the main division.
To correct that, you would need to adjust the size of the nav division and then add some padding to the main division at the left edge.
When applying a colored background to a navigation bar, you might also discover that the buttons do not have transparent edges; they need to be corrected using a graphics-editing program that supports transparency.
Note
When creating navigation buttons, if you need transparency, use the GIF or PNG format. JPEG format does not support transparency.
You can also add background images to divisions with the background-image style:
#header {background-image: url(images/leaf.jpg)}In the following exercise, you will apply a colored background to one division and a background image to another; then you will fine-tune the settings to improve the appearance.
Format Divisions
Format Divisions
Open index4.htm in Internet Explorer and then open default.css in Notepad. The files for this exercise are located in the DocumentsMicrosoft PressHTML5 Start Here11DivisionsFormattingDivisions folder.
In the default.css style sheet, add the wheat background color to the bottom navigation bar by adding this line:
#bottomnav {background-color: wheat}Save the file and then refresh Internet Explorer.
The bottom navigation bar is shaded.
In Notepad, open index4.htm and then remove the horizontal rules from the bottom navigation bar.
Save the file and then refresh Internet Explorer.
Oops! Look what happened. Without the horizontal rules, the bottom navigation bar is now unattractively thin.
In default.css, add a height to the bottom navigation bar:
#bottomnav {background-color: wheat;height: 22px}Save the file and then refresh Internet Explorer.
The bar is a little thicker now.
Now give the site a new look by getting rid of the graphic and the horizontal line in the masthead, and then inserting a background image in the header division.
But first, let’s change the way the header is set up. Some browsers don’t interpret <header> correctly. The masthead is a fairly important page element to get right, so in the interest of compatibility, turn that <header> back into a division whose name is header.
In the index4 file, change the <header> tag to <div id=“header> and then change the </header> tag to </div>. The header should look like this:
<div id="header"><h1 style="text-align: center; margin: 3px">Margie's Travel</h1> <i><h5 style="text-align: center; margin: 5px">Leave the details to us, and leave your worries behind</h5></i></div><header>Save the file.
In the default.css style sheet, add a style rule for the header division that applies an image as its background:
#header {background-image: url(images/pattern.jpg)}Save the file and then refresh Internet Explorer.
The new masthead looks interesting, but you need to add some padding so it doesn’t look so crowded and you need to increase the font sizes a bit.
In default.css, modify the style rule for the header division to add 10 pixels of padding on all sides:
#header {background-image: url(images/pattern.jpg); padding: 10px}In index4.htm, modify the styles for the <h1> and <h5> tags to use a fixed font size of 40px and 16px, respectively. We’re doing this in the individual tags because we don’t want this to affect all <h1> and <h5> headings:
<div id="header"> <h1 style="text-align: center; margin: 3px;
font-size:40px">Margie's Travel</h1> <i><h5 style="text-align: center; margin: 5px;font-size:16px">Leave the details to us, and leave your worries behind</h5></i> </div>Save the files and then refresh Internet Explorer to see the new masthead.
Close Notepad and Internet Explorer.


Key Points
To create a division, surround a section of a page with a <div> tag.
HTML5 uses semantic tags to define sections of a page. Some of the most common of these are <header>, <footer>, <nav>, <article>, <aside>, and <section>. Not all browsers support these tags yet. Internet Explorer 9.0 and higher does support these tags, as do the current versions of Google Chrome and Firefox.
Each division tag has an id attribute that should be unique within that document. Multiple documents can have the same division names, though, and in fact, this is encouraged so that one external style sheet can format multiple documents.
One way to position a division is with a float attribute. For example, to place a division at the left (for use as a navigation bar), use float: left.
Another way to position a division is with a position attribute. The valid values are absolute, relative, and fixed. When you use the position attribute, you must also use a top, bottom, left, and/or right attribute to specify the numeric value for the position.
With absolute positioning, the element is positioned absolutely within its parent element, which is usually the <body> tag, so the element is positioned absolutely on the page.
With relative positioning, the element is positioned in relation to its default position.
With fixed positioning, the element is positioned in relation to the browser window.
Divisions can be formatted by using the same character, paragraph, and page formatting styles you learned throughout the book, including background-color and background-image.