
Chapter 5. Creating Hyperlinks and Anchors
In this chapter, you will:
The web is based on hyperlinks. Each webpage contains active links to other pages, which in turn link to even more pages, until presumably the entire web (or at least a great chunk of it) is bound together. In fact, that’s where the name “web” comes from. Hyperlinks can connect to other places on a webpage, to other pages within your website, to pages outside your site, and to many types of web and non-web content.
You activate a hyperlink by clicking a designated bit of text or a graphic that, depending on the link, takes you to a different location on the page, opens a different webpage, starts an email message, downloads a file, lets you view a movie or listen to a sound clip, starts a web-based program, and so on. You have probably clicked thousands of hyperlinks, perhaps without thinking much about the coding behind them. After reading this chapter, you’ll understand how they work, and you’ll be able to create your own.
In this chapter, you’ll learn about the <a> tag, which is used to create various types of hyperlinks. You’ll find out how to create hyperlinks to webpages and email addresses, how to create anchor points within a document, and how to hyperlink directly to an anchor point. I’ll also show you how to hyperlink to non-web content, like a Microsoft Word document or a Microsoft Excel spreadsheet.
Important
Before you can use the practice files provided for this chapter, you need to download and install them from the book’s companion content location. See Code Samples at the beginning of this book for more information.
Hyperlinking to a Webpage
No matter what type of hyperlink you want to create, the basic syntax is the same. It starts with the <a> tag and then uses an href= attribute (short for “hyperlink reference”) which provides the URL or the path to the destination. For example, an opening tag might look like this:
<a href="http://www.microsoft.com">
This is followed by the text that will be underlined as the link text that you click, or by a reference to the image that will serve as a hyperlink. (You’ll learn more about images in Chapter 9.) After that text is the closing </a> tag. Here’s a complete example:
Visit <a href="http://www.microsoft.com">Microsoft.com</a> for the latest
information.
When viewed in a browser, this produces a text-based hyperlink (see Figure 5-1).
Hyperlinks are underlined by default. You can specify alternative formatting for hyperlinks by using styles, as explained in Chapter 6.
Using Partial Paths and Filenames
In some cases, you do not need to provide a file name or a complete path to the destination in a hyperlink. It depends on the context and the file’s name.
If you do not link to a specific page, the server that hosts the website responds by displaying the default page for that site (if one is available). If a browser does not request a specific page when accessing a server, most servers will send the default page, which is usually named either index or default. Perhaps you wondered why the main page of Margie’s Travel’s website is called index.htm—and now you know.
In Internet Explorer, type the following URL in the Address bar:
http://www.microsoft.com/en/us
The opening page of the US version of the Microsoft website opens. Now type this URL instead:
http://www.microsoft.com/en/us/default.aspx
The same page loads. The first time, when you omitted the file name, the web server responded by sending the default file, which is named default.aspx.
Note
The URL in this example points to a page named default.aspx. ASP stands for Active Server Pages, which is an advanced technology used for commercial web development. Pages created with ASP typically have .asp or .aspx extensions. For your own pages, you should continue to use the .htm extension.
If you want to link to a specific page, you must specify the complete file name. For example, if you wanted to provide a direct link to the page where users can download Windows Media Player, you would use this tag:
<a href="http://www.microsoft.com/windows/windowsmedia/player/
download/download.aspx">Download Windows Media Player</a>
Using Relative and Absolute Paths
Paths that contain a complete address that anyone can use to get to that page are called absolute paths. Absolute paths are very reliable, but they are also long and awkward to type. For example:
<a href="http://www.margiestravel.com/travel/images/london.htm">London Tours</a>
When you are linking to files in the same website as the link itself, you do not need to include the complete path to the file; you can simply provide its name. When the file is in the same folder, you need only supply the file name. For example, if the index.htm and london.htm pages of the Margie’s Travel site were in the same folder, in the index.htm file, you could refer to london.htm like this:
<a href="london.htm">London Tours</a>
This is called a relative path, because the destination file is relative to the current file’s location. Relative paths make it easier to develop and test your website in a different file location than the one where it will eventually be stored. For example, in this book, you’ll be doing most of your development in the DocumentsMicrosoft PressHTML 5 Start Here folder, which would typically not be the final destination for a site you are developing. By making as many relative references as possible, you avoid the need to re-code every URL when your site is moved to its final destination.
When creating a link to a file that’s stored in a subfolder of the current one, you can point to that subfolder but otherwise leave the path relative. For example, suppose that index.htm is stored in a folder called c:main and london.htm is stored in c:maindestinations, which would be considered a subfolder (or child folder) of it. To refer to london.htm from within index.htm, you would use a tag like this:
<a href="destinations/london.htm">London Tours</a>
You can also create a link to a file that is up one level (a parent folder) with a relative reference. For example, suppose you wanted to refer to index.htm from within london.htm (both in the same locations as before). You would precede the reference with ../ to indicate that the file is one level up:
<a href="../index.htm">Home</a>
Setting a Target Window
By default, a hyperlink opens the referenced page in the same browser tab. That means the new page replaces the previous page. Usually this is fine, but in some cases you might want the hyperlink to open in a new tab (or window, if the browser you are using does not support multiple tabs). For example, perhaps you want to recommend that visitors check out a page on another site, but you don’t want them to leave your site.
To direct the hyperlink to open a page in a new tab, add the attribute target=“_blank” to the <a> tag. For example, to open the london.htm file in a new window, the tag would be structured like this:
<a href="london.htm" target="_blank">London Tours</a>
Note
The target= attribute is not allowed in XHTML. W3C suggests that you use JavaScript for such situations.
In the following exercise, you will create hyperlinks to other files.
Create Hyperlinks to Files
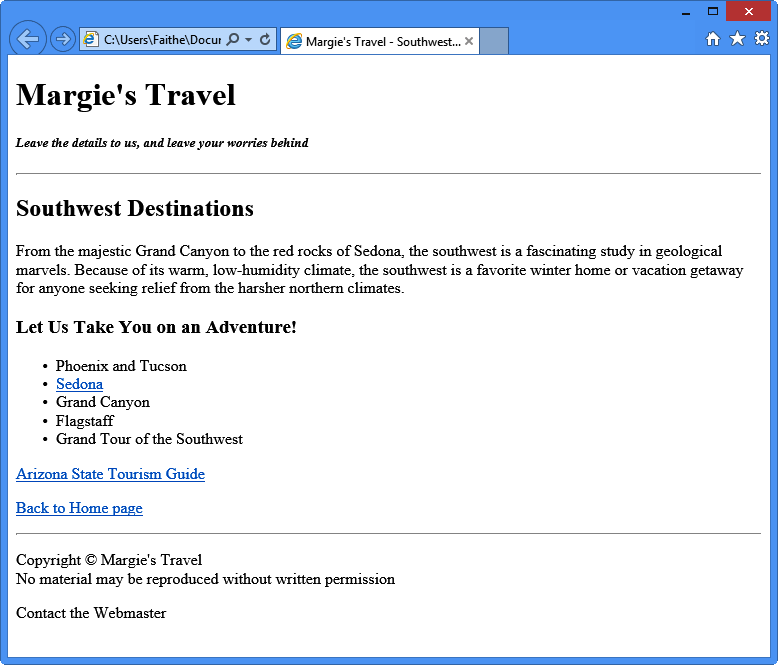
In Notepad and Internet Explorer, open the swdestinations.htm file located in the DocumentsMicrosoft PressHTML 5 Start Here�5LinksCreatingHyperlinks folder.
In Notepad, locate the text Sedona and enclose it with an <a> tag that refers to sedona.htm:
<li>
<a href="sedona.htm">Sedona</a></li>Locate the text Back to Home page and enclose it with an <a> tag that refers to index.htm:
<p>
<a href="index.htm">Back to Home page</a></p>Locate the text Arizona State Tourism Guide and enclose it with an <a> tag that refers to www.arizonaguide.com and opens in a new window:
<p>
<a href="http://www.arizonaguide.com" target="_blank">Arizona State Tourism Guide</a></p>Save the file and then refresh Internet Explorer.
In Internet Explorer, click the Sedona hyperlink. The Sedona page displays.
Click the Back button in the browser window to return to the Southwest page.
Click the Back to Home page hyperlink. The Index page displays.
Click the Arizona State Tourism Guide hyperlink. That site opens in its own tab.
Click the Back button to return to the Southwest page. Close all open files.
Hyperlinking to an Email Address
Hyperlinks can point to anything, not just to webpages. For example, you can create email hyperlinks that start the user’s default email program, create a new message, and insert the recipient’s address. (You can also set it to fill in the message subject if you like, which can be useful in helping you organize incoming messages and direct them appropriately.)
Email hyperlinks are useful when you want to direct someone to send a message to a particular person. For example, it is common to include a link that, when clicked, emails a site’s webmaster. To create a hyperlink to an email address, use the same href= attribute as you did previously, but instead of a web address, type mailto: followed by the email address, like this:
<a href="mailto:[email protected]">Contact Us</a>
Note
Not everyone who has web access also has an appropriate email program set up to take advantage of a mailto: hyperlink. You might prefer to set up a web-based contact form, which you will learn about in Chapter 14.
Not all browsers support live email hyperlinks. It’s a good idea to also include the actual email address in text form on the page, in case someone cannot use your hyperlink. In such a case, the text would mirror the address as follows:
Contact <a href="mailto:[email protected]">[email protected]</a>
Caution
Including an email address on a publicly accessible webpage is bound to generate a certain amount of incoming junk mail (also known as spam). For this reason, do not put your main email address on a public page. If you have your own domain, or if your ISP or hosting company allows you to have multiple email addresses, create a special account to be used for public contact (or ask your IT specialist to create one for you). That way if you get too much junk mail, you can delete that address and start over with a new one without disrupting your main email account. If you don’t have access to multiple email accounts, consider a free web-based account.
To add a default subject line to the email, add ?subject=Comment (or whatever you want the text in the subject line to be) after the email address, like this:
<a href="mailto:[email protected]?subject=Comment">Contact Us</a>The person using the hyperlink to contact you can change the subject line in her email program before sending the message.
Tip
Even if all email from the site is directed to the same person, you might still create multiple email hyperlinks, each one with different default subject lines.
Another option, title=, specifies a ScreenTip for the hyperlink. This attribute displays a message when the user hovers the mouse pointer over the hyperlink and also reports its information to screen reading programs. By default, the ScreenTip for a hyperlink shows the address of the link, but you can make it display anything you like.
In the following example, because the text is the same as the hyperlink, it would be a waste for the ScreenTip to repeat the same hyperlink yet again:
Contact <a href="mailto:[email protected]">[email protected]</a>
A ScreenTip should ideally be succinct and clearly state the purpose of the hyperlink. For example, to display the message Please contact us with questions or comments in the ScreenTip, add the following to the code:
<a href="mailto:[email protected]" title="Please contact us with questions
or comments">[email protected]</a>
You can also use the title= attribute to omit extraneous portions of the complete hyperlink so visitors do not see them in the ScreenTip. For example, creating a title that contains only the email address, and not the subject or title parts of the tag, makes it easier to read.
In the following exercise, you will create a mailto: hyperlink.
Create a mailto: Hyperlink
Create a mailto: Hyperlink
Note
Use the practice file provided for this exercise rather than the file created in a previous exercise.
In Notepad, open the swdestinations.htm file located in the DocumentsMicrosoft PressHTML 5 Start Here�5LinksLinkingEmail folder.
Locate the text Contact the Webmaster at the bottom of the document and enclose it in a hyperlink that sends email to [email protected]:
<p>
<a href="mailto:[email protected]">Contact the Webmaster</a></p>Add a subject line of Question/Comment to the hyperlink:
<p><a href="mailto:[email protected]
?subject=Question/Comment">Contact the Webmaster</a></p>Add a title to the hyperlink that will display [email protected] as a ScreenTip:
<p><a href="mailto:[email protected]?subject=Question/Comment"
title="[email protected]">Contact the Webmaster</a></p>
Save the file and then check your work in Internet Explorer.
In Internet Explorer, point to the Contact the Webmaster hyperlink at the bottom of the page.
The ScreenTip displays.
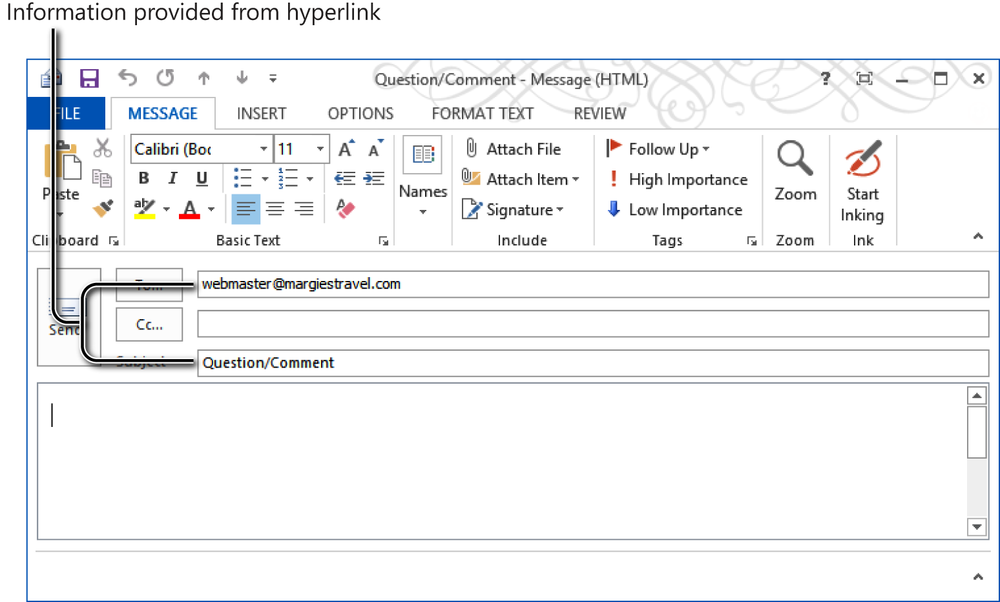
Click the Contact the Webmaster hyperlink.
Your default email program starts (if it was not already running) and a new email message opens with the specified information in the To: and Subject: lines. (Microsoft Outlook 2010 is shown in the graphic.)
Close the email message window without sending the message and then close the Notepad and Internet Explorer windows.

Creating and Hyperlinking to Anchors
An anchor is a marker within an HTML document, roughly analogous to a bookmark in a Word document. You define a specific location in the document with an anchor name and then you can hyperlink directly to that anchor.
Anchors are most valuable in long documents with multiple sections. They provide a means for users to jump directly to whatever section they want rather than having to read or scroll through the entire document. You can do this internally by creating a list of hyperlinks at the top of the document, or you can do this externally by including an anchor name in a hyperlink to another document. There are two parts to the process:
Mark the anchor location.
Create a hyperlink that refers to it.
To define an anchor, create an <a> tag around the destination text and include a name= attribute. For example, suppose you have a heading that reads Conclusion and you want to create an anchor point with that same name:
<a name="conclusion">Conclusion</a>
To refer to the anchor point, include its name in the href= attribute. Precede the anchor name with a pound sign (#). If the anchor point is in the same document as the hyperlink, you can use a relative reference like this:
<a href="#conclusion">View the Conclusion</a>
Otherwise, you must include the name of the file in which the anchor is located. For example, if the anchor were in a file called report.htm, it would look like this:
<a href="report.htm#conclusion">View the Conclusion</a>
The same rules apply to the file name as they do with regular hyperlinks. If the document is not in the same folder, you must refer to the folder either absolutely or relatively.
In the following exercise, you will create and link to anchor points in an HTML document.
Create an Anchor Point
Create an Anchor Point
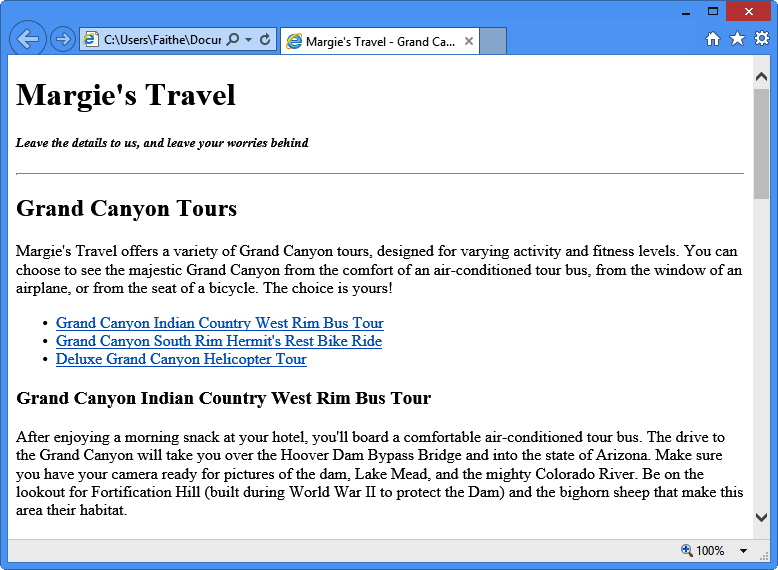
In Notepad and Internet Explorer, open the canyon.htm file located in the DocumentsMicrosoft PressHTML 5 Start Here�5LinksCreatingAnchors folder.
In Notepad, locate the following tag. Make sure you get the copy that is in a <h3> tag, not the copy that is in the list.
<h3>Grand Canyon Indian Country West Rim Bus Tour<h3>
Enclose the tag in an anchor tab and include bus with the name= attribute:
<h3>
<a name="bus">Grand Canyon Indian Country West Rim Bus Tour</a></h3>Repeat steps 2-3 for the other <h3> level headings in the document, using the names bike and copter for them, respectively:
<h3>
<a name="bike">Grand Canyon South Rim Hermit's Rest Bike Ride</a></h3> ... <h3><a name="copter">Deluxe Grand Canyon Helicopter Tour</a></h3>In the bulleted list at the top of the document, create a hyperlink from the bus tour anchor to the heading:
<li>
<a href="#bus">Grand Canyon Indian Country West Rim Bus Tour</a></li>Repeat step 5 for each of the other list items:
<li>
<a href="#bike">Grand Canyon South Rim Hermit's Rest Bike Ride</a></li> <li><a href="#copter">Deluxe Grand Canyon Helicopter Tour</a></li>Save the file and then refresh Internet Explorer.
Click each of the hyperlinks in the bulleted list; click the Back button after each one to return to the top of the page.
As you click each link, the browser scrolls down the page to display the corresponding heading at the top of the window. The exception is the last one, which does not display at the very top because it is so near the bottom of the page; instead, the lower portion of the page displays when its link is clicked.
Hyperlinking to Other Content
A hyperlink can reference any file, not just a web document. You can take advantage of this to link to other content such as Microsoft Office documents, compressed archive files such as .zip files, and even executable program files such as setup utilities for programs you want to provide to your visitors. The procedure for linking to other content is the same as for linking to a webpage; the only difference is the file name you enter in the hyperlink.
Note
You can create hyperlinks to pictures, but linking to a picture by using the <a> tag opens the picture in its own window rather than displaying it on the webpage. In Chapter 9, you will learn how to place pictures on the pages themselves.
Before you create a link to non-HTML content, you need to remember that not everyone has the same software. At first, it might seem like a great idea to provide a set of reports as Word documents, for example, but what about people who don’t have Word installed? Some browsers have a feature that automatically tries to download an appropriate viewer, player, or plug-in (an extension to the browser for handling a certain type of file) for anything it can’t display as native content. That’s a great feature when it works, but it’s not reliable because not all your web visitors will have a browser with this capability. If you don’t provide an HTML alternative for a proprietary-format file, you should at least provide a hyperlink to a free viewer that can display that file type. This is especially important with audio and video clips, which you will learn about in Chapter 15.
Here are some of the popular viewers and the addresses where they can be downloaded:
Microsoft Download Center, offering Microsoft Office viewers (PowerPoint, Excel, Word) and trial versions of Microsoft Office: http://www.microsoft.com/downloads/default.aspx
Tip
After the 60-day trial period, the Office trial version software operates in reduced functionality mode that still allows users to view documents created with Word, Excel, and PowerPoint.
In the following exercise, you will create a hyperlink to a Word file and to the Microsoft Download Center page.
Hyperlink to Other Content
Hyperlink to Other Content
In Notepad and Internet Explorer, open the swdestinations.htm file located in the DocumentsMicrosoft PressHTML 5 Start Here�5LinksLinkingOther folder.
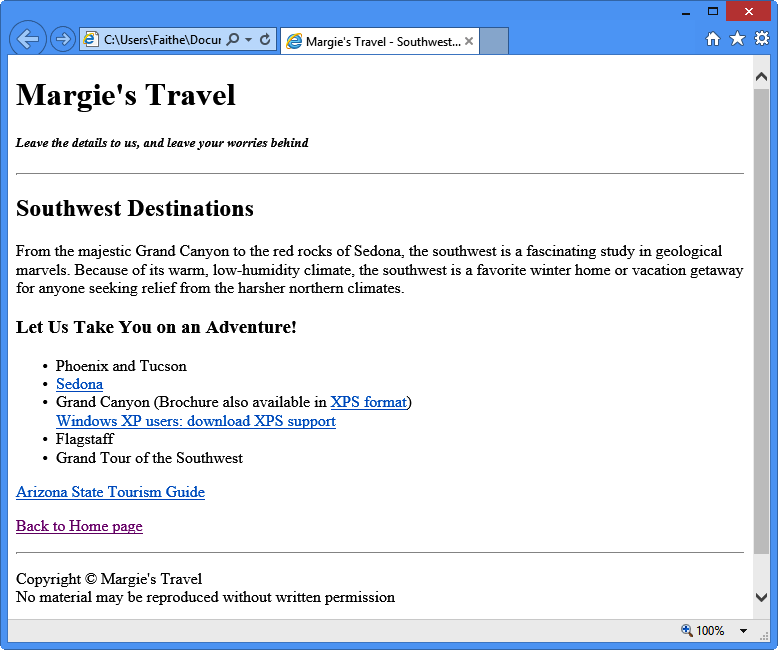
In Notepad, on the Grand Canyon line of the list, add the following:
<li>Grand Canyon
(Brochure also available in XPS format)</li>Add a hyperlink that makes the words XPS format a hyperlink to the file brochure.xps:
<li>Grand Canyon (Brochure also available in <a href="brochure.xps">XPS
format</a>)</li>
Save the file and then refresh Internet Explorer.
In Internet Explorer, click XPS format and confirm that the brochure displays. If it doesn’t, check your typing on the hyperlink and make sure that you have an XPS viewer installed.
Note
In order to display XPS format, you must have an XPS viewer; the viewer is included with Windows Vista and later. Users of Windows XP can get XPS capabilities by installing the Microsoft XML Paper Specification Service Pack, found at http://www.microsoft.com/download/details.aspx?id=11816.
In Notepad, add a line break at the end of the Grand Canyon list item, and then add a hyperlink that points people to the Microsoft page where they can download the XPS viewer:
<li>Grand Canyon (Brochure also available in <a href="brochure.xps">XPS format</a>)
<br><a href=" http://www.microsoft.com/download/en/details.aspx?id=11816">Windows XP users: download XPS support</a></li>Save your work in Notepad and then refresh Internet Explorer.
Test the new hyperlink to confirm that it displays the Microsoft page for downloading XPS support. If it doesn’t, check your typing in Notepad.
Close Notepad and Internet Explorer.
Key Points
To create a hyperlink, use the <a> tag with the href= attribute. The <a> tag is two-sided, so add </a> after the text that you use as the hyperlink.
Use absolute paths (that is, paths containing the full location of the file) when referring to content outside your own website. Use relative paths when referring to files in the same folder as the current page or files in a parent or child folder.
To open a hyperlink target in a new window, include the target=“_blank” attribute in the <a> tag.
To create hyperlink that opens a pre-addressed email message, precede the address with mailto: (for example, mailto:[email protected]).
To create an anchor point, use the name= attribute with the <a> tag (for example, <a name=“equipment”>).
To reference an anchor point, reference the anchor point name, but remember to precede the name with a pound symbol (#) in the href= attribute (for example, <a href=“#bike”>).
You can create hyperlinks to other types of content besides webpages, but you should include hyperlinks to viewers for any content types that might not be supported by all browsers (and/or make HTML or plain-text alternative versions available).
To provide a viewer for a type of content, create a hyperlink that points to a site from which it can be downloaded or store the viewer on your own website and provide a link to it.