
Chapter 6. Introduction to Style Sheets
In this chapter, you will:
After you learn about cascading style sheets, you will wonder how anybody ever had the patience to create large websites without them. Cascading style sheets can save you a tremendous amount of time by standardizing the formatting of an entire webpage or group of pages.
A cascading style sheet (CSS) is code that specifies formatting based on styles. You can store the CSS code in the <head> section of the webpage to which you want it to apply, or you can store it in a separate file with a .css extension (for situations in which you want the same CSS to apply to more than one webpage). The formatting then “cascades” down to the individual instances of each tag. You can also place a style directly within an individual tag if desired, as you did in Chapter 4.
In this chapter, you’ll learn how to construct style sheets and how to attach them to a document, either by placing them within the document itself or by linking to them as a separate file. You’ll learn how to define a style and how to apply it. The next several chapters will include further opportunities to practice with various style types.
Important
Before you can use the practice files provided for this chapter, you need to download and install them from the book’s companion content location. See Code Samples at the beginning of this book for more information.
Understanding Styles
In simplest terms, a style is a formatting rule. That rule can be applied to an individual tag, to all instances of a certain tag within a document, or to all instances of a certain tag across a group of documents.
In Chapter 4, you saw how to use the style= attribute for ordered and unordered lists. For example, to use a square bullet character in an unordered list, you would use the style= attribute with the <ul> tag like this:
<ul style="list-style-type: square">
But suppose you have several unordered lists in your document and you want them all to use the same square bullet character. You could type the style attribute into the opening <ul> tag for each one, but that’s a lot of work. Instead, you can create a <style> section within the <head> section that creates a global style rule for all <ul> tags in the document. The <style> section might look like this:
<style type="text/css">
ul {
    list-style-type: square
}
</style>
Don’t worry about the line breaks; they are simply a means of making your code more readable. Many third-party CSS editing programs format style rules with the extra line breaks for that reason. However, the preceding code could also be written like this:
<style type="text/css">ul {list-style-type: square}</style>Notice that the <ul> tag does not have angle brackets. Also, note that the rules for the tag display in curly braces. Other than those two minor differences, the syntax is exactly the same as when applied directly to a specific <ul> tag. You don’t need to include the style= attribute because the entire definition is enclosed in a <style> tag.
You can define multiple rules within one <style> section. For example, if you want to expand this example to also specify that ordered lists are labeled with lowercase letters rather than numbers:
<style type="text/css">
ul {
     list-style-type: square
}
ol {
     list-style-type: lower-alpha
}
</style>
Now further suppose that you want these specifications to apply to all the bulleted and numbered lists in all documents in your entire website. You can create an external cascading style sheet and then refer to that style sheet in the <head> section of each document to which it should apply. For example, here’s the entire text of an external cascading style sheet (a plain text file with a .css extension) that would apply the specified rules.
ul {
     list-style-type: square;
}
ol {
     list-style-type: lower-alpha;
}
It’s the same code that was enclosed within the <style> tag in the previous example. When style rules appear in a separate file, you don’t need the <style> tag.
A cascading style sheet can get very complex if it includes a lot of rules, but the principles are always the same as in these examples. The remainder of this chapter explores how to construct style rules within both embedded and external style sheets.
Constructing Style Rules
An embedded style sheet consists of a two-sided <style> tag placed in the <head> section of a document. Between the <style> and </style> tags, you define the rules for the various styles.
A style rule begins with the name of the tag or other element to which the style applies. For example, if you are creating a rule that will apply to all instances of the <h1> tag, start the rule with h1 (no brackets):
<style>
h1
</style>
No brackets are necessary around h1 because it’s already enclosed in the <style> tag.
Next, type a set of curly braces. (You can place them on separate lines for improved readability if you want.) Then place the rule inside the braces. For example, to create a rule that uses the color red for the text of a first-level heading, use the following:
<style> h1{color: red}</style>
If you have more than one rule to apply, such as a color plus a typeface, separate the rules with semicolons within the curly braces. It is customary but not required to write each rule on its own line. For example, to specify that the heading text must be both red and 14 pixels in height, include the following in your rule:
<style>
h1 {
   color: red;
   font-size: 14px;
}
</style>
If multiple tags should have the same rule applied to them, you can list them together and separate them by commas. For example, if all heading styles <h1> through <h6> should be red, you could write:
<style>
h1, h2, h3, h4, h5, h6 {
   color: red
}
</style>
In the following exercise, you will create an embedded style sheet governing the appearance of horizontal lines.
Create an Embedded Style Sheet
Create an Embedded Style Sheet
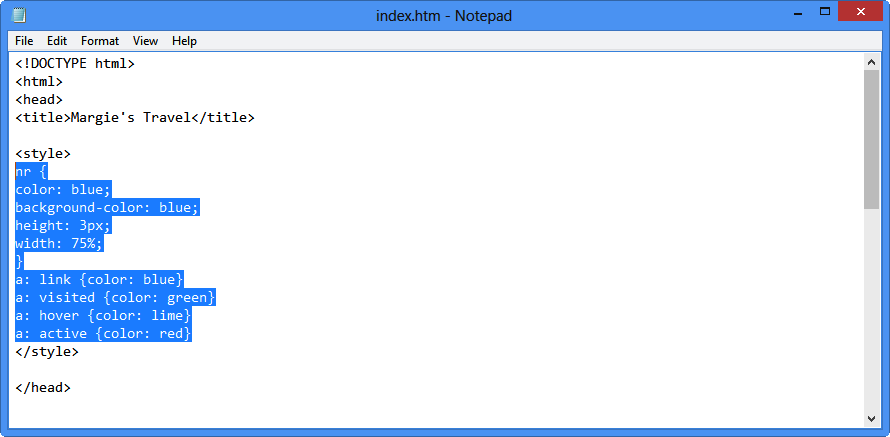
In Notepad and Internet Explorer, open the index.htm file located in the DocumentsMicrosoft PressHTML5 Start Here�6StylesConstructingRules folder. Use the referenced version rather than a copy you worked with in an earlier exercise.
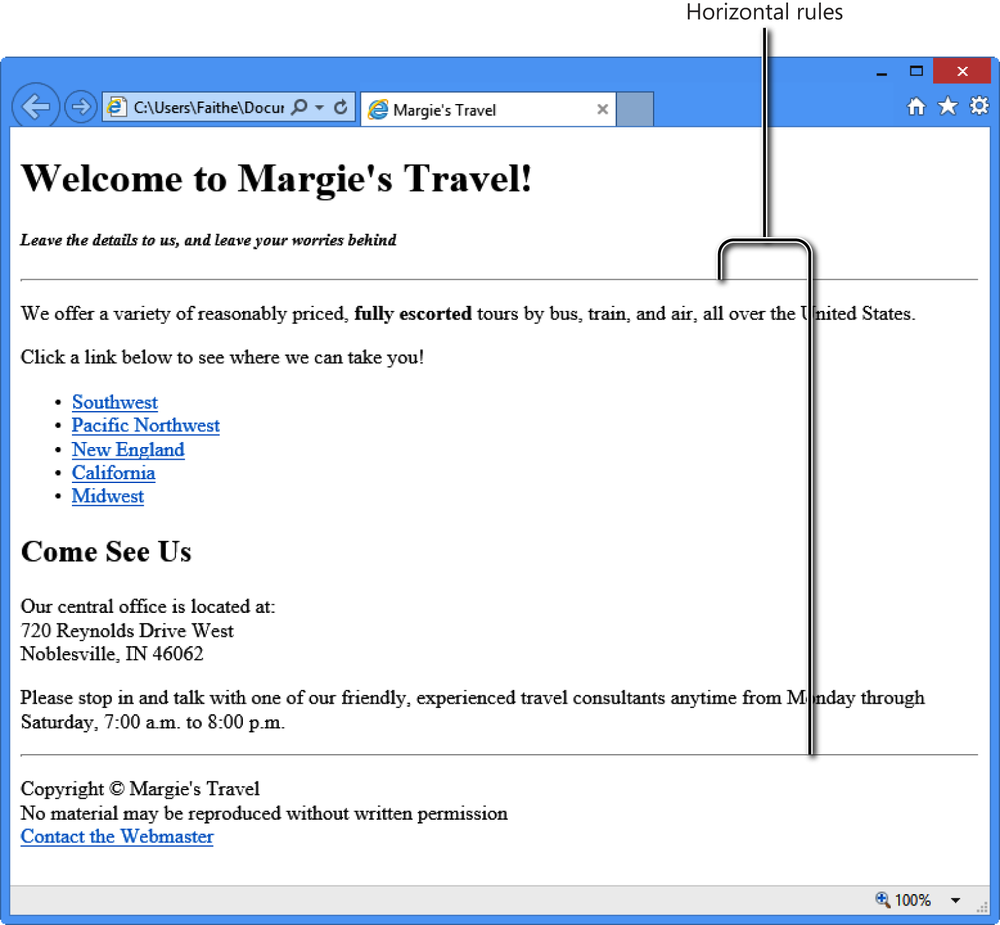
Examine the horizontal rules in Internet Explorer. Note that they are plain, gray, and run across the entire width of the page.
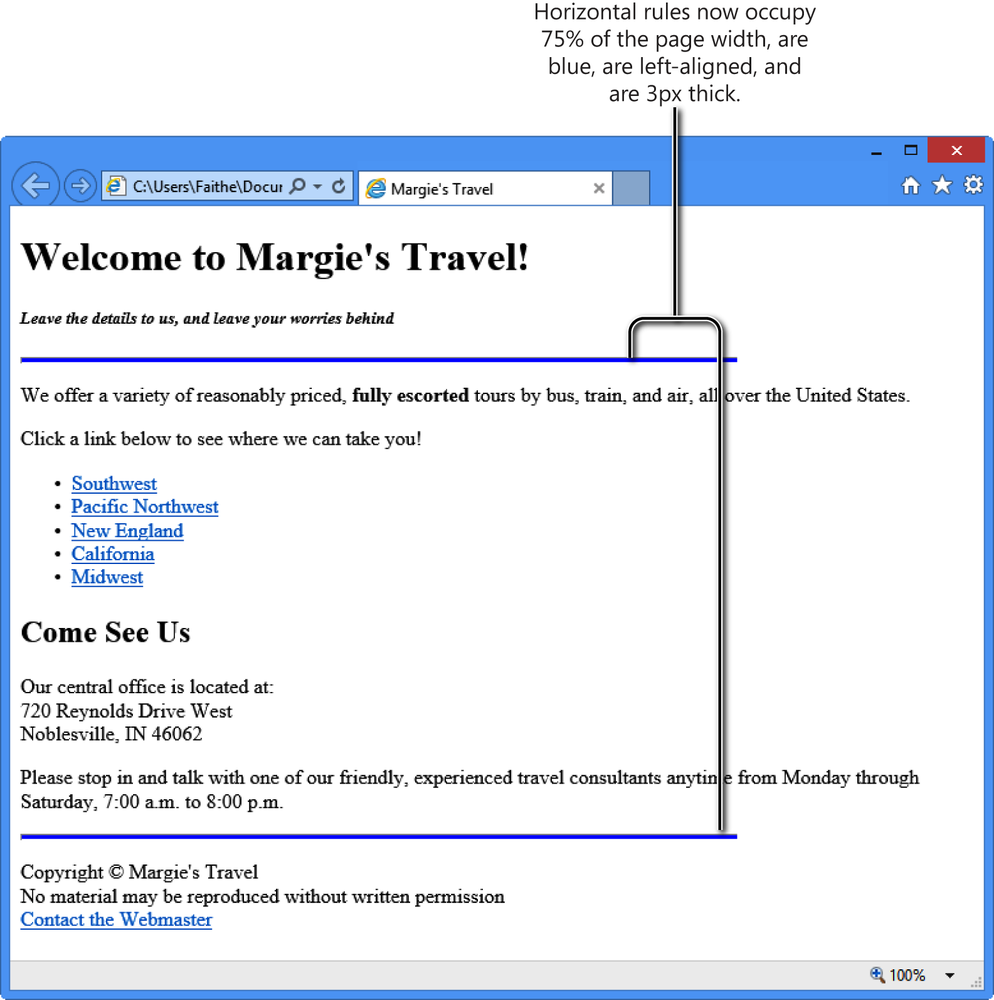
In Notepad, in the <head> section, modify the style so that the lines are blue, 75% of the browser window in width, 3 pixels in height, and left-aligned, as follows:
<style> hr { color:blue;background-color:blue;height:3px;width: 75%;text-align: left;} </style>The horizontal lines are now blue and 3 pixels thick.
Note
Notice that you use the text-align attribute to align the horizontal line even though it is not text. That’s because there is no separate alignment attribute for elements that do not contain text. Not all browsers support this usage (notably some versions of Firefox), so if horizontal rule alignment is an Important part of your layout, be sure to test this in multiple browsers.
Save the file and then refresh the Internet Explorer display.
The appearance of both lines has changed.
In Notepad, delete the text-align: left; portion of the style rule so that the lines are center-aligned (the default).
Save your work in Notepad and then refresh Internet Explorer to see the change.
Close Internet Explorer and Notepad.
Creating Styles for Nested Tags
Sometimes you might want to apply a specific formatting only when one tag is nested within another. For example, perhaps you want a bulleted list that’s nested within another bulleted list to use a different bullet character. If you simply created a rule for the entire tag, all text to which this tag has been applied would be formatted the same way. For example, if you created a style for the <ul> tag, all bulleted items would use the same bullet character. Instead, you must specify that you want to apply a rule only to the nested tag.
To do this, instead of using a single style name at the beginning of the rule, specify that the item is nested by listing the parent style name followed by the descendent (child) style name. For example, to use round bullets for all numbered lists that are nested within bulleted lists, specify the following:
ul ol {list-style-type: circle}This technique works with multiple nested levels. For example, to apply this formatting only to bulleted lists nested within other bulleted lists that are in turn nested within numbered lists, specify the following:
ul ol ul {list-style-type: circle}You can do this with any text attributes, not just those pertaining to the bullet or number type. For example, to make all the bold text that displays in unordered lists appear blue, specify the following:
ul b {color: blue}In the following exercise, you will apply different bullet characters to a nested list by creating styles in the <style> area of a document.
Use Styles to Format a Nested List
Use Styles to Format a Nested List
In Notepad and in Internet Explorer, open the destinations.htm file located in the DocumentsMicrosoft PressHTML 5 Start Here�6StylesCreatingNested folder.
Notice in Internet Explorer that the first-level bullet characters are black circles and the second-level bullets are white circles.
In Notepad, in the <head> section, type a two-sided <style> tag, and then within that, create a style rule specifying that first-level unordered lists have a square bullet character:
<style>ul {list-style-type: square}</style>Save your work in Notepad and then refresh Internet Explorer. All list items at all levels use the square black bullet character.
Create a style rule specifying that second-level unordered lists have a disc bullet character:
<style> ul { list-style-type: square }ul ul {list-style-type: disc}</style>Save the file and then refresh Internet Explorer. The bullet characters change.
Close Internet Explorer and Notepad.

Creating Classes and IDs for Applying Styles
As you have just seen, style rules can modify the built-in tags in HTML by redefining their formatting. Styles don’t stop there, however. You can make your own styles by creating classes and IDs.
Classes and IDs mark certain elements so that you can refer to them in your style sheet. A class can be applied to multiple selections, whereas an ID uniquely identifies a specific selection within a document. (Different documents can use the same ID.) Classes and IDs are the foundation of CSS formatting; you will use them extensively as you create your own websites.
For example, suppose you have an unordered list of items and you want the featured items to display in red. One way to do it would be to manually add the style=“color: red” attribute to each list item:
<li style="color: red">The Wineries of Italy</li>
However, this method is not optimal because if you instead decide to make the new items blue, you would need to make the change manually for each instance. A better way is to create a class called featured and then define formatting for it in the <style> area. Then you could apply the featured class to each bullet point you want to spotlight.
To apply a class style, add a class= attribute to the opening tag for the element. For example, to make a list item part of the new class, use the following:
<li class="featured">The Wineries of Italy</li>
Then in the <style> area, add a style that defines the class as red. The only difference between defining a class and redefining a standard tag is that you put a period in front of a class name:
<style>
.new {
   color: red
}
</style>
IDs work the same way, except that you can apply them only once per document. For example, you might apply an ID to a unique heading. To create an ID, add an id= attribute to the tag:
<li id="special">Special Discounts Available</li>
Then define the ID in the <style> area, preceding the ID name with a hash symbol (#), like this:
<style>
#special {
   color: red
}
</style>
Note
Why would you create an ID just for one heading? Wouldn’t it be easier to just apply the formatting to the individual heading’s tag? Well, yes, if you are creating only one webpage. However, if you are creating multiple pages and each page has an instance of that special item that the ID defines, you can save yourself a lot of time by using an ID, especially if you store your styles in an external CSS file (which you’ll learn later in this chapter).
In the following exercise, you will create a class and apply it to items in a list.
Create and Use Classes
Create and Use Classes
In Notepad and Internet Explorer, open the destinations.htm file located in the DocumentsMicrosoft PressHTML 5 Start Here�6StylesCreatingClasses folder.
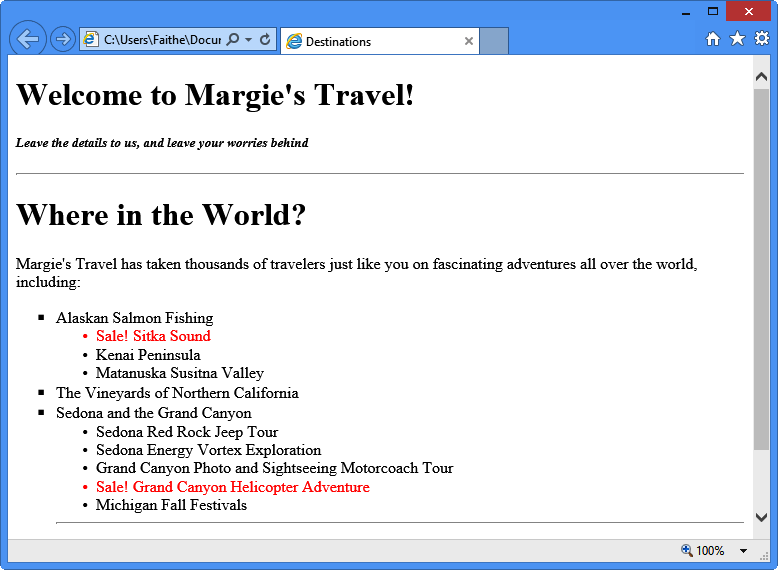
In the <style> section, add a new class that makes sale items red:
.sale {color: red}In the <body> section, add the class=“sale” attribute to the <li> opening tag for Sitka Sound and Grand Canyon Helicopter Adventure:
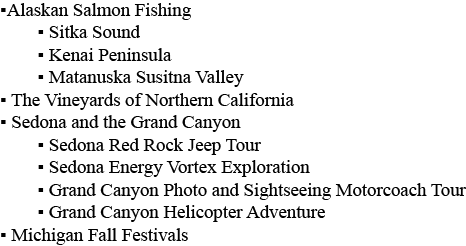
<ul> <li>Alaskan Salmon Fishing</li> <ul> <li
class="sale">Sitka Sound</li> <li>Kenai Peninsula</li> <li>Matanuska Susitna Valley</li> </ul> <li>The Vineyards of Northern California</li> <li>Sedona and the Grand Canyon</li> <ul> <li>Sedona Red Rock Jeep Tour</li> <li>Sedona Energy Vortex Exploration</li> <li>Grand Canyon Photo and Sightseeing Motorcoach Tour</li> <liclass="sale">Grand Canyon Helicopter Adventure</li>Add Sale! to the beginning of the tour names for each of the two lines you modified in step 3:
<ul> <li>Alaskan Salmon Fishing</li> <ul> <li class="sale">
Sale!Sitka Sound</li> <li>Kenai Peninsula</li> <li>Matanuska Susitna Valley</li> </ul> <li>The Vineyards of Northern California</li> <li>Sedona and the Grand Canyon</li> <ul> <li>Sedona Red Rock Jeep Tour</li> <li>Sedona Energy Vortex Exploration</li> <li>Grand Canyon Photo and Sightseeing Motorcoach Tour</li> <li class="sale">Sale!Grand Canyon Helicopter Adventure</ li>Save your work in Notepad and then refresh Internet Explorer to see the changes.
Note
Each style rule here is run in as a single line, whereas in earlier examples rules were broken into multiple lines for readability. It makes no difference which way you do it. The one-line method is more compact, but the multi-line method is easier to browse when editing code. From this point on in the book, most style rules will be written in the more compact form to save space.
Modify the sale class so that the text displays in orange:
.sale {color:orange}Save the file and then refresh Internet Explorer. Note that the sale items are now orange.
Close Internet Explorer and Notepad.
Applying Styles to Hyperlinks with Pseudo-Classes
By default in most browsers, text hyperlinks display as underlined blue text and visited hyperlinks (that is, hyperlinks to pages you have already visited) display as underlined purple text. You have probably seen websites where this wasn’t the case, though, and perhaps wondered how they did it.
You can control hyperlink formatting by placing attributes in the <a> tag for each link, although it’s tedious to do so. For example, to make an individual hyperlink magenta:
<a href="foliage.htm" style="color: magenta">Monte Carlo Resorts</a>
You could apply a class to all hyperlinks, as you learned in the preceding section, but that method does not provide a way to distinguish between the visited links and the unvisited links. Ideally you would want them to be different colors, and that’s not possible when you use a class to define them. To apply different colors, you can use pseudo-classes. A pseudo-class is a class that uses a variable to determine membership. HTML defines pseudo-classes called link and visited for unvisited and visited hyperlinks, respectively.
You do not need to apply anything to the individual hyperlink tags within the <body> section to use pseudo-classes. Simply create the style rule in the <style> section for the pseudo-classes and the browser will apply that rule throughout the document. For example, to make all visited links magenta and all unvisited links black:
<style>
a:link {color: black}
a:visited {color: magenta}
</style>
There are three additional pseudo-classes that you can use with hyperlink styles:
focus This is used for links that are selected by using the keyboard (that is, by using a keyboard shortcut to move the selection outline onto the hyperlink) but not yet activated (that is, the user hasn’t pressed Enter to activate the selection). This is not an issue when you select a link with the mouse because clicking a link both selects it and activates it. This pseudo-class is not commonly used because so few people navigate pages by using the keyboard that it is not worthwhile to go to the trouble.
hover This is used to change the appearance of a link when the mouse is positioned over it. You can use this pseudo-class to make a link change color, become bold, and so on when the user points at it.
active This is used for a link when it is clicked. Immediately after being clicked, the link changes to the visited state. You might use this pseudo-class if you have set the link and visited states to the same value but want the link to change momentarily when clicked.
Caution
A link can be in more than one state at once. For example, a link can be visited yet also in the hover state if a mouse pointer is positioned over it. Therefore, the order in which you list the style rules for links is significant, because later rules will override earlier ones. Define them in the following order to avoid any confusion: link, visited, focus, hover, active.
In the following exercise, you will create pseudo-class styles for various hyperlink states.
Use Pseudo-Classes to Define Hyperlink Formatting
Use Pseudo-Classes to Define Hyperlink Formatting
In Notepad and Internet Explorer, open the index.htm file located in the DocumentsMicrosoft PressHTML 5 Start Here�6StylesStylingHyperlinks folder.
In Internet Explorer, click the Southwest hyperlink, and then click the Back button to return to index.htm.
Different colors are used to identify visited and unvisited links.
In Notepad, in the <style> area, add these rules:
a:link {color: blue}a:visited {color: green}a:hover {color: lime}a:active {color: red}Save the file and then refresh Internet Explorer. The visited Southwest hyperlink now displays as green.
Position the mouse pointer over each hyperlink.
Notice that hyperlink text is lime green when you position the mouse pointer over it.
Click the Southwest hyperlink.
Notice that the hyperlink text color changes to red immediately before the Southwest Destinations page loads.
Click Back to return to index.htm.
Close Notepad and Internet Explorer.
Creating and Linking to External Style Sheets
Embedded style sheets work well for single-page websites, but to really take advantage of what cascading style sheets can do, you need to create an external style sheet. A single external style sheet can be linked to multiple documents, ensuring complete consistency even when used for a large site. An external style sheet also makes it easy to change the formatting of your site after the pages have been constructed. Rather than having to edit each page individually, you can simply change the style sheet.
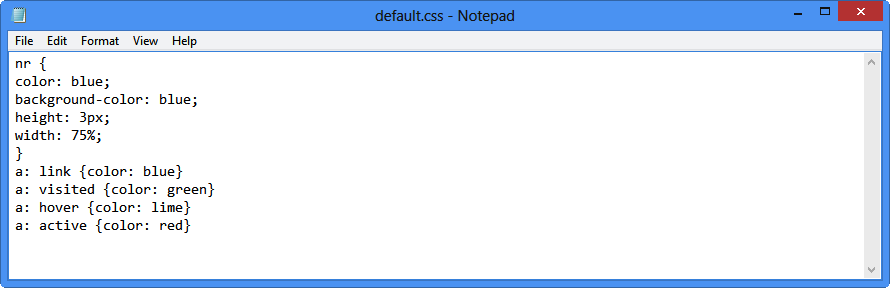
An external style sheet is a plain-text file, just like an HTML file. The only difference is that you assign it a .css extension rather than an .htm extension. It contains anything you would place within the <style> tag if you were creating the style sheet internally. You do not need the <style> and </style> tags themselves.
After creating the style sheet, you create a link to it in the <head> area of each document that will use it. For example, if the style sheet is named default.css, you would link to it by inserting this code in the document’s <head> area, as shown in the following:
<link rel="stylesheet" type="text/css" href="default.css" />
Note
The name default.css is common, but not required. You can name your style sheet anything you like, as long as the name ends with a .css extension.
An embedded style sheet takes precedence over an external one. For example, if your external style sheet specifies Roman numerals for ordered lists but your embedded style sheet specifies uppercase letters, ordered lists will be labeled with uppercase letters. Furthermore, any tag-specific styles you apply take precedence over both embedded and external style sheets. So if you add a style rule to an individual <ol> tag, that setting will override any style sheet settings.
Note
Since <link> is a one-sided tag, the space and the / at the end are used for XHTML compatibility; if you are not coding in XHTML, they are optional.
In the following exercise, you will create an external style sheet and link a webpage to it.
Create and Use an External Style Sheet
Create and Use an External Style Sheet
In Notepad and Internet Explorer, open the index.htm file located in the DocumentsMicrosoft PressHTML 5 Start Here�6StylesCreatingExternal folder.
In Notepad, select all the text between <style> and </style> but do not include those tags in the selection.
Press Ctrl+X to cut the text from the document and store it in the Clipboard.
Save the file and then start a new document in Notepad (File | New).
Press Ctrl+V to paste the text from the Clipboard into the new document).
Save the new document as default.css in the same folder as index.htm (DocumentsMicrosoft PressHTML 5 Start Here�6StylesCreatingExternal).
In Notepad, return to the index file and then delete the <style> and </style> tags.
Add this line to the <head> section:
<link rel="stylesheet" type="text/css" href="default.css">Save the file and then refresh Internet Explorer.
The file does not appear to change, but the styles are now defined in the external style sheet rather than in the embedded style sheet.
Close index.htm and then open swdestinations.htm in Notepad.
In swdestinations.htm, add the same line to the <head> section as in step 8.
Save the file and then close Notepad. Open swdestinations.htm in Internet Explorer to confirm that the external style sheet has been applied to this file too. (Look for green visited hyperlinks and blue horizontal rules.)
Close Internet Explorer.
Key Points
Styles can define the formatting for specific instances of a tag, for all uses of a tag within a document, or for all uses of a tag within a group of documents.
A cascading style sheet is a list of style rules applied to tags within an HTML document. This list can either be internal (embedded) or external to the document (a linked file).
When rule conflicts occur, they are resolved as follows (from highest priority to lowest):
There are three ways to apply a style. You can use the style= attribute within an individual tag, you can create an embedded style sheet, or you can create an external style sheet.
You place an embedded style sheet in the <head> section of the file and enclose it in a <style> tag. An external style sheet is a separate plain text file with a .css extension.
A style sheet consists of one or more style rules. A style rule is the tag, class, or ID name followed by curly braces in which the specifications are placed.
Each specification takes the format of name: value. For example, list-style-type: square.
Use semicolons to separate multiple specifications within a rule. To define two or more tags the same way, include both tags (with a comma between them) before the opening curly brace, like this: h1, h2 {color: black}. If you omit the comma, two tag names in a row refer to nested styles in a rule. For example, ol ul {color: green} refers to unordered lists nested within ordered lists.
You can assign a class to multiple elements. You can define a style based on a class. Precede a class’s name in a style sheet with a period, like this: .new {color: red}.
An ID must be uniquely assigned within a document. You can define a style based on an ID. Precede the ID in a style sheet with a hash symbol (#), like this: #special {color: red}.
Apply a class or ID to a tag by including the class= or ID= attribute within its opening tag, like this: <ol class=“new”>.
To apply styles to hyperlinks, use a pseudo-class of the hyperlink type. You can apply the link, visited, hover, active, or focus pseudo-class like this: a:visited {color: red}.
To create an external style sheet, start a new Notepad document and then place all the style rules within it. Then refer to it from the <head> section of each document to which that style sheet should apply by using the tag <link rel=“stylesheet” type=“text/css” href=“default.css”>, where default.css is the name of your style sheet.