
Chapter 1. HTML Basics: The Least You Need to Know
In this chapter, you will:
Learn how to publish your pages to a server
As you work through this book’s exercises, you’ll learn HTML by creating and editing text files in Notepad (or any plain text editor), and then viewing them in a web browser to check your work. This chapter teaches the important basic skills you need in order to work in these programs.
Important
Before you can use the practice files provided for this chapter, you need to download and install them from the book’s companion content location. For more information, see Code Samples at the beginning of this book.
Understanding HTML Tags
An HTML file (also known as a webpage file or document) is a plain-text file. That’s why you can use a plain-text editor like Notepad to edit an HTML file. Within that file is literal text (that is, text that will literally appear on the screen when you display the page in a browser) plus tags that tell the browser how to format and arrange the text.
HTML tags are codes inside angle brackets, like this: <p>. There are dozens of tags defined in the HTML5 standard. You can use these tags to specify where formatting should be applied, how the layout should appear, what pictures should be placed in certain locations, and more.
For example, suppose you wanted a certain word to appear in bold, like this:
Save up to 50% on clearance items.
In HTML, there’s no Bold button to click (like there is in a word-processing program). Therefore, you have to “tag” the word or characters that you want to be bold. The tag to turn on bold is <b>, and the code to turn bold off is </b>. Your HTML code would look something like this:
Save up to <b>50%</b> on clearance items.
That’s an example of a two-sided tag, which encloses text between an opening tag and a closing tag, in this case <b> and </b>. Note the forward slash (/) in the closing tag (</b>). That slash differentiates an opening tag from a closing tag. With a two-sided tag, there is always a corresponding closing tag for every opening tag.
To understand how this system of tagging came about, you need to know that back in the early days of the Internet, nearly everyone connected to it by using dial-up modems at speeds ranging from 2400 bps to 28.8 Kbps. That’s really slow. Text files transfer much faster than binary files, so for any type of information-sharing system to be popular, it had to be text-based. Otherwise, people would doze off while waiting for a page to load.
People designing webpages also wanted their pages to be attractive. They couldn’t just format pages in a word processor, though, because every word processor handled formatting differently and it was impossible to know which word processor a visitor might be using. Word-processing files are also much larger than plain-text files.
The web’s creators developed an elegant solution. Instead of sending the formatted pages over the Internet, they created an application—a web browser—that could interpret plain-text code (HTML tags) as formatting instructions. The text could be sent quickly and efficiently in plain-text format, and then be processed and displayed attractively and graphically on the local PC.
HTML worked great all by itself for all kinds of text formatting, but some web designers wanted to include graphics on their pages. To accommodate this, the <img> tag was created, which designers use to refer to a graphic stored on a server. When the web browser gets to that tag, it requests that the image file be downloaded from the server and displayed on the page. (You’ll learn how to insert images in Chapter 9.)
The <img> tag is different in several ways from the <b> tag. It is one-sided, meaning it does not have a closing tag, and it takes attributes. An attribute is text within the tag that contains information about how the tag should behave. For example, for an <img> tag, you have to specify a source (abbreviated src). Here’s an example:
<img src="tree.gif">
This <img> tag uses the src= attribute and specifies that the file tree.gif be displayed.
Many tags accept attributes, either optional or required. You’ll see many examples throughout the exercises in this book. Attributes are usually written in pairs in the form name=value, where the name of the attribute is on the left side of the equals sign, and the value on the right.
With HTML, you can also create hyperlinks from one page to another. When a visitor clicks a hyperlink, the web browser loads the referenced page or jumps to a marked section (a “bookmark”) within the same page. You will learn to create hyperlinks in Chapter 5.
The tag for a hyperlink is <a>, a two-sided tag, but most people wouldn’t recognize it without the attribute that specifies the file or location to which to jump. For example, to create a hyperlink with the words Click Here that jumps to the index.htm file when clicked, the coding would look like this:
<a href="index.htm">Click Here</a>
There’s a lot more to HTML, but that’s basically how it works. You mark up plain text with tags that indicate where you want to apply elements such as formatting, hyperlinks, and graphics. Then a web browser interprets those tags and displays the page in its formatted state, a process called rendering. The trick, of course, is to know which tags to use, where they’re appropriate, and what attributes they need. And that’s the subject of this book. Starting in Chapter 2, you’ll begin building a website from scratch, learning about each individual tag as you go. By the time you finish this book, you will have created a multi-page website using nothing but Notepad and the tags that you have personally learned about and typed. Talk about boot camp! There are professional web designers out there today who have never done this and who don’t have the fundamental HTML coding skills that you’ll have when you finish this book.
Opening a Webpage in Notepad
The rest of this book assumes that you will be working in Notepad or some other text editor, so you’ll need a basic understanding of whatever text editor you select. Notepad is included with all versions of Windows. It’s a simple text editor that saves only in plain-text format. That’s ideal for HTML editing because you don’t need to worry about any extra word-processing formatting being included in the file.
Note
You are welcome to use a different text editor application to complete the exercises in this book. Notepad is just a suggestion.
When saving or opening files in Notepad, the default file extension is .txt. The Save dialog boxes and Open dialog boxes are set by default to filter file listings so only those files with .txt extensions appear. That means each time you browse for a file, you need to change the file type to All Files so you can browse for webpages (which have .htm or .html extensions).
Note
You may run into various extensions on webpage files on the Internet, such as .php, .asp, and .jsp. Those are all special formats designed for use with specific server technologies. This book covers developing only the basic type of webpage: the type with an .htm extension.
In the following exercise, you will open a webpage in Notepad and examine its text and tags.
Open a Webpage in Notepad
Open a Webpage in Notepad
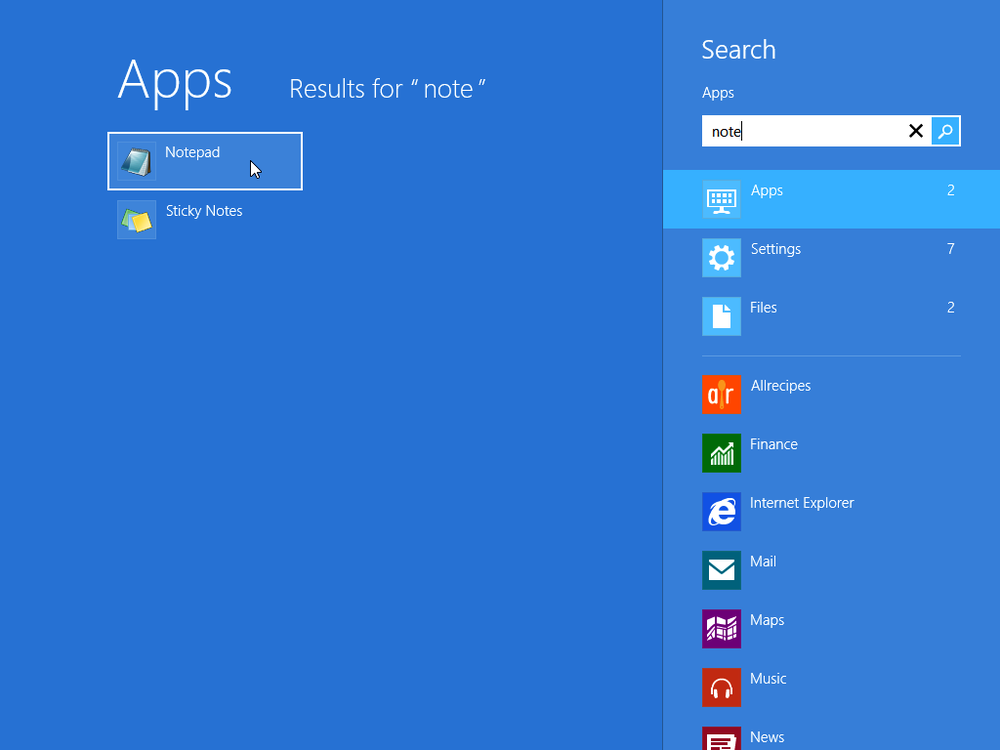
In Windows 8, press the Windows key to display the Start screen. Begin typing Notepad, and when you see Notepad at the left, click it.
Or, if you’re working in an earlier Windows version, from the Start menu, click All Programs | Accessories | Notepad.
Note
Because you will be using Notepad extensively in this book, you might want to create a shortcut for Notepad on the taskbar. To do so in Windows 8, after locating the Notepad app as shown in the previous figure, right-click its tile, and then click Pin to Taskbar. Or, in an earlier Windows version, after locating Notepad on the Accessories submenu, right-click it there and then click Pin to Taskbar.
In the untitled Notepad window, click File | Open.
Navigate to the folder containing the practice files for this chapter. To do so, on the Places bar, click Documents (or My Documents if you are using Windows XP). In the Open dialog box, double-click Microsoft Press, double-click HTML 5 Start Here, and then double-click 01Basics.
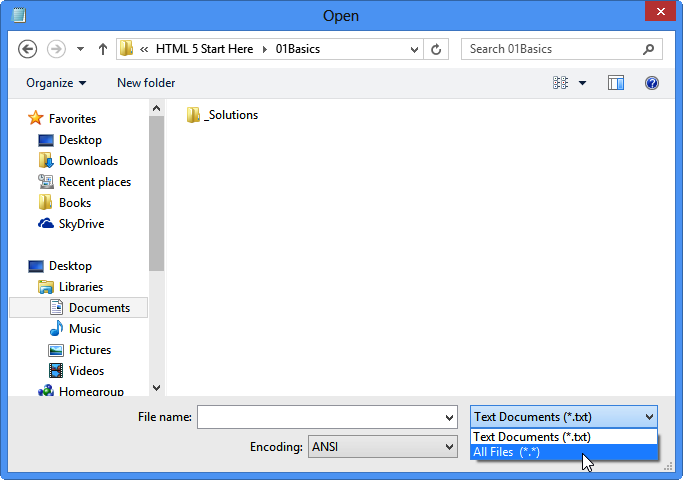
Click the Files Of Type drop-down arrow and then click All Files.
In the Open dialog box, click welcome.htm and then click Open.
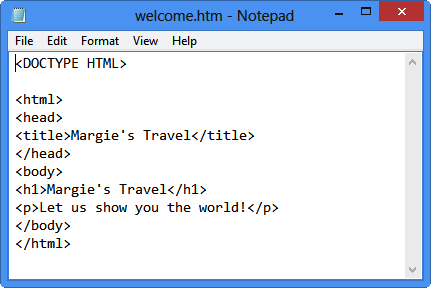
The welcome.htm file opens in Notepad.
Note
The .htm extension might not appear on the welcome file in the Open dialog box. By default, file extensions for known file types are turned off in Windows. To turn them on, open File Explorer (Windows 8), Computer (Windows Vista or 7), or My Computer (Windows XP). In Windows 8, on the View tab, select the File name extensions check box. In earlier Windows versions, click the Tools menu (press Alt for the menu bar if you don’t see it) and then click Folder Options. On the View tab of the Folder Options dialog box, clear the Hide Extensions For Known File Types check box and then click OK.
Locate the <html> and </html> tags.
These tags signify the beginning and end of the HTML. They are typically the first and last tags in document, with the exception of the DOCTYPE, which you’ll learn about later.
Locate the <body> and </body> tags.
These tags signify the beginning and end of the visible portion of the webpage when viewed in a browser.
Locate the <p> and </p> tags.
These tags signify the beginning and end of a paragraph.
Leave Notepad open for later use. You don’t have to save your work because you didn’t make any changes.
Other Ways of Opening Webpages in Notepad
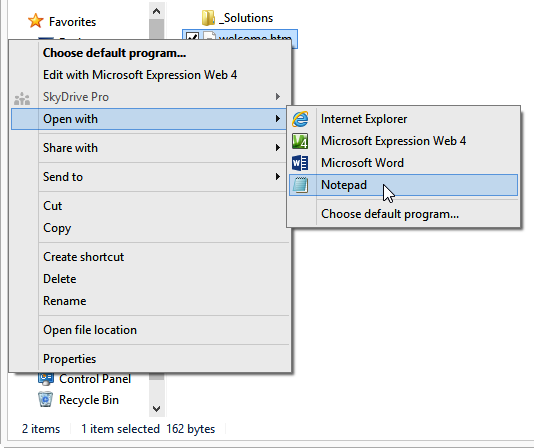
A quick way to open most file types in their default applications is to double-click them from any File Explorer (or Windows Explorer) window. However, the problem with doing that for HTML files is that the default application is your web browser, not Notepad. So when you double-click an HTML file, the file doesn’t open in Notepad; the file opens in your web browser. One way to get around this is to right-click a file in File Explorer, point to Open With, and then click Notepad (see Figure 1-1). This opens Notepad and loads the file.
Note
File Explorer is the file management interface in Windows 8. In earlier versions of Windows, that same interface is called Windows Explorer.
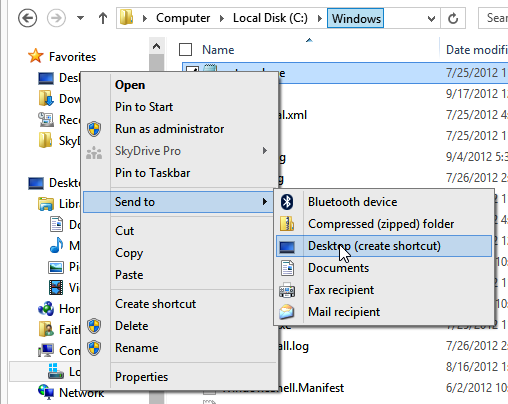
Here’s another method: You can create a shortcut to Notepad on your desktop and then drag-and-drop individual HTML files onto that shortcut whenever you want to open an HTML file in Notepad. To create a desktop shortcut for Notepad in Windows 8, locate Notepad from the Start screen, right-click its tile, and then click Open File Location. In the File Explorer window that displays, right-click Notepad, point to Send To, and then click Desktop (Create Shortcut). See Figure 1-2. In earlier Windows versions, locate Notepad on the Start menu (Start | All Programs | Accessories), right-click it, point to Send To, and then click Desktop (Create Shortcut).
Adding a Location to the Favorites List
While working through this book, you will open many files in Notepad. To save yourself the trouble of navigating to the data file folder each time, you might want to add that folder to your Favorites bar, which displays in the navigation pane in the Open dialog box.
In the following exercise, you learn how to add a shortcut that brings you directly to the HTML 5 Start Here folder from the Favorites list.
Add a Location to Your Favorites List
In Notepad, click File | Open.
Navigate to the folder containing the practice files for this book.
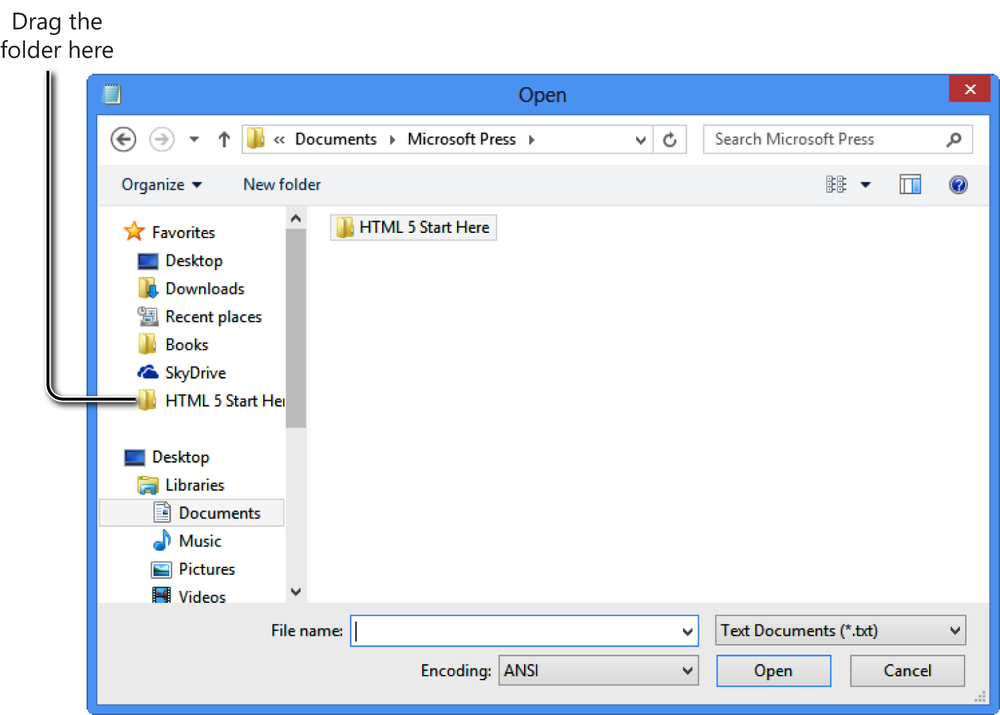
On the Places bar, click Documents (or click My Documents if you are using Windows XP). In the Open dialog box, double-click Microsoft Press. The HTML 5 Start Here folder displays as an icon. Depending on your View setting, the icon might be a different size than shown here. The icon size is not important for the task at hand.
Drag the HTML 5 Start Here folder icon to the Favorites list on the left side of the window.
Now, the next time you want to open a file in the Open dialog box, you can click that shortcut, and then double-click the folder for the chapter you are working on, which is much more convenient!
Previewing HTML Files in a Web Browser
Because Notepad is not a WYSIWYG (“What You See Is What You Get”) program, you won’t be able to immediately see how the tags you type will look in the finished product. To work around this, most people like to keep a browser window open next to Notepad so they can see their work by looking at their browser.
You can preview your work in any browser; you do not need to use Internet Explorer 10 (although that’s what I use in this book’s examples). In fact, as you progress with your web development skills, you will probably want to acquire several different browsers in which to test your pages, because each browser might display page elements a little differently. For beginners, though, Internet Explorer is a good choice because it’s one of the most popular browsers—one that a large percentage of your target audience is likely to be using. Other popular browsers include Google Chrome, Firefox, Safari, and Opera.
If you are using Windows 8, you have two different versions of Internet Explorer: the regular desktop version and the customized Windows 8 app version. You can start the desktop version of Internet Explorer from the Internet Explorer icon that’s pinned to the left of the taskbar on the desktop. You can start the custom version from the Internet Explorer tile on the Start screen. This book uses the desktop version of Internet Explorer, but you might want to check your work in the custom version when you start developing your own sites.
Caution
Versions of Internet Explorer prior to version 10 do not support some of the HTML5 features. (Internet Explorer 9 supports most of the features, but not all.) You will probably want to test your webpages in an earlier version of Internet Explorer to make sure that people who use those versions will be able to view your pages. But don’t use an early version of Internet Explorer as you work through this book’s examples; you won’t get the full effect of the new HTML5 features.
Tip
If the video card in your computer has two monitor connectors on it, or if you have an additional video card that you could install in your system, you might want to set up two monitors side-by-side. That way you can work on your HTML code in Notepad on one monitor and display the page full-screen in Internet Explorer in the other. All recent versions of Windows support at least two monitors, and some versions support many more.
In the following exercise, you will display an HTML file in Internet Explorer. I use the desktop version of Internet Explorer 10 for the examples in this book. To see the displayed file and the underlying code at the same time, open the file in Notepad and then arrange the windows so that both are visible at once.
Open a Webpage in Internet Explorer
Open a Webpage in Internet Explorer
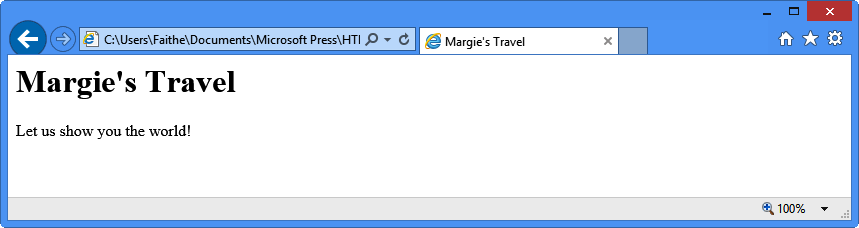
Using File Explorer (or Windows Explorer), open DocumentsMicrosoft PressHTML 5 Start Here�1Basics and then double-click welcome.htm. The file opens in Internet Explorer (or your default browser, if you’re not using Internet Explorer).
Note
If Internet Explorer is not your default browser but you want it to be, from within Internet Explorer, click Tools | Internet Options, click the Programs tab, and then click Make Default.
That’s by far the easiest way if File Explorer is already open and displaying the file’s location. Follow the next steps to learn another way that might be preferable when Internet Explorer is already open but File Explorer (or Windows Explorer) isn’t.
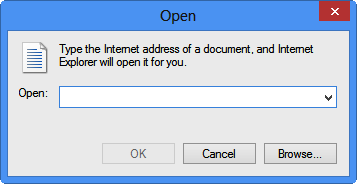
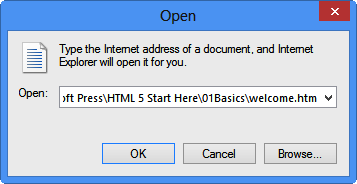
In Internet Explorer, click File | Open.
The Open dialog box displays.
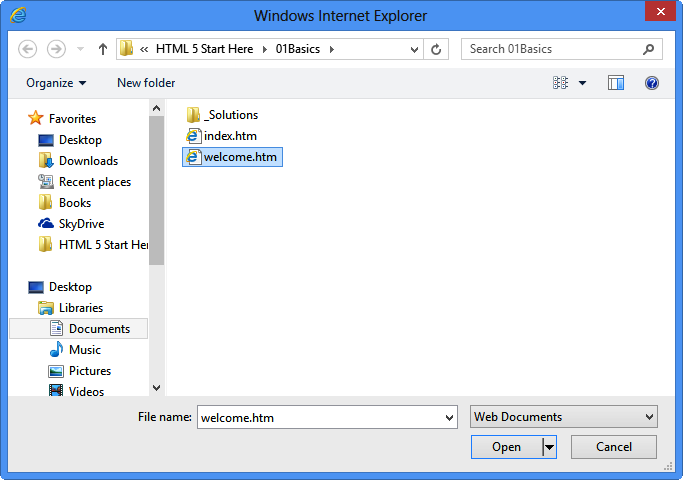
Click the Browse button and then browse to DocumentsMicrosoft PressHTML 5 Start Here�1Basics.
Click welcome.htm and then click Open.
The path to the file displays in the Open dialog box.
Click OK.
The file opens in Internet Explorer. Leave Internet Explorer open for the next exercise.
Tip
Remember, not all web browsers display pages the same way. For example, one browser’s idea of what text should look like might be different from another. It’s a good idea to check your pages in multiple web browsers, such as Firefox, Netscape, and Opera. These are available as free downloads from www.firefox.com, www.netscape.com, and www.opera.com, respectively.
Making, Saving, and Viewing Changes
After you’ve made a change to a webpage, you will probably want to see how that change looks in a browser. If you set up your Internet Explorer and Notepad windows side by side in the preceding two exercises, it’s easy to view those changes. Simply save your work in Notepad and then refresh the display in Internet Explorer by clicking the Refresh button or pressing F5.
In the following exercise, you will change us to me in the welcome.htm file and then preview that change in Internet Explorer. This exercise builds on the previous two, so make sure you have completed them before starting this exercise. You can use this procedure throughout the rest of the book to preview your work from each exercise.
Make and View Changes to an HTML File
Make and View Changes to an HTML File
In both Notepad and Internet Explorer, reopen the welcome.htm file (if it is not still open) located in the DocumentsMicrosoft PressHTML 5 Start Here�1Basics folder.
Remember, if you’re using Windows 8, we’re using the desktop version of Internet Explorer. In earlier versions of Windows that’s not an issue because there is no custom version.
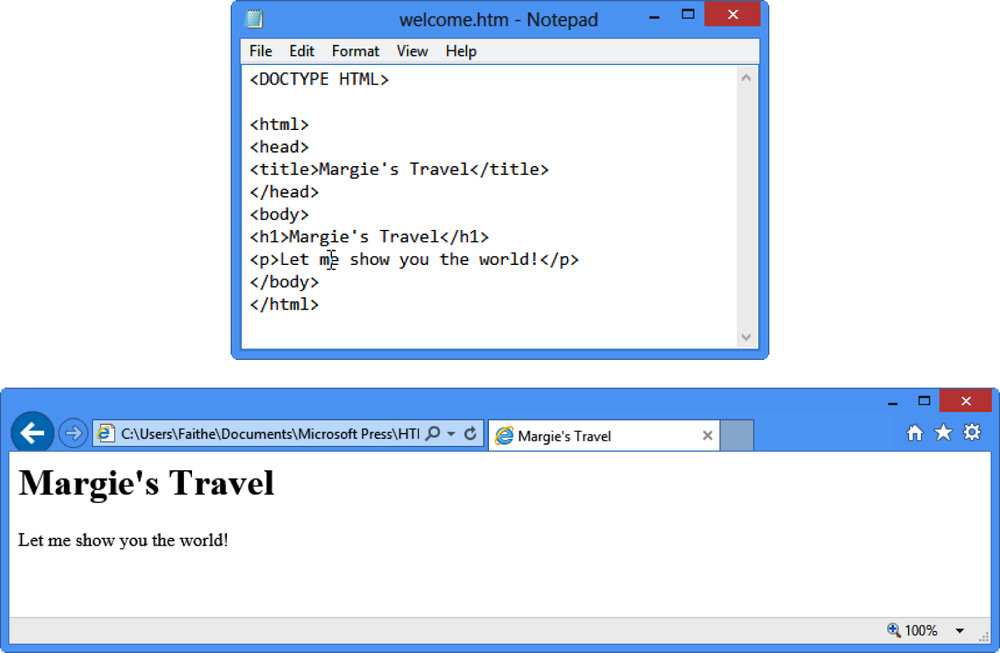
In Notepad, locate the word us and change it to me, as shown in the bold text in the following code:
<p>Let <userinput>me</userinput> show you the world!</p>
Save your work (File | Save).
Switch to Internet Explorer and click the Refresh button (or press F5).
The webpage now displays me rather than us.
Close Internet Explorer and close Notepad.
Key Points
In this chapter, you explored HTML and you were introduced to some basic skills that will be essential in following along with the exercises in upcoming chapters. Here are the key points to remember from this chapter:
Any plain text editor, including Notepad, can be an HTML editor.
Most webpages have an .htm or .html extension. You can open these pages in Notepad, but first you need to change the Files Of Type setting in the Open dialog box to All Files. You must change this setting each time you use the Open dialog box.
An alternative way to open a webpage in Notepad is to right-click it in File Explorer, point to Open With, and then click Notepad.
To preview a page in a web browser, click File | Open from the browser’s menu.
You can double-click an .htm or .html file in File Explorer to open it automatically in your default web browser.
To see the changes you make in Notepad reflected in your web browser, save your work in Notepad and then, with the file already displayed in your browser, click Refresh in the browser window.