
Chapter 2. Setting Up the Document Structure
In this chapter, you will:
Create paragraphs and line breaks
Specify a page title and keywords
Every society needs an infrastructure with certain rules that everyone agrees to for the general public good. For example, we have all agreed that a red light means “stop” and a green light means “go.” Everyone who wants to participate in the transportation system must play by those rules. If not, chaos ensues.
HTML is the same way. You can get creative with your web content, but there must be an underlying structure in place for web browsers to read and render your webpages properly. That means the document must contain certain tags that identify its major sections and that indicate to the browser what type of coding the document uses.
In this chapter, you’ll learn how to structure a document with the correct underlying tags. You’ll learn how to specify the type of HTML you are writing and how to create Head sections and Body sections. You’ll also learn how to create paragraph breaks and line breaks, how to specify a page title, and how to enter hidden keywords by which your page can be found in search engines.
Important
Before you can use the practice files provided for this chapter, you need to download and install them from the book’s companion content location. See Code Samples at the beginning of this book for more information.
Specifying the Document Type
The document type tells the browser how to interpret the tags. Including a document type tag is not strictly necessary, but if you’re trying to get into good HTML habits from the get-go, you’ll want to make sure it’s included.
When creating an HTML5 document, the first line of the document should be this tag:
<!DOCTYPE html>
The DOCTYPE tag always begins with an exclamation point and is always placed at the beginning of the document, before any other tag. Most HTML tags are not case-sensitive, but the word DOCTYPE should always be uppercase.
Using the DOCTYPE tag is like signing a contract. It is an optional tag, but when you use it, you are promising that your coding will conform to certain standards. When a web browser encounters a DOCTYPE tag, it processes the page in standards mode. When it doesn’t encounter the DOCTYPE tag, it can’t assume that the page conforms to a standard, so it processes the page in quirks mode. When the browser sees the tag <!DOCTYPE html>, it assumes you are using HTML5.
The distinction between standards mode and quirks mode came about in earlier days, when there were problems with standardization between web browsers. With some browsers, to display pages properly, you needed to get a little creative with the HTML code. Modern HTML coding does not allow that, but some older pages still include these obsolete workarounds. By using the DOCTYPE tag, you are making a promise to the web browser that there is nothing but pure HTML code in the page. (And, since I’m teaching you to do everything the right way, that’s a reasonable promise you can make.)
Earlier versions of HTML used more complex DOCTYPE tags. If you were using HTML 4.01, for example, the syntax for the tag would be:
<!DOCTYPE HTML PUBLIC "-//W3C/DTD HTML 4.01 Transitional//EN" "http://www.w3.org/TR/
html4/loose.dtd">
And, if you were using XHTML, the syntax for the tag would be:
<!DOCTYPE HTML PUBLIC "-//W3C/DTD XHTML 1.0 Transitional//EN" "http://www.w3.org/TR/
xhtml1/DTD/xhtml1-transitional.dtd">
Creating the HTML, Head, and Body Sections
All your HTML coding—except the DOCTYPE tag—should be placed in an <html> section. Recall from Chapter 1 that when a tag is two-sided, as <html> is, it requires a corresponding closing tag that is identical to the opening tag but contains a slash immediately after the opening angle bracket (for example, </html>). The tags <html> and </html> serve as a “wrapper” around all the other tags in the document except the DOCTYPE tag.
In addition, your HTML file should have two sections: a Head section and a Body section. The Head section is defined by the two-sided tag <head>. The Head section contains the page title, which is the text that will display in the title bar or page tab of the web browser. It also includes information about the document that is not displayed, such as its metatags (which you’ll learn about later in this chapter). You can also include lines of code that run scripts, like Javascript.
The Body section is defined by the two-sided <body> tag and it contains all the information that displays in the web browser when you view the page.
Note
The <html>, <head>, and <body> tags are all optional in HTML, but you should still use them because it’s a good design practice. They are required in XHTML. In addition, in XHTML you must add an argument to the <html> tag that declares its XML namespace, a reference to the fact that XHTML is created within XML (as you learned in Chapter 1). Here’s how the opening <html> tag should look in an XHTML document: <html xlmns=“http://www.w3.org/1999/xhtml”>.
In the following exercise, you will create an HTML5 template file that you can reuse later for your own work. That way you don’t have to retype those same DOCTYPE, head, and body tags every time you want to create a new webpage.
Create an HTML5 Template
Create an HTML5 Template
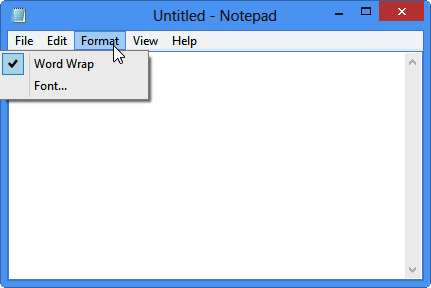
Open Notepad and then click the Format menu. Word Wrap should have a check mark next to it. If it does not, click it to enable the Word Wrap feature.
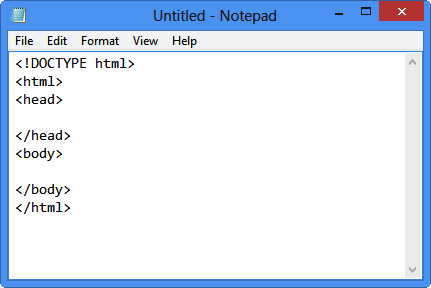
In the Notepad window, type the following:
<!DOCTYPE html>Press Enter and then type:
<html><head>Press Enter two or three times to insert some blank lines and then type:
</head><body>Press Enter two or three times to insert some blank lines and then type:
</body></html>Save the file as HTML5.htm on your Windows desktop (or to any other location that is convenient for you).
Close Notepad.
You now have a template for creating any HTML documents you like. You can reopen this template file and save it under different names.
Tip
If you want to avoid accidentally editing the template in the future, make it read-only. To do so, in Windows Explorer, right-click the file and then click Properties from the contextual menu. In the Properties dialog box, select the Read-Only check box. When you try to save changes to a read-only file, an error message displays and a Save As dialog box prompts you to save a copy of it with a new name.
Creating Paragraphs and Line Breaks
Within the <body> section of the document, you type the text that will display on the webpage. Each paragraph of text should be enclosed in a two-sided tag that indicates its type.
The most basic paragraph type is the body paragraph, indicated by the <p> tag. It is a two-sided tag, so the paragraph text is placed between a <p> and a </p>.
Note
In HTML, the code will still work even if the </p> is omitted; in XHTML, however, it won’t work without a closing tag. Even if you never plan on coding in XHTML, it is a good practice to include the </p> tag. This way, you won’t fall into any sloppy habits.
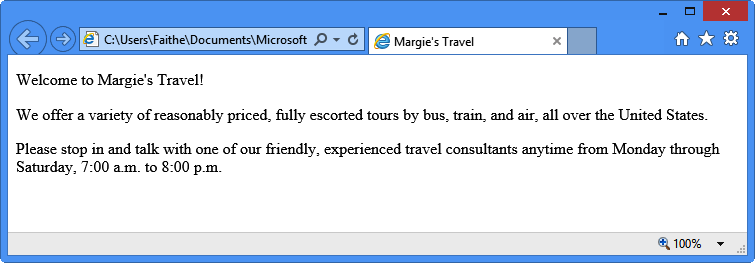
When a browser displays a webpage, it inserts vertical white space between paragraphs (see Figure 2-1).
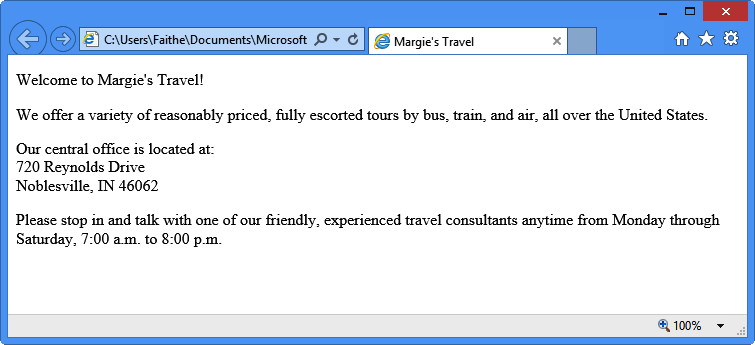
That spacing is usually convenient, but it can be a problem when the extra space between lines is unwanted, such as with an address (see Figure 2-2).
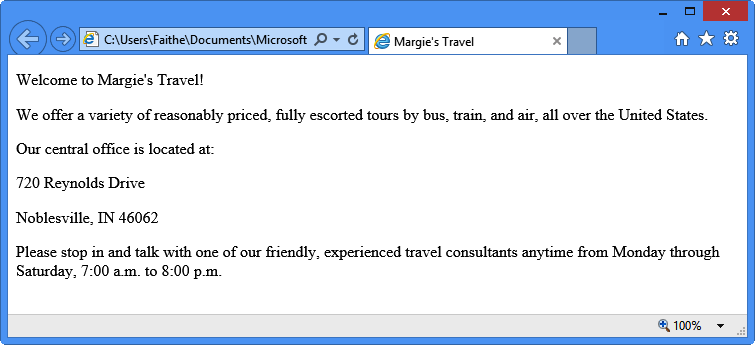
To create a line break without officially starting a new paragraph (and thereby adding that extra white space), use the line break tag: <br>. This is a one-sided tag placed within a paragraph, at the end of each line, like this:
<p>720 Reynolds Drive<br>
Noblesville, IN 46062</p>
Note
In XHTML, the line break tag is <br />. The end slash (and the space preceding it) is necessary to indicate that it’s a self-closing tag. Notice that the slash is placed after the letters, not before, as with the closing end of a two-sided tag. In XHTML, one-sided tags must end with a slash to indicate that they are self-closing. The space between the text and the final slash is also required, so the tag will be recognized in HTML.
In the following exercise, you will add text to an HTML file template and then preview it in Internet Explorer.
Add Text to an HTML File
Open the HTML5.htm file located in the DocumentsMicrosoft PressHTML 5 Start Here�2StructureCreatingParagraphs folder.
Save the file as index.htm in the DocumentsMicrosoft PressHTML 5 Start Here�2Structure folder.
Note
It is customary to name the opening page of a website index.htm, index.html, default.htm, or default.html. When users type a URL in their web browsers but omit the file name (like typing www.microsoft.com rather than www.microsoft.com/filename.htm), most servers will automatically respond with the index or default page (if one exists).
In Internet Explorer, open the index.htm file and arrange the Notepad window and the Internet Explorer window so that both are visible.
The index file displayed in Internet Explorer is currently blank.
In the Notepad window, type the following text between the <body> and </body> tags:
<p>Welcome to Margie's Travel!</p><p>We offer a variety of reasonably priced, fully escortedtours by bus,train, and air, all over the United States.</p><p>Our central office is located at:<br>720 Reynolds Drive West<br>Noblesville, IN 46062</p><p>Please stop in and talk with one of our friendly,experienced travelconsultants anytime from Monday through Saturday, 7:00 a.m. to 8:00p.m.</p>Save your work and then switch to Internet Explorer and press F5 or click the Refresh button to see the result of the changes. Leave both windows open for the next exercise.
Close Notepad and Internet Explorer.
Specifying a Page Title and Metatags
Perhaps you noticed in the preceding exercise that the complete path to the file displayed in the page tab or in the browser title bar (depending on the browser you are using). Usually when you view a webpage, a friendly, descriptive title displays in that spot instead. That text is specified by a <title> tag placed in the <head> section (also called the header). Here’s an example:
<head>
<title>Margie's Travel</title>
</head>
Note
Troubleshooting Make sure you place the <title> tag in the <head> section; don’t place it in the <body> section.
Another element you can place in the header is the <meta> tag. The <meta> tag has several purposes. One of these is to identify keywords related to your page. Placing appropriate keywords on your page can make it easier for people to find your page when they are searching the web using a search engine. When some search engines index your page, they rely not only on the full text of the page, but also on any keywords they find in the <meta> tag area.
Note
Not all search engines refer to <meta> tags. Google does not, for example; it indexes only the text contained in the <body> area. Because of the potential for abuse of the system, such as web developers packing their pages with unrelated keywords, fewer and fewer search engines these days are using them.
For example, suppose the Margie’s Travel site would be useful to people who are searching for guided travel tours and vacations that are customized for senior citizens. Perhaps the phrase “senior citizen” is not mentioned on the main page, but you want people who search for that phrase to be directed to the main page anyway. You could place the following in the <head> section:
<meta name="keywords" content="senior, senior citizen, travel,tours">
Notice that the <meta> tag in this code is a single-sided tag that contains two attributes: name and content. The values for each of those arguments follow the equals sign and are contained in double quotation marks.
Note
If you are coding in XHTML, you would add a space and a / at the end of <meta> tag because it is a one-sided (self-closing) tag. This is not necessary in HTML.
The <meta> tag can also be used to redirect visitors to another page. For example, suppose you told everyone the address of your website and then you needed to move it to another URL. You could place a “We’ve Moved” page at the original address and use the <meta> tag to redirect users to the new address after five seconds, like this:
<meta http-equiv="refresh" content="5; url=http://www.contoso.com/newpage.htm">
Here’s yet another common use: the <meta> tag can specify a character encoding scheme. This is not a big issue if you are coding only in English (or in a language like English that uses a Roman character set), but it is considered a tidy coding practice to include anyway. If you want, you can add <meta charset=“utf-8”> to the <head> section of your document to explicitly spell out that your page is in English.
In the following exercise, you will add a page title and some keywords to the index.htm page you created in the preceding exercise.
Specify a Page Title and Metatags
In Notepad, open the index.htm file from the previous exercise. If you have not completed the previous exercise, open the index.htm file located in the DocumentsMicrosoft PressHTML 5 Start Here�2StructureSpecifyingTitle folder.
Between the <head> and </head> tags, type the following text to create the page title:
<title>Margie's Travel</title>After the title, type the following <meta> tag:
<meta name="keywords" content="senior, senior citizen, travel,tours">Press Enter to start a new line and then type the following <meta> tag:
<meta encoding="utf-8">Save your work and then view the file in Internet Explorer.
The tab displays the site name, but notice that the inclusion of the <meta> tags caused no apparent difference in the displayed text of the page. This is because the keywords and encoding specification do not display on the webpage itself.
Close Notepad and Internet Explorer.

Key Points
In this chapter, you learned how to create the overall structure of a document and how to divide it into head and body sections. You learned how to create paragraphs and how to add a page title. Here are the key points to remember from this chapter:
To specify HTML5 as the document type, type <!DOCTYPE html> at the beginning of the file.
All the HTML coding in a document (except the DOCTYPE) is enclosed within a two-sided <html> tag.
The <html> and </html> tags enclose the <head> and <body> sections.
The <head> area contains the page title (<title>) and any <meta> tags. The <body> area contains all the displayable text for the page.
Enclose each paragraph in a two-sided <p> tag. Most browsers add space between paragraphs when displaying the page.
To create a line break without starting a new paragraph, use the one-sided <br> tag.
When coding for XHTML, end one-sided tags with a space and a slash (/). The space is required for recognition in HTML, and the slash is necessary for recognition in XHTML.
Use the <title> and </title> tags to enclose the text that should display in the browser’s title bar. Place these in the <head> section of the file.
Use <meta> tags in the <head> section to indicate keywords and the document encoding language.