When you first began working with XHTML (We’re going to refer to XHTML in this book, but if you want to substitute “HTML” in your head, it’s fine with us; we’re not purists), you learned that you use it to define the structure of your Web page document, and to define the nature of each element of your page’s content. By adding markup to an element, you are telling the Web browser what that bit of content is. Markup is made up of tags, and tag names are enclosed in angle brackets. For example, you define a bit of text as a paragraph by surrounding it with the <p> and </p> tags, like so:
<p>Alpaca wool is prized for its beauty and softness.</p>
Marking up text into paragraphs provides some structure to the document, and adding section headings helps define further what text is important. You define headings by containing the heading text with heading tags:
<h1>Our selection of repossessed alpacas</h1>
Some tags for content that isn’t text (like an image) use a single tag (there’s no closing tag):
<img src="images/alpaca.jpg" alt="a fine looking alpaca" />XHTML provides the structure of the document; CSS defines the presentation of the content, telling the Web browser how it should display the content to the user. For example, you use CSS to define the font of the text on the page, and where the text appears on the page.
In this chapter, we’ll delve into what you need to write CSS and explain the basic structures of CSS, including rules, classes, and IDs. We’ll also learn about inline styles, internal stylesheets, and external stylesheets. Finally, we’ll touch on the cascade, the idea that lends Cascading Style Sheets their power. It’s a lot to cover, but we’ll make it easy. Let’s go!
The good news about writing CSS is that you don’t need any special software to create it. All you need is a text editor, and the ones included with Windows and Mac OS X will do. On Windows, that’s Notepad, and on the Mac, TextEdit will work just fine. What is important is that you save the CSS file as a plain text file (and add a .css file extension to the filename). You’ll also probably need an FTP program to upload your CSS and XHTML files to your Web server.
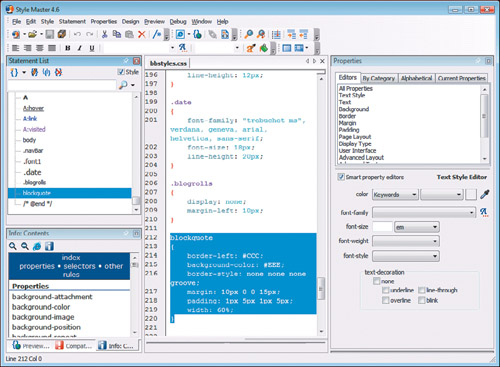
You can get away with using these simple text editors, but if you’ll be writing a lot of CSS, it will be well worth the expense to purchase a program that is designed as a specific CSS editor. These programs help you in many ways, including automatically building the CSS code from choices you make in panels or dialog boxes, ensuring that you’re not frustrated because you made a typo. Most of them have built-in previewing features, which let you instantly see the effects of your changes without having to switch to a Web browser. And the better programs have debugging and validation features that help you fix any problems that crop up. Here are a couple of favorite CSS editors that we can confidently recommend. Both have free trial versions you can download.
If you work on both Windows and Mac, check out WesternCiv’s Style Master (www.westciv.com).
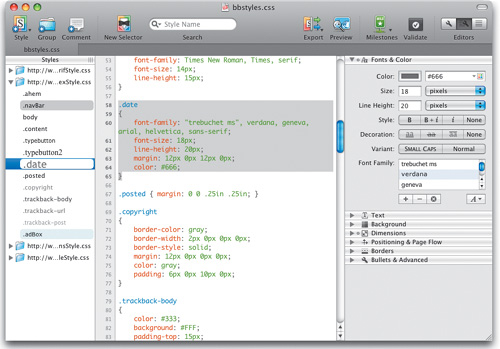
If you’re Mac-based, take a look at MacRabbit’s CSSEdit (www.macrabbit.com).
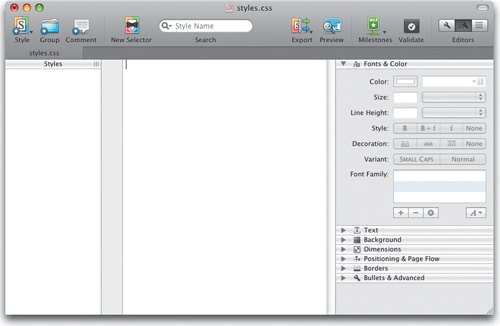
No matter what program you use to create your CSS, all you need to do to get started is to launch the program, which will create a new document. Then immediately save it onto your hard disk, using the name styles.css. In the next section, we’ll begin writing a CSS rule and filling in that blank space.
A CSS rule consists of instructions that apply to one or more elements in your document. A rule has two parts: the selector and the declaration block.

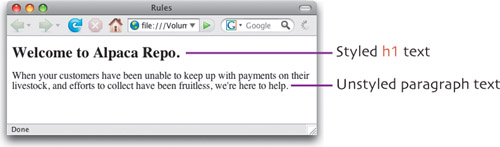
This rule sets the contents of any h1 tags in the document to be 1.5 ems in size. Here’s how the rule looks in action:
The selector part of the rule defines what the rule applies to and can be any XHTML tag, as well as other CSS elements, such as classes and IDs (we’ll get to those later in this chapter). The declaration block defines what the rule does, and includes everything between and including the curly braces.
The declaration block opens with the left brace, then the declaration itself begins. It includes a property (in the rule above, that’s font-size); a colon; and a value for the property (1.5em above). A property is always paired with a value. After the value, there must be a semicolon (indicating the end of the declaration). Within a single declaration block, you can have as many declarations as you want, as long as they are separated by semicolons, as shown below. Finally, you close the declaration block with a right brace.
h1 {font-size: 1.5em; font-weight: bold; color: green;}
The spaces after the colon and semicolon within the declaration are optional, but makes it a bit easier to read your rules, so we recommend it. You don’t need a space between the final semicolon and the right brace.
You can also write the rule with returns and indentations between each declaration, which can make the rule easier to read, like so:
h1 {
   font-size: 1.5em;
   font-weight: bold;
   color: green;
}
If you want to apply the same declarations to multiple selectors, just add the additional selectors to the rule, separated by commas:
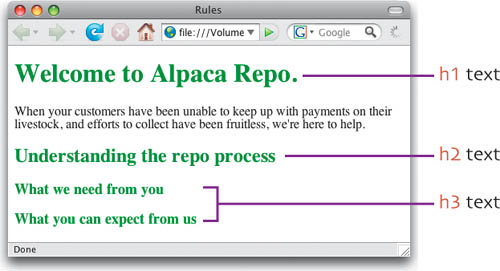
h1, h2, h3 {font-weight: bold; color: green;}
This can save you a lot of typing, because you don’t have to repeat the declarations for each tag. In this case, removing the font-size declaration makes sense, because the different heading levels have inherent sizes. The rule above makes all three heading sizes bold and green.
You use a tag selector when you want to apply a style rule to all of the instances of that tag. For example, if you define a rule for the <p> tag, that rule will be applied to the contents of every <p> in your document. If you’re using external stylesheets (more about those later in this chapter), the rule will be applied to every <p> in your whole site. But what if you have some paragraphs that you want to treat differently? They’re still paragraphs, but you need some way to identify them for special treatment. That’s what a CSS class does. There are two things you need to do to use a class in your documents. In the XHTML markup, you add a class attribute to the tag, like so (for clarity, we haven’t included all the paragraph text in the line below):
<p class="bodytext">When your customers...</p>
You must also add a style rule in the CSS stylesheet:
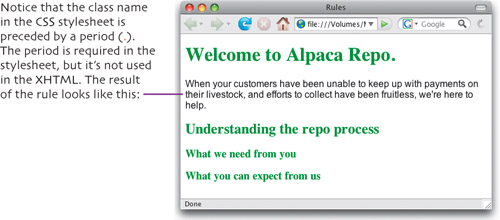
.bodytext {font-family: Arial, Helvetica, sans-serif;}
A class can be applied to more than one element; in fact, that’s usually the case. Use a class when you want to reuse a style rule in more than one place in your document or throughout your site. The elements don’t have to be the same, either; you could, for example, apply the same class style rule to headings and paragraphs.
Classes let you target one or more elements on your page, but if you need to be more specific, you can use an ID. Unlike classes, IDs must be unique within an XHTML document. You can, however, use the same ID name in more than one page of your site, as long as there is only one instance of the ID in each document.
Again, you’ll need to add to your XHTML markup and also add a style rule in your CSS stylesheet. Begin by adding the markup, like so (because a copyright notice is only likely to appear once on a page, it’s a good candidate for an ID):
<p id="copyright">Copyright 2008 Alpaca Repo, Inc. All rights reserved.</p>The style rule looks like this:
#copyright {color: gray; font-style: italic; text-align: center;}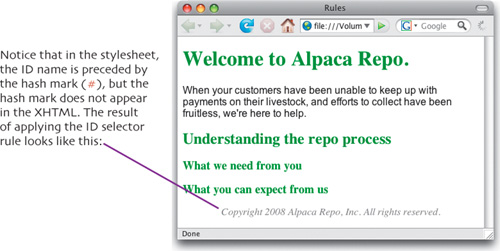
When you name the ID, be sure that you use only letters and numbers, with the caveat that the first character cannot be a number. So #body2 is acceptable, but #2body is not. You can also use underscores in an ID name, but not spaces. The same naming rules also apply to classes.
One of the best gifts you can give to yourself is to add comments to your CSS as you write it. It’s very easy to write a stylesheet and create class and ID names that make perfect sense in the moment. But when you go back to modify some styles six months later, you may not remember the difference between .content and .content2. Adding comments while you’re creating the style will pay off down the line.
To add a comment to your CSS stylesheet, type /* at the beginning of the comment and */ at the end, enclosing the comment in between, like so:
/* This is the style for names of the authors */

.byline {style declaration goes here}
Note that CSS comments are different from XHTML comments, which begin with <!-- and end with -->.
You can also “comment out” part of a style rule, which is useful when you are making changes and testing your CSS. Here is what that looks like; we’re using the vertical way of writing the style rule for clarity.
h1, h2, h3 {
    color: green;
    /* font-weight: bold; */
}
A few pages back, we asked you to create a stylesheet document in whatever program you are using. By doing that, you created an external stylesheet, that is, a document that contains only CSS rules. That’s the recommended way to use CSS, and we’ll go into external stylesheets in more detail in the next section.
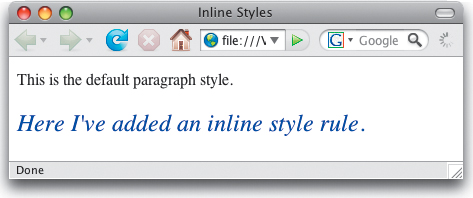
There are two other ways to write style rules: inline and embedded. An inline style is added to an XHTML tag, using the style attribute, like this:
<p>This is the default paragraph style.</p>
<p style="color: blue; font-size: 1.5em; font-style: italic;">Here I've added an
inline style rule.</p>
This is the result:
Embedded styles go in the head of your XHTML document, between the <head> and </head> tags. You enclose the style rules in <style> tags, like this:
<head>
   <style type="text/css">
   h1, h2, h3 {
       color: green;
       font-weight: bold;
   }
   .bodytext {
      font-family: Arial, Helvetica, sans-serif;
   }
   </style>
</head>
Inline and embedded styles work only for the tag and the page that they are on, respectively. That’s why we don’t think you should use inline styles at all, and think you should only use embedded styles for testing. It’s much better to have your styles in an external stylesheet, because that way all the pages in your site can share the styles.
By putting your styles in a separate document, some or all of the pages in your site can link to the stylesheet, sharing its style rules. When you want to change the look of your site, you just edit the style rules in the external sheet, and the changes automatically ripple throughout your site. Instead of changing dozens or hundreds of pages, you just have to modify one. It’s a tremendous time saver.
There are two ways to connect your XHTML documents to your CSS stylesheet: linking and importing. The former is a simple <link> to the stylesheet; the browser knows to then get styles from the link’s target and apply them to each XHTML page as it is loaded. Most of the time, linking is all you need. The @import style rule is more flexible, because you can not only bring styles from an external stylesheet into an XHTML document, but you can also import one or more CSS files into another. With larger sites, this allows you to further organize the style rules into easily understandable documents.
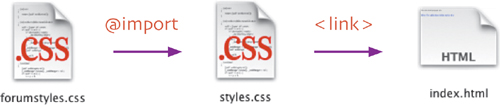
In this example, styles in forumstyles.css are imported into styles.css, and the styles in both are then linked to index.html.
To create a link from an XHTML document to an external stylesheet, add the <link> tag in the <head> tags, like this:
<head>
   <link href="styles.css" type="text/css" rel="stylesheet" media="screen" />
</head>
In the <link> tag, the href attribute specifies the stylesheet’s location; the type attribute alerts the browser that the file contains CSS; the rel attribute tells the browser that this link will be a stylesheet; and the media attribute specifies the media type. In this case, it says the stylesheet should be used for display in a Web browser, but if the attribute was “print” the stylesheet would contain print-friendly styles that you developed. Similarly, if the attribute was “handheld” the stylesheet would contain styles you had optimized for mobile devices.
To import a stylesheet into an XHTML document, add a <style> tag to the head of the document, as we did in “Using Internal Styles,” earlier in this chapter, then add @import url(yourfilename.css); like this:
<head>
   <style type="text/css">
      @import url(styles.css);
   </style>
</head>
An external stylesheet can include as many @import style rules as you want. This allows you to virtually consolidate multiple stylesheets into a single sheet which contains only @import rules (in effect creating a “master” stylesheet), then link that master sheet to all of your XHTML documents. As an example, imagine that you have one stylesheet that contains all the rules for how text in your site will be presented (text.css); another with all the layout rules (layout.css); and a third with styles for the navigation bar (navbar.css). Then you import all of these into the “master” stylesheet (masterstyles.css). That stylesheet only contains this:
@import url(text.css);
@import url(layout.css);
@import url(navbar.css);
In each of your XHTML documents, add a link tag to the “master” sheet as described previously (using a link instead of an import works around a problem with Internet Explorer), like this:
<head>
  < link href="masterstyles.css" type="text/css" rel="stylesheet"
    media="screen" />
</head>
Now you can add or subtract stylesheets to and from your site simply by changing the @import rules in masterstyles.css.
An embedded stylesheet can import styles and also include other style rules. However, the @import rule(s) must come first.
When you’re working with CSS, it’s important to know that the placement of style rules within the stylesheets and XHTML will affect the way those rules will be applied when the browser builds the page. Because style rules can reside in several different places, you could have conflicts between styles affecting a particular element. For example, different rules styling the <p> tag could be in both an external stylesheet and embedded in the XHTML page. There needs to be a method of resolving these conflicts, and that’s what the cascade is: rules that determine which conflicting rules win out and what gets displayed.
The cascade can get quite complex, but it can be boiled down into two main rules:
The closer a rule is to the content being styled, the higher its precedence.
The most specific rule wins.
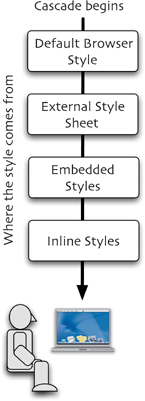
First, let’s talk about the order of precedence for styles. All browsers have a built-in default stylesheet that displays XHTML elements if there are no CSS stylesheets present. These are overridden by rules in any external stylesheets. Within the XHTML document, embedded styles are next in the preference order. And finally, inline styles—the ones closest to the content—win out.
Next up is specificity. The order here can be complex, but almost all the time, all you have to remember is this: when applied to the same elements, ID selectors override class selectors, which in turn trump tag selectors.???????????????