Now that we've created our first set of templates, we should make it just a little bit easier for editors to pick the right one in the page properties. TYPO3 includes all available TemplaVoila templates in the appropriate drop-down menus, but we can create preview icons for our templates that will show up in the page properties. Preview icons are actually helpful for a couple of reasons.
Of course, preview icons can be created to show what the template will actually look like. Like I said before, naming our templates is important, but sometimes a picture works even better. A preview icon is whatever we create, but there are basically two options that are normally used: screenshots or wireframes. If we want, we can take screenshots of an example page for each template and shrink it down to illustrate the template. If that sounds too busy or possibly confusing for a thumbnail, another idea is just to create wireframes like the examples in this section. With a basic wireframe icon, we can still show how many columns are being used and basic layout, but we are not worried about colors or if a sidebar is distinguishable in a small image.
The other reason to use preview icons, though, is that they are displayed separate from the drop-down menu in the backend. If you have a large site with multiple sections, you could end up with dozens of specialized templates that your editors don't really need to see. Just because there is a special e-mail invitation template available, doesn't mean that you want to confuse your editors by putting it at the same level in the drop-down menu as the half-dozen templates that they may actually use every day. With preview icons, it's easy to highlight the common templates. If we only make previews for the handful of templates that editors need to use most often, they will rarely have to open the drop-down and see all the template objects that are used once a year or in special situations. In addition, you don't have to worry as much that they will accidentally assign the 2005 Christmas Donation Newsletter template to the front page. It will be easier for you and the editors to have this separation between common templates and the rest.
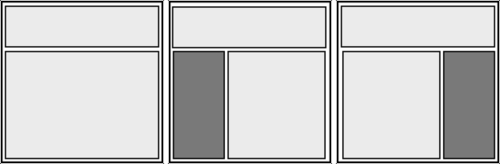
Our first step is obviously to create a few icons in a graphics editor. I chose to create wireframe previews as you can do that in even the simplest editor with a couple of box shapes. We need to create icons for the main template and both single sidebar templates, but we'll ignore the template with two sidebars; our editors should rarely, if ever, have to use it for our simple website. We can make simple square preview icons like these for our purposes:
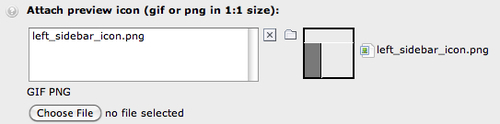
On the main TemplaVoila page in the backend, let's add an icon to the Left Sidebar Template [Template] by clicking on the edit icon. When we open up the editing view, we can see an area labeled Attach preview icon (gif or png in 1:1 size): with a blank box. We can upload a new icon with the Choose File button or choose one from our current directory structure by clicking on the folder icon to the right of the box. If our preview icon is named left_sidebar_icon.png, then it will look like the following screenshot after we have chosen it.
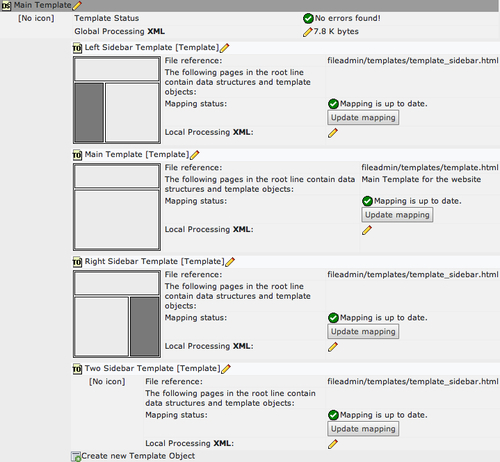
After we have saved the changes to Left Sidebar Template [Template], we can add icons to Right Sidebar Template [Template] and Main Template [Template]. After saving our changes to all three template objects, the main TemplaVoila screen will show preview icons in the list of templates like this:
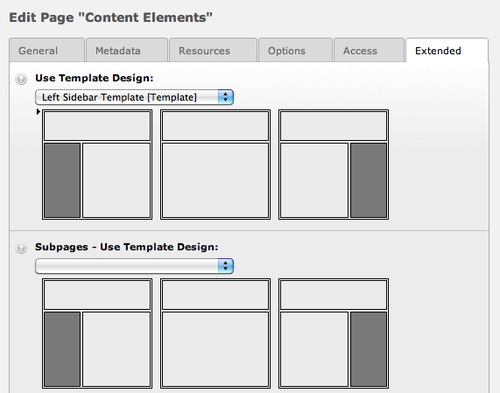
If we go to edit the page properties of the Content Elements page again, we can see that the preview icons are being used now. TemplaVoila is even indicating which template is currently being used with a small black arrow: