Use Mail in iOS
So far, the bulk of this book has been about Mail on a Mac. Although I’ve mentioned iOS Mail from time to time (and some of the things I’ve discussed apply equally to both platforms), Mail in iOS has enough unique characteristics that it deserves its own chapter. As was the case for macOS Mail, I’m not going to cover every feature here. Instead, I want to point out the most important things you need to understand in order to use iOS Mail effectively—especially aspects of Mail that are unclear, obscure, or otherwise confusing.
I begin with a list of the key differences between iOS Mail and macOS Mail. Then I move on to 18 Things Every iOS Mail User Should Know and wrap up with how to Troubleshoot iOS Mail Problems.
iOS Mail vs. macOS Mail
Mail in iOS shares a great deal in common with Mail on a Mac, so anyone accustomed to one platform should be able to pick up the other easily. Naturally, the iOS version makes accommodations for smaller screens, a touch-screen interface, and the numerous iOS user interface conventions that differ from those of macOS. I won’t spell all those out here, but I do think it’s worth pointing out several key differences in functionality—as well as a few similarities you may not have noticed.
Here’s what you should know about the iOS version of Mail:
No rules or spam filtering: If you want to sort messages or weed out junk mail automatically, it’s best to set these tasks up on your mail server. (See Use Rules and Control Spam, respectively.)
Push (but no IMAP IDLE): Mail in iOS supports push delivery of messages from iCloud, Exchange, and Yahoo IMAP accounts—and push works even when Mail isn’t open (see Fetch, Push, and IMAP IDLE). However, IMAP servers that offer only IMAP IDLE as a way of “pushing” messages don’t give you push delivery on an iOS device. As a result, Mail in macOS is likely to display messages from such servers before Mail in iOS.
Push delivery, where applicable, works with your Inbox and—for iCloud and Exchange accounts only—with other mailboxes you explicitly set up (see Change Account Settings).
In addition, note that even with iCloud and Exchange accounts, although Mail pushes new messages to your device immediately, it does not push changes made on other devices, such as moved or deleted messages. So, if your iOS Mail icon says you have one unread message, and you delete that message on your Mac, the “1” badge won’t disappear right away; you may need to open Mail to force it to resynchronize its Inboxes.
Limited mailbox syncing: Related to the last point…whereas the macOS version of Mail caches complete copies of all messages in all IMAP and Exchange mailboxes, syncing them in the background, iOS Mail doesn’t (which is a good thing, because that would chew up lots of cellular bandwidth and storage space).
Instead, for IMAP accounts, Mail syncs only the Inbox in the background. For Exchange accounts, you can specify how far back to sync email messages (from a day to a month, or all messages), and as I mentioned in the previous point, you can select, for iCloud and Exchange accounts, which mailboxes should have their messages pushed to your device. As for any other mailboxes, Mail syncs them only when you tap on them to display their contents.
This may be significant if you use server-side filters or rules to sort your messages into mailboxes, because mailboxes other than Inbox won’t indicate that they contain any new, unread messages until you manually select them.
Autocomplete for multiple addressees: If you regularly send messages to the same set of addresses (for example, your spouse and your mother), Mail notices this and offers the combination of addresses as an option when autocompleting a partial address (in my example, when you start typing your spouse’s name, your spouse’s email address will appear as an option, but so will the combination of your spouse’s address and your mother’s).
No user-defined local mailboxes: You can create new mailboxes in server-based accounts on your iOS device, but there’s no way to create a new local mailbox. (iOS Mail can, however, store predefined special mailboxes, such as Sent and Archive, locally.) So, if you use POP, only messages in your Inbox and, optionally, a single Archive mailbox can be stored locally—you can’t file them away in other arbitrary mailboxes on your device as you can do on a Mac. However, it is possible to move a message from a POP account’s Inbox (or Archive) to a mailbox in a server-based account on your iOS device (see Move a Message to a Different Account).
(Almost) no smart mailboxes: On a Mac, you can create smart mailboxes, which are simply saved searches that show you messages, from any mailbox, that match the criteria you specify. You can’t do this on iOS because Mail in iOS doesn’t cache all your messages. However, you can display and use a few built-in mailboxes that are “smart” in their own way, such as VIP, Flagged, Unread, To or CC (which shows only messages that explicitly include you as a To or Cc addressee), Thread Notifications (see Manage Notifications), Today (which shows only messages received today), and Attachments. These mailboxes, which you can add by editing your top-level Mailboxes view, display messages matching those criteria from any of your Inboxes (but only your Inboxes).
To add, remove, or rearrange these mailboxes, navigate to the top-level Mailboxes view and tap Edit.
You can also use inbox filtering (see Filter Your Inbox), as on a Mac, to limit which messages are displayed in your Inbox.
No account syncing: macOS can use iCloud to sync the settings for all your email accounts across your Macs, so that once you’ve set up an account on one Mac, you need not repeat that process on the others. Unfortunately, account settings on your iOS device don’t sync with either your Macs or other iOS devices.
No plugins: On a Mac, you can extend and modify Mail’s features with plugins (see Use Third-Party Plugins), but no such mechanism exists in iOS, so if you’re unsatisfied with Mail’s features, your only option is to look for a third-party email client.
Fixed sort order: In macOS Mail, I like to see my messages with the oldest at the top and newest at the bottom. (That’s the way English works—we write from top to bottom—so I expect older information to be above newer information.) But in iOS Mail, you can’t change the sort order; messages are always arranged with the newest at the top.
A similar restriction applies to mailboxes themselves. iOS always displays the mailboxes within each account in alphabetical order, and you can’t rearrange them. (The sole exception is mailboxes in the top-level view, which you can turn on or off and drag up or down in the list—see the item “(Almost) no smart mailboxes,” earlier in this list.)
No collapsible mailboxes: In macOS Mail, you can create mailboxes inside mailboxes inside mailboxes—to whatever depth and complexity suits you. When using an IMAP or Exchange server, all those nested mailboxes appear in the Mail app just fine. But Mail in iOS has no way of collapsing a hierarchical mailbox list to hide the items in it—there’s no disclosure triangle or plus/minus icon that means show/hide or collapse/expand. So, if you have 5 top-level mailboxes in a given account, with 20 sub-mailboxes in each one, Mail shows you a single long list of 105 mailboxes. Sub-mailboxes are indented to show their position in the hierarchy, but there’s no way to hide them. Since (per the previous point) mailboxes always appear in alphabetical order within any group and can’t be rearranged, if you file one message in the Apple mailbox, and the next one in the Zoo mailbox, get ready for a lot of scrolling!
By reducing your overall number of mailboxes (see Optimize Your Mailboxes) and renaming your most frequently used mailboxes so they appear first in an alphabetical list, you can reduce the amount of scrolling you must endure.
On the plus side, iOS 11 does let you collapse or expand an entire account by tapping its header in the Mailboxes list—but that does not apply when you’re filing messages.
S/MIME but no PGP/GnuPG: The iOS version of Mail supports encryption and digital signatures using S/MIME, just as the macOS version does (see Sign and Encrypt Messages), although the setup process is different (see Sign and Encrypt Messages in iOS). Because Mail doesn’t support plugins, you can’t use PGP/GnuPG or other encryption methods—but you are free to use an entirely different app, such as Canary Mail or iPGMail, if you need PGP/GnuPG.
18 Things Every iOS Mail User Should Know
If you want to get the most out of iOS Mail, you should be aware of some configuration and usage options that may not be immediately apparent. Of the many things Mail can do, I focus here on the 18 that I think are most essential.
Change Account Settings
To add, delete, or change the settings for accounts on your iOS device, go to Settings > Accounts & Passwords (or, in a few cases, Settings > Mail). Most of what’s in those two spots is self-explanatory, but some settings require quite a bit of tapping to get to or are located in less-than-obvious places.
Allow me to call your attention to a few of these:
Signature: As in macOS, a signature is optional text that’s automatically appended to the end of each message you send, often with information such as your name, phone number, or home page URL. Set up signatures by tapping Settings > Mail > Signature.
By default, Mail uses the same signature for all your accounts, but you can create a different signature for each account. That’s handy if, for example, you want to include a personal signature in email messages from your home account but professional information in messages from your business account. To switch to per-account signatures, tap Per Account. Then fill in a signature for each account in the spaces below. To return to using a single, system-wide signature, tap All Accounts.
Pushing extra mailboxes: With Exchange and iCloud accounts only, iOS Mail can push new messages to other mailboxes besides Inbox. To set this up, go to Settings > Accounts & Passwords > Fetch New Data > Account Name, make sure Push is turned on, and tap the name(s) of the additional mailbox(es) whose contents you want pushed to your device.
Archive vs. Delete: For all account types, you can choose whether the default behavior for discarding messages is to move them to a Trash mailbox (the default) or to move them to an Archive mailbox. In the former case, you’ll see a Trash
 icon when viewing a message, and swiping to the left in a message list displays a Trash button; in the latter case, you’ll instead see an Archive
  icon, and swiping to the left in a message list displays an Archive button. (I say more about swipe gestures and how to customize them ahead, in Use Swipe Gestures.)
To change this setting for a given account, you’ll need to go to the Advanced view, which is in a different location depending on the account type:
iCloud: Settings > Accounts & Passwords > iCloud > Mail > Advanced
IMAP: Settings > Accounts & Passwords > Account Name > Account > Advanced
Exchange: Settings > Accounts & Passwords > Account Name > Account > Advanced Settings
Once there, look for the label Move Discarded Messages Into and tap either Deleted Mailbox (for Trash) or Archive Mailbox underneath it to designate your choice for that account.
Special mailboxes: If you’re having trouble with special mailboxes (Drafts, Sent, Trash, or Archive) in iOS, skip ahead to Special Mailbox Problems.
Collapse Read Messages: You’ll find a number of controls that affect how Mail displays message threads in Settings > Mail, under the Threading heading. One of these, Collapse Read Messages, appeared in iOS 11 and is enabled by default. With this setting turned on, Mail hides the bodies of messages in a thread other than the message you’re currently reading; to view the message, tap its header in the message list.
Choose Between Fetch and Push
Back in Fetch, Push, and IMAP IDLE I explained the difference between fetch and push message delivery. On your iOS device, you can choose between fetch and push for accounts that support push. But why wouldn’t you just leave push turned on, since that results in your messages being delivered faster? Well, using push drains your device’s battery much faster than using fetch, especially if you receive lots of email; this effect is more pronounced with cellular connections than with Wi-Fi.
Having experimented extensively with both push and fetch, I don’t see much benefit to push email delivery. I never receive messages of such urgency that waiting 15 minutes until the next scheduled check (or checking manually) would be a problem. The only advantage push would confer is saving me a few moments waiting for messages to download in cases where they’ve arrived between scheduled checks—but at the expense of battery life, which I value a great deal. Of course, that’s me; your mileage may vary. I only want to make the point that push isn’t necessarily the no-brainer it may appear to be.
You can configure global settings for when push is used and for fetch frequency; you can also choose account-specific retrieval options, which override your global settings.
To configure push, follow these steps:
Go to Settings > Accounts & Passwords > Fetch New Data.
To turn push email on for accounts that support it, turn on the Push switch.
To set different fetch/push behavior for a particular account, tap an account name. Then tap the type of mail retrieval you want for that the account—Fetch, Push, or Manual (the available options depend on the mail server’s capabilities).
If you select Push, you can also select which mailbox(es) you want messages pushed to—the default is Inbox only, but if you have server-side rules sorting messages into other mailboxes, you may want to push those as well.
Tap Fetch New Data to return to the previous screen.
Under Fetch, set the default mail-checking frequency for accounts that don’t support push, for when the global Push setting is Off, or for when an individual account is set to use fetch:
Automatically: Let Mail decide how often to check, based on factors like connection type and battery level.
Every 15 Minutes, Every 30 Minutes, Hourly: Connect to each account at the chosen interval to check for new messages.
Manually: Don’t fetch in the background at all; connect only when you open Mail, when you switch to a particular account, or when you use the pull-to-refresh gesture in Mail.
The revised settings take effect immediately.
Add Multiple Addressees Manually
When you’re addressing a new outgoing message, you can use autocomplete to add addressees from your Contacts list. But if you manually type (or paste) an email address, Mail doesn’t turn it blue to let you know it’s complete, and it’s not obvious how you go about adding another address—typing a space doesn’t work, and the comma key doesn’t even appear on the keyboard.
The trick is to tap Return after typing or pasting an email address. That turns the address blue and adds a comma, so you can enter the next address.
Add an Inline Drawing
Starting with iOS 11, you can create freehand drawings in any outgoing message. To do this, double-tap any empty spot in your message and then tap Insert Drawing in the popover control. (You may have to tap the right arrow once or twice to display the Insert Drawing command.) A screen with drawing tools (Figure 32) appears.

Tap a control at the bottom of the screen—from left to right, pen, marker, pencil, eraser, lasso, and color—and write or draw with your fingertip or an Apple Pencil. (Toggle the display of these controls by tapping the pen ![]() icon in the upper-right corner.) Tap the +
icon in the upper-right corner.) Tap the + ![]() icon for additional controls, including a text box, signature tool, magnifier, and shapes (including lines and arrows).
icon for additional controls, including a text box, signature tool, magnifier, and shapes (including lines and arrows).
When you’re finished with your drawing, tap Done. Then tap Insert Drawing to place it in your message at the spot where you double-tapped.
Use Swipe Gestures
iOS offers a variety of gestures that let you quickly perform actions on messages in the message list. For example, you can swipe right to left across a message in the list to delete it, which saves one or more taps compared to other methods of deleting messages. These gestures are especially useful on devices with small screens that can’t display a message and the message list side-by-side.
Swiping is fantastically handy once you get the hang of it, but it’s also odd in several respects.
Short Swipes vs. Long Swipes
Most importantly, Mail distinguishes between a short swipe (less than halfway across the message) and a long swipe (most or all of the way across):
Short swipe: Display one or more options, which you can then perform with a tap (Figure 33).
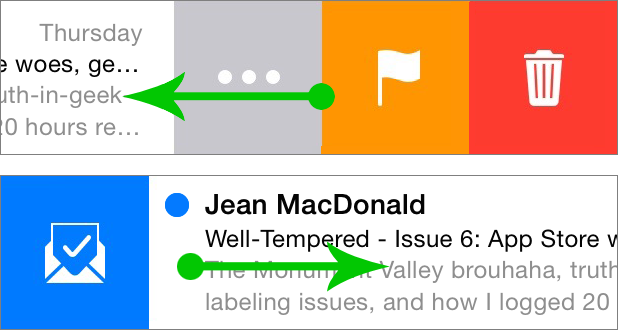
Figure 33: A short swipe to the left (top) or to the right (bottom) with default settings shows these options. Long swipe: Perform the default action for the direction in which you swiped (Figure 34). The long-right-swipe action is whatever the (single) right-swipe button says, whereas the default long-left-swipe action is always the rightmost choice (Trash
 or Archive
  ).
).

For example, let’s say you leave all the settings at their defaults and swipe to the left. If you swipe only a short distance, you’ll see buttons for More ![]() , Flag
, Flag ![]() , and Trash
, and Trash ![]() . (I’ll explain More
. (I’ll explain More ![]() in a moment.) On the other hand, if you do a long swipe to the left, you’ll move the message directly to the Trash, no further tapping required.
in a moment.) On the other hand, if you do a long swipe to the left, you’ll move the message directly to the Trash, no further tapping required.
Customization Choices Behave Oddly
A second respect in which swiping is odd is what happens when you change the default behavior for left and right swipes (see How to Customize Swipe Behavior, just ahead). Customizability is great, but the choices you’re offered don’t necessarily mean what they say. For example, if you customize a left swipe to be None (rather than the default of Flag), you might assume that swiping to the left will have no effect. But that’s not what happens—given a setting of None, a short swipe to the left shows More ![]() and Trash
and Trash ![]() buttons (without Flag
buttons (without Flag ![]() ), while a long swipe to the left moves the message to the Trash, just as it does with the default settings.
), while a long swipe to the left moves the message to the Trash, just as it does with the default settings.
But wait! It gets even weirder. If you have a particular account configured to archive deleted messages instead of moving them to the Trash (see Change Account Settings), all the Trash ![]() options for swiping become Archive
options for swiping become Archive ![]() (which makes sense).
(which makes sense).
But in addition, if you selected Archive as the Swipe Right action and Move Discarded Messages Into is set to Archive (see Change Account Settings), a long swipe to the right actually moves the message to the Trash (and a short right swipe shows a Trash ![]() button). That’s right: configuring Mail to archive deleted messages, and then setting Swipe Right to Archive, causes a right swipe to delete a message.
button). That’s right: configuring Mail to archive deleted messages, and then setting Swipe Right to Archive, causes a right swipe to delete a message.
This is actually a useful feature, in that you can choose whether to delete or archive any message in the message list depending on which way you swipe, but the user interface for configuring these settings is terribly confusing—and the behavior can change from one message to the next in the list, depending on how each account is set up.
Using the … (More) Button
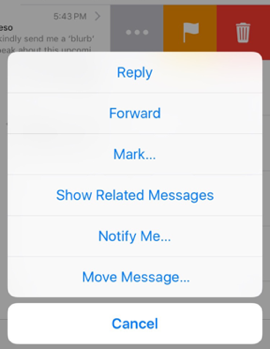
Regardless of your settings, one option in a short left swipe is always a button labeled with an ellipsis ![]() , which means “More.” Tap that to see a menu of additional controls (Figure 35), such as Reply/Reply All, Forward, Mark (that is, Flag, Mark as Read/Unread, or Move to Junk), Show Related Messages (earlier and later messages in the same thread, even if filed elsewhere), Notify Me (covered ahead, in Manage Notifications), and Move Message (which lets you tap a destination mailbox). Not all choices are available for every message; for example, if there are no related messages, that command doesn’t appear.
, which means “More.” Tap that to see a menu of additional controls (Figure 35), such as Reply/Reply All, Forward, Mark (that is, Flag, Mark as Read/Unread, or Move to Junk), Show Related Messages (earlier and later messages in the same thread, even if filed elsewhere), Notify Me (covered ahead, in Manage Notifications), and Move Message (which lets you tap a destination mailbox). Not all choices are available for every message; for example, if there are no related messages, that command doesn’t appear.
How to Customize Swipe Behavior
To change the behavior of left and right swipes, go to Settings > Mail > Swipe Options, tap either Swipe Left or Swipe Right, and then tap the desired setting for that direction. As I mentioned earlier, the options that appear when you choose settings here aren’t obvious. Here’s what you get with each setting.
Swipe Left:
None: More
 and Trash buttons
Mark as Read: More
, Mark as Read  or Unread
  , and Trash buttons
Flag: More
, Flag  , and Trash buttons
Move Message: More
, Move Message  , and Trash buttons
In all four cases, Trash ![]() is the long-swipe action.
is the long-swipe action.
Swipe Right:
None: Nothing happens (as advertised!)
Mark as Read
, Flag , Move Message , Archive : Show a button with this action for a short swipe, or perform the action without a button for a long swipe
Use Drag and Drop
If you’re using an iPad with iOS 11, you now have access to a variety of gestures that enable you to drag items from one app to another—for example, dragging one or more images from Photos into an email message, or dragging an attachment from an incoming message into Messages.
Apple has some fantastic one-minute videos that demonstrate the sorts of things you can do (even though they mostly show Messages rather than Mail):
Here are the basic steps to follow to drag items into Mail:
Open Mail, and create a new message (or reply to an existing message).
Drag up from the bottom of the screen to display the Dock.
Touch and hold the icon for another app (such as Photos). Then drag to the left or right side of the screen to make a split view with that app, or drag anywhere else for slide-over view.
Touch and hold an item (a graphic or a file) in the other app, drag it into the in-progress message in Mail, and lift your finger.
To add multiple items at once, drag the first one over the Mail window but don’t lift your finger yet. With another finger, tap additional items in the other app. Now lift the first finger.
You can follow similar steps to drag attachments from a Mail message into another app, such as Messages.
Minimize In-Progress Messages
Mail in iOS normally shows only one message at a time. But there’s a brilliant shortcut whereby you can minimize an in-progress message (or even more than one), do anything else in Mail you may want to do, and then return to composing the message with a tap or two.
Here’s how it works. Create a new message or reply. Before you send it, drag the title bar (which says New Message until you fill in the Subject field, and then it shows the subject) down to the bottom of the screen (Figure 36, left). It’ll stay there indefinitely while you read other messages, navigate within Mail, or perform other activities. When you’re ready to continue composing, tap the docked title bar.

If, while an in-progress message is minimized, you start another new message or reply, only the most recent subject shows at the bottom. But if you tap that subject, all your in-progress messages—along with whatever message was showing in Mail’s main view—appear in a stack (Figure 36, above right).
Tap any in-progress message to bring it up, or tap the message at the top to continue viewing it, sending the other messages back to the bottom of the screen.
Address a Message to a Group
When you type the name (or partial name) of a group in a message’s To, Cc, or Bcc field, the pop-up menu that lists potential matches from Contacts now includes matching groups (although, oddly, it doesn’t include the group’s name, just a list of its members with the label Group). Tap a group to add all its members as recipients.
However, be aware of these limitations to using groups:
Mail adds all the email addresses for every group member to the address field. So if a contact has five email addresses in Contacts, all five of them are added. You’ll have to select them one by one in the address field and delete the ones you don’t want. But, that’s tricky because Mail shows only the contact’s name, not the email address; to discover which address any name uses, you have to double-tap it to open the contact record and see which address is marked with a gray Recent label. (“Recent”? Geez.)
Contacts in iOS 11 still offers no capability to add or edit groups. You’ll have to do that on your Mac (or in the Contacts web app at iCloud.com).
Because Contacts for iOS has no concept of smart groups, any smart groups you created on your Mac won’t appear in iOS Contacts and thus won’t be available to iOS Mail.
Handle Attachments
Mail in iOS can handle most incoming and outgoing attachments easily, if not quite as conveniently as on a Mac. You have access to iCloud Drive and other cloud storage locations for both adding and saving attachments. In addition, you can use Markup to annotate graphics before sending them.
Incoming Attachments
An incoming message that includes attachments generally shows a paperclip ![]() icon next to the sender’s name in the message list. Without any additional software, iOS devices can natively view (or play) a wide variety of file formats, including most graphics and audio formats, Microsoft Office and iWork, and PDF, among others. And Mail can even expand Zip archives (tap the Zip attachment to list its contents, swipe left to browse the files, and tap the Share
icon next to the sender’s name in the message list. Without any additional software, iOS devices can natively view (or play) a wide variety of file formats, including most graphics and audio formats, Microsoft Office and iWork, and PDF, among others. And Mail can even expand Zip archives (tap the Zip attachment to list its contents, swipe left to browse the files, and tap the Share ![]() icon to send an individual file to a different app).
icon to send an individual file to a different app).
Icons for attached files usually appear at the end of a message. If an attachments hasn’t yet been downloaded, tap its icon to download it. Attached graphics, once downloaded, appear inline in your email message. For other files, tap the icon to open it in a separate view.
To share an incoming attachment or save it outside Mail, touch and hold the attachment to display a Share sheet (Figure 37).
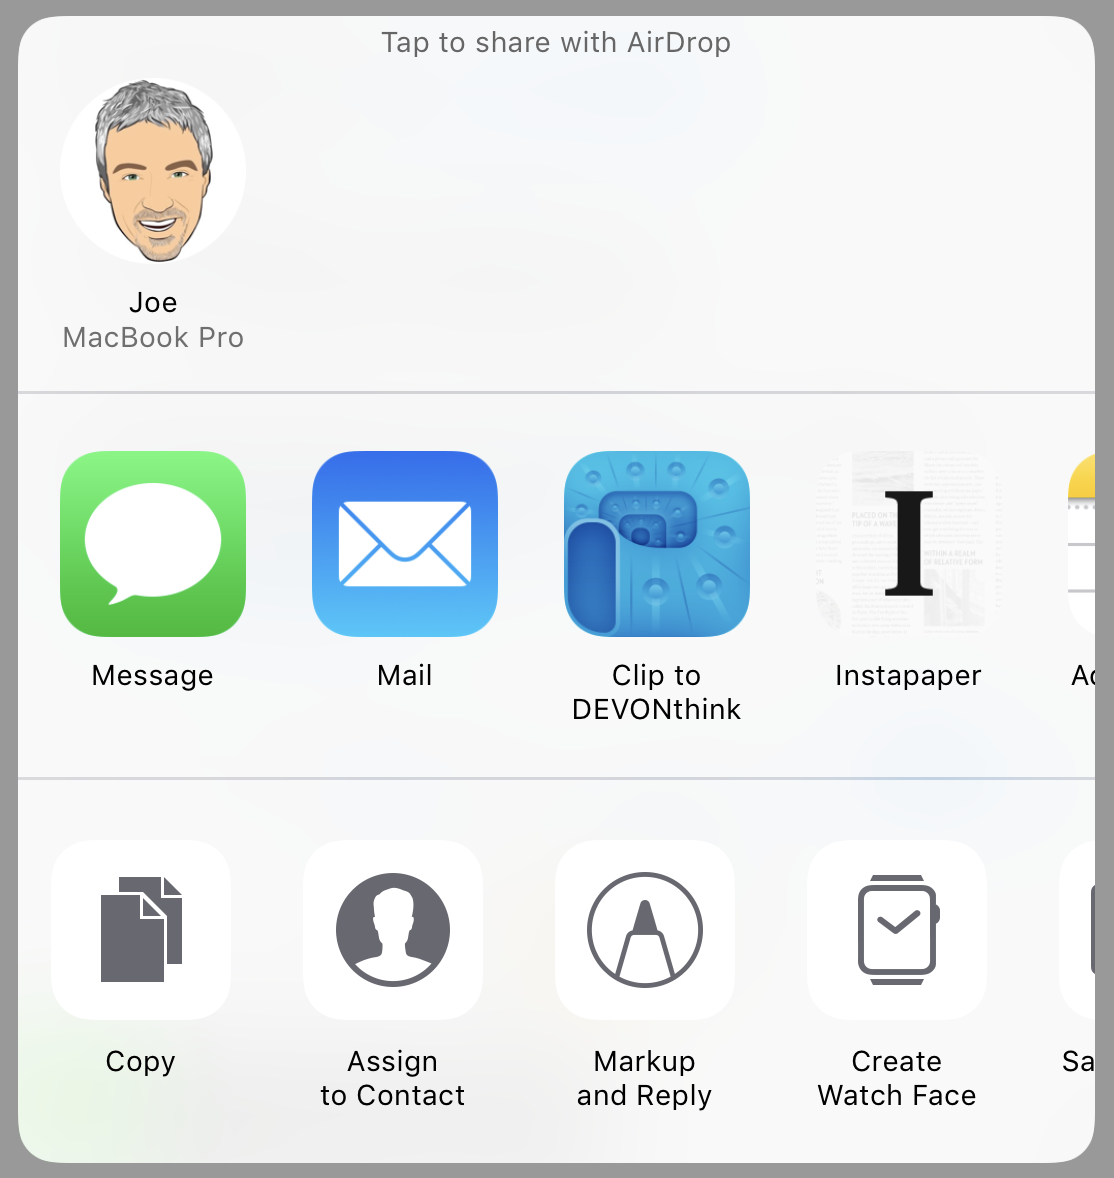
Then tap the icon for the app or action you want. Among the options are Save Image (or Save Number Images), which saves images to Photos, and Save to Files, which lets you save the attachment to iCloud Drive or to any other app or cloud service you’ve configured in the Files app.
Another action on the bottom row of the Share sheet (you may have to scroll to the right to see it) is Markup and Reply, which is available for certain graphic types. Tap this to reply to the message, attach the current graphic or PDF, and open a Markup view (much like the Markup feature in macOS) where you can annotate the image. I say more about Markup just ahead.
Outgoing Attachments
Just as iOS Mail can save attachments to almost any location via the Files app, it can also add attachments to outgoing messages from the same variety of locations. But Mail uses two different procedures—one for photos and videos from Photos, and one for all other files.
Photos and Videos
To attach photos or videos while composing a message, double-tap at the spot you want the item to go, and then tap Insert Photo or Video on the pop-up control (which may require you to tap a right arrow first, depending on the screen size or orientation). Locate the photo or video, select it, and then tap either Use or Choose (depending on the device).
If you attach large photos, you usually have the option to resize them (depending on the format and starting size):
On an iPhone or iPod touch, when you tap Send, Mail displays a list of resizing options.
On an iPad, the right side of the Cc/Bcc, From header shows the total size of the attachments. Tap that header and you’ll see a series of buttons for changing the image size.
Tap Small, Medium, or Large (the exact resulting file size is shown on each button) to resize the image, or tap Actual Size to send the original, full-size image.
If you attach a graphic or PDF, you can annotate it before sending the message using Markup, which is much like its macOS counterpart (see Markup). Double-tap the graphic and then tap Markup in the popover control. (You may have to tap the right arrow once or twice to display the Markup command.)
Mail then opens a new Markup view (Figure 38), where you can draw on the image, add text, or sign your name, using exactly the same controls available when you Add an Inline Drawing.

Other Attachments
For other files, once again tap in the message, but this time tap Add Attachment in the resulting popover (which, again, may require tapping the right arrow once or twice first). The Files window appears. Figure 39 shows the top level of the Files app; if you see this, tap an app or cloud service to see its files. If you find yourself already within an app or service and you want to choose a different one, tap Locations at the top. Once within the app or service you want to use, navigate to a file and tap it to attach it.

Like Mail in macOS, Mail in iOS supports Mail Drop for outgoing attachments—indeed, it’s on by default for IMAP and Exchange accounts and can’t be turned off—so you need not worry about attachment size.
Leave a Mailing List
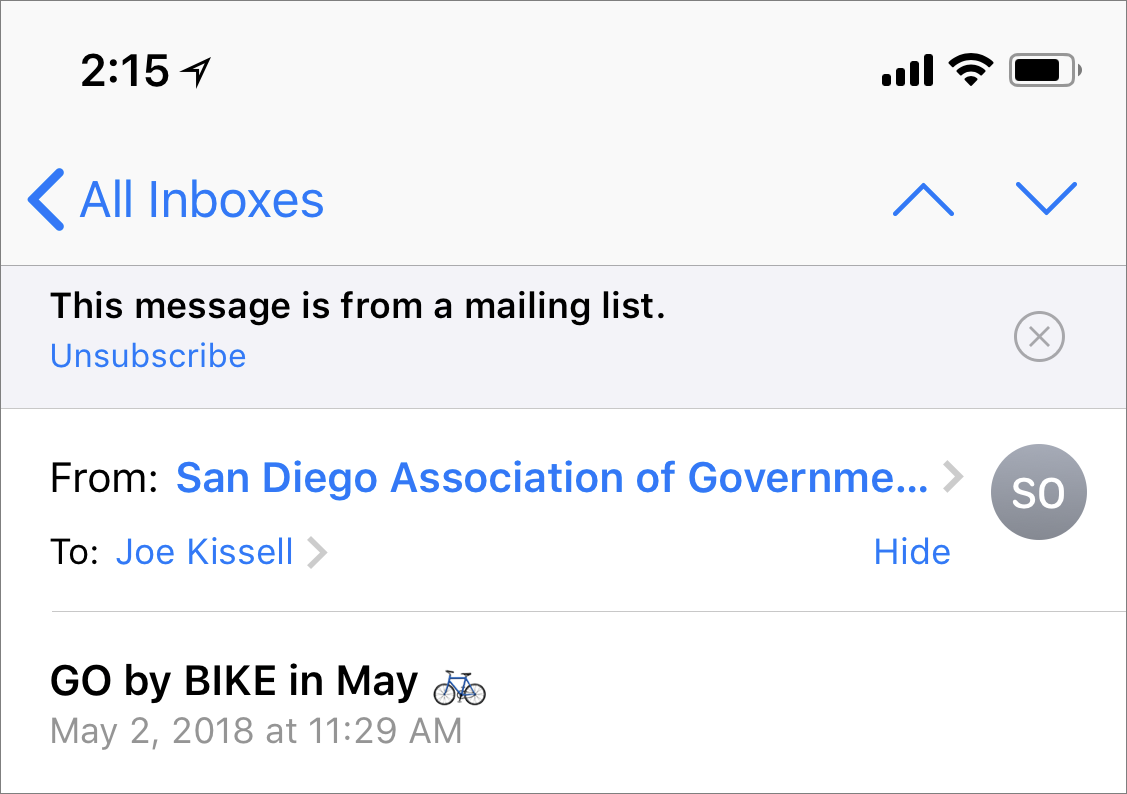
If you subscribe to a newsletter or mailing list and want to unsubscribe, there may be (should be) an Unsubscribe link at the bottom. In addition, many mailing lists add a hidden List-Unsubscribe header to the message. If a message contains this header, Mail gives you a shortcut to unsubscribe: a banner at the top of the message saying “This message is from a mailing list” (Figure 40). Tap the Unsubscribe link in this banner to unsubscribe.
Change Your From Address
If you’ve configured more than one email address or account, Mail uses the From address associated with the mailbox you’re viewing when you create an outgoing email message. When you create the message while in the Accounts view, or from within another app, the From address is ordinarily the main email address of your default account, as set in Settings > Accounts & Passwords. However, you can choose a different From address for any given outgoing message:
Compose and address the message as usual.
Tap the line in the header that says Cc/Bcc, From: address. That line expands into separate Cc, Bcc, and From lines.
Tap the From line.
Using the control at the bottom of the screen (on an iPhone or iPod touch) or the popover list that appears (on an iPad), select the address you want to use.
Tap Send.
But wait—what if the address you want doesn’t show up in Step 4? By default, what you see here are the From addresses from all the accounts set up on your device. If a given POP or IMAP account can use any of several From addresses (for example, you use [email protected] as an alias to [email protected]) and those extra addresses don’t appear in this list, you may be able to add them.
To add extra From addresses or to set the default From address for a compatible account, follow these steps:
Go to Settings > Accounts & Passwords.
Tap the name of the account in question (if it’s an IMAP account, next tap Account).
Tap the Email field under IMAP Account Information or POP Account Information—not the User Name field under Incoming Mail Server.
Tap Add Another Email, type the next address, and tap Return. Repeat if you want to add more addresses.
To select a default From address for this account, tap it; the default address displays a checkmark.
Tap Account at the top of the screen to save your settings.
Now open Mail and try the procedure I described near the beginning of this topic; you should see your new address(es) in the From selector.
Use iCloud Aliases in iOS
Speaking of multiple From addresses, iCloud offers its own take on these, in the form of aliases (refer back to Use iCloud Aliases for setup instructions). On the iCloud website, you can configure up to three extra @icloud.com addresses that deliver email to your iCloud Inbox. Mail in iOS automatically makes these aliases available to you, and you can choose one of them for any outgoing message the same way you choose any other From address.
However, one thing iOS Mail can do that macOS Mail can’t is to disable any aliases you want to omit from the menu as potential From addresses. To do this, go to Settings > Accounts & Passwords > iCloud > Mail and under Allow Sending From, turn off the switch for any alias you want to exclude from that menu. Turning off an alias here doesn’t prevent you from receiving email at that address, however.
Manage Notifications
Assuming you use either push or scheduled fetch, new messages will arrive on your device from time to time without any intervention on your part—even if Mail isn’t running or the device’s display is turned off.
You can choose whether or how you want your device to alert you when this happens. The default behavior is for your device to play a sound when a new message arrives—and, if you have Vibrate turned on as part of your ringer settings (on the iPhone only), to vibrate as well.
You can choose one or more additional notification options, too, making it more likely that you’ll notice important incoming messages. Conversely, you can turn off notification types that you find annoying or intrusive.
The options you can adjust fall into two categories: sounds and vibrations (discussed next), and visual notifications (discussed just ahead).
Sound and Vibration Notifications
Configure system-wide sound and vibration notifications (for all email accounts) as follows:
Go to Settings > Sounds (iPad or iPod touch) or Settings> Sounds & Haptics (iPhone).
Under the Sounds heading (iPad or iPod touch) or Sounds and Vibration Patterns (iPhone), set the options you prefer:
To hear a sound when new messages arrive, tap New Mail and then tap the sound you want to hear for new messages. For no sound, tap None.
For the iPhone only, to also (or instead) feel a vibration when new messages arrive, set Vibration (still under New Mail) to the pattern you prefer, or tap Create New Vibration to make your own pattern. For no vibration, tap None.
To hear a sound when outgoing messages are sent, tap Sent Mail and then tap the sound you want to hear when messages are sent. For no sound, tap None.
Visual Notifications
To change the visual notifications you receive for incoming messages, do the following:
Go to Settings > Notifications.
Tap Mail (which should appear in alphabetical order).
Make sure Allow Notifications is turned on.
Tap an account name to configure notifications for that account. If you’ve designated at least one VIP sender, you can tap VIP to set up VIP notifications, too.
For each account, or for VIPs, adjust the following settings to your taste:
Sounds: Tap this control to determine which sound and/or vibration pattern (if any) should play when incoming messages arrive for the selected account or from VIPs. (Unlike Sound and Vibration Notifications, this setting is account-specific, and it overrides any system-level notification sounds.)
Badge App Icon: When this is on (the default), Mail’s Home screen icon shows a badge that includes the number of unread messages in this account’s Inbox. To omit this account’s messages from that count, turn off this setting.
Show on Lock Screen: To enable alerts to appear on your lock screen—which is convenient for determining if you should unlock your device and read the entire message immediately, but also means anyone who can see the screen can preview your incoming messages—turn this on. (This is not a problem on the iPhone X, which hides the preview of incoming messages until you authenticate using Face ID.)
Show in History: Turn this on to show previous notifications on the lock screen, not just the most recent one.
Show as Banners: Display a banner at the top of the screen when an incoming message arrives. You can then tap Temporary for a banner that disappears automatically after a few seconds, or Persistent, for a banner that disappears only after you tap it.
Show Previews: To include a preview of message contents in alerts, set this to Always or When Unlocked (Default).
Use Calendar and Contact Shortcuts
On occasion you’ll see a banner at the top of an incoming message (Figure 41) with an icon and message (such as “Siri found new contact info,” “Siri found updated contact info,” or “Siri found 1 event in this email”) and a link that says “add.” Click the link to confirm and add the information.
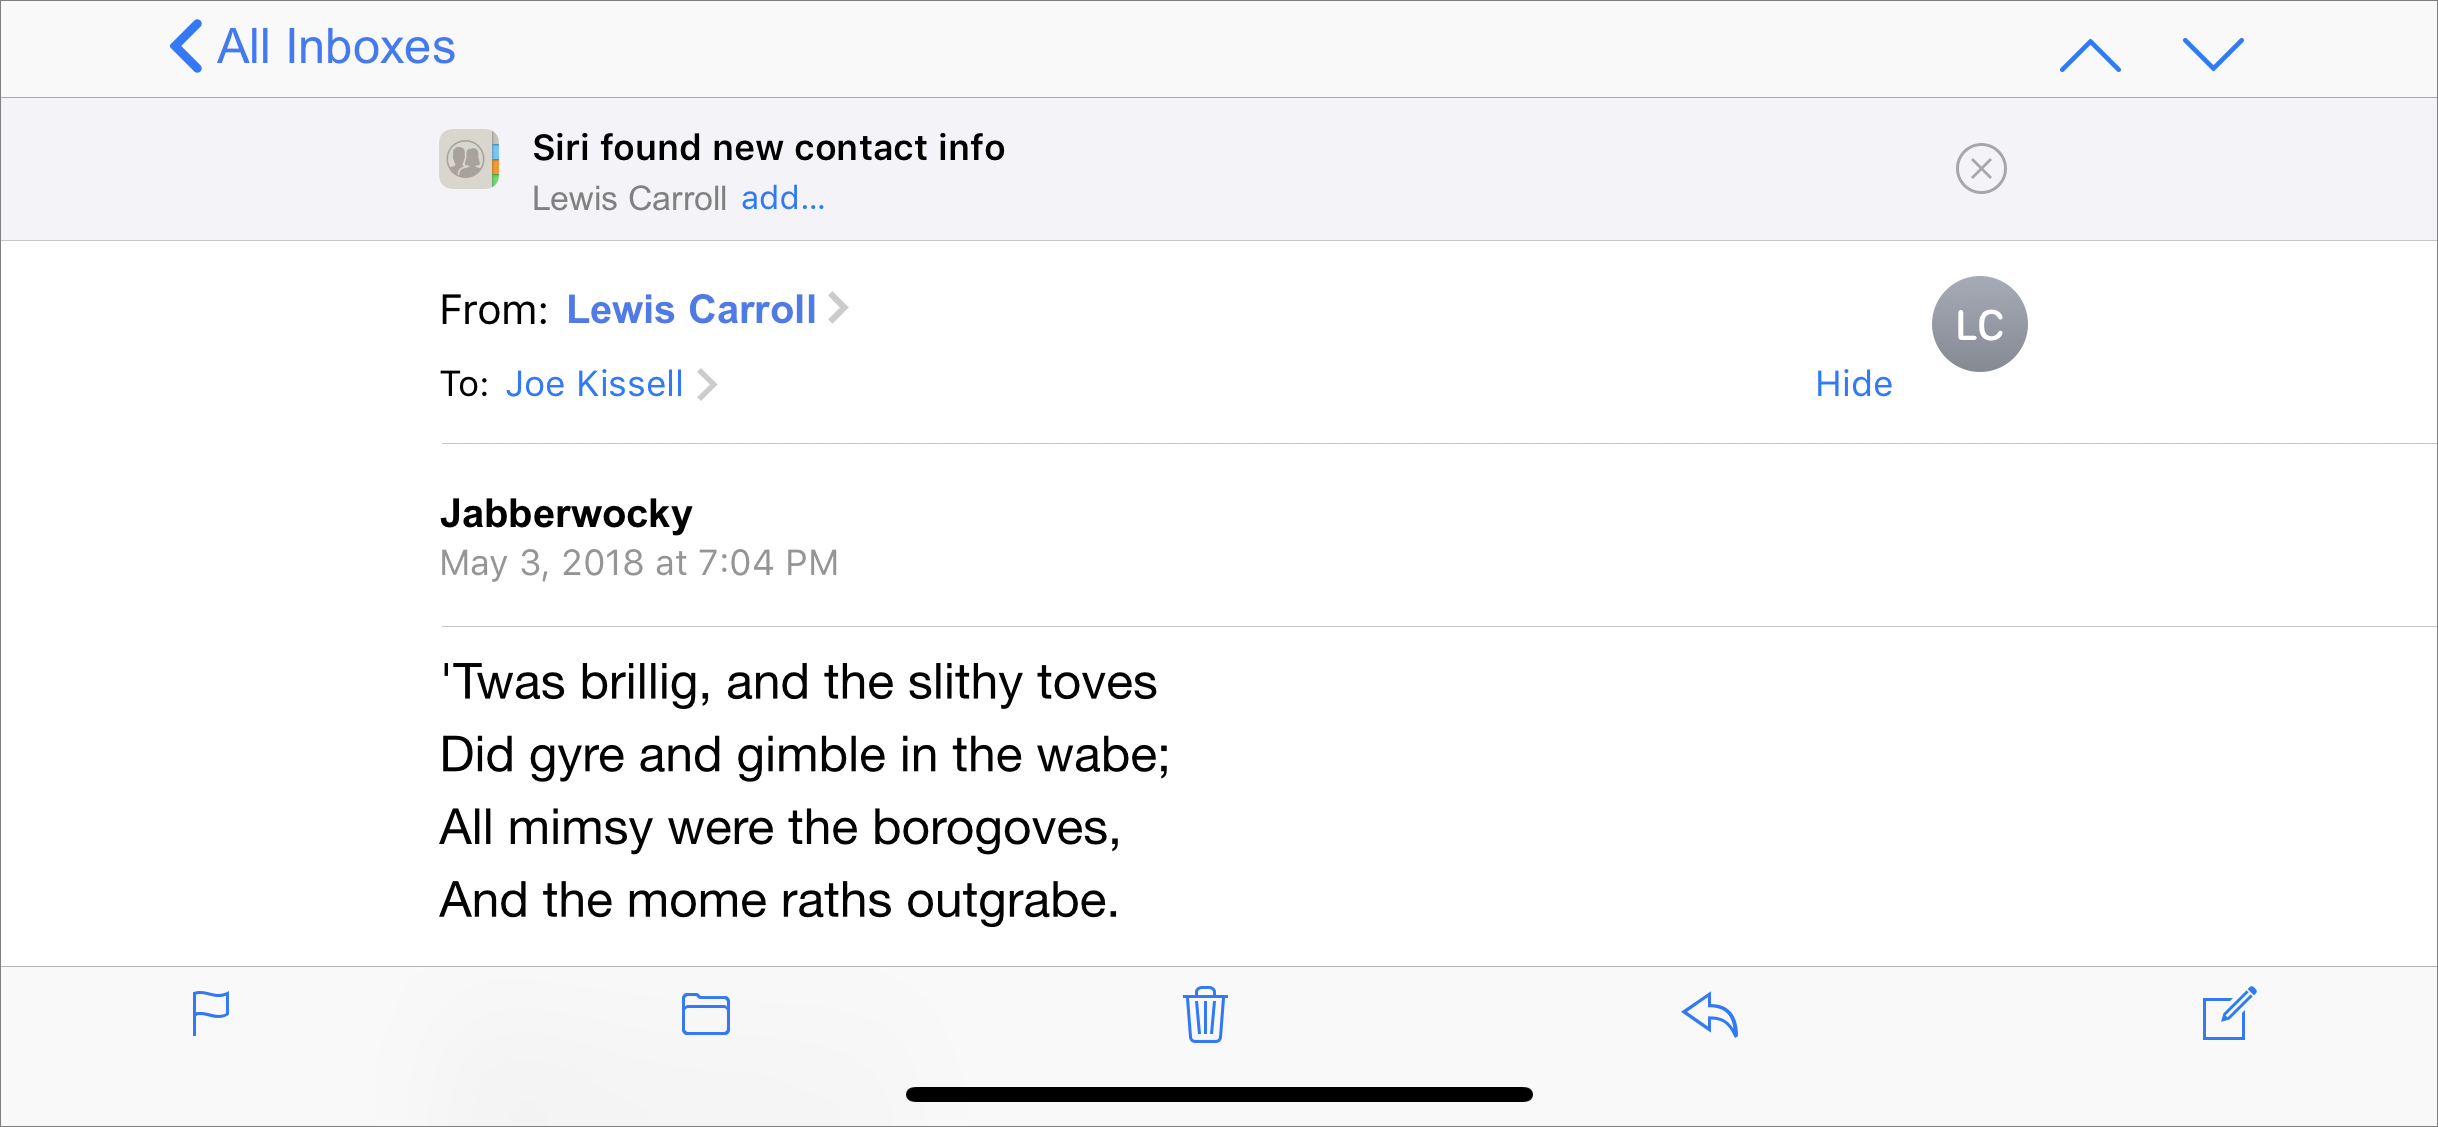
When these banners appear, it’s because Mail has found something in the message that it identifies as contact or event information—this is the iOS version of Data Detectors—so the buttons are shortcuts to put that information in the Contacts or Calendar app. However, Apple doesn’t specify exactly what does and doesn’t trigger these banners. For example, I usually see Add Contact when the sender includes a phone number in the message signature, but sometimes messages with phone numbers in the signature don’t have the banner. So, although you can’t force the banners to appear, you can at least use them as shortcuts when they do show up.
Filter Your Inbox
In iOS Mail, as in macOS Mail (see Message Filters), you can filter your currently selected mailbox to display only those messages that match certain criteria you specify.
To filter your messages, click the filter ![]() icon at the bottom of the message list. By default, Mail then displays only those messages in the currently selected mailbox that are unread, and text at the bottom of the message list reads “Filtered by: Unread.” (If you’ve enabled the optional Unread mailbox, the default filtering in that mailbox is Flagged.) To change which messages appear when the filter is on, click the blue text (in this case, “Unread”) to display a menu.
icon at the bottom of the message list. By default, Mail then displays only those messages in the currently selected mailbox that are unread, and text at the bottom of the message list reads “Filtered by: Unread.” (If you’ve enabled the optional Unread mailbox, the default filtering in that mailbox is Flagged.) To change which messages appear when the filter is on, click the blue text (in this case, “Unread”) to display a menu.
In this menu, click one or more items to check or uncheck them; Mail displays only messages matching the checked items.
To stop filtering your messages, click the dark-blue filter ![]() icon.
icon.
Use VIPs
I explained how VIPs work in macOS back in VIPs; I also mentioned there that any VIPs you set up in macOS Mail sync to iOS Mail and vice versa, via iCloud. The process for handling VIPs in iOS Mail is slightly different than in macOS Mail.
To use VIPs in iOS Mail, first make sure VIP appears in Mail’s top-level Mailboxes list; if not, navigate to the top-level Mailboxes view, tap Edit, and then tap the circle ![]() next to VIP to select it
next to VIP to select it ![]() . Tap Done. Also check to see that any prospective VIP is listed in Contacts—only an existing contact can become a VIP.
. Tap Done. Also check to see that any prospective VIP is listed in Contacts—only an existing contact can become a VIP.
Then, to add your first VIP, tap VIP, then Add VIP. Then tap a person’s name. While in that view, you can tap Add VIP to add more VIPs.
To add VIPs in a subsequent session, tap the blue info ![]() icon next to VIP in the top-level Mailboxes list. Tap Add VIP, and then tap a person’s name. Repeat this step as needed to add more VIPs.
icon next to VIP in the top-level Mailboxes list. Tap Add VIP, and then tap a person’s name. Repeat this step as needed to add more VIPs.
To delete a VIP, swipe from right to left across the VIP’s name and tap Delete.
Once you have at least one VIP, you can view all the messages from VIP senders in any of your Inboxes by navigating to the Mailboxes view and tapping VIP.
Move a Message to a Different Account
Although it may not be apparent at first glance, you can move a message from anywhere in one account to a mailbox in a different account. For example, if you receive a message in your iCloud account but want to file it in Gmail instead, you can. Likewise, you can move a message from a POP Inbox to a mailbox in an IMAP account.
To move a single message to another account, tap the File ![]() icon while viewing the message (or, to move multiple messages, tap Edit while the message list is visible, tap one or more messages to “check” them, then tap the File
icon while viewing the message (or, to move multiple messages, tap Edit while the message list is visible, tap one or more messages to “check” them, then tap the File ![]() icon). Tap Other Mailbox. Then tap Accounts at the top of the screen, then an account name, and finally a mailbox name.
icon). Tap Other Mailbox. Then tap Accounts at the top of the screen, then an account name, and finally a mailbox name.
Search for Messages
iOS offers shortcuts that make searching fast and efficient. Mail defaults to searching message metadata (sender, recipient, subject, date, and so on) across all mailboxes in all accounts—but only data your iOS device has cached and Spotlight has indexed, which almost certainly won’t be all of your messages.
To search in Mail, swipe downward to scroll to the very top of the message list for any mailbox and enter some text in the search field. Mail searches the message metadata it has indexed and immediately displays a selection of people, subjects, mailboxes, and dates matching your search term. If the subject, person, or other criterion you want is in the list, tap it to display matching messages; then tap a message to display its contents.
If you don’t see a match, tap the top most item in the list (Search for “Search Term”) to perform a conventional search of message contents. When you do this, a thin blue progress bar appears under the Search field and fills as Mail searches for matches. If you swipe down slightly on the results list, you’ll see All Mailboxes and Current Mailbox buttons under the progress bar; tap either one to specify the search scope. Mail remembers your choice and uses it for subsequent searches. If Mail doesn’t find any matches among messages it has already cached, it continues the search on the server. This may take some time; if you leave the search open long enough, more results gradually appear.
You can also find Mail messages (along with other kinds of data) when Mail isn’t open by using the system-wide Spotlight search. Swipe down on the home screen (although not from the very top edge) to display a Search field. Type in this field, and iOS immediately begins returning matching items.
Troubleshoot iOS Mail Problems
The Fix Mail Problems chapter contained instructions for solving problems with the macOS version of Mail. iOS Mail has its own set of problems and solutions, and this final topic covers some of the most common ones.
Mail Downloading Problems
Certain very specific situations give rise to odd behaviors in which Mail refuses to display messages that ought to have been downloaded. For example, when a message has just appeared on your iOS device and you tap it during the brief interval between when the headers have been downloaded and when the rest of the message arrives, Mail may get confused, stop downloading the rest of the message, and never try again. I’ll mention two variants of this problem.
Message Has No Content
In the message list, a message’s preview may say “This message has no content.” If you ignore that and tap it anyway, sometimes you’ll see the message just fine, but other times the message body says only, “This message has not been downloaded from the server.” On the other hand, sometimes the preview displays just fine but the message is nevertheless blank.
I’ve found that I can usually get the message back by force-quitting Mail and reopening it. To force-quit Mail, double-press the Home button, and then slide the thumbnail of the Mail screen upward and “off” the screen. Then press Home again and reopen Mail. (On a device without a Home button, such as the iPhone X, swipe up from the bottom of the screen and hold for a moment at the halfway point to display the App Switcher. Swipe until you see Mail. Then touch and hold on the Mail thumbnail and tap the Delete ![]() icon when it appears. Swipe up again from the bottom of the screen to return to the Home screen, and then reopen mail.)
icon when it appears. Swipe up again from the bottom of the screen to return to the Home screen, and then reopen mail.)
Message Cannot Be Displayed
A related problem, which appears under conditions I haven’t been able to nail down, is that a preview appears correctly in the message list, but when you tap the message to view it, the message body says, “This message cannot be displayed because of the way it is formatted. Ask the sender to send it again using a different format or email program,” followed by the message’s current format, such as “multipart/alternative” or “text/plain.”
Force-quitting Mail sometimes brings such messages back, but this solution is less consistently successful than with the “This message has no content” error. If it doesn’t work, a more reliable (although much more inconvenient) solution is to remove that entire email account from your iOS device (go to Settings > Accounts & Passwords > Account Name, tap Delete Account [or, for iCloud accounts, Sign Out], and tap Delete again to confirm)—and then add the account again from scratch.
Special Mailbox Problems
When you set up a new account that isn’t a predefined option (such as Google, AOL, or Yahoo), Mail has a tendency to guess incorrectly about which mailboxes should be used for Drafts, Sent, Trash, and Archive. And even if Mail guesses “correctly,” you can override that choice if you prefer.
To specify which mailbox Mail should use:
Go to Settings > Accounts & Passwords > Account Name > Account > Advanced (or, for iCloud accounts, Settings > Accounts & Passwords > iCloud > Mail > Advanced; for Exchange accounts, Settings > Accounts & Passwords > Account Name > Mail > Advanced Settings).
Tap the name of a mailbox under Mailbox Behaviors and then tap the mailbox you want to use for that purpose. Note that you can choose either a local mailbox (at the top, under “On My iPhone/iPad/iPod touch”) or—what you more likely want—a mailbox on the server.
Back in Untangle Special Mailboxes, I explained what to do in macOS Mail if you have duplicate special mailboxes in an account. If you’re experiencing this problem, you can follow essentially the same steps on an iOS device, except that instead of going to Mail > Preferences > Accounts > Account Name > Mailbox Behaviors, you visit the Advanced (or Advanced Settings) view as described above.
Network Problems
If you’re having trouble sending or receiving mail, first try the following suggestions.
If you’ve never been able to send or receive mail on your device for a given account, try deleting the account (go to Settings > Accounts & Passwords > Account Name, tap Delete Account, and tap Delete again to confirm) and then adding it again.
For cases in which you have previously been able to send or receive mail from a certain account, but it’s stopped working, do the following:
Make sure you have an active data connection. In the status bar at the top of your screen, you should see a symbol or text indicating that you’re connected to the internet via Wi-Fi or a cellular network, such as LTE, 4G, 3G, EDGE (E), or GPRS (shown by a small circle icon). If not, connect to a Wi-Fi network manually or move to a location where you have cellular data access (for devices that support it).
If you have a Wi-Fi data connection, make sure it’s active. An easy way to test this is to open Safari and try to load any webpage. (Sometimes a device makes a local network connection over Wi-Fi but can’t get out to the internet; for example, because you’re using a public hotspot that requires you to log in using a browser first.)
If you’re using Wi-Fi and you can’t access the internet (or you can, but you still can’t receive email), turn off Wi-Fi (in Settings > Wi-Fi) to see if you can retrieve email over the mobile network.
Turn off your device, turn it back on, wait for your network connection to be reestablished, and open Mail again.
In the vast majority of cases, one of these suggestions will get your email working again.
Can’t Receive POP Mail
If Mail displays an error message every time it tries to connect to a POP account, make sure that no other device (a computer or another mobile device) is trying to connect to the same account at the same time. (Unlike IMAP, some POP accounts don’t support multiple concurrent connections—or even connections from multiple devices within a short period of time.)
Can’t Send Mail
If you see an error message when sending mail, or if the progress bar at the bottom of the screen never makes any progress, and none of the previous network-related suggestions helped, try the following:
Change the SMTP port for the account. Mail automatically tries the most common ports for SMTP (25, 587, and 465) and automatically uses authenticated SMTP for outgoing mail if available. But if your email provider requires a different SMTP port (such as 2525), go to Settings > Accounts & Passwords > Account Name > Account > SMTP, tap the server listed under Primary Server, enter a new port number in the Server Port Field, and tap Done. Mail attempts to verify the new port, and it saves the setting only if verification was successful. If so, try sending the message again.
Turn on one or more additional SMTP servers for the account that’s unable to send. Go to Settings > Accounts & Passwords > Account Name > Account > SMTP as in the previous step, tap the name of another server, tap the Server switch to turn it on for that account, and try resending the message. (However, be aware that in practice, this often fails, because SMTP servers tend to reject messages whose From address doesn’t match the sending account.)
If all else fails, and your account is accessible via a webmail interface, log in using Safari and send your message there.
Other Suggestions
If you encounter any other email problems with your iOS device, or if none of the previous suggestions helps, you have several other options:
If your account supports webmail, try checking your email temporarily in the Safari app.
Consult Apple’s If you can’t send or receive emails on your iPhone, iPad, or iPod touch page on the web.
Post an inquiry in Apple’s Using iPhone support community or in the Using iPad support community.
Ask a Genius at your local Apple Store.