
Set Up Calendar Alerts
The best thing about entering an event in your electronic calendar is that it doesn’t stop at that. Unlike the paper version that we had to remember to check, the calendar on your Mac (and iPhone and iPad) can remind you about events, too.
If you need more jogs to your memory, set multiple alerts. For instance, you might set one to the night before, when you need to lay out your clothes, and another for when it’s time to leave. You can even set up an alert that sends you email or opens a file.
Once you’ve figured out an alert system for yourself, you’ll never get caught off guard by a forgotten commitment again.
Understand Alert Basics
To create a basic alert, open an event’s Info pane and then click the event’s time. More options appear, including an Alert pop-up menu. Click this and choose a time—At Time of the Event, 5 Minutes Before, and so on. (I talk about custom alerts later in this chapter.)
To set another alert, click the Plus ![]() icon beside the Alert pop-up menu. I often set an alert for when I need to prepare for an event, as well as one right before it begins.
icon beside the Alert pop-up menu. I often set an alert for when I need to prepare for an event, as well as one right before it begins.
If you have second thoughts and want to remove your alert, choose None from the Alert pop-up menu.
Because your alert is not a custom alert, it takes the form that’s set up for Calendar; see Find Notification Settings. For most people, this means an alert-style notification appears in the upper-right corner of the screen (Figure 39).

Hover over the alert to reveal a Close ![]() icon at its corner and an Options menu. Click the
icon at its corner and an Options menu. Click the ![]() icon to trigger automatic snoozing, as described next. You can also snooze the alert with more granularity by clicking Options and choosing from an array of snooze times:
icon to trigger automatic snoozing, as described next. You can also snooze the alert with more granularity by clicking Options and choosing from an array of snooze times:
Snooze (Automatic): At one point the default and only option, automatic snoozing results in an alert reappearing nine minutes later if it’s either more than nine minutes before the start of the event or the event’s start time has passed. If it’s less then nine minutes before the start of the event, the alert shows up again at the time the event is to start.
Snooze for X period: You can select 5, 15, or 30 minutes or 1 hour.
Snooze until X minutes before: Pick either 5 or 15 minutes before the event’s start time.
Snooze until start time: You’re reminded at the moment the event is scheduled to begin.
Custom Alerts
It’s easy to miss the fact that Calendar lets you remind yourself in ways other than what’s set up in Notifications settings for the Calendar app (see Find Notification Settings).
Choose Custom at the bottom of the Alert pop-up menu to see the possibilities:
Message with sound: When this alert-style notification appears—similar to the one shown in Figure 39—macOS plays a sound. To change the alert sound, go to System Preferences > Sound and click Sound Effects (Monterey and earlier) or System Settings > Sound (Ventura), and choose an alert sound from the list or pop-up menu.
Email: Calendar sends you a reminder email message at the alert time. The message includes your notes, but not files that you’ve attached to the event.
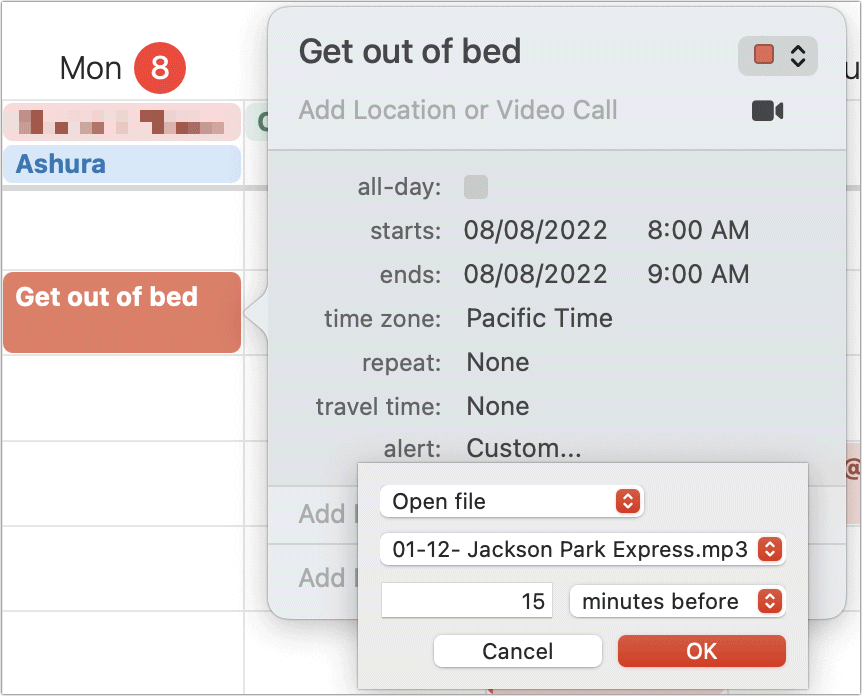
Open file: Here’s where you can get creative. At the appointed time, a file opens. It could be an audio file, email message, document, or Automator workflow. For instance, when it’s time to do your monthly accounting, a calendar event can open a spreadsheet. After you choose Open File, click the second pop-up menu and choose Other to select the file (Figure 40).
Time to Leave
Wouldn’t it be handy to know not only when an event is, but also when you need to walk out the door? Apple makes this possible with the Time to Leave alert. This alert keeps an eye on traffic conditions between your current location and your event and lets you know when you should leave to get there on time.
Enable Time to Leave in choose Calendar > Preferences/Settings > Alerts: check the Time to Leave box.
Calendar tries to find your starting point to determine when you need to leave in what seems like a non-obvious way: it tries to sort out where it thinks you’ll be in order to provide a guess of when you need to leave to arrive on time for the event you’re modifying. Apple uses this decision tree:
Calendar first examines the location in any events that are up to three hours before the one you’re adding an alert to.
If there isn’t an event with a location, Calendar next turns to your work address or home address, depending on the time of day. (Your work hours reflect Calendar’s settings for when your day starts and ends, as described in General Preferences, in the “Hours in a day” bullet item.)
Finally, if your Contacts card doesn’t include your addresses, Calendar uses your computer’s current location.
Create a new event, enter a Location for it, and a Time to Leave alert is automatically created—click the event time, and you can see it chosen in the Alert pop-up menu.
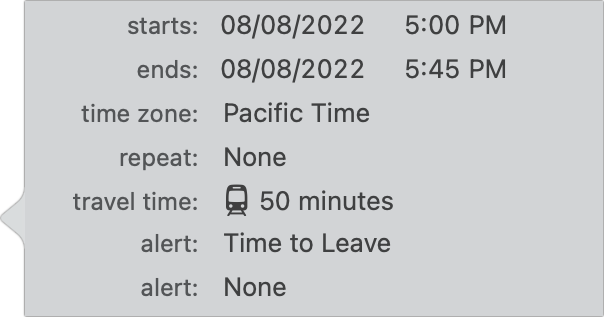
By default, Time to Leave reflects driving time. If you plan to walk or use transit, choose that from the Travel Time pop-up menu (Figure 42).
Now you can see the problem with this estimate: if the precise end-to-end time is shown, that may be insufficient to get from inside your home or another location to the start of the directions! Let’s say you get the alert, you’re on the ninth floor of a building, and haven’t brushed your teeth! Fortunately, Calendar has you there, too. With a travel time option selected, the alert pop-up menu adds the option to trigger 5, 10, 15, or 30 minutes or 1 or 2 hours before travel time. This can help you manage what you need before your trip by foot, car, bike, or public transit begins.
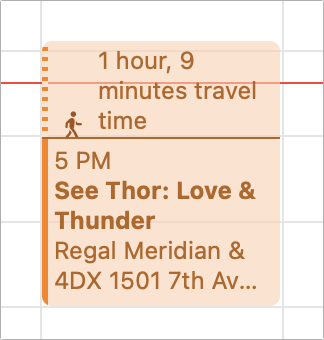
Travel time selection also provides a graphical aid: your calendar event now expands to the precise number of minutes before the start time you picked to incorporate the current estimate for travel time.
Apple offers three elements to help distinguish your event from travel time (Figure 42): a horizontal dividing line between travel time and the event start time, a dotted line to the left of the travel time portion of the event listing, and a description with an icon, time, and the label “travel time.”
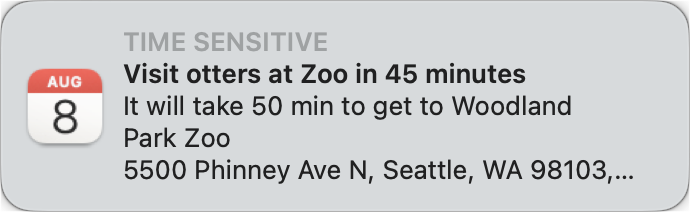
When an alert appears, it includes the travel time in narrative form (Figure 43). Hover over the alert and a Directions button appear—click it to open Maps with the destination filled in.
Modify Your Default Alerts
Although a new Calendar event doesn’t include alerts by default, you can change that, even varying it by the calendar account. For example, you can specify that events added to an On My Mac calendar always have an alert included by default, but events added to an iCloud calendar do not include an alert by default.
To change your default Calendar alerts:
Choose Calendar > Preferences/Settings > Alerts.
Choose the account you want to alter from the Account pop-up menu (Figure 44).
Click the Events and All Day Events pop-up menus, and then choose an alert time if you want to add one.
If you chose something other than On My Mac in step 2, such as iCloud or Yahoo, the alerts you set up in the previous step propagate to all your Macs that are using Calendar with that account. If you don’t want this to happen, select the “Use these default alerts on only this computer” checkbox.
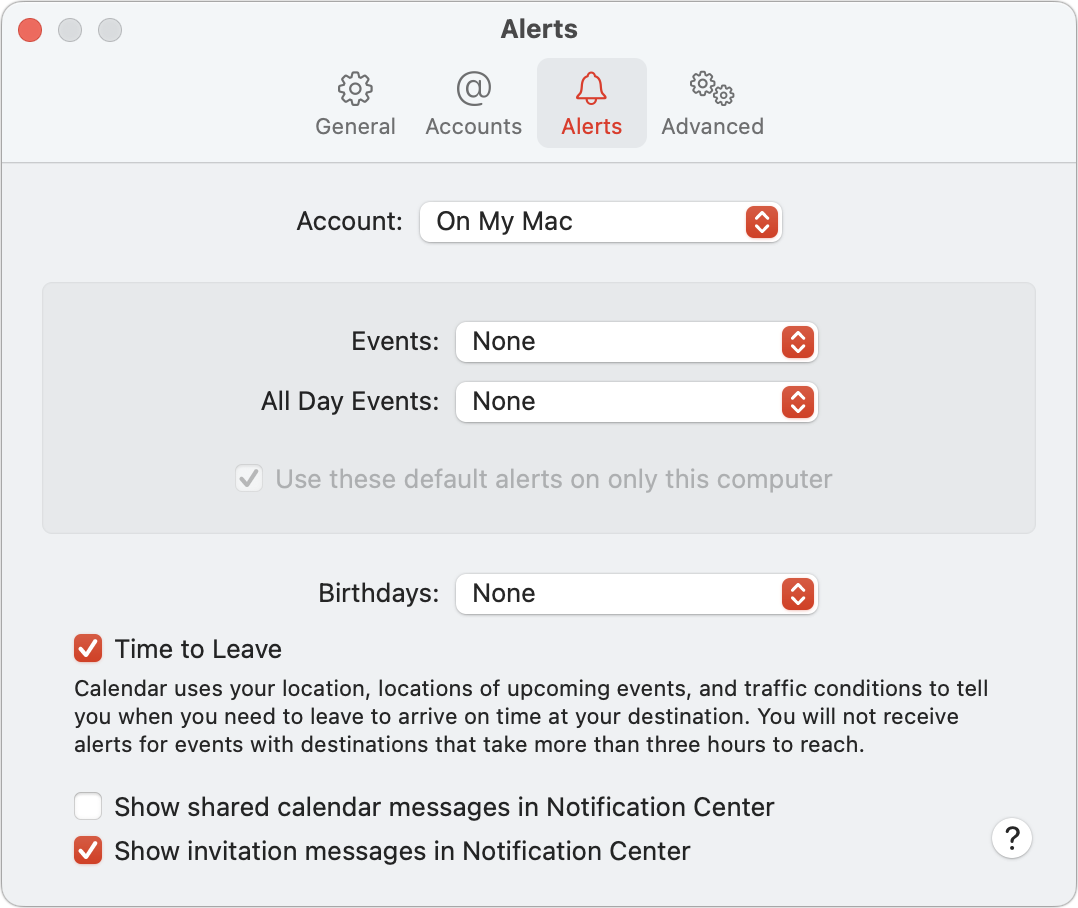
Figure 44: You can set different default alerts for each of your calendar accounts.
If you specified a default alert for Events or All Day events, then when you create a new event, that alert is applied automatically and you see it with (default) appended to it in the Info pane when the time fields are not expanded (Figure 45).
So, what happens if you change the default alert again? Default alerts for existing events update to reflect your new alert preference. For instance, say your original default alert for events is set to 5 Minutes Before. If you always end up being late, you can switch that setting to 10 Minutes Before and alerts for all events using the default change. Alerts that you chose manually using the Alert pop-up menu stay put.

Turn Off Alerts for a Single Calendar
If you turn on default calendar alerts for an account, you may soon ruefully consider turning them all off again. This might not be necessary. If it’s one calendar in particular that you don’t need to hear from, turn off its alerts. To do so:
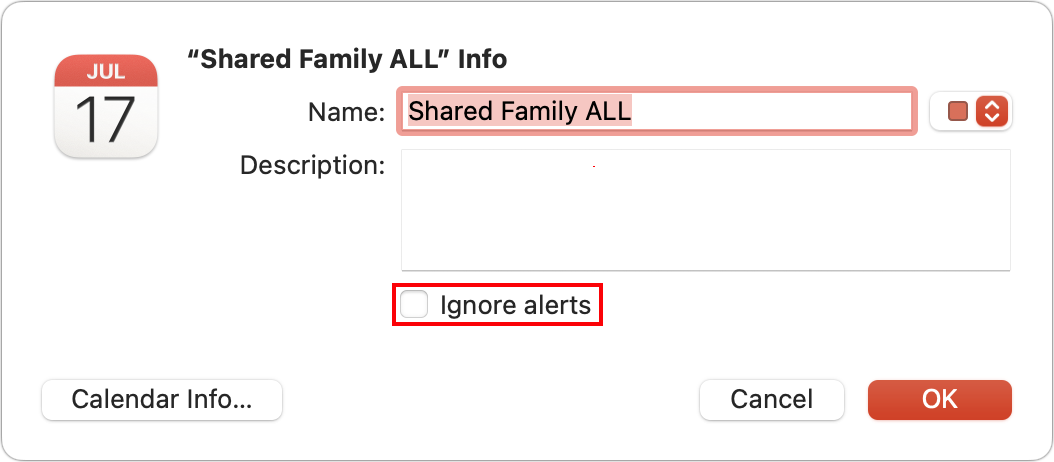
Control-click or right-click the name of the calendar in the Calendars list, and then choose Get Info.
Select the Ignore Alerts checkbox, and then click OK (Figure 47).
If the problem is a flurry of activity on this calendar—say, because of a big event coming up with many activities—you can go back to this dialog afterward and turn the calendar’s alerts back on.