
Clean Up Your Files
When you clean up old paper files, you’re at the mercy of the physical world. Maybe you (or whomever had the files before you) had the prescience to store related files in clearly marked boxes, or perhaps files are completely haphazard. Either way, you must open a box, open each folder, and handle each file.
With digital files, you’re not limited to pushing atoms around a space. There’s still clutter and stuff to sort through, but you can use the tools and techniques we’ve covered so far to make quicker work of it.
Set a Cleaning Strategy
Establishing a good file management strategy is primarily about looking forward: how you act on files you will create or receive. As time goes by, that structure makes it easier to locate those files later.
What about the files that existed before you adopted your strategy? They may be organized in similar schemes, or they might be in a condition best described as “a tornado ripped through the filing room.” Either way, you can apply the techniques we’ve covered to your old files, remove what you don’t need, and generally get to a state that’s good for your files and your mental health.
Start Easy
In my book Take Control of Your Digital Photos, one of the struggles I describe is finding the time to work through the backlog of unsorted photos. It’s so easy to say to yourself, “This weekend I’m going to sit down and organize all my old photos!” And then something comes up, or the task is much larger than you expected, or you don’t make much progress, and the goal is abandoned.
Dealing with all your files is the same way. Break the job into smaller tasks that are more manageable. At the beginning of this book, I encouraged you to ask yourself, What Is the Scope of the File Management? Now, consider the scope of the existing files that need organization. Some possible strategies could include:
Choose a handful of folders to sort through. Not your entire Documents folder or that nested series of
Old_Documents/Old_Stuff/To_Filefolders you may have been stashing files in for years. When you finish with your small selection, go enjoy the beverage of your choice and then choose another handful of folders. (Or don’t! Take the rest of the day off.)Use search queries and smart folders to locate groups of similar files, which may share keywords or tags. Locate projects or clients or school assignments and scan through them.
Work backward through your archive by date. Set up smart folders to show all the files created in 2017, for example, or in the last half of 2017.
If you have files with the same identifying information, such as old utility bills, duplicate the rules you created in Automate with Hazel that are currently watching for new files in the Downloads folder and point them at your old files.
Take advantage of existing folder hierarchies and adapt them to your current system. Maybe you already have folders for bills and bank statements, but they’re in separate locations.
If all the older files are thrown together haphazardly, maybe you keep them in place but assign tags to them, saving you the trouble of moving files into other folder hierarchies.
Find and Eliminate Duplicates to cut down the amount of clutter overall.
Free Up Storage Space, which is often a quick way to delete large unnecessary files or folders and give you the satisfaction of recovering large amounts of storage space.
Most of all, remember that cleaning up files does take time. You will run into situations where you’ll need to dig into folders of files to determine what can be deleted or filed, just as if you were going through those cardboard boxes of paper files.
Clean with Spotlight and Smart Folders
When faced with a mass of files and folders, you want to break them down into more manageable piles. One way of doing that is to locate files you haven’t touched recently by searching in Spotlight by date.
Let’s say you want to use the year 2018 as a starting point. Start a new Spotlight search (choose File > Find) and set the following criteria using what we learned in Search in the Finder:
[Last opened date] is [after] 1/1/2018
[Last opened date] is [before] 12/31/2018
However, that search brings up too much. In Figure 72, I’m seeing catalog files and backups for an old version of Luminar, a photo editing application, on my Mac.
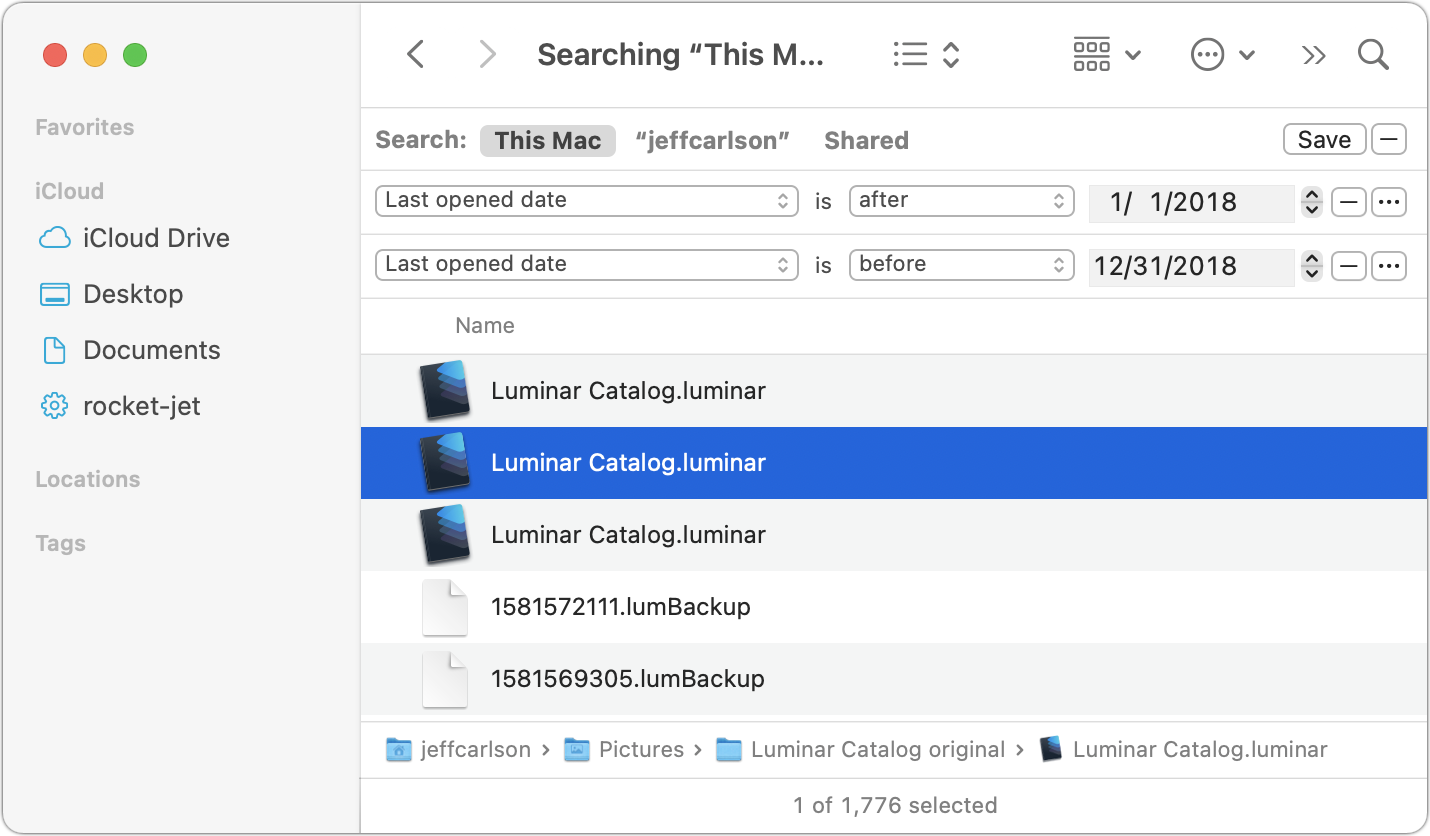
When I select an item, I see its path at the bottom of the window. That could help me start to sift through that location for files that need to be archived or deleted, but in this case I want a better pointer. So, next I’ll narrow the search to include only folders last opened in 2018 by adding the following criterion:
[Kind] is [Folder]
This result is much easier to handle (Figure 73). I can right-click (or Control-click) an item and choose Show in Enclosing Folder, and then deal with the folder and its contents by moving, deleting, or tagging them.
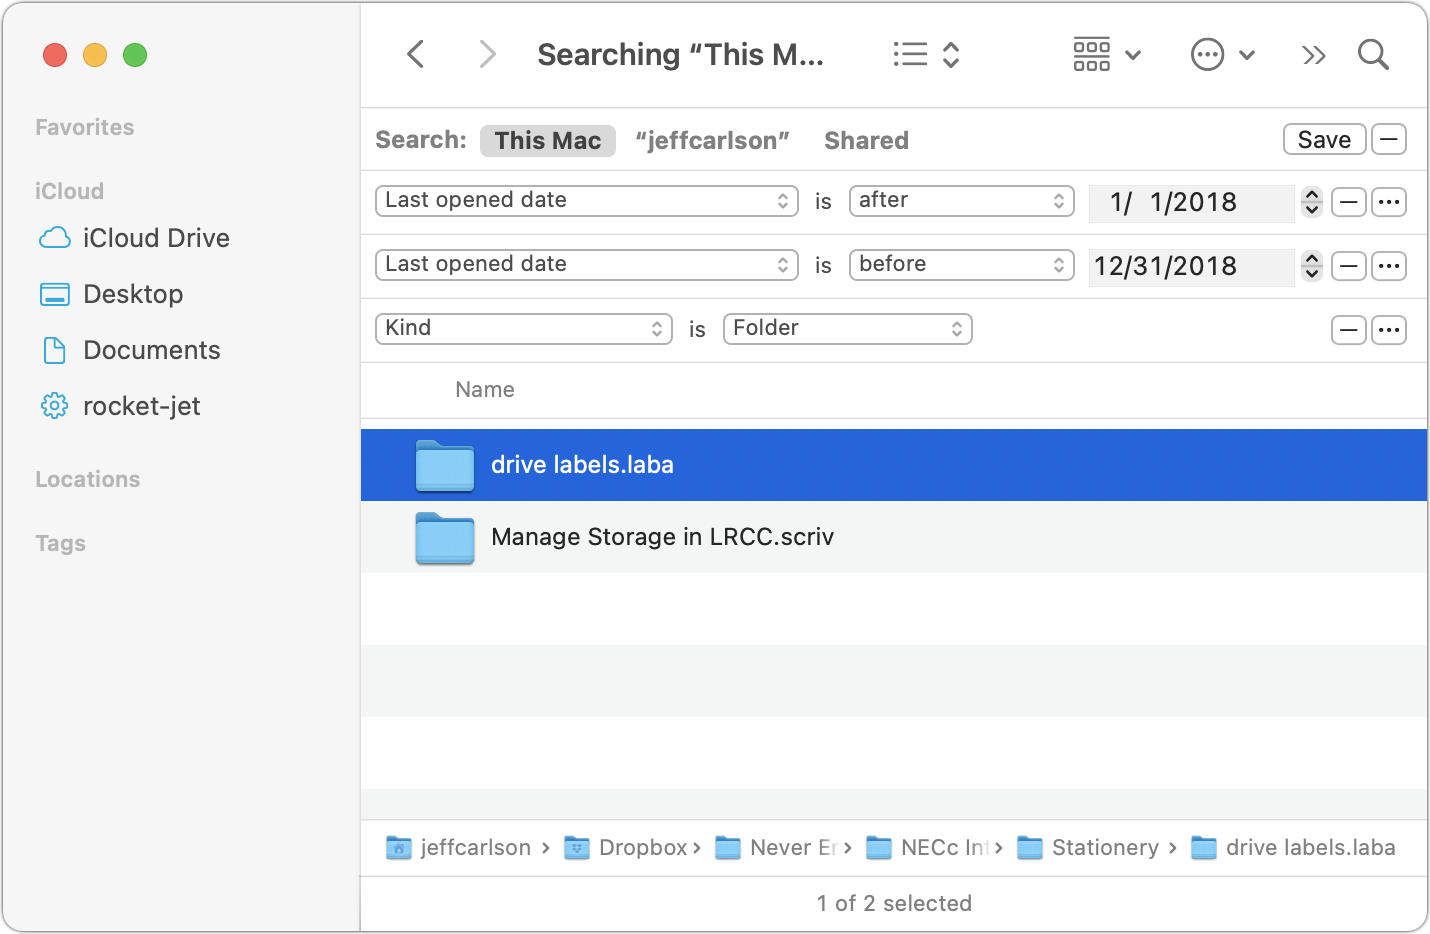
Alternatively, I could add tags to items in the search window, such as a movelater tag set to yellow for easy identification later.
If you use Hazel, the built-in Old Items rule does a variation of this search. All you’d have to do is specify a new folder, Duplicate the Old Items rule, and assign the duplicate to the new folder.
Find and Eliminate Duplicates
Another annoyance with files over time is that they seem to spawn duplicates. Apps dedicated to dealing with them are available, like Gemini 2 (just ahead), but handling them still requires that you evaluate what the software thinks is a duplicate and take action.
Here’s a simple way to search for duplicates using Spotlight:
Navigate to a folder you want to check and choose File > Find to create a new search.
Leave the first default criterion at its default, which is:
[Kind] is [Any]
- Hold Option and click the More
 button that appears in place of the Add
  button. Set the condition to the following to remove folders from the results:
[None] of the following are true
<code>[Kind] is [Folder]</code>Click the Group By
 icon on the toolbar and choose Kind.
Option-click the Group By
icon and choose Name to sort the items by name.
Now, the files of the same name and kind appear next to each other in the list (Figure 74). Select one to reveal its path at the bottom of the window and decide whether to keep it or not.

Granted, that’s a fairly laborious approach. The app Gemini 2 by MacPaw in macOS does a much better job of finding and presenting duplicates in a way that’s easier to determine where files are located (Figure 75). You can also mark duplicates for removal, and then throw them all in the Trash at once when you’re ready.

Free Up Storage Space
This book is mostly focused on helping you with the contents of your files, but storage space is always a part of that. Plus, it can be extremely satisfying to dump gigabytes of large files or junk that were taking up space.
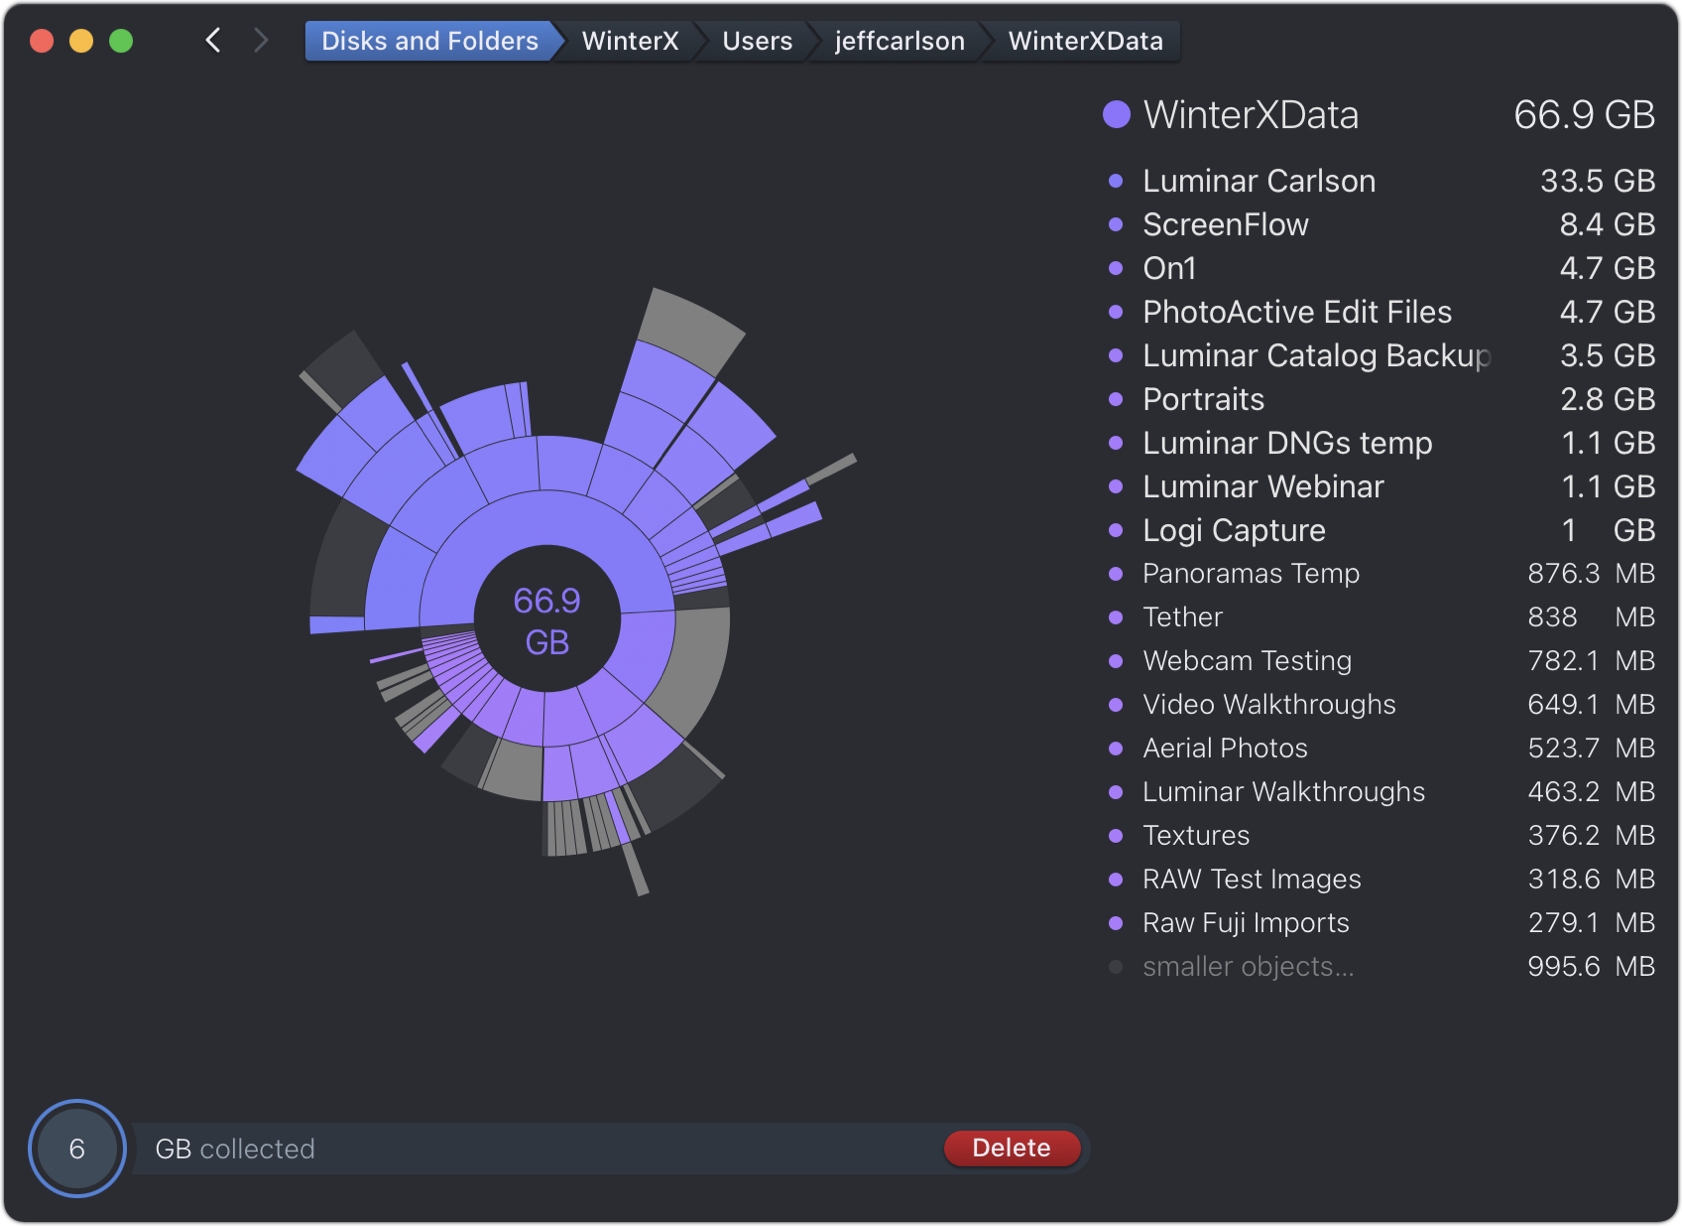
For this task, I turn to third-party software. DaisyDisk scans the drive you choose and presents a visual graph of large files, with the option to delete them straightaway (Figure 76).
If you’re not as impressed with the graphics as I am, macOS also includes a feature for identifying large files and taking other action on the computer’s storage. Choose > About This Mac > Storage and click Manage to view categories of storage being used (Figure 77).

The tool also lets you browse through things like images and documents attached in the Messages app, review iOS Files (which are local device backups), and automatically delete movies or videos after you watch them.
I mentioned this earlier, but another way to free up storage is to Optimize Mac Storage, where files saved to iCloud Drive are temporarily removed as needed and replaced with small proxy files. When you need the original, it’s downloaded from iCloud.