10. Seeing Like an Inspector
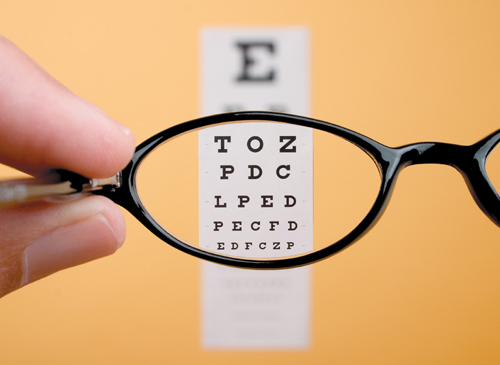
Figure 10.1. Eyeglasses. © Gene Chutka (istockphoto.com/gchutka)
The most significant obstacle to overcome when you produce photos for stock is how you judge your own finished work. It is perfectly natural to have emotional attachments to your photos due to the combination of the experiences that occur in their creation. Everything from the pre-production visions in your mind’s-eye, to what happened when the photos were captured, to everything you put into them during post-production can affect your perception of the final output.
Unfortunately, these attachments cloud our objectivity and cause us to overlook flaws and problems that are more easily spotted by a neutral observer. This puts us at a serious disadvantage, because the person who will review our stock submissions has no emotional attachments to our photos, which are just the next collection of pixels to appear on his screen. We need to learn how to become a little more detached so that we can start to see our photos through a more objective set of eyes.
It is also very common for new contributors to have little experience in critically viewing other people’s photos. Sure, we all love to look at pretty pictures, but how often have you really scrutinized someone else’s photos at 100 percent to evaluate focus, noise, and sharpness, in the context of its quality of composition, lighting and subject matter, all the while keeping vigilant for legally problematic issues? This is what the photo inspectors do every day, multiplied by hundreds of photos. The long-term benefit of an inspector’s photo-immersive experience is a calibration of what to expect when they are viewing different photos. If you only ever critically examine your own photos, it puts you at an additional disadvantage, because you lack a sense of where your work fits into the larger context of work produced by your peers.
These problems are surmountable, though, with skills that will come with experience and practice. Being aware that the issues exist can help you adjust your expectations when getting started, and propel you to take the necessary steps to expand your vision. You are the first and most important part of the inspection process, so let’s talk about how to get yourself up to speed.
Being Your Worst Critic
This isn’t about self-loathing. This is about being as objective as you possibly can when viewing your photos at different points in your workflow. The goal is the management of your expectations, the preservation of your time, the creation of a clear path for growth, and increasing the acceptance rate of your submissions. All of this adds up to a much more profitable, productive, and satisfying experience over time. There are several points in your workflow that you will need to examine your work and make decisions about where to focus your energies or cut your losses. Inspection is a continual process.
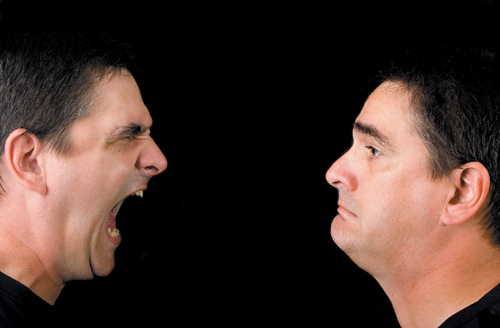
Figure 10.2. Mad at Me. © Randolph Pamphrey (istockphoto.com/imbarney22)
Capture Time
I admit to sometimes being a first-class chimper when out shooting. Not heard of chimping? You know the move. You’ve just fired the shutter and without hesitation you rotate the camera to see the preview appear on the back of the camera’s LCD as the photo is saved to your memory card (Figure 10.3). It is fun to see what you have just captured, and enjoying yourself is a significant reason to be out shooting in the first place. That said, there is a time and place for everything, and you certainly wouldn’t want to miss a shot because you were too busy staring at the back of the camera. Of course, there is useful information to be gained via that LCD preview, so check focus occasionally, make sure you are exposing properly (see Chapter 6), use the tools at your disposal to take corrective action, and take pleasure in what you have captured. I encourage you to save the serious review session for when the shooting is over, and you can put those photos up on the computer’s screen. Light can be fleeting, so capture it while you can.
Figure 10.3. Great Shot. © Nathan Jones (istockphoto.com/bjones27)

As you are shooting (and chimping), keep the following questions in mind:
• Are you working inside the sweetspot of your equipment?
• Is the subject so unique/compelling it is worth moving outside the sweetspot?
• Are you meeting your original goals for why you went out shooting that day?
First Review
Tip
Be sure to create backup copies as soon as possible after shooting so you are not relying on a single memory card to safeguard your work.
So now the shooting is done, and you are dying to dive in and see what you’ve got. Not to be a killjoy, but I do want to point out that you are probably not in your most objective mental state at this point, so you may want to refrain from making any final decisions on this first pass. Your hopes may be so high that you are overly critical of your work. One of the simplest ways to add a lot more objectivity to your process is to increase the amount of time between when you create the captures and when you sit down to separate the wheat from the chaff. Make your immediate first pass and satisfy your curiosity. You may even be able to take some corrective action and reshoot if time allows, but then give yourself 24 hours to transition out of the moment before you bring out the axe. You’ll be surprised at how much more effective you’ll be with just that bit of distance.
Post-production
You’ve invested all that time in the shoot, you’ve been thorough in making your selects for processing, and now you’re darn well going to get some photos ready for uploading. Try just focusing on the very best two or three, process them well, and prepare them for uploading. Let the rest sit on the bench until you’ve gotten some feedback on your star players. Investing your energy on a few sure winners, running them up the flag pole, and then waiting to see who salutes can be incredibly valuable in helping you decide if it is worth your time to go back and process the next group of selects from that shoot.
Objectivity Practice
Working with your own photos will only get you so far. To gain proficiency in being objective, you need to get access to as many photos created by other people as you can, then sit down and view them as if you were in charge of accepting or rejecting them for your own stock site. You’ll already be far more objective since you have no emotional connection, but the main goal here is the calibration of your eyeballs to the gamut of what is possible, and to gain a better sense of where your own work fits on the spectrum. That may seem like a tall order, but there are a number of resources for (legally) getting access to other people’s work.
First, make a habit of regularly downloading the free photos that various stock sites offer as customer incentives. These are typically found on the site’s home page, but you should also sign up for any customer-focused newsletters that are offered, as links to free photos can be included in these as well. Aside from being free practice material for you, these photos have already passed their initial round of inspection, and very likely a second round of inspection.
Note
When you are evaluating accepted photos at various sites, it is helpful to look for the upload date. The more recent the better. Standards do evolve over time, and evaluating photos approved several years ago are a poor gauge for current standards.
This won’t give you a lot of material to work with in the beginning, so also consider investing a small amount of your earnings in purchasing some credits at a site of your choosing. Then do a series of targeted searches on subjects you are interested in shooting. Evaluate the thumbnails. Which catch your eye? Why? If the site offers a zoom function, take the time to zoom in to 100 percent and evaluate. Pick one of the best shots and use your credits to download the largest size. There’s no harm in checking out the competition to see how you measure up. You want to get a feel for what is acceptable quality.
In addition, get involved in the contributor community at each site. There are so many people who are walking the same path and will share what they’ve learned along the way. At iStockphoto, there is a dedicated Critique Request forum where people can post their rejected images and get free feedback from their peers (inspectors chime in, too). It is a huge opportunity not only for feedback, but also for any contributor who wants to gain experience calibrating his or her eyeballs to see like inspectors do because you can download the full-sized versions of the rejected files and look at them up close and personal. This is probably one of the best learning tools in existence. Download the photos, take part in the discussions, listen to the feedback, offer your own, and watch your learning take off.
As you begin to make connections with other contributors, I encourage you to reach out to some of them and even consider creating your own critique group. I know a number of contributors who have formed these groups over the years and have benefited from the experience. You end up with a whole team of people with whom you can share, evaluate, cheer on, and talk shop.
Developing an Inspection Workflow
It’s time for a little role-playing. Put yourself in the shoes of an image inspector. You’re getting ready to sit down and examine several hundred photos. What do you need to get the job done? There isn’t any magic here. You need a large, good-quality, and calibrated monitor for viewing each photo at its best, and a color-managed, image-viewing application (such as Photoshop or Photoshop Elements) that will respect the embedded color profile of each photo and allow you to easily zoom to 100 percent to inspect the photo at full size. That’s it. The rest is up to your eyes and brain to methodically check each photo for any problems that could result in a rejection. You need to remain as objective as possible. Each photo stands or falls on its own merits, and there are no points given out for effort.
You might think of the act of inspection as something that only happens at the end of the workflow, but as I’ve tried to continually stress, when you are in the inspection seat of your own process, it should be happening all the time. It is in your best interest to spot and take corrective action as early in your process as possible. That said, one of the most important times to inspect is the last step, before you submit your work to the various stock sites, so that you can potentially spot any problems you overlooked before they are out of your hands.
I’ll talk about how to organize your photos in the next chapter, but one simple tip is to create a single upload folder, into which you will save a final copy of every photo you plan to upload. I can’t tell you how often I see people with uploader’s remorse, trying to cancel an upload after the fact because they realized they either uploaded the wrong photo, the wrong version of the photo, or a last-second-look revealed a problem they missed. There is no reason to waste your time this way. By placing a copy of all final versions in a single folder, inspecting that folder one last time, and then only uploading photos pulled from that folder, you can eliminate these all too common rookie mistakes.
Creating an Upload Pre-flight Checklist
Put on a cup of tea or coffee (save the hard stuff for later), pull up your comfy-yet-ergonomically-designed office chair, fire up your file browser and image viewer, and let’s get down to work. None of the criteria we’re using should be new to you at this point, but that doesn’t mean you won’t find a problem that has escaped your notice up until now, which is exactly why we are here.
Figure 10.5. Red Positive Tick. © Robert Hadfield (istockphoto.com/NuStock)

The first thing an inspector is going to see is a thumbnail of some size. The thumbnail provides the first impression of the subject and overall composition, and it is exactly what customers are going to see when they view search results on a stock site. Remember, the thumbnail is what sells your photo to the customer. Generally speaking, each stock site displays a small thumbnail of about 100 pixels on the longest edge in the search results, as well as a larger thumbnail, anywhere between 300 to 500 pixels on the longest edge depending on the site. So choose a similar size for first viewing your own photos. Ask yourself the following:
• Can I tell what the subject is from the thumbnail?
• Does the thumbnail have enough visual impact to make a customer want to click in for a closer look?
Inspectors aren’t going to reject your photo based on the thumbnail, but honestly, it can set a tone, and as the saying goes, you only get one chance to make a good first impression. If you answered a solid “no” to either of those questions, it’s not a deal-breaker. Just note it and move forward. Not every photo is going to have a strong thumbnail, and that’s OK, if the photo is otherwise useful and technically sound.
Open the first photo into your image viewer, and make it as large as you can and still see the entire photo edge to edge. Ask yourself the following:
• Does it appear properly exposed?
• Does the lighting work?
• Does the composition support the subject and does it make it more useful?
The more times you can say “yes” here, the better. When you view the entire photo at this larger size, you can get a good sense of what the subject matter is, how it works in that composition, and the overall impact of the image. Every photo doesn’t have to knock your socks off, but if you are seeing problems at this stage, it isn’t going to get better once you zoom in and examine at full size.
OK, zoom in to 100 percent view, start at one of the corners, and work your way across every inch of that photo. Ask yourself the following as you progress:
• Is the subject in focus where it needs to be?
• Is there adequate detail in the shadows and the highlights?
• Have I reduced the luminance and color noise to an acceptable level without sacrificing important detail?
• Have I removed any sensor spots, hot pixels, or other distracting flaws?
• Have I reduced all chromatic aberration along the high-contrast edges?
• Did I remove all logos or other trademarked content?
• Do I have model releases for all the people I am using as compositional elements in this photo?
If you answer “yes” to all of those questions, that’s great: Those photos are ready to upload. If you answered “no” to any of those questions, or you weren’t sure, then I suggest removing those shots from the upload folder. You need to decide it if it is within your abilities, and worth your time, to make the necessary adjustments to those photos to change the answer to “yes.” If you do go back to the drawing board with some, then you should repeat the inspection process by saving a final copy back to the upload folder, and going through the above checklist again.
Dealing with Rejection
It is inevitable. Even after all the work you have done prior to submission, you’re still going to encounter rejected submissions from time to time. There are no automated or mechanical aspects to the inspection process at any site. At the other end of your stock submission is another human being who has been trained to evaluate each image according to that site’s standards for acceptance. It is never personal. Honestly, it is far easier for them to accept a submission than it is to reject, so if you did get a rejection, there was some reason, some issue, that triggered that person to take that action.
I can tell you from my own inspection experiences that I absolutely loved seeing good work come through the queue and accepting it into the collection, because it is faster and more satisfying. Rejecting new submissions is a pain. Unless a photo is horribly flawed (which is rare), it takes longer to evaluate a so-so photo, and then you’ve got to provide a rejection reason before moving on to the next photo. There is no joy in rejection.
Tip
You’re going to need some place on the Web to upload your photos in order to share them with your peers. If you don’t have a website, some of the more popular (free) options are www.vox.com and www.dropbox.com.
We’ve all had work rejected, and there’s no shame in it. What you are hopefully coming to understand is that the line between acceptance and rejection is not thin and black, but rather wide and gray. That means there’s a level of subjectivity that is inherent in any human process. Don’t waste energy hoping for more consistency in the process because that is outside of your control. Learn to roll with the feedback, improve your game, cut your losses, and check your ego.
Figure 10.6. Pain. © Valentin Casarsa. (istockphoto.com/Casarsa)

Should the day come when a rejection email lands in your inbox, the first thing to do is figure out what triggered the rejection. Sometimes we miss the small problems that are an easy fix, such as a missed logo that didn’t get cloned out. If that is the case, then it is worth your time to make the fix and resubmit. If you’re not sure what the problem really is, and you believe that the concept, composition, and lighting is otherwise solid, then it is worth your time to seek some outside help from your fellow contributors via a critique forum. Let some fresh (and neutral) eyes take a close look at your work, and be open to the feedback. Once you have a handle on the problem, it is up to you to decide to either salvage the reject or reshoot with an eye toward improvement. Although it may seem like more work, I’m a bigger fan of a reshoot than a salvage job whenever reshooting is possible because it is a new opportunity to take all the feedback and create an all-around better shot.
Yes, there will be photos that for any combination of reasons are just not possible to reshoot. When faced with such a situation, invoke the 24-hour rule: Close the email and step outside. Put a little distance between the feeling of rejection and your decision about how to proceed. Postpone all decisions until tomorrow, and be amazed by the amount of clarity a day can bring.
Figure 10.7. Relax. © Jill Chen

Assignment
To help you on your way to earning your inspector badge, I have put together a collection of full-sized JPEGs for you to review. You can download them in a Zip file from www.takingstockphoto.com/downloads. These are all my own photos that I rejected, and I have included a text file that explains why I rejected each one. These are very typical of the types of photos I have seen submitted over the years, and I encourage you to put each photo through your inspection process (with the checklists provided in this chapter) to see what reasons you choose before referring to the text file I included. The goal is to help calibrate your eyes to what will get your work rejected so that you can set your own bar higher. I want you to be able to recognize these problems early in your workflow, so that you can take corrective action, and invest your energy on your best work.
Repeat the same process with all of the approved photos you’ve downloaded from the various stock sites, whether they are the free samples or the ones you’ve paid for, and work on calibrating your eyes to what acceptable quality looks like, and aim higher still.
