
Recording is the simplest way to create you first auto test. No programming skills are required as it is extremely simplistic to go about and execute. In this recipe, we will make a recording of the first executable test to be launched to make sure it is workable.
Before recording the first test, we need to perform some prerequisite steps:
- Create a new project in TestComplete, as described in the Creating your first project recipe.
- Download the Calculator Plus application from the Microsoft website, if you have not yet done so, and install it (http://www.microsoft.com/en-us/download/details.aspx?id=21622). This application will be needed for many examples in the book.
- Launch the Calculator Plus and opt for the View | Classic View menu, so that the Calculator Plus could look like a no-frill Windows application, without bells and whistles.
- Select the View | Standard menu item. Having done so, Calculator is switched to the Standard working mode.
Note
If you are working in the Windows XP or Windows Vista operation systems, you can get by with a usual calculator that comes along as an embedded system component. For Windows 7 and later, the embedded calculator will not work to handle the examples at hand, because it is much harder to obtain the calculus results from its text output field.
In order to record a test we need to perform the following steps:
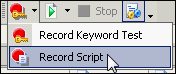
- Select the Test | Record | Record Script menu item or go for the appropriate option from the drop-down menu on the toolbox, as shown in the following screenshot:
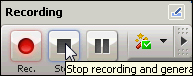
At this point, we would have a floating window widget Recording with the buttons Rec., Stop, and Pause.
- In the Calculator Plus window, click on the buttons 2, +, 2, *, 5, and =. In the end result, the result of the calculation will appear in the text output to the following effect: 2+2*5 = 20. This is a standard calculation mode for the calculator where operation priorities are not accounted for.
- Click the Stop button in the Recording window, as shown in the following screenshot:
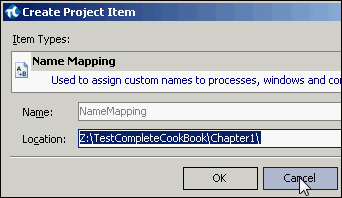
- If you have the Create Project Item window opened afterwards, prompting for adding the NameMapping element to the project, click on the Cancel button, as shown on the following screenshot:
- In the result, the TestComplete editor will contain the following script:
function Test1() { var wndSciCalc; var btn2; wndSciCalc = Sys.Process("CalcPlus").Window("SciCalc", "Calculator Plus"); btn2 = wndSciCalc.Window("Button", "2"); btn2.ClickButton(); wndSciCalc.Window("Button", "+").ClickButton(); btn2.ClickButton(); wndSciCalc.Window("Button", "**").ClickButton(); wndSciCalc.Window("Button", "5").ClickButton(); wndSciCalc.Window("Button", "=").ClickButton(); } - Now, we can go ahead and double-check if the recorded script works as it's been intended. For this purpose, we right-click on any spot in the
Test1function, and from the context menu select the Run Current Routine menu item: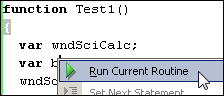
- As a result, the script will launch and execute all the prerecorded actions.
All the actions made during the script recording are transformed by TestComplete to the corresponding scripting commands, that is, mouse-clicks, text input, and selection of elements from a drop-down list; all these actions are covered by specific corresponding commands.
In our example:
- In the first two lines, there appear variables for the calculator window and the button 2.
- In the following two lines these variables are initialized and they have specific objects assigned.
- Now, it is possible to carry out different actions with these objects.
- In the further six lines of code, we reproduce one and the same action with the help of several buttons, that is, the button-click, in particular.
- Please note that the button 2 has become peculiar. Only for this button do we have a variable (
btn2) declared, while other buttons are handled through the window variable (wndSciCalc). This happens because the button 2 is being used more than once, which was duly recognized by TestComplete and further on transmuted into the recursively applied code in view.
Although TestComplete is generating a readable code at the point of recording, all the recorded scripts are the least readable and not easily maintainable. Sometimes, in case of changes in the tested application, the prerecorded scripts should be redone from the scratch rather than unraveled or modified to fit new conditions. Hence, the recording technicalities are not recommended to be applied to create scripts that should be workable recursively with intention to be applied for regression testing.
However, there are several cases when recording is useful, for example:
- To learn and understand how TestComplete interacts with a tested application and controls within it
- To quickly implement a simple script for a one-time task
- To record several actions for future modifications
- Recording scripts is just a first step towards creating effective scripts. To learn how to improve your tests, read the Modifying the recorded test recipe.
- If you want to better understand how TestComplete works with windows and controls, refer to the Understanding how TestComplete interacts with tested applications recipe.
- Running functions is explained in detail in Chapter 4, Running Tests.