
Chapter 3
Understanding Photographic Exposure
How Exposure Works
The purpose of this book is not to teach you to be a photo lab technician but to give you the basic knowledge and tools to become a better photographer. While I won’t go into great detail about photo processing, it is important to understand the fundamentals of it—which, in turn, will make you a better photographer. So in a nutshell, here’s how exposure works.
In black-and-white photography, the film is coated with a layer of gelatin that contains silver halide particles, which are sensitive to light. We call this the “emulsion” of the film.
As light hits the film, the silver halide particles are excited in direct proportion to the amount of light that hits them.
When the film is processed, the areas that received the most light are transformed into silver particles. If too much light has hit, or exposed, the film, then the highlights (bright parts) of the scene will become blocked with too many silver grains. This means the picture was “overexposed.” If too little light hits the film, then the shadow areas will lack detail and the overall photograph will be muddy and lack contrast (underexposed).
The same effects happen in digital photographs. Digital photos shot in JPEG format (the default setting on your camera) are actually much more demanding of perfect exposure than photographs shot on film. Because it seems as though we can “fix” them so easily with photo editing software on the computer, they just seem to be more forgiving.
A digital photograph that lacks highlight details and looks blown out (overexposed) can’t really be saved. This is because the information—the detail—is actually lost, and a digital photograph that has too little exposure will have digital noise. Manipulating the photograph on the computer can mitigate both problems, but there’s a limit to what can be achieved.
You should aim to expose all photographs as well as you can when you’re shooting them.
All electronic devices have a certain amount of noise or static due to the electrical current that is passing through them, called digital noise. On your stereo, it might be the low hum of the speakers when you turn up th volume but don’t have music playing. The hum is still there once you play a CD, but the music masks it.
In digital photographs, the “noise” is visible in areas that didn’t receive enough light and shows up as colored speckles that actually resemble th “grain” patterns of underexposed film.
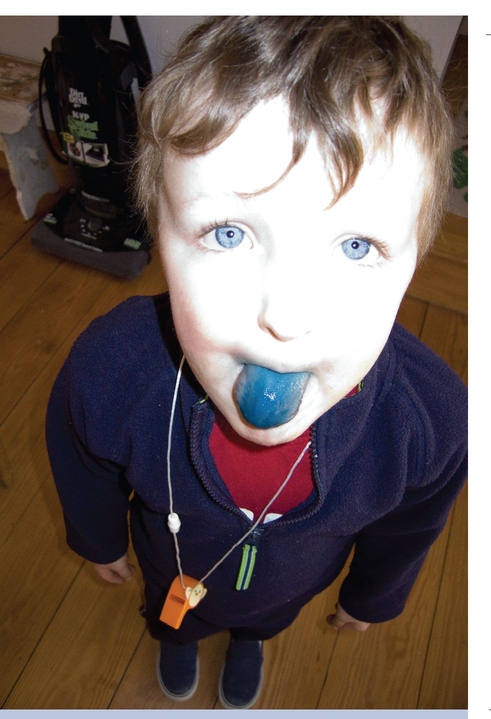
In this digital photograph, I accidentally overexposed by more than three stops (I let in more light than I should have). This photograph has already been fixed as much as it can be. There is no way to recover the detail in the face. (The blue tongue has nothing to do with the bad exposure; it was really blue.)

This photograph was underexposed by about three stops (not enough light). It has also been fixed to about the limit of what is possible. The speckles are digital noise. Notice also that the photograph lacks contrast; there are no true blacks.
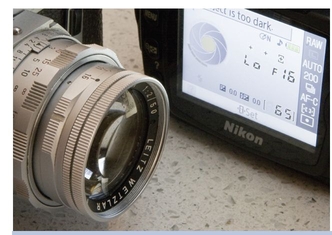
A display showing aperture.
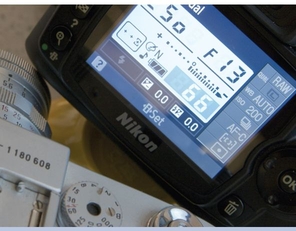
Shutter speed dial and digital display.
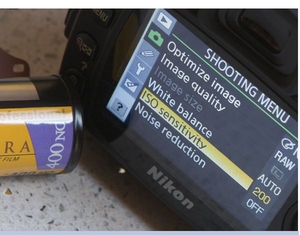
Digital display and film speed
The Basic Exposure Controls
There are three basic controls, or considerations, for properly exposing photographs of any type:
1. The aperture, or f-stop, of the lens
2. The shutter speed
3. The ISO speed of the film or digital sensor
Aperture (F-stop) and Exposure
In the last chapter, we learned how the f-stop can be used to control depth of field, but the primary function of the lens aperture is to control exposure.
Pro Tip
Modern cameras will display f-numbers (f/6.3 or f/9, for example) between the commonly used f-stops (f/2, f/2.8, and so on). They are still indicative of the ratio between the aperture and the focal length. They are there as a way for you to fine-tune the exposure in smaller increments than entire stops.
As you close the aperture (bigger number equals smaller size, remember?), the lens lets in less and less light. At each of the common f-stop numbers—f/2, f/2.8, f/4, f/5.6, f/8, f/11, f/16, and f/22—the lens lets in twice as much light as the next bigger number in the sequence (or vice versa; each f-stop lets in progressively more light, twice the amount for each stop).
So, an aperture setting of f/4 is letting in half as much light as an aperture set at f/2.8, and an aperture setting of f/8 is letting in twice as much light as an aperture setting of f/11.
If you’re still not quite getting it, don’t worry. We’ll come back to it, and it will all become clear.
Shutter Speed
This one is much easier to understand. As the shutter speed gets shorter, or quicker, less light is allowed to enter the camera.
The common shutter speeds are 1 second, 1⁄2 second, 1⁄4 second, 1⁄8 second, 1⁄15 of a second, 1⁄30 of a second, 1⁄60 of a second, 1⁄125 of a second, 1⁄250 of a second, 1⁄500 of a second, and 1⁄1000 of a second. On some cameras, the progression even goes up to 1⁄8000 of a second.
In this sequence, the relationship is quite clear: each number is half of the number that preceded it, and each lets in half as much light.
As with f-stops, modern cameras will allow and display shutter speeds between the common speeds. But for the purposes of keeping the learning curve simple, we’ll just use the common f-stops and shutter speeds.
ISO Setting (Film Speed)
The International Organization for Standardization (ISO) assigned ratings to films to distinguish their different sensitivities to light. The ratings are also used for digital cameras to define the sensors’ sensitivities to light.
Photosensitive
Do you see how the more the camera thinks for you, the less you are thinking for yourself?
To make sure you keep thinking, try switching to the full manual mode on your camera for a while. If you feel unsure, then choose shutter priority mode and let the camera set the corresponding f-stop. This will make you more conscious of the choices you are making.
The common ISO settings, or film speeds, are 50, 100, 200, 400, 800, and 1600. Again, the relationship is pretty simple to understand. Each setting is twice as sensitive as the preceding one— meaning that the higher the number, the faster shutter speed or smaller f-stop you can use.
How It All Goes Together
Choosing the optimal combination of film speed, aperture, and shutter speed is one of the first and most fundamental creative decisions for any photographer. What should be fairly obvious when we look at the settings for aperture, shutter speed, and ISO is the way they are all based on each setting being half as much— or twice as much—as the adjacent setting.
Think of it this way: if you were trying to fill a bucket of water (exactly to the top), you would have three things to consider:
1. The size of the bucket (this is equivalent to the ISO setting)
2. How much you opened or closed the faucet (this is equivalent to the size of the aperture)
3. How long you left the faucet open (the shutter speed)
For pros, it is a series of quick, seemingly instinctive choices based on years of experience: “I need that race car to be absolutely sharp; I need at least 1⁄1000 of a second,” or, “That background looks like hell; maybe I’ll slow down the shutter and pan with the car so the background will just be a blur of indistinct color.”
So how do all of these fundamental choices affect the final image? Let’s find out.
Choosing Film Speed
While there are pros and cons to higher and lower film speeds, or ISO settings, most of the time we tend to simply pick a speed and leave it there (a holdover from when you couldn’t just change the film anytime you wanted).
In digital photography, there is always a tradeoff between the ISO and image quality. Digital sensors will become progressively noisier as the ISO is increased, so pros try to shoot digital at the lowest ISO setting they can for a given situation.
For our purposes, an ISO of 400 is a good starting point. This speed will offer a good variety of available shutter speeds and f-stops both indoors and out. So for now, let’s assume we’re working with a film, or ISO speed of 400.
Many digital cameras will automatically choose a new ISO for you (in Program mode) in order to optimize your aperture and shutter speed. Personally I don’t like this because I’d rather be fully aware of what ISO I am shooting at. I’d rather know that I have to set up a tripod at ISO 100 instead of the camera telling me it’s okay to shoot hand-held at ISO 800.
Shutter Speed Decisions
Shutter speed is also fairly intuitive and easy for beginners to understand, so let’s tackle that now.
If you set your camera to a one-second shutter speed and try to photograph a busy street scene, it will become very obvious that a second is a very long time. A New York City taxi covers almost an entire block in one second (except when you are in it and are late for an appointment). Therefore, a second is likely too long. You need to pick a shutter speed that is fast enough to stop any motion in the photograph (or slow enough to make motion apparent, if that’s what you want).
Pro Tip
Your shutter speed should equal the focal length of the lens you are shooting with in order to minimize camera shake. If you’re shooting with a 28 mm lens, your minimum shutter speed should be at least 1⁄30 of a second. With a 100 mm lens, the minimum shutter speed would be 1⁄100th of a second and so on.
Setting Aperture
You must now set the aperture (f-stop) to allow just the right amount of light in for proper exposure. This final decision has actually already been determined by your first two choices for film and shutter speeds. Your aperture choice should correspond accordingly.
But wait … aren’t there more options than that?
Of course. A shorter shutter speed would mandate a larger aperture (less depth of field). A longer shutter speed would mandate a smaller f-stop (more depth of field but a greater risk of camera shake). You could even change the ISO setting (with a digital camera) if you really need to.
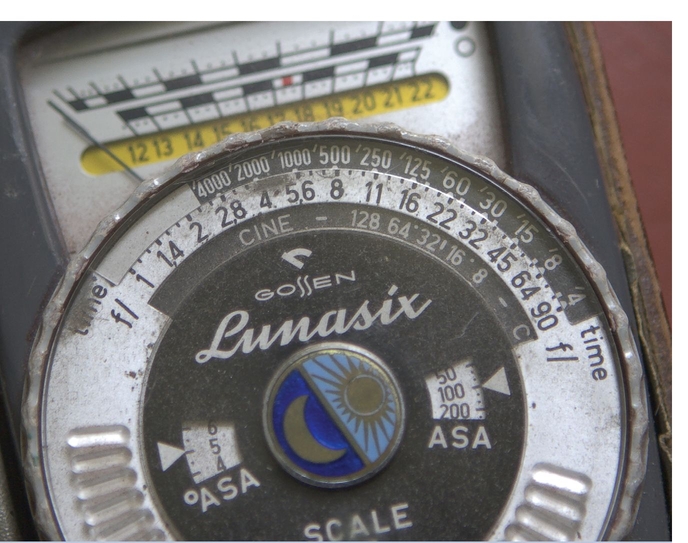
An analog light meter.
One of the great things about old-style analog light meters was that they showed you at a glance all of the choices available for a given lighting situation. There are actually many choices when it comes to aperture and shutter speed. As far as the film/sensor is concerned, it doesn’t care whether you shoot at f/16 at 1⁄125th of a second, f/11 at 1⁄250th of a second, or f/8 at 1⁄500th of a second. Each setting will allow exactly the same amount of light to reach the film/sensor. Each setting reflects a set of compromises:
• Too high an ISO will degrade the image with film grain or digital noise.
• Too low a shutter speed will cause the image sharpness to suffer. However, sometimes camera shake or blur can be good (see the following discussion).
• Too big an f-stop will result in less depth of field. (Again, this can often be desirable.)
How Light Meters Work
Light meters are very stupid devices, but people think light meters are infallible. Once you understand just how dumb they are, you are on your way toward using your light meter well.
Here’s how stupid light meters are: they think that everything you point them at is gray. If you point one at a black cat sitting in a coal bin, it will assume the scene is gray and set your camera to make the scene gray (resulting in overexposure). If you point one at a polar bear in a snowstorm, it will assume the scene you are shooting is gray and will set your camera accordingly (resulting in underexposure). If you are shooting a landscape that includes a lot of sky, then it will assume it is gray and set the camera accordingly (underexposure).
Because light meters try to make everything gray, photographers often carry “gray cards”—special pieces of heavy gray cardboard to point the camera at—in order to ensure that the camera will average out to gray (resulting in accurate exposures).
You can try this yourself at home. First, find a piece of white typing paper. Then, focus your camera so that the paper fills the frame—and look at the exposure the camera recommends. Now, replace the typing paper with a black book cover and look at the new exposure recommendation.
The amount of light present never changed. The only difference was the reflectivity of the object. Photographs are recordings of an object’s reflectivity. You want the white paper to look white and the black book to look black.
If you now put the book and typing paper together so that each fills half of the frame, then they will average out to gray and the exposure will be proper.

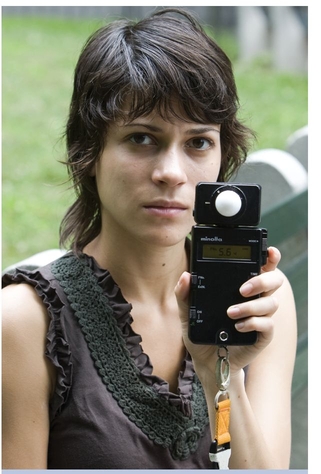
The model is holding a gray card. A spot meter reading from the light reflected off the gray card determined the exposure. The photograph is correctly exposed.
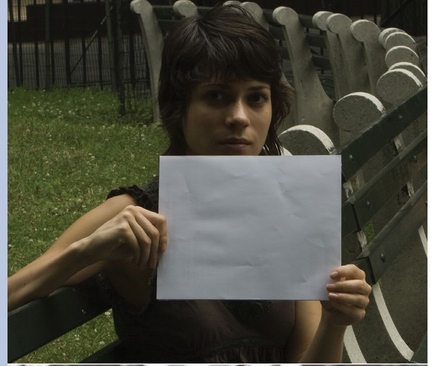
The rectangle the model is holding is actually a white piece of paper. A spot meter reading from the light reflected off the paper determined the exposure. Consequently, the photograph is underexposed.

The rectangle the model is holding is actually a black piece of paper. A spot meter reading from the light reflected off the paper determined the exposure. Consequently, the photograph is overexposed.
Most of the time, this works out just fine because the tones we encounter in the everyday world average out to be gray most of the time. But it means that as a professional photographer, I am always looking at the world through my lens and wondering, “Does this scene average out to gray?” If I think that it does, then I just keep shooting.
When I shoot, I am always looking at the settings the camera is giving me and questioning whether they make any sense. My years of shooting with handheld meters has enabled me to build a mental catalog of past situations and how I handled them. You will build your own mental catalog as well if you devote just a few hours a week to shooting with no distractions and looking at your results critically.
Your Light Meter
The light meter in your camera is a remarkable device and is actually a little bit smarter than what I just described.
Any modern camera has some form of segment metering (different brands have different names for this; for example, matrix metering) . This is kind of like having lots of meters in your camera—all of which are reading different parts of the frame and comparing notes. The camera also has software to evaluate the segments and compare them to situations that the designers have programmed into the software. The result is a meter that is almost foolproof.
A modern meter in a contemporary camera would still make a mistake with the polar bear or black cat scenarios but probably not with the landscape. Why? A couple of the segments read “bright” and a couple read “dark,” and the software says, “I think this is a landscape” and makes a calculation to optimize the exposure for what the camera “thinks” you are shooting.
Remember that photographs aren’t unlimited in terms of the tonal range they can capture. No camera or film can resolve both a white wedding dress in bright sunlight with a black tuxedo in deep shade in the same image.
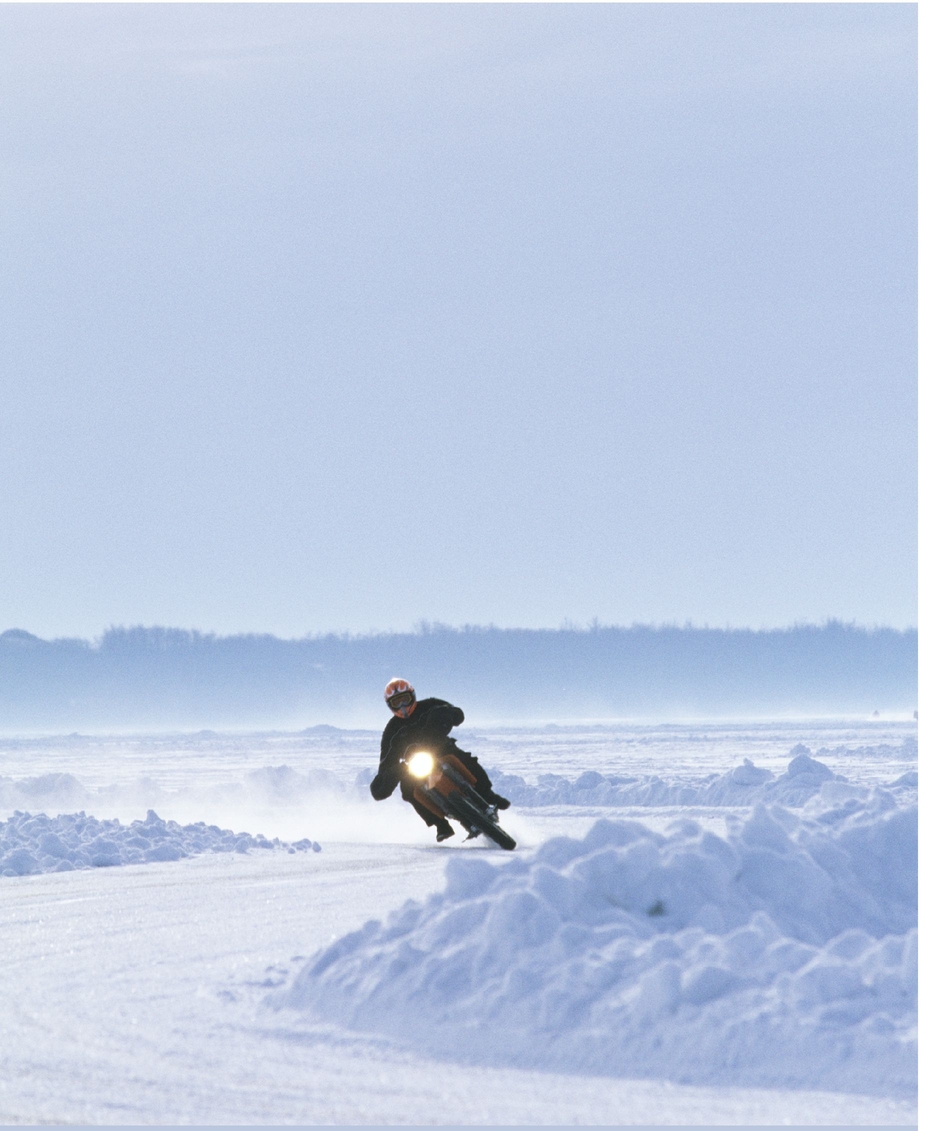
This was a situation that played havoc with my metering. The huge expanses of snow and bright sun (combined with a headlight shining into the lens) had my camera convinced that my proper exposure should be about 1/1000 of a second at f/16. I knew it was wrong, but it’s hard to trust your instincts when the camera is always warning you that you are overexposing by at least three stops. This was a situation where a handheld meter and the “Sunny 16” guide saved the day and resulted in perfect exposures.
Pro Tip
Pros often use the “Sunny 16” guide as a way to shoot with cameras that don’t have meters. You simply match your shutter speed to the ISO setting of the film/sensor (ISO 100, for example), then set your f-stop to 16. So on a sunny day (with clear, distinct shadows), this would give an exposure of 1⁄100th of a second at f/16 (with the ISO set at 100). Similarly, the exposure for “bright overcast” (softer shadows) is f/11; “overcast” (shadows barely visible) is f/8; and “heavy overcast” (no shadows at all) is f/5.6.
Knowing the “Sunny 16” guide can help you double check whether your meter is being fooled in tricky situations.
Try using your meter in a few different situations on the “M” (Manual) setting to see just how it works. Try adjusting the shutter speed and aperture to any given exposure that your camera deems to be “correct.” Now, try a different shutter speed and find the new f-stop to correct the new exposure.
This will show you the relationship between shutter speed and f-stop. If I am shooting outside on a sunny day, then my base exposure might be 1⁄125 of a second at f/16—but I could also choose 1⁄500 of a second at f/8 or 1⁄4000 of a second at f/2.8. To the film/sensor, it’s all the same.
Verifying Proper Exposure
Digital cameras have three amazing tools to help you verify correct exposure:
1. Simply look at the back of the camera at the image in playback. This is better than nothing, but it isn’t a terribly accurate way to check your exposure because the camera has “processed” the photograph and already tried to compensate for what it thinks you wanted. It also requires a certain level of experience with your camera because different screens can render images differently according to how the screen brightness has been set up.
2. Use the “histogram.” This is a terrific tool but is a little advanced for what we are trying to do now. We’ll learn a little more about histograms later, but for now just realize that in theory, a good histogram (good exposure) for most situations looks like a bell curve. Fat in the middle indicates good mid-tones, and tapering at each end means good highlights and shadow detail. When the fat part of the curve goes far to one end or the other, this usually indicates either overexposure or underexposure.
In theory, this is fine—but in the real world, many photograph’s don’t yield an ideal bell curve. So while the histogram is a useful tool, you need some real experience to know how to interpret them. Again, the histogram for our black cat and polar bear scenarios isn’t going to look like a bell curve.
3. The third and best tool for you right now is the “clipping warning.” On a Nikon, just look at the image in playback and then press the thumb pad multi-selector up or down until the image shows the highlights blinking. On a Canon, do the same thing with the “Info” button. Almost any camera will have this feature.
The areas that are blinking in the clipping warning mode are areas that will not have highlight detail (they are “clipped” and outside of the range of the sensor). These areas will be rendered as pure white in the final image. You now have to decide how important these areas are because they can’t be saved later. Bear in mind that it is acceptable for certain parts of a photograph to be pure white as long as you want them to be. I’ll accept a clipping indicator in a background window or in the reflection of the sun in a car … but not in a bride’s dress.
The clipping warning only applies to highlights, so you still need to be careful and eventually learn to use the histogram.
Other Metering Modes on Your Camera
Your light meter can be fooled, but the amazing thing about your light meter is that you can also change it into different types of meters in order to get it to work in various, difficult shooting situations.
Most modern cameras offer a couple of other options besides the segment/matrix metering mode. One is “center weighted.” This gives a special priority to the center of the frame (where you are most likely to position a face, for instance). There might also be a full “average” mode, which simply measures the entire scene and averages everything in order to come up with an optimal combination of shutter speed and f-stop. Neither of these options are likely to be better than the segment/matrix metering, so I don’t feel it’s necessary to go into detail on them.
Spot Metering
Spot metering, however, does offer some real advantages in tricky situations. It reduces the angle your meter reads to a very small spot in the center of your viewfinder (usually the middle autofocus sensor area). Spot metering can be very valuable when your main subject is surrounded by a large expanse of bright light (in front of a window or a field of snow, for instance).
Pro Tip
Bracketing exposures is a way pros safeguard themselves against making exposure mistakes. It simply means that you take three photos at three different exposures; usually one at the recommended setting, another with one stop less light, and another with one stop more.
Remember that the spot meter still “sees” gray no matter where you point it. If you are using a spot meter and the small area you have singled out is very bright or very dark, the meter will still be fooled.
Be sure to switch your meter back after you have spot metered and shot your photograph.
Cameras do have an exposure compensation button that will allow you to override the camera’s settings and overexpose/underexpose in Program mode, but I find it’s faster and more accurate to just switch to Manual mode. Besides, forgetting to reset the exposure compensation after you have made the shot (easy to do) will ruin everything else.
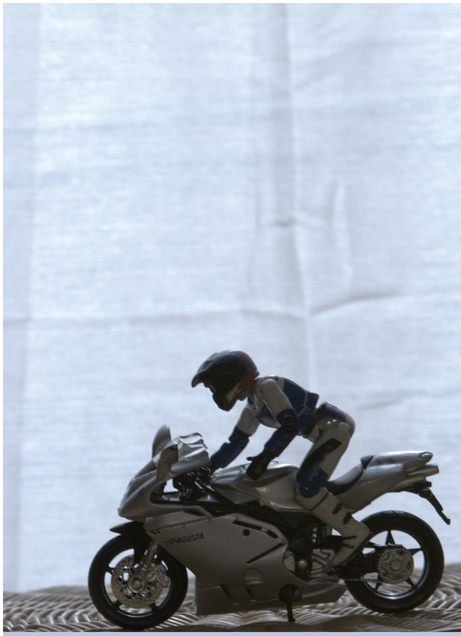
For this photograph, I used the standard segmented meter in the camera. It was fooled by the large expanse of white behind the action figure. Technically, it is a perfectly correct exposure because it retains all of the detail in the white drape.
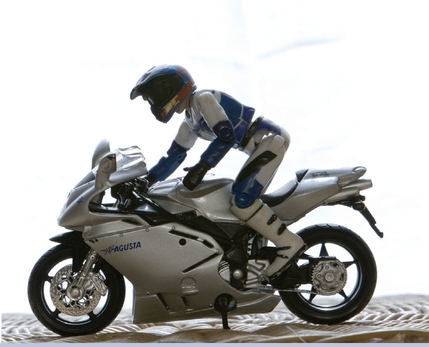
This photograph was made using the camera’s spot meter option to read the light reflecting off the toy motorcycle (notice that it’s silver/gray). The highlight detail in the drapes is gone (the camera can’t handle everything), but I was really looking for the figure to be exposed correctly (and it is)
Handheld Light Meters
If you are getting serious about photography, you might want to consider purchasing a handheld light meter.
Handheld meters also make everything gray, but once you learn how to use them they can tell you much more than the meter in your camera. Most can also meter flash/strobe light.
Pros all have their preferences for different kinds of meters, and they all have their advantages. Handheld spot meters can meter different parts of a scene in order to accurately determine the entire tonal range of the scene. Handheld meters are also far more sensitive in low-light situations.
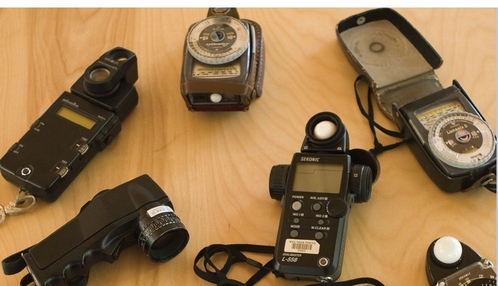
Different types of light meters.
My personal favorite—and the one I am never without—is an all-purpose “incident” meter. The incident meter measures the actual light falling on an object, and for this reason it can’t be fooled by extremely bright or dark areas in a scene. As a general-purpose meter, it is close to infallible and easy to use.
The incident meter has a plastic translucent dome on the front. This dome is made to approximate the basic shape of a face. To use an incident light meter, you walk up to your subject and point the dome of the meter back toward the camera’s position, making certain that the light on the dome is similar to the light on the subject’s face. (If you don’t want to hold the meter right up to your subject, you can just look at the light as it is hitting the dome and make sure that it is approximately the same as the light hitting your subject.) You press the button, the meter gives you a reading, and you are done.
An incident meter.
Case Study: Motion and Exposure Choices
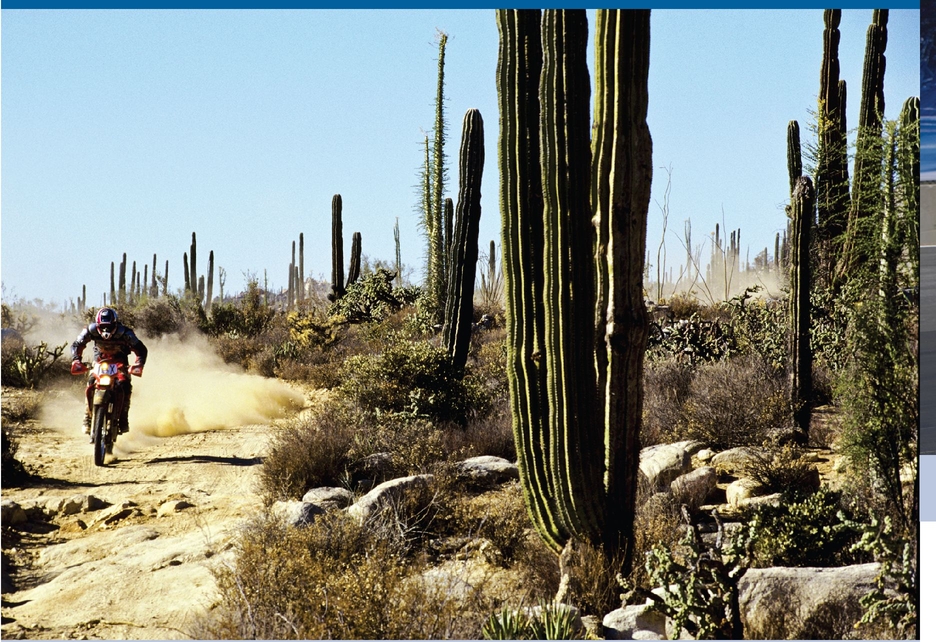
Legendary desert racer Johnny Campbell negotiates a tricky bit in the Baja 2000. For this photograph, I wanted as much depth of field as possible because I felt the landscape was integral to the romance and adventure of the race.
Shooting with a 300 mm lens and ISO 100 film, I stopped down to f/16 and set the shutter speed to 1⁄125 of a second. These settings were fast enough to stop the action of the rider (about 80 mph) because he was moving parallel to the axis of the lens. However, it wasn’t fast enough to handhold the camera with such a long lens; I needed to use a tripod to support the camera.
This is a good example of why learning to go beyond Program mode is a good idea. The “sports” setting on most cameras would have chosen a larger f-stop (and higher shutter speed) and not given the depth of field I wanted.
The billboard in the background is a painting that mirrors the body position of the racers in the actual corner they ride through.
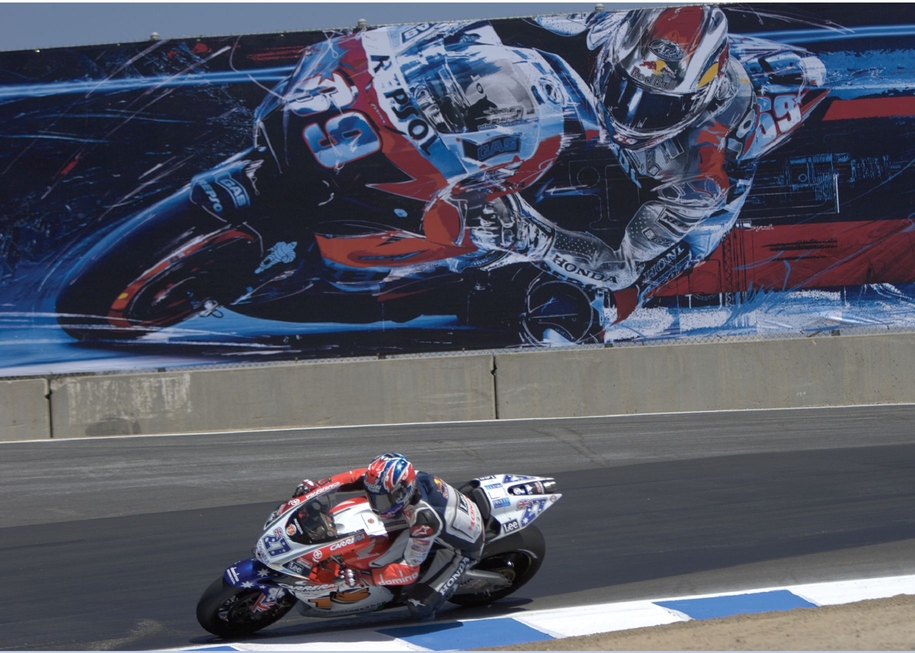
For this photograph, I wanted to stop the motion of MotoGP star Casey Stoner. His speed is in excess of 100 mph, but I also wanted as much depth of field as I could get in order to keep the billboard in focus. Shooting with a digital camera allowed me to experiment a lot in order to find the optimal combination of shutter speed and f-stop. I shot the photograph with other racers in order to find my final setting of about 1⁄2000 of a second at f/5.6 with a 300 mm lens and an ISO setting of 200.
The programmed “sports” setting would give a very similar (perhaps better) result.

In this photograph, I wanted to convey the speed and power of World Superbike Champion Neil Hodgson’s Ducati.
Hodgson was going well over 100 mph, and his trajectory was perpendicular to the axis of the lens. By panning (moving the camera at the same rate of speed), I was able to blur the ground but keep the bike sharp despite my relatively slow shutter speed of 1⁄125 of a second with a 100 mm lens.
In this photograph and the next, the “sports” program mode would have given too high a shutter speed to let the motion blur slightly.
Panning is hard to get the timing right You are trying to match your body/lens speed exactly to the motion of the object you are shooting. Like shooting clay pigeons with a shotgun, the key is to follow through with the motion and not stop the panning motion once you have pressed the shutter release. The tricky part is that the mirror is up, so you are temporarily blind when you are trying to follow the motion.
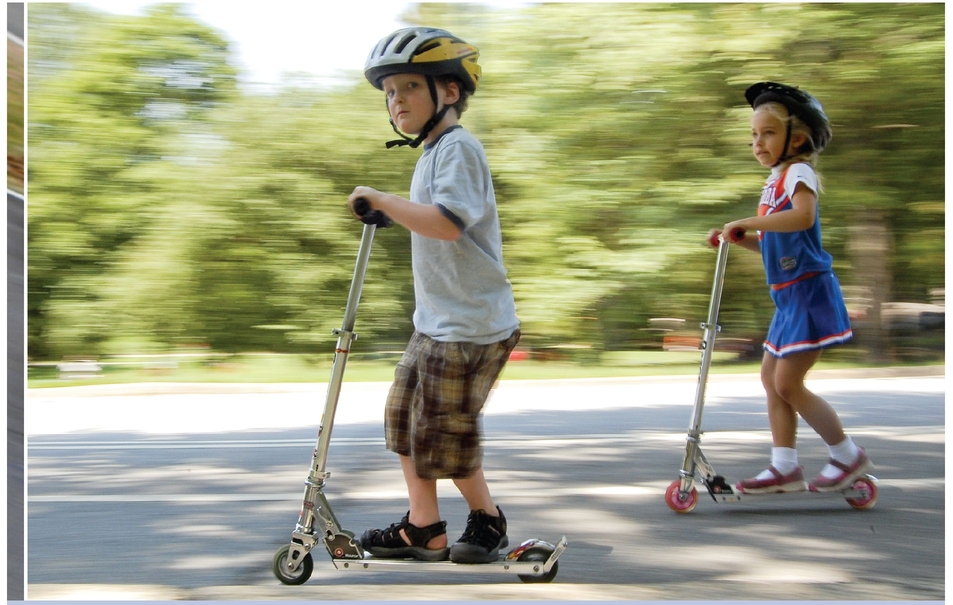
Panning can also make slower-moving objects look like they are going very fast. These kids were probably only going 5 mph. I shot this picture at about 1/15 of a second with the lens stopped all the way down and an ISO of 200.
The Least You Need to Know
• Proper exposure is important and exact. Your photos will suffer if you are sloppy with exposure.
• Getting the most from your camera requires finding the optimal combination of shutter speed, aperture, and ISO setting.
• A handheld light meter might be a worthwhile investment if you often find yourself in tricky lighting situations.
• Learning to use your camera manually (or semiautomatically) will make you a better photographer.
..................Content has been hidden....................
You can't read the all page of ebook, please click here login for view all page.