
Chapter 4
Formats: Digital Sensors and Traditional Film
For the purposes of this book, I will steer clear of going into the ins and outs of various types of digital sensors (CMOS, CCD, Fovean, and so on). Whatever sensor you already have in your camera is probably fantastic, so don’t worry about changing anything.
However, it is important to look at some of the primary differences in the file size and compression options, as well as the different capture formats, to get a better idea of how to use what you’ve got.
All Megapixels Are Not Created Equal
A pixel is a “picture element.” Each pixel represents one of the mosaic-like tiles that creates a digital photograph.
On the digital chip inside your camera, there are “imaging arrays”—millions of little light-sensitive photo sites that are filtered to respond to red, green, and blue light. These sensors correspond to the megapixel (MP) count, or dimensions, of your camera. A six megapixel camera, for instance, has about 6 million of these little photo sites crammed into the space of its sensor.
The common misconception is that more megapixels are better. While there’s some truth to that, there are many other factors that contribute to a digital image than simply counting the photo sites on the sensor. In some respects, this is the least important thing to be concerned with.
Image quality is determined primarily by the optical quality of the lens, the sensor’s “dynamic range” (the capability of the sensor to record both highlights and shadows), and by the inherent “noise” (remember our discussion from Chapter 3) of the sensor. Finally, each camera also has an “image processor” that interprets the information and is ultimately far more important than pixel count in determining the quality of the final image.
My point-and-shoot digital camera has 7.1 megapixels, but the sensor size is only about 10 percent as big as the sensor in a typical DSLR—and the lens quality is questionable for anything more than snapshots. The photographs are also noisy, even at low ISO settings.
The Nikon D40 is “only” a 6-megapixel camera, but it blows my point-and-shoot away with image quality. The photographs I’ve shot with the 6 MP Nikon, even with the kit lens, could easily be published or possibly even submitted to a stock agency.
A Note About ISO Settings and Digital Noise
As you increase the ISO sensitivity of a digital sensor, the sensor has less and less “signal” (light) to mask the inherent noise of the electronic circuitry. This means that digital photographs get noisier and noisier as you increase the ISO setting of the camera. At very high ISO settings (ISO 800 and beyond), the photo might look fine on the back of the camera but will turn out to be a totally unprintable mess once you look at it on your computer screen. I only shoot higher than ISO 400 when I am desperate. However, I’m also a photographer whose work is defined by clarity and detail. A photojournalist might accept a lot more digital noise in order to photograph in certain environments. It also bears mentioning that the effects of noise can also be mitigated to a large degree in Adobe Photoshop, (and other photo editing programs) as well as with other digital noise reduction software and plug-ins like Noise Ninja.
The ISO setting on a digital camera represents another level of creative control that is on par with the shutter speed and f-stop. You can change it, and you should experiment with it in order to find what levels of noise it (and you) can tolerate.
For the following photographs, I set up this little still life to illustrate the differences in the noise as you increase the sensitivity of the camera’s sensor. This is difficult to reproduce in a printed book, but on a computer screen or in a finished print it’s pretty dramatic.
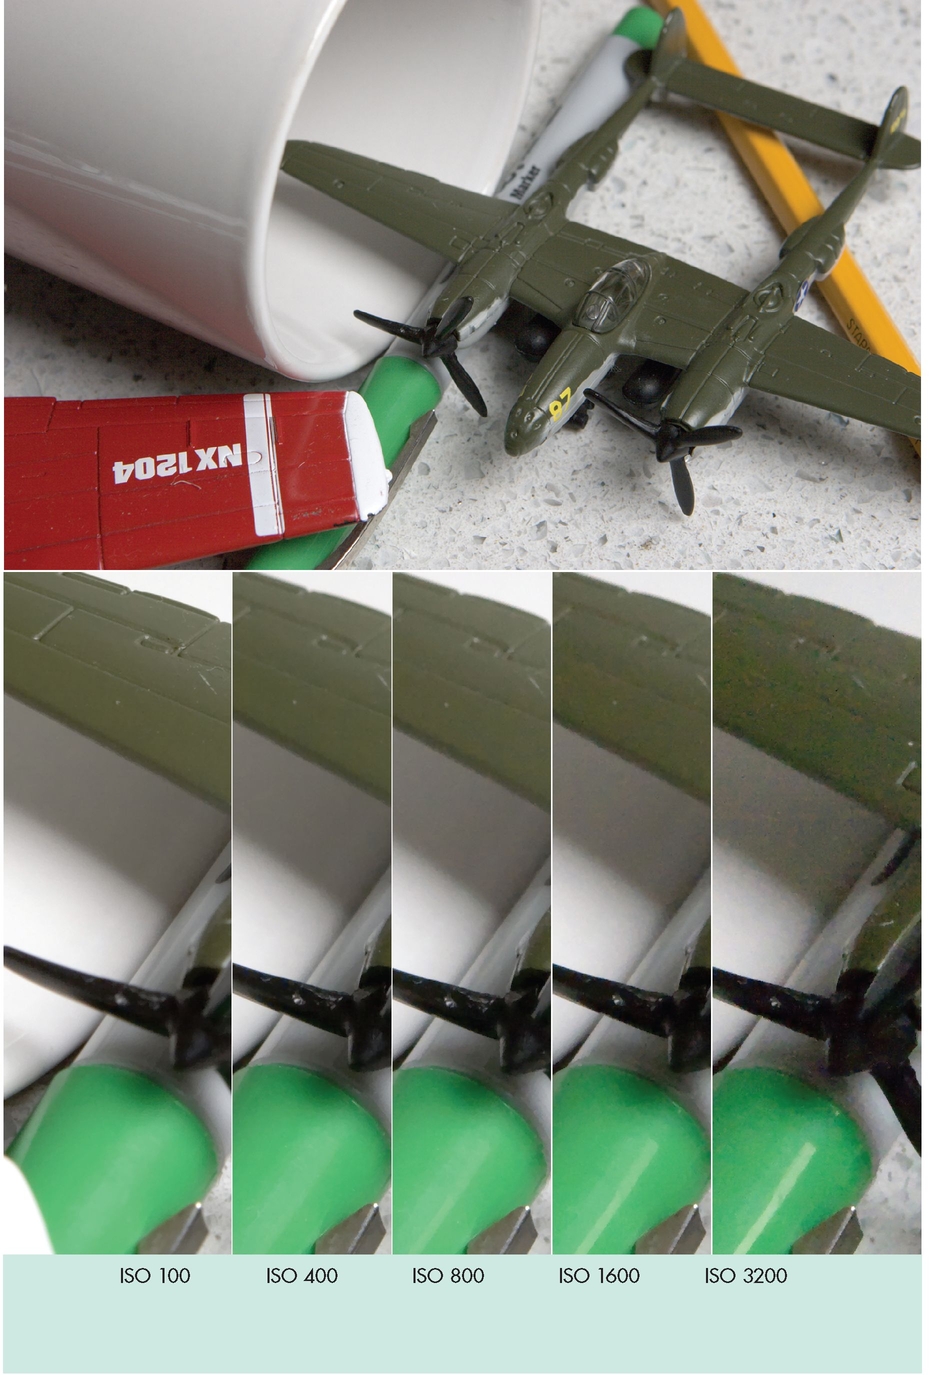
In looking at these photos (from ISO 100 to ISO 400), you can see that there is very little change in the noise levels. This is completely acceptable for almost any use.
At ISO 800, the noise becomes much more visible and objectionable in the smooth areas (the shadow on the cup and the wing of the green plane). But the granite countertop has so much texture that it masks the effects of noise.
Still, you probably wouldn’t notice it in a small snapshot.
At ISO 1600, the noise is very visible in all the smooth surfaces, blacks, and midtones.
At ISO 3200, the noise is so bad it looks like the photo was shot with a cameraphone.
Midtones are the areas of medium brightness, or the middle range of tones, in a photographic image.
Capture Format: JPEG
JPEG is the default format on all digital cameras. With many cameras, if you are shooting in one of the custom program modes (portrait, sports, landscape, and so on), your camera might only be shooting JPEGs (this varies among different manufacturers).
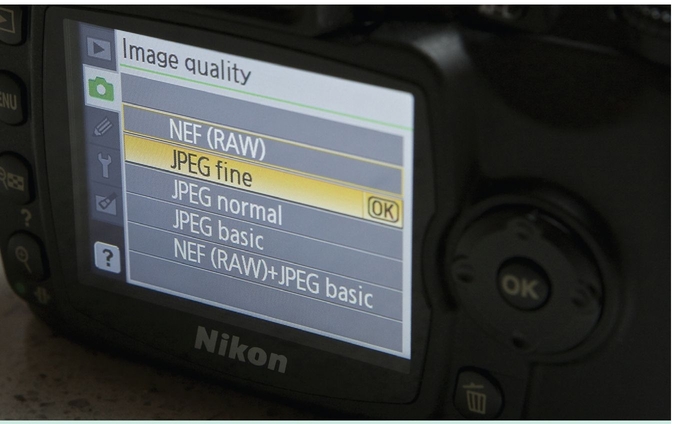
Display showing that the camera is shooting in JPEG mode.
When you move to one of the advanced settings—AV (Aperture Value or Aperture Preferred), TV (Time Value or Shutter Preferred), M (Manual), or P (Program)—you can chose to shoot in either the RAW (more on this in a minute) or JPEG format. You can even opt to shoot both at the same time. The options vary widely from brand to brand, so you will have to check your manual.
JPEGs are compressed files. For our purposes at the moment, this means that the camera takes the picture, assesses the information, decides what to keep, decides what might be redundant, and throws away everything else.
The term JPEG is an acronym for Joint Photographic Experts Group, an international committee that created the standard.
When you set up your camera with its basic menu, you can choose to shoot JPEGs with both different pixel dimensions (how many pixels per inch—S, M, and L on your menu) and different levels of compression (usually represented by a symbol that looks like little stairs or a smooth arc) next to the sizes. (Or, it might say something like “Fine.”) You should set your camera to Large/Fine JPEG. You can always resize it later to make it smaller.
When you choose to compress your files (the little stairs icon on Canon and many other cameras), you are giving the camera more permission to interpret what is important and what isn’t. Let’s say that I take a picture of a piece of coal lying in the snow. The sensor sees a little black dot in a white field. It decides to throw away a lot of the white because much of it is redundant and can always be recreated later. For most casual snapshots, this is true—and we seldom notice what information has been discarded. If I choose to compress the file a lot, I might lose much information in the snow—like very fine gradations in tone, for instance, that the camera decided were unnecessary. Most of the time, you won’t notice the effects of compression in an original camera JPEG. In a more complex photo, though, the camera might not compress the image as much.
Most digital files use some form of compression in order to save disk space. But some (like RAW files) do not lose or “throw away” any information in order to compress the file. JPEGs are a “lossy” form of compression in that every time you slightly change or alter a file, some of the information is discarded when the file is recompressed differently. This has significant ramifications for the archiving of your work, which we’ll discuss further in Chapter 11.
JPEGs are 8-bit files (more on this to come). In other words, in digital images, for every different color channel (red, green, and blue) there are 256 distinct levels of gradation between black (no light) and pure white. Remember: this is per color, and strictly speaking your camera can only “see” three colors. The other colors you see are a result of these three colors combining.
Because JPEGs are compressed and only 8 bits “deep,” the camera processes the information and decides what is valuable and what isn’t. Film actually does the same thing; that’s why we choose different films for different situations.
Within the menus of your camera, there are “looks” that you can choose—vivid color, softer color, black-and-white, sepia, and so on. These are roughly the equivalent of using different films. Still, you are telling the camera what is important to you and the camera is “throwing away” everything else.
Pro Tip
Keep your sensor clean by never taking off your lens (of course this isn’t always practical). But when you do change lenses, you should always turn the camera off so the static charge of the sensor doesn’t attract dust.
I think of JPEGs as digital color slides. What you see (on the screen) is what you get. If you got it right, that’s great; but if you didn’t, then you probably aren’t going to be able to change it much later. For this reason, JPEGs are terrific for learning how to use your camera. The JPEG format is also a universally accepted file. You can send a JPEG to anyone who has a computer, and they will be
able to open the file and look at the photograph. The compression of the JPEG file also means that the file is small enough to send as an e-mail attachment.
Pros and Cons of JPEGs
Of course, as with anything, there’s good and bad to shooting in JPEG. Some of the pros and cons of JPEGs are:
Pros:
• JPEG is a universally accepted format and is easily read by computers (into the foreseeable future, at least).
• Compression allows for many more photos per memory card and small files for data transfer and e-mailing.
• Because they are unforgiving of sloppy technique they’re a great learning tool.
Cons:
• “Lossy” compression can sometimes compromise image quality. (Choose minimal compression in your camera menu— usually denoted as “fine” in the menu.)
• The 8-bit file depth limits the ability to fix mistakes later.
• All digital photographs (including RAW) are only as permanent as your hard drive and storage. Back up everything!
• JPEGs are actually the most demanding of all capture formats (including film). Underexposure equals noise; overexposure equals a loss of detail.
Capture Format: RAW
RAW files (also called RAW image format files) are photographs that are minimally processed and minimally compressed, with no loss of information in the camera.
RAW files are unique to each camera brand and model. In other words, you will need special software in order to look at your photographs. Your camera almost certainly came with the necessary software, but you can’t just send someone a RAW file and expect them to be able to open it. Adobe Photoshop can read RAW files, but you might need to download a plug-in if you have a new camera and an old version of Photoshop. RAW files also have a unique file extension designation for each camera type or manufacturer (.NEF for Nikon, for example, or .CR2, .CRW, and so on for Canons).
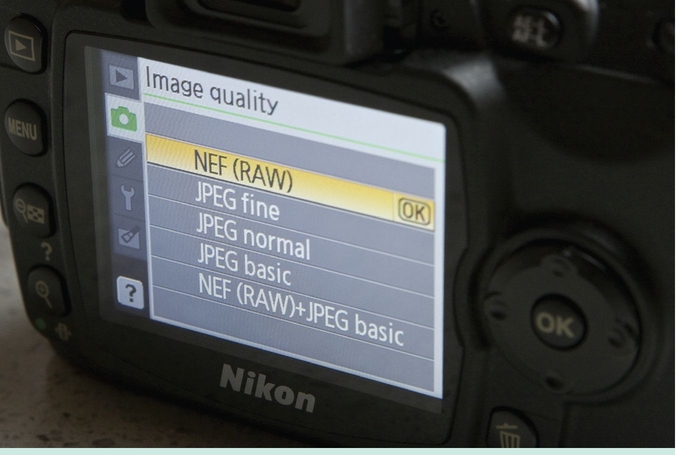
Display showing that the camera is shooting in RAW mode.
This presents a potential problem for future storage/access to your work because we are never sure how long software manufacturers will continue to support certain types of files. Adobe has help on the way with a new type of file called DNG (Digital Negative) that can essentially back up RAW files (more to come on this), in a more universal format, but converting RAW files is another step in the archiving process that has to be considered.
Because RAW files are not processed in the camera, they include all of the information the camera received (hence the term “raw”). In other words, they are not color corrected and the exposure hasn’t been optimized. The software you view them with might make some default corrections that are really good, but RAW files require post-processing that is analogous to printing in a darkroom (but much easier).
RAW files have a -12-14 bits per color channel of information. This sounds like 1.5 as much information as JPEGs; however, it represents an exponentially longer and wider range of tones and colors than an 8-bit file can achieve. This allows them to be more forgiving of mistakes.
RAW files are very much like color negatives; you can extensively manipulate the palette of the photograph because you can create a palette of your own. They can be overexposed by about a stop (sometimes more) and will still be beautiful. You can correct the white balance of the photograph and fine-tune the level of post-production “sharpening.” You use a RAW file to create the photograph in another file format, like a JPEG, that reflects your choices on how you want to present the image.
Wait! Why Not Just Shoot a JPEG?
Okay … I know what you’re thinking. Why would I want to shoot a file one way just to turn it into another?
When you shoot an original JPEG, the camera throws away all the information it deemed unimportant. When you shoot an original RAW file, everything is saved. This gives you much more flexibility over the image. You view and manipulate the image in a RAW file converter program (special software) and use the converter to create a new file in one of the more universally accepted formats (like JPEG). This way, you are deciding what information should be thrown away instead of the camera making that choice for you.
This has two important advantages. First, you have much more flexibility to fix mistakes in exposure, white balance, and so on. The-12-14bit-per-channel file allows you to get more subtle tonal transitions and colors than you could with original JPEGs. Second, you are never destroying or throwing away any information in a RAW file. This means that you can always “start over” in the editing process, even if you have done something drastic (like converted the image to black-and-white).
But there is a price to pay for all this flexibility. RAW files take up lots more room on your camera’s digital media and your hard drive. On an 8 MP Rebel XT, a 2GB (gigabyte) card will shoot about 518 Large JPEG images set on Fine (minimal compression) but only 225 RAW files. If you shoot RAW files all the time, you are going to need a new hard drive sometime in the future. I currently have 750GB of hard drive storage on my computer, and I am running out of room fast.
In many ways, RAW files are the digital equivalent of color negative film. They are more flexible and forgiving, but they require some training and knowledge to actually use them correctly.
Pro Tip
JPEG OR RAW? Just tell me what to shoot! Here’s what I recommend: keep shooting JPEGs if you consider yourself a casual photographer. They are simple, handy, and a great learning tool.
If you aspire to more, then shoot large JPEGs and RAW simultaneously. Use the JPEGs as your learning tool. They are completely fine for almost all purposes. Keep the RAW files on backup DVDs as a way to hedge against the point in the future when you can really sit down and learn how to work with them.
Pros and Cons of RAW Files
Pros:
• It’s very forgiving of mistakes (with training and software).
• Information is never lost.
• Because RAW files require post processing they require you to look at your work much more critically. Conceptually, they’re almost like working in your own darkroom.
Cons:
• RAW is a professional format that requires special skills to make the most of it.
• RAW files are unique to each camera, so there are potential risks to accessing your photographs in the future.
• Long-term access to RAW files is an open question. It’s best to back up all important photographs in another more universal format (for example, JPEG or DNG).
• RAW files eat up a lot of disk space on your camera’s media and on your hard drive.
Film
The explosion in digital photography notwithstanding, there are still plenty of great film cameras out there—and many good reasons to shoot with film. Film offers many advantages over digital capture:
• Most films have more dynamic range—a greater ability to capture both highlights and shadows—than digital sensors and digital photographs.
• Most films (excluding color slides) are more forgiving of mistakes in exposure.
• Film is still much better at making very long exposures.
• Film allows any camera to be upgraded by new technology. A 40-year-old Leica is still a viable professional camera if it is loaded with modern film.
• Film teaches you to think more decisively about photographs (more on this in Chapter 5).
• Film creates a permanent archive of your work that requires little maintenance.
Film Speed and Grain
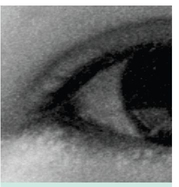
This close-up shows film grain.
As I mentioned in the last chapter, film is sensitive to light because silver halide crystals are embedded in the photo-sensitive side of the film. Photographers commonly refer to these tiny particles as “grain.” These particles are actually what you see when you look at a traditional photograph. They are darker or lighter depending on how much light struck the film. Grain constitutes the very fabric of the photograph.
When these particles are larger, they have more surface area available for light to strike them—and the film, therefore, has a greater sensitivity to light. This is the determining factor in the ASA, or ISO settings—the speed of the film.
In order to make faster films, manufacturers make the grain larger (bigger chunks equal faster speed, which equals lower resolution). In order to make film resolve more detail, they make the grain smaller (smaller chunks, slower speed, and higher resolution) .
Some older cameras and light meters will have ASA designations (American Standards Association) as opposed to ISO. The settings are the same: ISO 100 equals ASA 100.
For this reason, professional photographers usually choose the lowest possible film speed they can.
I would guess that 99 percent of my professional work is shot on films with a rating of ISO 100, but these are photographs that have to be used as double-page spreads in a magazine. For most amateurs, a film speed of ISO 400 should yield a very good compromise between flexibility in different lighting situations and image quality.
Types of Film
Despite the convenience of digital photography, the best reason to still shoot film lies in the millions of awesome film cameras already out there. I still own two view cameras (4×5), seven medium-format cameras, a couple of Leicas, and a panoramic camera. All of these film cameras have unique capabilities and “looks” that are beautiful and intrinsic to the design of the camera. Despite its age, that old Rollei or Hassleblad your dad handed down to you is an awesome camera, too, and it only shoots film. Take it out for a spin.
Black-and-White Negative Film
Black-and-white films are easy to understand. Light strikes the emulsion of the film with the tiny particles of silver halide, and these particles are excited in direct proportion to the amount of light they received. The film is processed, and the silver halide is transformed into silver particles. Excess silver (in the areas that received proportionately less light) is washed away, and the result is a photographic negative.

Example of a photograph taken with film.
The negative is then put into an enlarger and printed onto photographic paper (that is also coated with an emulsion of silver halide particles), and a positive print is made.
During the printing process, the contrast and tone of individual areas can be modified to a very large degree—affording many more controls to a skilled photographer. This secondary level of control and interpretation is one of the hallmarks of traditional black-and-white photography.
Black-and-white negative film is available from many manufacturers in speeds from ISO 100 through 1600. Even higher speeds can be achieved with special processing.
Pros and Cons of Black-and-White Film
Once again, there’s good and bad to think about when deciding whether or not to shoot with black-and-white film. Some of the most important points to consider are:
Pros:
• There is still a special magic to black-and-white photography.
• Negatives can last for centuries with proper storage.
• It’s quite forgiving of mistakes.
• Extremely long tonal ranges are possible.
Cons:
• There is no color.
• In an era where digital is taking over, it has become increasingly difficult and expensive to shoot black-and-white film.
• Quality black-and-white labs with master technician/printers are becoming extinct. Alas, it’s a dying, but beautiful, art.
Color Slide/Transparency Film
Color slide film is also known by the terms “transparency film,” “reversal film,” and “chrome.” When you buy color film, you can usually tell that you are buying a color slide film because it will have the word “chrome” in the name (for example, Ektachrome, Fujichrome, Kodachrome, and so on).
Color slide films produce a direct positive image on the actual film that was in the camera. They also use light-sensitive silver halide crystals to collect the light that strikes the film. As a consequence, the grain and resolution of the film is also affected by film speed.
There are two important differences in all color films:
1. The film has three different layers to the emulsion, each of which is sensitive to a different part of the spectrum of light that hits the film.
2. These different layers are coupled with special dyes that correlate to the respective colors in the film. When the film is processed, the actual silver is completely carried away but the dyes remain. These dyes form the different colors of the final photograph.
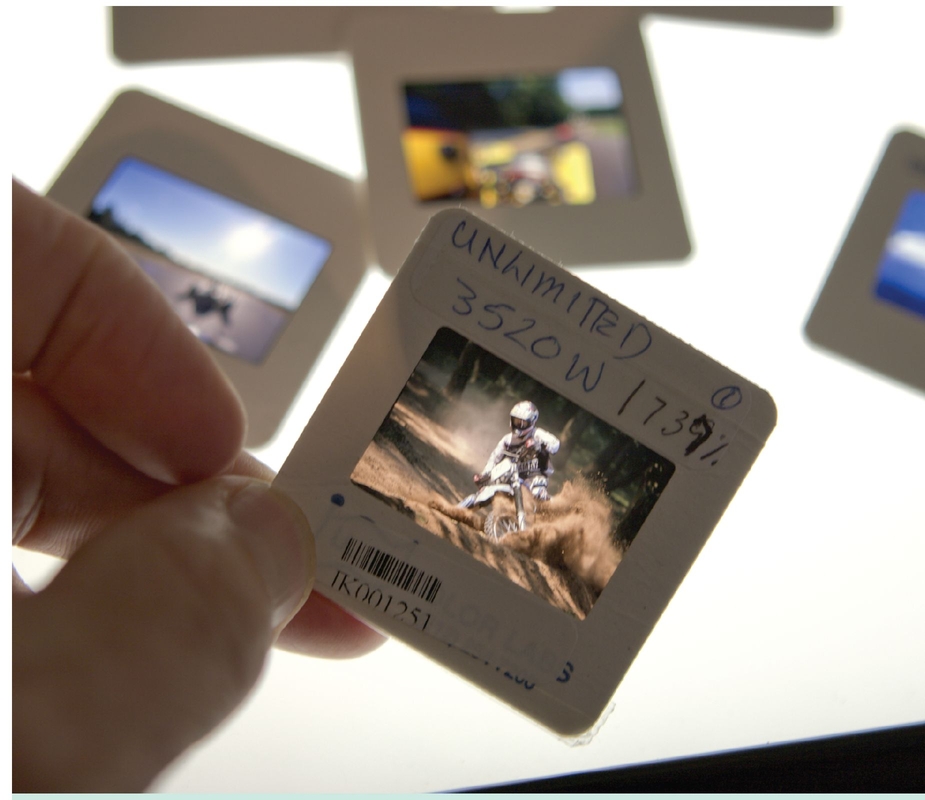
Example of a photograph taken with color slide film.
Pro Tip
Because slides are a direct record of the light that was present when the photograph was made (with no added interpretation such as printing or digital manipulation), they are a fantastic way to learn how to see color the way cameras and films see color. They are also unforgiving of sloppy techniques.
In my color photography course, I require students to shoot color slides for almost a month before we move to making color prints or shooting digitally.
When color slides are processed, they are typically mounted to cardboard mounts for viewing in a slide projector.
Because color slides are the actual film that was in the camera, the film must be perfectly exposed when the photograph is made. A slide that has been overexposed by more than a stop can’t be saved. Color slide films are also “balanced” (more on that later) to a particular type of light (daylight or incandescent). Pictures that have been shot out of balance can’t really be fully corrected later, even on the computer. You have to use either the correctly balanced film or special filters to correct the film during exposure.
Each brand and type of color slide film has a unique look, or “palette of colors.” Each also has a range of contrast. These special qualities are very difficult to modify. Pros spend years learning how to exploit these unique characteristics and might base an entire style around a particular type of film.
Pros and Cons of Color Transparencies/Slide Films
Some considerations when thinking about using color transparencies /side films are:
Pros:
• Beautiful, vivid color when done right
• Still the best way to learn critical color photography skills for the advanced photographer
• Produces beautiful scanned files for computer manipulation and printing
• Decent archival storage—about 30 years if stored casually (room temperature, in boxes or archival sleeves)
Cons:
• Extremely demanding
• Fragile; no other record for the photograph unless it is scanned into a digital file
Color Negative Films
Color negative is the most commonly used film for amateur photography. In recent years, it has become widely accepted by professional photographers as well.
Pro Tip
What’s the difference between drugstore film and the pro film sold in photo stores?
Amateur films sacrifice a certain amount of quality (less color saturation and chalky highlights) in order to withstand the abuse amateurs put their film through. (‘Fess up … you’ve left a camera in your car on a hot day, haven’t you?)
Pros can see the quality difference easily, but most snapshot photographers can’t. If you want the best results, shoot professional film and get it processed in a timely fashion.
Color negative films are sometimes called “print films” and are widely available. You can usually tell when you are buying color negative film because the name of the film will have the word “color” in the name (Vericolor, Fujicolor, and so on).
Color negative films also use three layers of light-sensitive emulsion and are subject to the same grain/film speed tradeoffs as every other film.
Traditionally, color negatives were put in a special color enlarger to make color prints. Most photo labs now use automatic scanners to scan the negative and then use a special digital printer to print the photographs onto color photographic paper. The printer uses tiny points of colored light to expose the paper in a similar
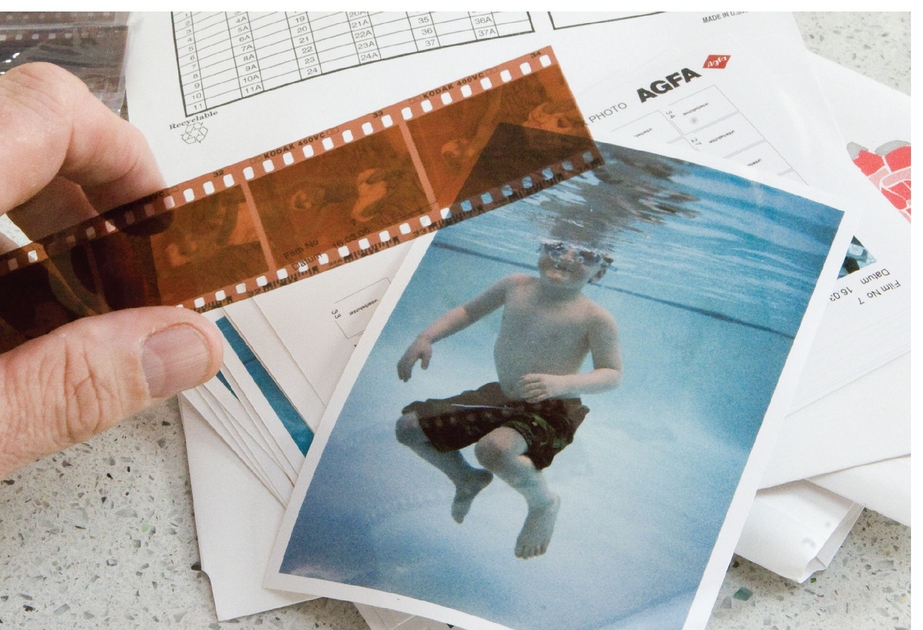
A color negative.
way that inkjet printers use tiny drops of ink to produce a print. A technician typically looks at the photograph on a computer screen and quickly optimizes the scanned file in order to make a color print that has acceptable color balance.
Color negative films are amazingly flexible. While they do have a color balance (almost always daylight), they can be shot out of balance and still produce beautiful prints.
They are not tolerant of underexposure without a very noticeable loss in quality (about a half a stop is okay), but they are very forgiving of overexposure (two to three stops is often fine and sometimes desirable). They scan beautifully.
Color negative film does require a secondary level of interpretation in the printing process. This means that (within limits) what you see in your print was what the automated printer or technician decided you probably wanted. They usually get it right for casual snapshots; in fact, they often fix your mistakes because there’s a reference point (like a face or some other easily recognized object) in the photograph.
However, when you shoot more creatively, these reference points become open to interpretation and are often less recognizable. This is why color prints aren’t a very good way to learn critical color skills.
Pros and Cons of Color Negative Film
Some considerations when thinking about using color transparencies /side films are:
Pros:
• Available anywhere
• The most flexible and forgiving of all film types
• Very fine resolution
• Easily corrected when shot incorrectly (within limits)
• Makes many old cameras fully modern tools
• Easy archiving of original negatives with a fair level of permanence (about 30-plus years) with casual storage
Cons:
• Requires a trained eye to correctly interpret and optimize final prints
• Very high cost per roll including processing and proofs
• Final prints (enlargements) can be expensive.
Format FAQs
When is color negative a better choice?
I’d look at what kind of photographer you are. Do you shoot fewer than 10 rolls a year because you are too busy?
If that’s the case, I’d stick with color negative for three reasons: it forgives mistakes, the cameras are cheaper, and you can throw the negatives in a shoebox and they’ll probably be fine.
If you are shooting that little, you probably won’t invest the time to back up digital files on you computer. You can request a CD of your work for computer files when the film is processed. Then, throw the negatives into a shoebox for posterity.
When is color transparency the best choice?
Any photographer who is serious should shoot color slides for a while. It’s cheap (there are no prints to make), very unforgiving, and shows you the color that the film saw without interpretation.
When are JPEGs the best choice?
Casual snapshooters and serious photographers both benefit from shooting JPEGs due to pure economics. No cost equals lots of photos, and backing up your work on a DVD is a pretty simple process with JPEGs because the files are so small.
When are RAW files the best?
Raw files offer the best of everything with two important exceptions: you’ll have to invest at least a few days learning the software, and you’ll have to maintain your archives diligently.
The Least You Need to Know
• Film isn’t dead and is still preferable for many applications.
• JPEGS are the simplest and most handy format to shoot in; what you see is what you get.
• Digital photographs shot in RAW format offer many more controls and options for creative photography.
..................Content has been hidden....................
You can't read the all page of ebook, please click here login for view all page.