
Chapter 1
Getting Started: Basic Camera Equipment and Essentials
Camera 101
So you’ve bought a new camera. Now what? There are so many buttons, features, menus, and cords that you’re wondering, “How do I just take a simple picture that will look good?” Good question. And because you’re reading this book, you’re headed in the right direction to learn just how to do that … and a whole lot more. This book will help make the seemingly daunting mechanics of your camera become second nature to you and prepare you with knowledge, tips, and advice on how to skillfully capture all of your cherished moments on film.
Whether it’s your baby’s first steps, your vacation to the Grand Canyon, or the flowers in your backyard, learning how to use your camera to take good pictures takes knowledge and practice.
Chances are the camera you just bought or have been using is a single-lens reflex (SLR) camera, which is very popular today among both novice and professional photographers—so it’s the basic type of camera we will explore in this book. While different brands and models of SLR cameras vary somewhat, they all have the same basic features and capabilities—so the principles covered in this book will apply across most SLR cameras.
A single-lens reflex (SLR) camera refers to a type of camera that uses an
automatic mirror system that directs an image from the lens through the viewfinder, where the photographer can see it. The abbreviation DSLR refers to digital single-lens reflex cameras.
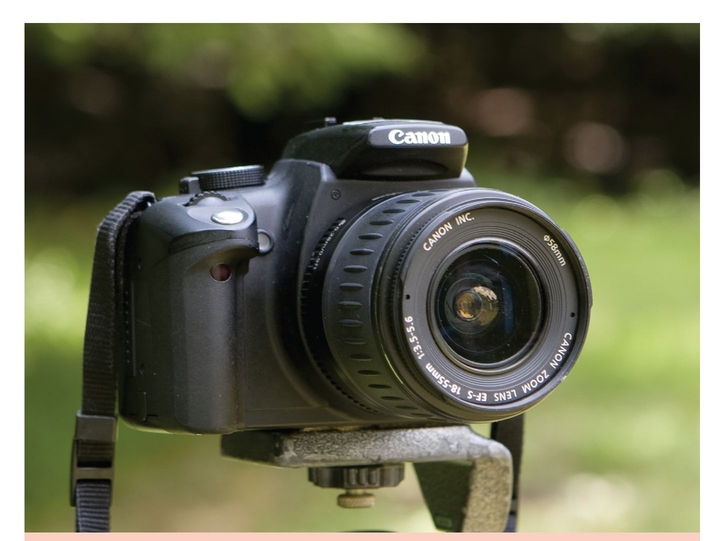
A Canon Rebel XT digital SLR camera.
Back to your camera … it likely came as a “kit” with a moderate wide-angle to moderate telephoto zoom lens. Also it likely has autofocus and can be programmed in various ways to optimize exposures for portraits, landscapes, and sports or close-up photography. Whether it shoots 35 mm film or digital photos, the basic concepts in this book will apply to both.
If some or all of these assumptions are true for your camera, congratulations! You own an absolutely awesome piece of equipment. It’s likely better than anything Henri Cartier-Bresson—a famous French photographer who is considered the father of modern photojournalism—or Ansel Adams—an American photographer best known for his photographs of the American West—ever owned. You also chose a perfect camera to own for learning the essentials of photography. Your camera is amazing. Just a few years ago, professionals were spending tens of thousands of dollars on cameras that weren’t as good. The fact is, now you can take a camera out of the box, charge the battery, set the dial to P (which stands for Program), and shoot photos that can be as good as most of the photos you see in glossy magazines. Qualitatively, the only difference between you and a top professional is the brain behind the lens. A pro knows absolutely everything about his or her camera and how to get the most out of whatever he or she is shooting. Getting to know your camera and how to get the most out of it for the pictures you want to take is the purpose of this book.
To put myself in your shoes (or close to it), I bought a Nikon D40—one of the most popular D-SLRs on the market—and a camera you are likely to own. Because I normally shoot with Canon-brand cameras, using the Nikon helps me provide you with some of the similarities and differences between the two. All cameras work on the same basic principles, so if I mention something specific to the Nikon or Canon controls, you can probably be assured that your particular camera (Pentax, Olympus, and so on) has a way of doing the same thing. I will not talk about extremely specific features (for instance, the D40 has in-camera retouching options), but instead I’ll focus on controlling the camera and knowing how and what to use—and when—to get the most out of your camera while you’re out there shooting.
Getting to Know Your Camera
One thing that has always fascinated me about how people view photographers and photography is that they somehow think photography skills can be picked up without much—or any—practice. Concert pianists practice six hours a day or more; professional athletes also train several hours a day; and rock stars jam and “noodle” on their guitars constantly. The same goes for photographers and their cameras. But somehow people think the skills of photography can be picked up almost instantly by simply buying a new camera—and what’s worse, doing so the day before a vacation, wedding, or other memorable event. That’s like learning how to swing a baseball bat the day before you’re scheduled to play in the World Series.
Now unless you plan to become a professional photographer, you won’t need to (and likely aren’t able to) practice taking pictures for six hours a day. But if you want to get better at it and make the most of your investment, you should set aside at least two hours a week to take pictures. That’s two hours when you are just walking around with your camera (and this book, of course), snapping away. It can be 20 minutes a day, all on a Sunday morning, or over a couple of lunch hours during the week—whatever works for you. The point is to start taking pictures on a regular basis.
The purpose of this exercise is two-fold:
1. First, it will take some or all of the pressure off when you’re in high-pressure photographic situations. You won’t be figuring out how your camera works when your daughter is walking down the aisle on her wedding day. Believe me, I still sweat the big photo-ops just as much as you do. But training is what helps me, as it will you, stay cool under pressure.
2. Second, it will teach you how to see, and what to look for to make photographs that you will enjoy and be proud of. If you don’t know what to take a picture of, just look around and find an object in your field of vision right now. A good photographer can make that object look interesting; a great photographer can make that object look fascinating. There’s always a picture worth taking somewhere around you; just pretend that your camera is a kaleidoscope and there’s no limit to the possibilities. Taking that picture and trying your best to make the mundane look interesting will train you over time how to use your camera creatively.
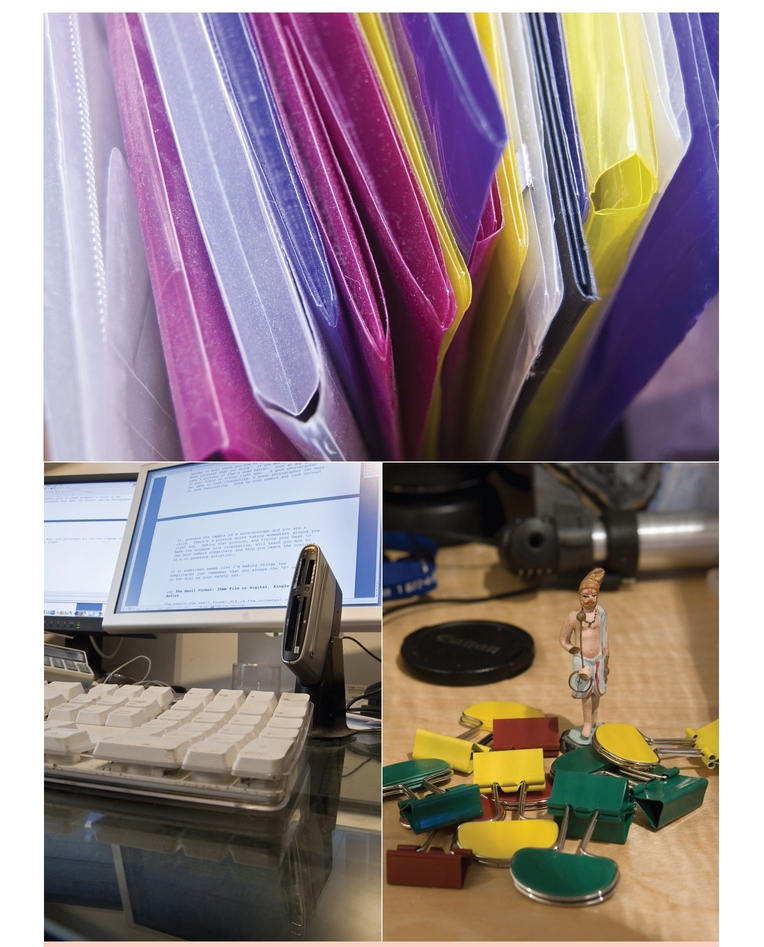
As proof of what I’m saying, here are three photographs I shot in my office just after writing the sentence you just read.
In the course of taking just these three quick pictures, I learned four things about the brand-new Nikon camera I am using:
• It has a little light on the front of the camera that turns on automatically to assist the autofocus in low light situations (more details on this later).
• In Program mode (or “P”), it changed the ISO (which stands for International Standards Organization; I’ll provide more details about that in Chapter 3) automatically to keep me from making a total blunder of a shot.
• I learned how to use the autofocus lock button (a very nice touch on this camera; you’ll learn why a little later on).
• There is no depth of field (DOF) preview button on the Nikon D40 (more details on this later).
Now, while some or all of that information may sound foreign to you at the moment, rest assured that very soon you’ll know it all. The point is, that’s a lot to learn in fewer than five minutes—and tinkering around with your camera is exactly how you will learn more about it.
Anatomy of a Single-Lens Reflex Camera
Small-format SLRs are the universal choice for required equipment at every university photography department because they are remarkably capable of doing almost everything. Professionally speaking, it’s the only camera I absolutely can’t do without.
Pro Tip
A good photographer is constantly playing around with his or her camera, learning how to use it and manipulate it. A good photographer also makes plenty of mistakes, which is a big part of the learning process.
The most appealing attribute of all SLRs, regardless of size or format, is the fact that you are looking through the actual lens that makes the photograph. When you shoot with an SLR camera, you pretty much see what you get (and get what you see).
All SLR cameras have a few things in common: the lens, the viewing and focusing system, the focal plane shutter, and the light meter.

Cutaway image of an SLR camera.
The Lens
Looking at the camera from front to back, we first see the lens. Inside the lens is an adjustable diaphragm, or aperture, which controls the amount of light passing through the lens. Light is an essential aspect of photography, so throughout this book we will talk about it constantly and explain how to use and manipulate it.
Aperture is the opening in a camera’s lens through which light passes, it can be made larger or smaller by the mechanical diaphragm, a series of overlapping blades which open and close like the iris of your eye.
The Viewing and Focusing System
Behind the lens is a movable mirror that redirects and projects the light passing through the lens onto a focusing screen. The mirror flips out of the way when you press the button to snap the picture, and it instantly flips back after the picture is taken. When the mirror flips out of the way, there is a temporary moment of blindness for the photographer because the mirror is no longer reflecting the image so it can be seen. But it all happens so fast that the blindness is typically negligible. Under certain conditions (using very long/slow shutter speeds) can it become a little problematic.
Photosensitive
Never touch the mirror on an SLR camera. It has been positioned to perfectly focus the image on the focusing screen at the same optical distance as the film or electronic sensor. Touching it or even blowing compressed air onto it can change its relationship to the focal plane and result in your photographs appearing out of focus even though they looked in focus when you took the picture.
The focusing screen is actually made of ground glass or finely etched plastic, which displays the image for viewing the scene projected by the lens with the focus as it will appear on the film. However, on the focusing screen the image is actually reversed from left to right. Above the focusing screen is a prism that flips the projected image once more, allowing you to see it in a normal, non-reversed, left-to-right orientation through the viewfinder.
The focusing screen has a series of marks that you will see light up in the viewfinder when shooting in autofocus camera. The lights indicate what the camera is focusing on when you shoot.
The term diopter is used to denote the optical power of a lens. The term is typically used by optometrists in prescribing corrective lenses.
On most modern cameras, there is also some form of diopter adjustment to tailor the camera’s eyepiece to your individual vision, or corrective prescription. Many people are not sure how this feature works. So, here’s a simple way to use it: just point the camera at a white wall and don’t worry about focusing the lens on the front of the camera. Look through the eyepiece and adjust the diopter setting until you can see all the information as clearly as possible, such as shutter speeds and focusing marks. Now, you’ll be able to see all the different functions you’ll be working with.
Right underneath the focusing screen, through the viewfinder, you will see a bar containing all of the information that is pertinent to the camera’s current settings, such as the shutter speed and f-stop (which we will cover later).
Photosensitive
Never leave a camera lying on its back outside with the lens facing up. Cameras can be damaged by the sun’s heat, being focused into the camera’s body.
The Focal Plane Shutter
Behind the mirror and just in front of the film (or electronic sensor on a DSLR), there is the shutter. Because of the shutter’s location, it is called a “focal plane shutter.”
Focal plane shutters are one of the most important features and advantages of small-format SLR cameras. On the other hand, they can also be one of the significant drawbacks, so let’s take a moment to review how they work.
Shutter refers to the camera component that allows controls the amount of time light is allowed to strike the film or digital sensor.
The focal plane shutter is like two window shades that move in unison across the focal plane and uncover the film or sensor. At slower shutter speeds (typically, less than 1⁄60th to 1⁄250th of a second) one shutter simply opens across the entire focal plane—beginning the exposure—and then the other shutter simply follows behind it and ends the exposure.
At higher shutter speeds, the two shutters move in unison creating only a slit that “paints” the light as they move across the film. The actual amount of light hitting the film is controlled by the size of the slit. At extremely high shutter speeds, the slit might be only a few millimeters wide. (This has some ramifications when you are shooting with flash, so you should understand the basics of how the shutter works.)
The focal plane shutter is a marvel of engineering. Capable of such high speeds—some as high as 1⁄8000th of a second—it can actually stop, or capture, the motion of a bullet in flight.
Having the focal plane shutter in the camera also means that lenses for small-format SLR cameras are less expensive compared to other camera types, because each lens doesn’t need to have its own shutter (like some professional cameras).
The Light Meter
The light meter is positioned in various places depending on the make, model, or vintage of the camera.
For our purposes right now, the most important thing to know is that the light meter reads the actual light coming through the lens. One of the most foolproof ways to accurately make a perfect exposure The recommended settings are displayed in the viewfinder and the photographer can choose to over-ride these recommendations, accept them, or use the camera in a fully manual mode. Learning to use the light meter well is probably the most necessary step to advancing your personal photography and avoiding the most common technical problems.
Pros and Cons of SLRs
The SLR camera (in all its forms), while virtually the most versatile photographic device created to date, does have some limitations. Here are its main pros and cons:
Pros:
• Very easy to pre-visualize the final image
• Vast array of available optics lenses, including those from third-party suppliers at a reduced cost
• Highly accurate exposures even with filters (we’ll cover filters more in a little bit)
• Highly portable, fast, and easy to use
Cons:
• Limited lighting options in certain situations due to slow flash synchronization
• Temporary “blindness” at the moment of exposure
• Highly portable, fast, and easy to use
Wait! Why is that last item on both lists?
Well, because as terrific as SLRs are, they are also common. The downside of being common is that the photographs made from these small cameras (especially digital ones) have a certain uniformity to the way they look and the way people use them. So, if you want your photographs to be truly interesting and unique, you have to add another ingredient: yourself.
Camera makers have made modern SLR cameras so easy to use that it’s easy to think you don’t need to know anything about photography to use them. But to use your camera well—to really understand how to take great pictures—you have get past thinking of and using your camera as a fancy point-and-shoot, and that means learning a little about photography. You might not know how to build a car, but you likely know the basics of how they operate—they need gas, oil changes, tune-ups, and so on. You also took lessons to learn how to drive, earned a driver’s license, and probably “practice” driving every day. Think of your photography in the same way—the camera is your car, and you’re learning to drive.
Setting Up Your Camera
If you have a brand-new camera, you should spend a few days just shooting with it—using the basic guidelines from its instruction book—and just getting a feel for your new camera. This will familiarize you with the basic menus and controls as well as teach you how to “fall back” on the camera’s automatic mode if you are totally confused in an important picture-taking situation.
Assuming you have done this already, let’s set up your camera so that you can get the most out of using it (along with this book).
Here are a few basic setup steps:
• Set the picture quality to JPEG (fine). (I’ll explain more about JPEGs later on.) On Canon cameras, this setting is called “Large” and has a smooth arc icon next to it. This will give you the highest-quality JPEG photos.
• Leave the camera set to “Auto White Balance” for now. (Again, more on this setting in a little bit.)
• On the Nikon D40, set up the “info display format.” Press the Menu button on the back of the camera. Then select the wrench icon then scroll down to choose “info display format. ” This is followed by “Select info display,” scroll down and you will then see a bar with "P, S, A, M,” select this option, press “OK” and then you see two more options, one says “classic” and the other “graphic.” Highlight the graphic bar and press “okay.” This will display a little graphic icon for lens aperture that we will discuss in the next chapter. If you prefer not to see this icon, you can change it later. Most other cameras have a separate window to display this information and need no setup. If you are a real beginner then seeing this icon might help you to get a better understanding of what the aperture is doing when we discuss it in the next chapter.
• Set your exposure mode dial to “A,” which will allow you to set the camera’s aperture easily (and the camera will set the shutter speed itself).
Don’t worry if you don’t fully understand all of these settings at this point. You will soon enough.
Pro Tip
As an assignment for young photographers, I often require that they spend a week shooting everything on a tripod—no matter how much light there is. Spending a solid week or month shooting everything on a tripod will absolutely make you a better, more thoughtful photographer. The surprising thing is that it will also make you faster because you’ll learn to see more carefully and think more decisively.
Camera Accessories
There are several photographic accessories that even the most casual photographer simply can’t live without.
Tripods
Tripods ($125 to $900) do a lot for photographers besides just hold their cameras. They make you slow down and really think about what you’re shooting. They enable you to truly level the camera on all of its axes, which gives a certain authority to photographs.
Every photographer needs a tripod. It’s not a very sexy thing to buy, but you need one readily available at all times. The tripod you left at home can’t help you and will only cause you frustration. Most quality tripods are sold as separate head/legs units. If you buy an all-in-one tripod, then be sure it is made for still photography. Many cheaper tripods are made for video cameras and might not allow you to rotate your camera for vertical shots. You will curse a cheap tripod every time you use it. If you buy a good tripod the first time, chances are you’ll own it forever. You might also want to buy a strap or bag to free your hands when you carry the tripod.
I’d start by setting up the tripod in the store; the legs should extend quickly and effortlessly. Make sure that you can get the top (without the camera attached) to at least the height of your chin without extending more than half of the center post. A good tripod should allow you to look though the camera without stooping. You might think this is because of back strain, but it’s really because we tend to compose photographs from our natural eye level. There is nothing more frustrating than setting up a tripod and discovering you don’t have the height you need.
Your choice of tripod material—aluminum, carbon fiber, basalt (a new lightweight fiber made from volcanic rock), or even wood—is just a matter of how much weight you’re willing to carry and how much of your budget you’re willing to spend.
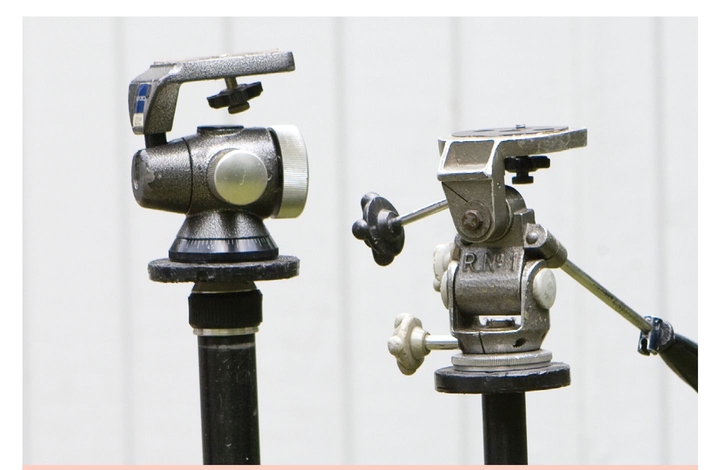
Two examples of basic tripod heads.
A last point on tripods is that there are two basic types of tripod heads (the part that sits on top of the legs):
• Ball heads are very compact and fast to work with. They also travel well because there are fewer protruding handles to break or bend.
• Three-way pan and tilt heads are more precise because they allow you to position each of the axes of the camera independently. Some are also geared, which allows for extremely precise movement and camera positioning.
The proper use of a tripod seems self-explanatory, but I see so many people making basic mistakes that a quick primer seems in order.
Always try to set the legs of the tripod so that you are using the minimum amount of center post. You’ll want a few inches of center column protruding so that you can fine tune the height but not so much that it introduces instability or camera shake.
Position the camera so that the lens is in alignment with one of the legs. Why? First, with longer lenses it puts the weight of the heavy lens over a leg for more security. Second, it means that you aren’t tripping over a leg sticking out from behind.
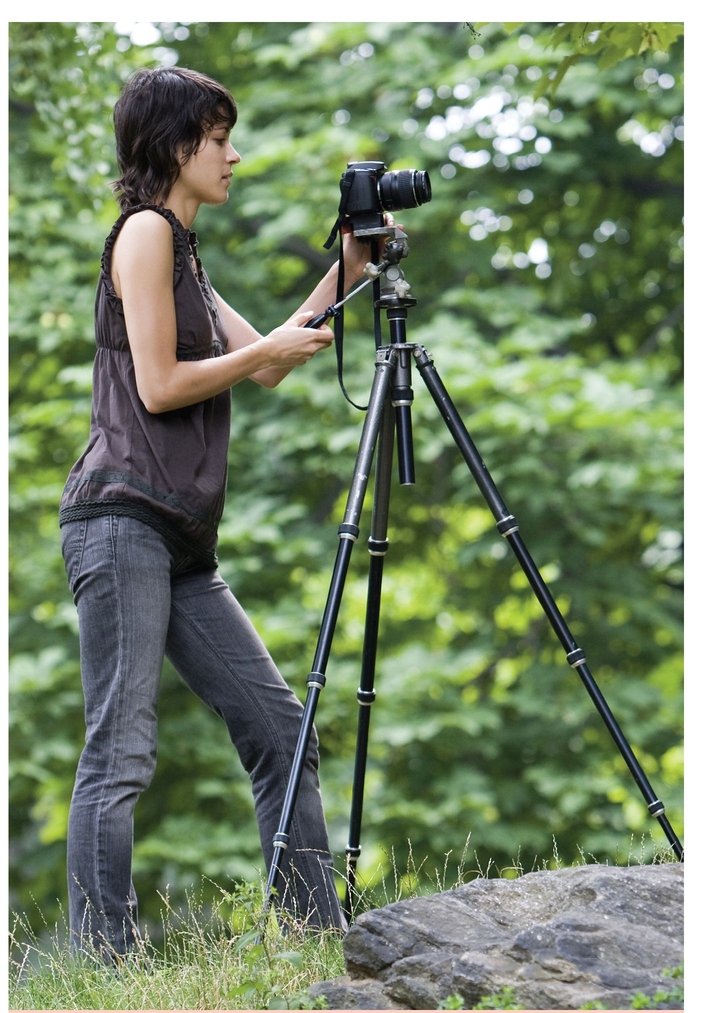
Proper use of a tripod.
On three-way-pan heads, the long adjustment paddle/locking knob goes behind the camera and the short one sticks out to the right. This allows the camera to flop quickly to the left for vertical photographs.
If it’s windy or the tripod is simply a little too light for the camera, hang a camera bag or something with some weight from the center column. This will allow you to get away with using a lighter tripod.
Quick Releases
Most tripods screw the camera onto the head using a knurled thumbscrew on the tripod head. This works perfectly, but can slow down mounting the camera to the tripod for each shot.
A quick release (about $100, comes standard on certain tripod brands) allows you to quickly and easily attach or detach the camera from the tripod. It works by using plates that are semi-permanently mounted to your camera and snap into the receiving unit that is screwed onto the tripod. A quick release is a real convenience if you like working on a tripod.
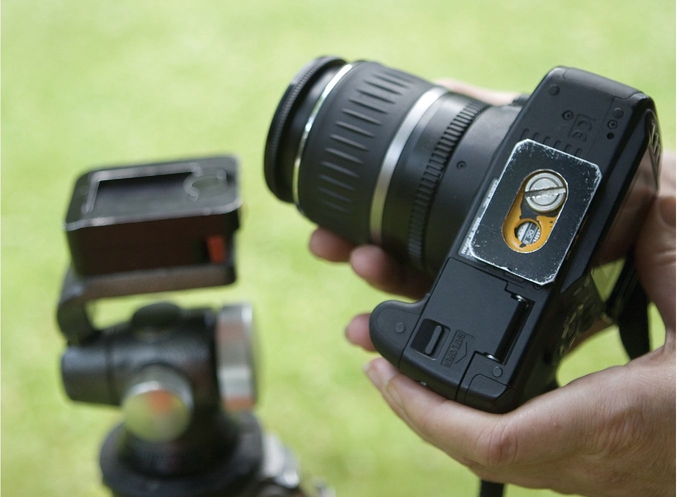
An example of a quick release.
Gaffer Tape
There are certain things a good photographer just doesn’t leave the house without, and gaffer tape is one of them. Next to Velcro and computers, gaffer tape is one of the hallmarks of advanced civilization. I have used this miracle adhesive to temporarily fix lenses, hold filters, tape extension cords to floors, tape cameras to motorcycles, fix flat tires, and shorten a model’s skirt. Gaffer tape is not to be confused with cheap duct tape. Although they look very similar, duct tape will leave gummy residue on your equipment and can rip the paint off walls.
Once you have a roll of real gaffer tape in your bag or at home— and use it—you will discover it is indispensable, not only to photographers, but modern life in general.
Cable Releases and Remotes
A cable release ($5 to $100) is a device (usually a flexible wire with an internal spring and plunger mechanism) that allows you to trip the cameras shutter without actually touching the camera.
If you are using a tripod at slow shutter speeds, you should use a cable release so that you don’t shake the camera.
Many modern digital cameras require an electronic cable release. Most manufacturers of digital cameras also offer remote shutter releases that use infrared light beams (like the remote on your TV) to trip the camera’s shutter. These can be very handy for including yourself in the shot.
If you don’t have a cable release available, use your camera’s self-timer in order to minimize camera shake during long exposures.
Filters and Lens Hoods
Filters ($20 to $100) and lens hoods ($15 to $40) are accessories that screw onto the front of your lens, they both help to protect the lens and preserve it’s optimal performance.
You should always use a lens hood, period. If you didn’t let the salesperson talk you into one when you bought your camera, get in the car now. I’ll wait here while you go back and buy one.
Any light—and let me repeat, any light—that strikes the lens and is not part of the scene you are shooting degrades the image to a certain degree. We call this stray light “flare,” and it’s usually most noticeable as little points of light that radiate from light sources in the photograph. A lens hood helps reduce or eliminate flare caused by sources outside the picture frame; yet, flare that is caused by a light source in the frame can’t be controlled.
Flare is caused by light that reflects on the interior surfaces of the camera and the individual elements of the lens. Other more subtle forms of flare can also occur, such as when you are using a skylight filter (more on this in a minute) on an overcast day. The large expanse of sky will reflect light onto the filter and slightly lower the contrast and resolution of the photograph. Lens hoods do a silent but effective job of controlling this type of flare as well.
In spite of (or possibly because of) all the advances in modern optics, flare actually seems to be more of a problem than it used to be—which is why lens hoods are a good idea. Modern zoom lenses (like the one that probably came with your camera) are a great convenience, but they are also far more complex optically and more prone to flare than the simpler lenses that are typical of older cameras.
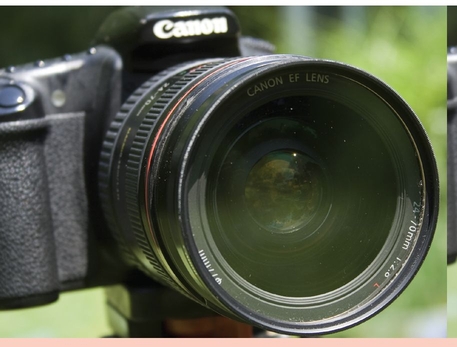
The pinpoint of sun you see reflected in the lens will cause lens flare. The dust will also be visible as a slight reduction in contrast in the final photograph.
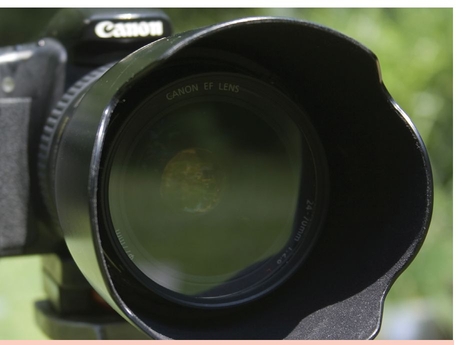
This lens will not flare, and the small amount of dust is now negligible.

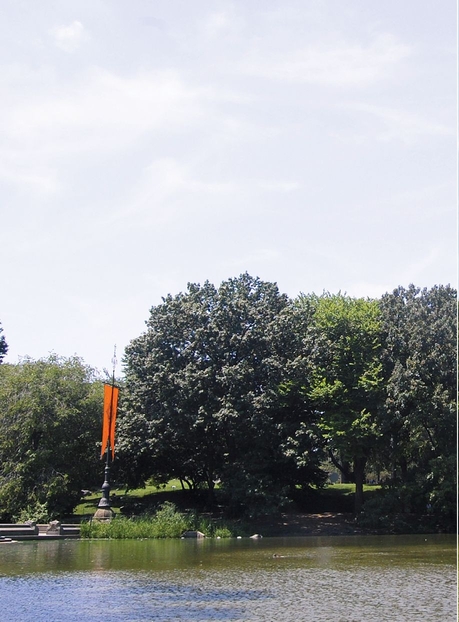
This photo was shot without a lens hood. The pink area in the trees is lens flare; the slight haziness to the right is caused by some dust that was on the skylight filter. Both flaws would be very difficult to fix in post-processing.
Skylight and Ultraviolet Haze Filters
Filters are like clear lens caps. Your lenses are significant investments, and they will never again be as clean and perfect as the first time you take them out of the box—so I highly recommend using filters (with a lens hood).
Good skylight filters are not just clear pieces of glass; they are optically neutral, multi-coated, precise additions to your lens that will protect it from the damage of everyday dust, grime, children’s fingerprints, and over-cleaning, it’s best to buy quality filters. A simple cheap one might be $20 while the top multi-coated filters might be $80. It may seem like a lot of money, but this is not at item to scrimp on. My lenses are all pristine—in spite of the abuse I subject my equipment to—because of skylight filters. When the filter is ruined I just throw it away.
The difference between a skylight and an ultraviolet haze filter is that a skylight filter is optically totally neutral while a UV haze filter cuts down the effect of atmospheric haze (slightly) but has no effect on the rest of the scene.
For most of my photography, I prefer to record things as I actually see them (which includes haze), so my wide-angle lenses all have skylight filters instead of UV haze filters. Long lenses get UV haze filters because the effect of haze is greater with long lenses, and the filters do seem to make a slight difference in the overall contrast.
Polarizing Filters
A polarizing filter is really an optional accessory, but it’s one of those things you don’t know you need until you need it.
When light strikes a reflective (but non-metallic) object, it becomes polarized. The light rays become parallel, and this is why you can see the reflection.
Polarizing filters act like the louvers of a Venetian blind, allowing you to control whether or not you want the reflected light to come through. You rotate the filter until the reflection is diminished to your satisfaction.

This photo was shot without a polarizing filter. The reflections (due to polarized light) in the water’s surface obscure the view underneath the water.
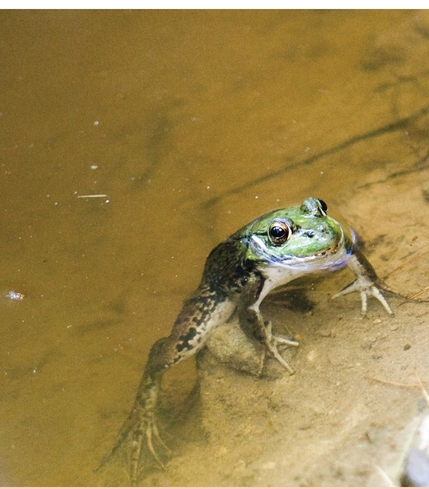
A photo shot with a polarizing filter allows the photographer to control the reflection by reducing the polarized light.
This photograph was shot without a polarizing filter.

This photo was shot with a polarizing filter in order to accentuate clouds in the sky.
Because the blue of the sky is diminished by stray reflections in the atmosphere, a polarizer can also accentuate clouds in photographs by darkening the blue of the sky.
Newer autofocus lenses require use of a “circular” polarizing filter in order to maintain their ability to auto focus. However, the newer circular filters are so prevalent today that almost any salesperson will automatically assume you want this model. If you have a hand-me-down of the older “linear” polarizers it will still work with a modern camera as long as you focus the camera manually.
Card Readers
A card reader ($30) is a device that allows you to take the memory card out of your camera and download your photos directly from the card. It quickly transfers photographs to your computer (and also ensures that your camera’s battery won’t be exhausted midway though downloading photos from your memory card). You just insert your memory card into your card reader, which is plugged into your computer, and download your photographs. It is a very inexpensive convenience, and I highly recommend it.
Digital Storage Devices
Small hard drives/viewers ($100 to $500) can be used to download the pictures from your camera’s digital media card so the media card can then be erased and reused. But because digital media cards, such as Secure Digital (SD) and CompactFlash (CF),) have consistently come down in price and are currently quite inexpensive, a digital viewer/drive isn’t as important as it was a few years ago.
While not all storage devices have screens to view your work, the ones that do are a great way to look at your photographs in the field when you don’t have a computer available. I’d certainly want one on any extended vacation as a way to back up photos and share them. Most can also serve as media players, enabling you to watch movies and listen to music.

An example of a photo storage device.
Point-and-Shoot Cameras
I include these cameras as an additional piece of equipment because this book assumes you are beyond the point-and-shoot stage as a photographer.
Chances are you already own one, but if you are considering getting a new one I would suggest that you get one that uses the same SD or CF cards as your SLR.
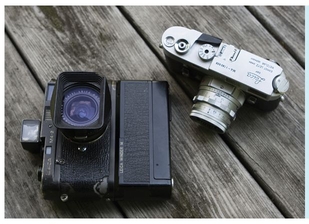
I own a digital point-and-shoot camera, but my personal choice is still one that shoots film. The tiny sensors in digital point-and-shoot cameras still aren’t good enough for my tastes (yet). I also require an optical viewfinder in any point-and-shoot camera I’d own. Good photography isn’t done at arm’s length on a TV screen.
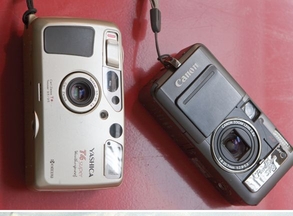
Some examples of point-and-shoot cameras.
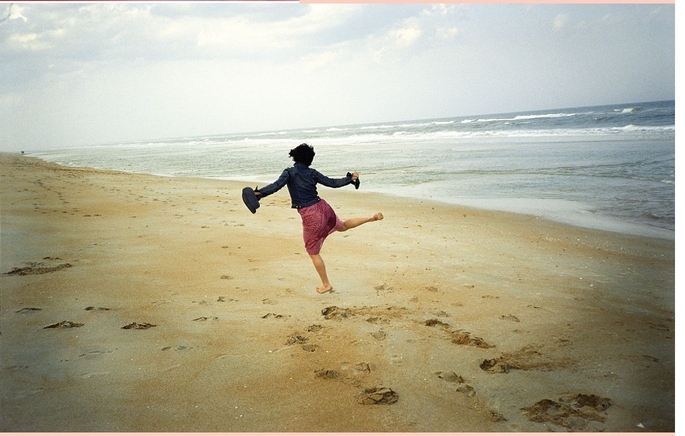
A photo shot with a point-and-shoot camera.
Whatever type you choose, every photographer needs a great point-and-shoot camera, something, small and inconspicuous to throw in your pocket when your SLR is more than you want to carry.
The Least You Need to Know
• The small-format, single-lens reflex (SLR) is the most versatile camera created to date.
• Lens hoods, skylight filters, and tripods are essential accessories that will extend your photographic capabilities.
• Great photography takes some investment and time. Practicing every day or at least a few hours per week will quickly take your photos from good to great.
..................Content has been hidden....................
You can't read the all page of ebook, please click here login for view all page.