
Setting Up for Camera Projection
If you’re new to Maya, it’s a good idea to watch the Essential Skills Movies that appear when you first start Maya. If they don’t come up, choose Help Learning Movies. There are seven movies, each about a minute long, and they will provide you with the Maya basics to do this lesson.
Set the Project Folder
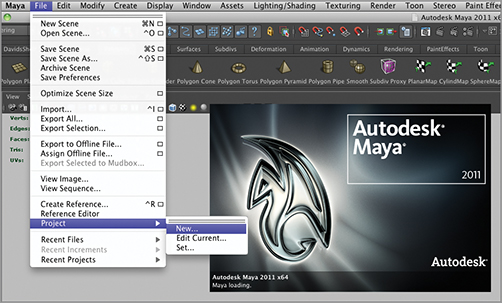
After you open Maya, set up a new project by choosing File Project New to create a new project folder (Figure 8-12). Name the new project Castle_Project. You’ll use this project folder for the entire camera projection, so locate it somewhere convenient on your hard drive.
Figure 8-12: Open Maya, and set up a new project file.
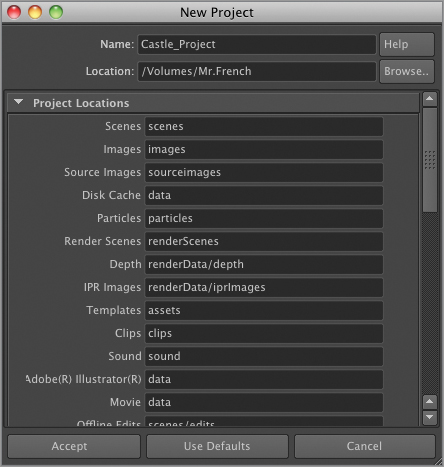
Click Use Defaults, and then click Accept (Figure 8-13). Doing so creates a new project folder to organize your files. Notice that because you chose Use Defaults, Maya creates many different folders inside your project folder—including images, mel, scenes, and sourceimages—which will hold the different assets you create for the project. You should now move all the color and alpha channel files for the castle layers into the sourceimages folder in the Castle_Project folder you just created.
Figure 8-13: Create a new Maya project folder.
Save your Maya file to the scenes file in the Maya project folder directory. Maya files can be saved as either Maya Binary (.mb) or Maya ASCII (.ma) files. Save the file as a .ma file.
Create a Projection Camera
Next, create a new projection camera to use to line up your geometry. To do so, choose Create Cameras Camera, and click the box to the right of Camera menu item to open the Create Camera Options dialog box (Figure 8-14).
Figure 8-14: Create Camera Options dialog box
You need to estimate the focal length of the new camera. Because you’re working on a painted scene, you don’t have a focal length with which to work. However, since the demonstration file was not created using extreme vanishing points, you can make an intelligent guess regarding the focal length. Start by entering 50 mm for the focal length under Lens Properties. You can leave the rest of the properties at their defaults for the time being. Click Create to close the dialog box.
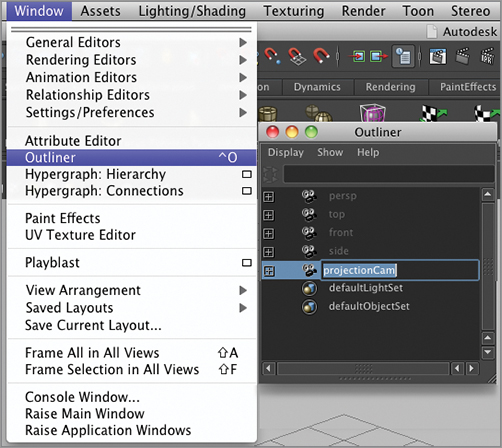
Choose Window Outliner to open the Outliner, which lists all the objects, lights, and cameras in the scene (Figure 8-15). Double-click the default camera name, camera1, and rename it projectionCam because you’ll be projecting the painting from this camera.
Figure 8-15: Maya Outliner window
Set the Rendering Parameters
Open Render Settings to input your rendering parameters. To do so, on the top menu, click the icon that resembles a clapboard with two dots next to it ![]() .
.
Choose the following (Figure 8-16):
- File Name Prefix: Castle_Project.
- Image Format: Maya IFF. Usually, you’ll want to render out to a file sequence rather than a QuickTime movie. If you render out to a movie and the render crashes, you lose all your work.
- Frame/Animation Ext: name.#.ext.
- Frame Padding: 4.
- Start Frame and End frame: 1 and 200.
- Alpha Channel (Mask): deselect, because you won’t need the alpha channel in your render.
- Width and Height: the width and height of your original Photoshop file. This size should exactly match the TIFF files you prepared for each layer.
One of the most common errors I see in file setup by students is not matching the Width and Height to the actual file size of the images to be projected. Double check that this dimension matches the original Photoshop file!
Figure 8-16: Maya Render Settings dialog box
After you enter the width and height of your painting, Maya automatically calculates the device aspect ratio by dividing the TIFF file by dividing the TIFF file’s width by the height. In this case, it’s 2,048 divided by 1,800, or 1.138.
Set the Film Aspect Ratio
You need to use the device aspect ratio from the Render Settings dialog box in another place: the number must be entered in the Film Aspect Ratio setting in the projectionCamShape node. Leave the Render Settings dialog box open, and move it to one side while you adjust the film aspect ratio.
To open the projectionCamShape node in the Maya Attribute Editor, do the following:
1. Select projectionCam in the Outliner by clicking the name.
2. Choose Window Attribute Editor. The Attribute Editor lists the parameters of any object you have selected.
3. The projectionCamShape attributes appear in the Attribute Editor.
4. Move down to the Film Back rollout, and enter the number from the Render Settings Device Aspect Ratio setting into the Film Aspect Ratio field (see Figure 8-17).
Figure 8-17: Device aspect ratio and film aspect ratio
The device aspect ratio and film aspect ratio are determined by the dimensions of the castle painting and the TIFF files you prepared. Double-check to see that these two numbers are the same, and correct them for your files if necessary. If the values aren’t the same, the projection won’t line up!
Turn off the Default Light
You must attend to one last detail in the Render Settings dialog box: you need to turn off the default light. To do so, deselect Enable Default Light (Figure 8-18). You may need to expand or scroll down in the Render Options rollout to get to this setting, because it’s at the bottom.
Figure 8-18: Turn off Enable Default Light

You don’t need the default light. You’ll use the lighting from your painting, not Maya’s 3D lights, to illuminate your scene. Close the Render Settings dialog and the Outliner.