Now you’ll add an image plane to projectionCam to use as a reference for modeling. An image plane is attached to a particular camera, and it serves as a backdrop for that camera. The image is fixed to the camera at a distance you set, so it moves when the camera moves in any direction (Figure 8-19). By default, the camera doesn’t have an image plane attached to it.
Figure 8-19: Image plane attached to a camera
Assign the Image Plane to the projectionCam
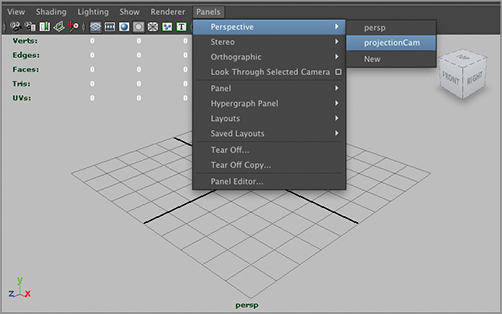
You need to assign the full castle painting as the image plane, or backdrop, for projectionCam. Depending on how your interface is set up, you may have 1–4 viewport panels visible. Click inside any one of the viewport panels. At the top of each viewport panel is a menu—a unique set of controls that only pertains to that view. In the viewport menu, choose Panels Perspective projectionCam to set that viewport to see the scene from projectionCam (Figure 8-20).
Figure 8-20: Set the viewport to projectionCam.
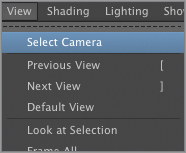
Even though you set the viewport to projectionCam, you still need to select the camera. From the viewport menu, choose View Select Camera to select the projectionCam camera (Figure 8-21). You could have done this through the Outliner window, but this way is handier because you don’t need to leave the view to select your camera.
Figure 8-21: Select projectionCam to add the image plane.
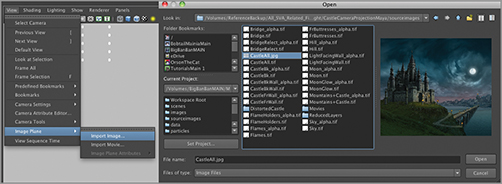
At this point, you can add the image plane. With your camera selected, choose View Image Plane Import Image, and import the flattened version of the painting showing all the layers. You may have saved this as either a JPEG file or a TIFF; either will work (Figure 8-22). You’ll use this plane to line up the geometry.
Figure 8-22: Import the image plane.
Turn on the Resolution Gate
With projectionCam still selected, choose View Camera Settings Resolution Gate. Turning on Resolution Gate gives you some extra space around the image in the viewport (Figure 8-23). This ensures that you can see the entire image.
Figure 8-23: Turn on Resolution Gate.
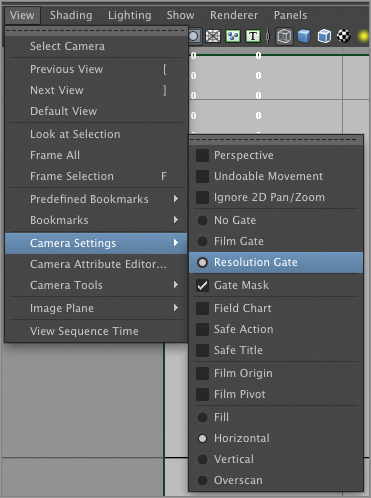
Image Plane Attributes
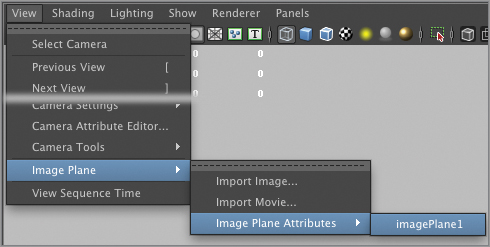
You should position the image plane so it fills the view of the camera entirely. To do so, choose View Image Plane Image Plane Attributes imagePlane1 (Figure 8-24).
Figure 8-24: Image plane attributes
With the image plane attributes open, scroll down to the Placement rollout, and click Fit To Resolution Gate. By adjusting Depth to 750, you move the image plane further out to make room for the geometry you’ll add to the scene (Figure 8-25).
The view of the castle painting in the projectionCam viewport won’t change, because no matter how far away or near the image plane is, it always fills the viewport.
Figure 8-25: Image plane depth