8
Incremental modularization of existing projects
This chapter covers
- Working with the unnamed
- Helping modularization with automatic modules
- Incrementally modularizing a code base
- Mixing class path and module path
Depending on how smoothly your migration to Java 9+ went (see chapters 6 and 7), you may have encountered a few of the more unpleasant effects of introducing a module system to an ecosystem that’s old enough to order its own beer. The good news is it was worth it! Java 9+ has a lot to offer beyond the module system. If you’re in a position to raise your project’s Java requirements to 9, you can start using them right away.
You can also finally start modularizing your project. By turning artifacts into modular JARs, you and your users can benefit from reliable configuration (see section 3.2.1), strong encapsulation (section 3.3.1), decoupling via services (see chapter 10), run-time images including entire applications (see 14.2), and more module-related goodness. As section 9.3.4 shows, you can even modularize projects that run on Java 8 and before.
There are two ways to make JARs modular:
- Wait until all your dependencies are modularized, and then create module descriptors for all artifacts in one fell swoop.
- Start early by modularizing only your artifacts, possibly just a few at a time.
Given everything discussed in chapters 3, 4, and 5, implementing the first option should be straightforward. You may need some of the more-advanced module system features that chapters 10 and 11 present, but other than that, you’re good to go: create a module declaration for each artifact you’re building, and model their relationships as you learned earlier.
Maybe your project sits atop a deep dependency tree, though, and you’re not one to wait until all the dependencies are finished modularizing. Or perhaps your project is too big to turn all artifacts into modules in one go. In those cases, you may be curious about the second option, which allows you to incrementally modularize artifacts regardless of whether their dependencies are modular or plain JARs.
Being able to use modular and mon-modular artifacts side by side not only is important for individual projects, but also means the ecosystem as a whole can embrace modules independently of one another. Without that, the ecosystem’s modularization might have taken several decades—this way, everyone should be able to do it within one decade.
This chapter is dedicated to features that enable incrementally modularizing existing projects: we start by discussing the combination of class path and module path, then examine the unnamed module, and wrap up by looking at automatic modules. When you’re done, your project or parts of it will benefit from the module system despite potentially unmodularized dependencies. You’ll also be well prepared for chapter 9, which discusses strategies for modularizing applications.
8.1 Why incremental modularization is an option
Before we get into how to incrementally modularize a project, I want to contemplate why that is even an option. Module systems usually require everything to be a module. But if they’re late to the game (like the JPMS) or are only used by a small share of their ecosystem (like OSGi or JBoss Modules), they can hardly expect that to be the case. They have to find a way to interact with mon-modular artifacts.
In this section, we first ponder what would happen if every JAR had to be modular to run on Java 9+, leading to the conclusion that it must be possible to mix plain JARs and modules (section 8.1.2). I then show how using the class path and the module path side by side allows this mix-and-match approach (section 8.1.3).
8.1.1 If every JAR had to be modular …
If the JPMS was strict and demanded that everything be a module, you could only use it if all JARs contained a module descriptor. And because the module system is an integral part of Java 9+, by extension you couldn’t even update to it without having modularized all your code and dependencies. Imagine the consequences if that were the case.
Some projects might update to Java 9+ early, forcing all their users to modularize their code bases or stop using the project. Others might not want to force that decision or have other reasons not to make the jump, thus holding their users back. I wouldn’t want my project to have dependencies that made opposing decisions. What could I do?
Then again, some projects would ship separate variants with and without module descriptors, for which they would have to use two entirely disjoint sets of dependencies (one with and one without module descriptors). Furthermore, unless they were backporting across old major and minor versions, users would be forced to perform a lot of (possibly time-consuming) updates all at once to be able to make the jump to Java 9+. And that doesn’t even consider projects that are no longer maintained, which would swiftly become unusable on Java 9+ even if they didn’t have any dependencies themselves.
The only way to avoid wasted effort and a deep split would be for the entire ecosystem to have a day on which every project updated to Java 9+ and started to release modular JARs. But there’s no way that would work. And whichever way we sliced it, anyone executing a JAR would have to know which Java version it was created for, because it wouldn’t work on 8 and 9. In summary: we’d be in big trouble!
8.1.2 Mixing and matching plain JARs with modules
To bypass that trouble, the module system must offer a way to run mon-modularized code on top of the modularized JVM. In the introduction to chapter 6, I explain that this is indeed the case and that plain JARs on the class path work just as they did before Java 9+. (As chapters 6 and 7 explain, the code they contain may not function, but that’s a different matter.) Section 8.2 explains how class-path mode works.
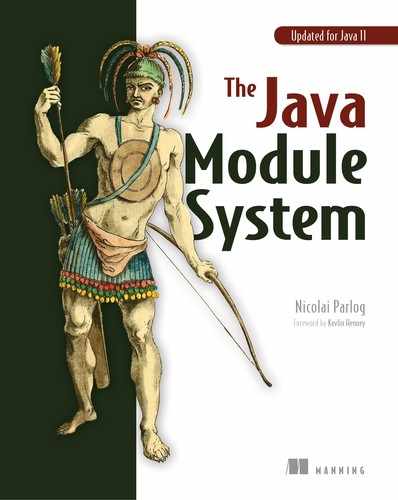
Just the fact that it works is already an important revelation: the module system can handle mon-modularized artifacts and knows how to navigate the boundary between them and explicit modules. That’s good news—and there’s more: that boundary isn’t set in stone. It doesn’t have to separate application JARs from JVM modules. As figure 8.1 shows and the rest of this chapter explores, the module system allows you to move that boundary and to mix and match modularized and mon-modularized application JARs with platform modules as your projects require.

Figure 8.1 The module system allows non-modular code to run on a modular JDK (left). More important, it gives you the tools to move that boundary (right).
8.1.3 Technical underpinnings of incremental modularization
The basic principle that makes incremental modularization possible is that the class path and module path can be used side by side. There is no need to move all application JARs from the class to the module path in one go. Instead, existing projects are encouraged to start on the class path and then slowly move their artifacts to the module path as modularization efforts progress.
Using both paths at the same time with plain as well as modular JARs requires a clear understanding of how these concepts relate. You may be thinking that JARs lacking a module descriptor go onto the class path and that modular JARs go onto the module path. Although I never said it like that, you’d be excused for having read between the lines. Nevertheless, that theory is wrong, and now is the time to let go of it.
Two mechanisms invalidate that theory and make incremental modularization possible:
- The unnamed module is implicitly created by the module system with all the content loaded from the class path. In it, the chaos of the class path lives on. (Section 8.2 explains in detail.)
- An automatic module is created by the module system for each plain JAR it finds on the module path. (Section 8.3 is dedicated to this concept.)
The class path makes no distinction between plain and modular JARs: if it’s on the class path, it ends up in the unnamed module. Similarly, the module path makes little distinction between plain and modular JARs: if it’s on the module path, it ends up as its own named module. (For plain JARs, the module system creates an automatic module; for modular JARs, it creates an explicit module according to the description.)
To understand the rest of this chapter as well as to perform a modularization, it’s important to fully internalize that behavior. Table 8.1 shows a two-dimensional recast. Not the type of JAR (plain or modular) but the path it’s placed on (class path or module path) determines whether it becomes part of the unnamed module or a named module.
| Class path | Module path | |
| Plain JAR | Unnamed module (section 8.2) | Automatic module (section 8.3) |
| Modular JAR | Explicit module (section 3.1.4) |
When deciding whether to place a JAR on the class path or the module path, it’s not about where the code comes from (is the JAR modular?); it’s about where you need the code to be (in the unnamed or a named module). The class path is for code you want to go into the ball of mud, and the module path is for code you want to be a module.
But how do you decide where code needs to go? As a general guideline, the unnamed module is about compatibility, enabling projects using the class path to work on Java 9+; whereas automatic modules are about modularization, allowing projects to use the module system even if dependencies aren’t yet modularized.
For a more detailed answer, it’s time to look more closely at the unnamed and automatic modules. Chapter 9 then defines larger modularization strategies. If you’re wondering whether modularizing an existing project is worth the hassle, take a look at section 15.2.1.
8.2 The unnamed module, aka the class path
There’s one aspect I haven’t yet explained in detail: how do the module system and the class path work together? The first part of the book gives a clear view of how modular applications place everything on the module path and run on the modularized JDK. Then came chapters 6 and 7, which are big on compiling non-modular code and running applications from the class path. But how does the class-path content interact with the module system? Which modules are resolved, and how? Why can the class-path content access all platform modules? The unnamed module answers these questions.
Exploring them has more than academic value. Unless an application is fairly small, it probably can’t be modularized all at once; but incremental modularization involves mixing JARs and modules, class path and module path. This makes it important to understand the underlying details of how the module system’s class-path mode works.
The unnamed module contains all mon-modular classes, which are
- At compile time, the classes being compiled, if they don’t include a module descriptor
- At compile time and run time, all classes loaded from the class path
As section 3.1.3 describes, all modules have three central properties, and this is also true for the unnamed module:
- Name —The unnamed module has none (makes sense, right?), which means no other module can mention it in their declarations (for example, to require it).
- Dependencies —The unnamed module reads all other modules that make it into the graph.
- Exports —The unnamed module exports all its packages and also opens them for reflection (see section 12.2 for details on open packages and modules).
In contrast to the unnamed module, all other modules are said to be named. Services provided in META-INF/services are made available to the ServiceLoader. See chapter 10 for an introduction to services and particularly section 10.2.6 for their interaction with the unnamed module.
Although it isn’t exactly straightforward, the concept of the unnamed module makes sense. Here you have the orderly module graph, and over there, a little to the side, you have the chaos of the class path, lumped into its own free-for-all module with some special properties (see figure 8.2). (To not make matters more complicated than they have to be, I didn’t tell you at the time, but the unnamed module underlies all of chapters 6 and 7, where you could replace every occurrence of class-path content with unnamed module.)
Let’s get back to the ServiceMonitor application and assume it was written before Java 9. The code and its organization are identical to what we discussed in previous chapters, but it lacks module declarations, so you create plain JARs instead of modular JARs.
Assuming the jars folder contains all application JARs and libs contains all dependencies, you can launch the application as follows:
$ java --class-path 'jars/*':'libs/*' monitor.Main
This works on Java 9+, and, aside from the alternative form of the --class-path option, it does the same on Java 8 and earlier. Figure 8.2 shows the module graph the module system creates for this launch configuration.

Figure 8.2 Launched with all application JARs on the class path, the module system builds a module graph from the platform modules (left) and assigns all classes on the class path to the unnamed module (right), which can read all other modules
Armed with that understanding, you’re well prepared to run simple, mon-modular applications from the class path. Beyond that basic use case, and particularly when slowly modularizing an application, the subtleties of the unnamed module become relevant, so we look at them next.
8.2.1 The chaos of the class path, captured by the unnamed module
The unnamed module’s main goal is to capture class-path content and make it work in the module system. Because there were never any boundaries between JARs on the class path, it makes no sense to establish them now; so having a single unnamed module for the entire class path is a reasonable decision. Within it, just like on the class path, all public classes are accessible and the concept of split packages doesn’t exist.
The unnamed module’s distinct role and its focus on backward compatibility give it a few special properties. You saw in section 7.1 that at run time, strong encapsulation of platform modules is mostly disabled for code in the unnamed module (at least on Java 9, 10, and 11). When we discussed split packages in section 7.2, you discovered that the unnamed module isn’t scanned, so package splits between it and other modules aren’t discovered and the class path portion isn’t available.
One detail that’s a little counterintuitive and easy to get wrong is what constitutes the unnamed module. It seems obvious that modular JARs become modules and hence plain JARs go into the unnamed module, right? As explained in section 8.1.3, this is wrong: the unnamed module is in charge of all JARs on the class path, modular or not.
As a consequence, modular JARs aren’t bound to be loaded as modules! If a library starts delivering modular JARs, its users are by no means forced to use them as modules. Users can instead leave them on the class path, where their code is bundled into the unnamed module. As section 9.2 explains in more detail, this allows the ecosystem to modularize almost independently of one another.
As an example, let’s launch the fully modularized version of ServiceMonitor, once from the class path and once from the module path:
$ java --class-path 'mods/*':'libs/*' -jar monitor
$ java --module-path mods:libs --module monitor
Both work fine and without any obvious differences.
One way to see how the module system treats both cases is to use an API that we take a closer look at in section 12.3.3. You can call getModule on a class to get the module it belongs to and then call getName on that module to see what it’s called. For the unnamed module, getName returns null.
Let’s include the following lines of code in Main:
String moduleName = Main.class.getModule().getName();
System.out.println("Module name: " + moduleName);
When launched from the class path, the output is Module name: null, indicating that the Main class ended up in the unnamed module. When launched from the module path, you get the expected Module name: monitor.
Section 5.2.3 discusses how the module system encapsulates resources in packages. This only partly applies to the unnamed module: within a module, there are no access restrictions (so all JARs on the class path can access resources from one another), and the unnamed module opens all packages to reflection (so all modules can access resources from JARs on the class path). Strong encapsulation does apply to access from the unnamed to a named module, though.
8.2.2 Module resolution for the unnamed module
An important aspect of the unnamed module’s relation to the rest of the module graph is which other modules it can read. As described, it can read all modules that make it into the graph. But which modules are those?
Remember from section 3.4.1 that module resolution builds a module graph by starting with the root modules (particularly the initial module) and then iteratively adding all their direct and transitive dependencies. How would that work if the code under compilation or the application’s main method is in the unnamed module, as is the case when launching an application from the class path? After all, plain JARs don’t express any dependencies.
If the initial module is the unnamed one, module resolution starts in a predefined set of root modules. As a rule of thumb, these are the system modules (see section 3.1.4) that don’t contain JEE APIs, but the actual rule is a little more detailed:
- The precise set of java.* modules that become root depends on the presence of the java.se module (the module representing the entire Java SE API—it’s present in full Java images but may be absent from custom run-time images created with
jlink):
- If java.se is observable, it becomes root.
- If it isn’t, every java.* system module and java.* module from the upgrade module path that exports at least one package without qualification (meaning without limitation to who can access the package—see section 11.3) becomes root.
- Beyond java.* modules, every other system module and module on the upgrade module path that isn’t an incubating module and exports at least one package without qualification becomes a root module. This is particularly relevant to jdk.* and javafx.* modules.
- Modules defined with
--add-modules(see section 3.4.3) are always root modules.

Figure 8.3 Which modules become the root for module resolution (see section 3.4.1) depends on whether the initial module was defined with --module (if not, the unnamed module is the initial one) and whether java.se is observable. In any case, modules defined with --add-modules are always root modules.
This is a little complicated (see figure 8.3 for a visualization), but it may become important in edge cases. The rule of thumb that all system modules except the JEE and incubating ones are resolved should cover at least 90% of cases.
As an example, you can run java --show-module-resolution and observe the first few lines of output:
> root java.se jrt:/java.se
> root jdk.xml.dom jrt:/jdk.xml.dom
> root javafx.web jrt:/javafx.web
> root jdk.httpserver jrt:/jdk.httpserver
> root javafx.base jrt:/javafx.base
> root jdk.net jrt:/jdk.net
> root javafx.controls jrt:/javafx.controls
> root jdk.compiler jrt:/jdk.compiler
> root oracle.desktop jrt:/oracle.desktop
> root jdk.unsupported jrt:/jdk.unsupported
This isn’t the entire output, and the order could be different on your system. But starting at the top, you can see that java.se is the only java.* module. Then there are a bunch of jdk.* and javafx.* modules (spot jdk.unsupported from section 7.1.1) as well as an oracle.* module (no idea what that one does).
You can easily observe that behavior by launching ServiceMonitor from the module path without defining an initial module:
$ java --module-path mods:libs monitor.Main

> Error: Could not find or load main class monitor.Main
> Caused by: java.lang.ClassNotFoundException: monitor.Main
Running the same command with --show-module-resolution confirms that no monitor.* modules are resolved. To fix that, you can either use --add-modules monitor, in which case monitor is added to the list of root modules, or --module monitor/monitor.Main, in which case monitor becomes the only root module (the initial module).
8.2.3 Depending on the unnamed module
One of the module system’s primary goals is reliable configuration: a module must express its dependencies, and the module system must be able to guarantee their presence. We settled that in section 3.2 for explicit modules with a module descriptor. What would happen if you tried to expand reliable configuration to the class path?
Let’s make a thought experiment. Imagine modules could depend on the class-path content, maybe with something like requires class-path in their descriptor. What guarantees could the module system make for such a dependency? As it turns out, almost none. As long as there is at least one class on the class path, the module system would have to assume the dependency is fulfilled. That wouldn’t be helpful (see figure 8.4).

Figure 8.4 If com.framework depended on some class-path content with the hypothetical requires class-path, the module system couldn’t determine whether that requirement was fulfilled (left). If you build your application on that framework, you wouldn’t know what to do to fulfill that dependency (right).
Even worse, it would seriously undermine reliable configuration, because you might end up depending on a module that requires class-path. Well, that contains next to no information—what exactly needs to go on the class path (again, see figure 8.4)?
Spinning this hypothetical even further, imagine two modules, com.framework and org.library, depended on the same third module, say SLF4J. One declared the dependency before SLF4J was modularized and hence requires class-path; the other declared its dependency on a modularized SLF4J and hence requires org.slf4j (assuming that’s the module name). Now, on which path would anybody depending on com.framework and org.library place the SLF4J JAR? Whichever they chose: the module system had to determine that one of the two transitive dependencies wasn’t fulfilled. Figure 8.5 shows this hypothetical situation.
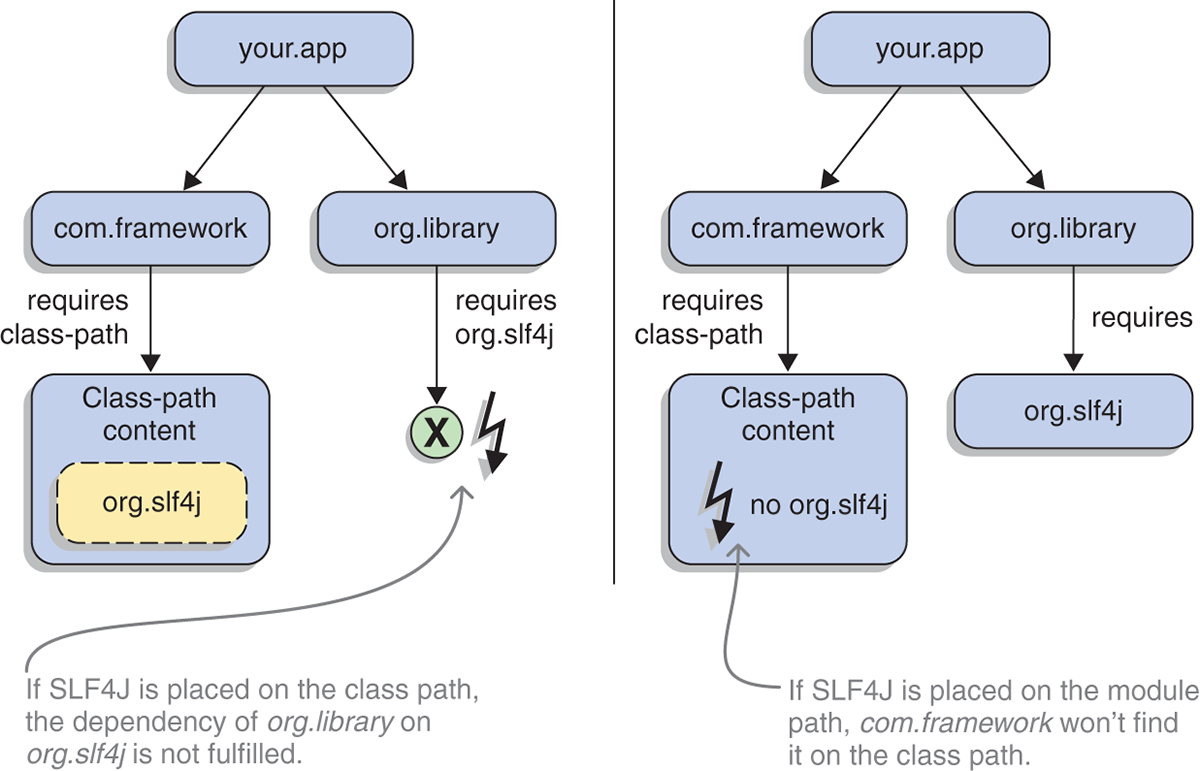
Figure 8.5 If com.framework depended on SLF4J with the hypothetical requires class-path and org.library required it as a module with requires org.slf4j, there would be no way to satisfy both requirements. Whether SLF4J was placed on the class path (left) or the module path (right), one of the two dependencies would be considered unfulfilled.
Thinking this through leads to the conclusion that depending on arbitrary class-path content isn’t a good idea if you want reliable modules. And for that reason, there’s no requires class-path.
How do we best express that the module that ends up holding the class-path content can’t be depended on? In a module system that uses names to reference other modules? Not giving that module a name—making it unnamed, so to speak—sounds reasonable.
And there you have it: the unnamed module has no name because no module is supposed to ever reference it in a requires directive—or any other directive, for that matter. Without requires, there’s no readability edge, and without that edge, code in the unnamed module is inaccessible to modules.
In summary, for an explicit module to depend on an artifact, that artifact has to be on the module path. As mentioned in section 8.1.3, this may mean you place plain JARs on the module path, which turns them into automatic modules—a concept we explore next.
8.3 Automatic modules: Plain JARs on the module path
The long-term goal of any modularization effort is to upgrade plain JARs to modular JARs and to move them from the class path to the module path. One way to get there is to wait until all your dependencies come to you as modules and then modularize your own project—this is a bottom-up approach. That could be a long wait, though, so the module system also allows top-down modularization.
Section 9.2 explains both approaches in detail, but for the top-down approach to work you first need a new ingredient. Think about it: how can you declare a module if your dependencies come in plain JARs? As you saw in section 8.2.3, if you place them on the class path, they end up in the unnamed module, and your module can’t access that. But you paid attention in section 8.1.3, so you know that plain JARs can also go onto the module path, where the module system automatically creates modules for them.
For every JAR on the module path that has no module descriptor, the module system creates an automatic module. Like any other named module, it has three central properties (see section 3.1.3):
- Name —An automatic module’s name can be defined in the JAR’s manifest with the
Automatic-Module-Nameheader. If it’s missing, the module system generates a name from the filename. - Dependencies —An automatic module reads all other modules that make it into the graph, including the unnamed module (as you’ll see soon, this is important).
- Exports —An automatic module exports all its packages and also opens them for reflection (see section 12.2 for details on open packages and modules).
In addition, executable JARs result in executable modules, which have their main class marked as described in section 4.5.3. Services provided in META-INF/services are made available to the ServiceLoader—see chapter 10 for an introduction to services and particularly section 10.2.6 for their interaction with automatic modules.
Once again assuming ServiceMonitor wasn’t yet modularized, you can nonetheless place its artifacts on the module path. If the directory jars-mp contains monitor.jar, monitor.observer.jar, and monitor.statistics.jar, and jars-cp contains all other application and dependency JARs, you could launch ServiceMonitor as follows:
$ java
    --module-path jars-mp
    --class-path 'jars-cp/*'
    --module monitor/monitor.Main
You can see the resulting module graph in figure 8.6. Some details may be unclear (like, why did all three automatic modules make it into the graph even though only monitor was referenced on the command line?). Don’t worry; I explain in the next sections.

Figure 8.6 With the plain JARs monitor.jar, monitor.observer.jar, and monitor.statistics.jar on the module path, the JPMS creates three automatic modules for them. The class-path content ends up in the unnamed module as before. Note how automatic modules read each other and the unnamed module, creating lots of cycles in the graph.
Automatic modules are full-fledged named modules, which means
- They can be referenced by name in other modules’ declarations: for example, to require them.
- Strong encapsulation keeps them from using platform module internals (unlike for the unnamed module).
- They’re subject to split-package checks.
On the other hand, they do have a few peculiarities. I want to discuss those before you start using automatic modules in earnest in section 9.2.
8.3.1 Automatic module names: Small detail, big impact
The main point of turning plain JARs into modules is to be able to require them in module declarations. For this they need a name, but lacking module descriptors, where does it come from?
First manifest entries, then filename
One way to determine a plain JAR’s module name relies on its manifest, which is a file MANIFEST.MF in a JAR’s META-INF folder. The manifest contains all kinds of information in the form of header-value pairs. One of the most prominent headers is Main-Class, which defines a mon-modular application’s entry point by naming the class containing the main method—this makes it possible to launch the application with java -jar app.jar.
If a JAR on the module path contains no descriptor, the module system follows a two-step process to determine the automatic module’s name:
- It looks for the
Automatic-Module-Nameheader in the manifest. If it finds it, it uses the corresponding value as the module’s name. - If the header isn’t present in the manifest, the module system infers a module name from the filename.
Being able to infer the module’s name from the manifest is preferable by a wide margin because it’s much more stable—see section 8.3.4 for details.
The exact rules for inferring a module name from the filename are a little complicated, but the details aren’t overly important. Here’s the gist:
- JAR filenames often end with a version string (like
-2.0.5). These are recognized and ignored. - Every character apart from letters and digits is turned into a dot.
This process can lead to unfortunate results, where the resulting module name is invalid. An example is the bytecode manipulation tool Byte Buddy: it’s published in Maven Central as byte-buddy-${version}.jar, which leads to the automatic module name byte.buddy. Unfortunately, this is illegal, because byte is a Java keyword. (Section 9.3.3 gives advice for how to fix such problems.)
To not leave you guessing which name the module system chooses for a given JAR, you can use the jar tool to find out:
$ jar --describe-module --file=${jarfile}
If the JAR lacks a module descriptor, the output starts as follows:
> No module descriptor found. Derived automatic module.
>
> ${module-name}@${module-version} automatic
> requires java.base mandated
${module-name} is a placeholder for the actual name—which is what you’re looking for. Unfortunately, this doesn’t tell you whether the name was picked from the manifest entry or the filename. To find that out, you have several options:
- Extract the manifest with
jar --file ${jarfile} --extract META-INF/MANIFEST.MF, and look at it manually. - On Linux,
unzip -p ${jarfile} META-INF/MANIFEST.MFprints the manifest to the terminal and thus saves you opening the file. - Rename the file, and run
jar --describe-moduleagain.
Let’s pick Guava 20.0 as an example:
$ jar --describe-module --file guava-20.0.jar

> No module descriptor found. Derived automatic module.
>
> [email protected] automatic
> requires java.base mandated
# truncated contained packages
Used as an automatic module, Guava 20.0 is known as guava. But is that universal or due to the module name? Using unzip, I looked at the manifest:
Manifest-Version: 1.0
Build-Jdk: 1.7.0-google-v5
Built-By: cgdecker
Created-By: Apache Maven Bundle Plugin
[... truncated OSGi-related entries ...]
As you can see, Automatic-Module-Name isn’t set. Renaming the file to com.google.guava-20.0.jar yields the module name com.google.guava.
If you used a less outdated version of Guava—23.6, for example—you’d get the following output:
$ jar --describe-module --file guava-23.6-jre.jar

> No module descriptor found. Derived automatic module.
>
> [email protected] automatic
> requires java.base mandated
# truncated contained packages
As you can see from the fact that the chosen name and the filename aren’t the same, Google chose com.google.common as Guava’s module name. Let’s check with unzip:
Manifest-Version: 1.0
Automatic-Module-Name: com.google.common
Build-Jdk: 1.8.0_112-google-v7
There you go: Automatic-Module-Name is set.
When to set Automatic-Module-Name
If you’re maintaining a project that’s publicly released, meaning its artifacts are available via Maven Central or another public repository, you should carefully consider when to set Automatic-Module-Name in the manifest. As I’ll explain in section 8.3.4, it makes using a project as an automatic module much more reliable, but it also comes with the promise that future, explicit modules will be drop-in replacements for the current JARs. You’re essentially saying, “This is what the modules will look like; I just didn’t get around to releasing them yet.”
The fact that defining an automatic module name invites users to start relying on your project artifacts as modules has a few important implications:
- The names of the future modules must be exactly those that you declare now. (Otherwise, reliable configuration will bite your users because modules are missing.)
- The artifact structure must remain the same, so you can’t move supported classes or packages from one JAR to another. (Even without modules, this isn’t recommended practice. But with the class path, it doesn’t matter which JAR contains a class, so you could get away with it. With the module system in play, on the other hand, a class’s origin is relevant because accessibility forces users to require the correct module.)
- The project runs reasonably well on Java 9+. If it needs command-line options or other workarounds, these are well documented. (Otherwise, you can’t be sure there aren’t problems hidden in your code that make the other promises moot.)
Software development is, of course … let’s say, “not entirely predictable,” so these can’t be guarantees. But you should have good reasons to believe you can hold to these promises. If you don’t have the bandwidth to test on Java 9+, or you discovered problems that make a modularization unpredictable, be honest about it and don’t set Automatic-Module-Name yet. If you set it and have to make such changes anyway, a major version bump is in order. Figure 8.7 shows an example of setting Automatic-Module-Name.

Figure 8.7 If you’re planning to move classes between packages or packages between JARs before modularizing your project, wait to set Automatic-Module-Name until you’re finished. Here, the project’s JARs (left) were refactored before being published with an automatic module name (middle), so when they’re modularized (right), the structure doesn’t change.
Your project doesn’t need to target Java 9+ for you to be able to set Automatic-Module-Name. The JAR may contain bytecode compiled for older JVM versions, but defining the module name still helps users who are using the module system. The same is even true for module descriptors, as section 9.3.4 explains.
8.3.2 Module resolution for automatic modules
A critical ingredient to comprehending and predicting the module system’s behavior is to understand how it builds the module graph during module resolution. For explicit modules, this is straightforward (it follows requires directives; see section 3.4.1); but for the unnamed modules, it’s more complicated (see section 7.2.2) because plain JARs can’t express dependencies.
Automatic modules are also created from plain JARs, so they have no explicit dependencies either, which begs the question how they behave during resolution. We’ll answer that question momentarily, but as you’ll see, that leads to a new one: Should you place an automatic module’s dependencies on the class or the module path? When you’re done with this section, you’ll know.
Resolving automatic module dependencies
The first question to answer is what happens during module resolution if the JPMS encounters an automatic module. Automatic modules were created for modularization in the face of mon-modular dependencies, so they’re used in situations where developers are actively working on a modular representation of their project. In that scenario, it would be detrimental if automatic modules pulled in nearly every platform module (like the unnamed module does), so they don’t do that. (To be clear, they also don’t pull in any explicit application modules.)
Still, JARs have the tendency to depend on one another; and if the module system only resolved automatic modules that were explicitly required, all other automatic modules would have to be added to the graph with --add-modules. Imagine doing that for a large project with hundreds of dependencies you decided to place on the module path. To prevent such excessive and fragile manual module-adding, the JPMS pulls in all automatic modules once it encounters the first one.
As soon as one automatic module is resolved, so are all others. You get either all plain JARs as automatic modules (if at least one is required or added) or none (otherwise). That explains why figure 8.6 shows three monitor.* modules even though only monitor, which can’t express dependencies, was explicitly resolved by making it the root module.
Note that automatic modules imply readability (see section 9.1) on other automatic modules, which means any module that reads one, reads all of them. Keep this in mind when determining dependencies on automatic modules—going with trial and error can lead to fewer requires directives than are needed.
In the ServiceMonitor application, the monitor.rest module depends on the Spark web framework and, for the sake of this example, on Guava. Both dependencies are plain JARs, so monitor.rest needs to require them as automatic modules:
module monitor.rest {
    requires spark.core;
    requires com.google.common;
    requires monitor.statistics;

    exports monitor.rest;
}
The thing is, one of the requires directives on spark.core or com.google.common could be missing, and everything would still work. As soon as the module system resolves the first automatic module, it resolves all others, and any module reading one of them reads all of them.
So even without requires com.google.common, guava.jar would be picked up as an automatic module together with spark.core.jar; and because monitor.rest reads spark.core, it would also read guava. Be sure to properly determine dependencies (for example, with JDeps—see appendix D)!
If automatic modules could only read other named modules, you’d be done. Once you placed a plain JAR on the module path, all of its direct dependencies would have to go onto the module path as well, and then their dependencies, and so on, until all transitive dependencies were treated as modules, explicit or automatic.
Turning all plain JARs into automatic modules has downsides, though (more on that in section 8.3.3), so it would be nice to be able to leave them on the class path and have them loaded into the unnamed module. And the module system allows just that by letting automatic modules read the unnamed module, which means their dependencies can be on the class path or the module path.
Choosing a path for transitive dependencies
You generally have two options for automatic modules’ dependencies (remember, you can use JDeps to list them, too): the class path or the module path. Unfortunately, not all circumstances allow you to choose freely, and in some cases, you need to do more than just decide on the path.
Table 8.2 presents the options to bring those dependencies into the module graph, based on whether they’re required by another module and whether they’re platform modules, plain JARs, or modular JARs. The following figures shine a spotlight on specific situations:
- Figure 8.8 shows how platform modules that are only required by an automatic module aren’t resolved by default.

Figure 8.8 If a project (your.app in this case) uses an automatic module (org.jooq), you can’t be sure the module graph works out of the box. Automatic modules don’t express dependencies, so platform modules they need may not make it into the graph (here, that happened with java.sql) and have to be added manually with --add-modules.
- Figure 8.9 covers the different cases for plain JARs that are needed by an automatic module.
- Figure 8.10 shows the module graph’s evolution if a transitive dependency is turned from a plain into a modular JAR.
| Dependency required by another, explicit module | ||
| Class path | Module path | |
| Platform module | ✔ | |
| Plain JAR | ✘ (dependency unfulfilled) | ✔ |
| Modular JAR | ✘ (dependency unfulfilled) | ✔ |
| Dependency not required by an explicit module | ||
| Class path | Module path | |
| Platform module | ! (resolve manually) | |
| Plain JAR | ✔ | ✔ (automatically resolved) |
| Modular JAR | ✔ | ! (resolve manually) |
Focusing on platform modules for a moment, we see that an automatic module can’t express dependencies on them. As a consequence, the module graph may or may not contain them; and if it doesn’t, the automatic module is likely to fail at run time with an exception due to missing classes.
The only way around this is for the project’s maintainers to publicly document which modules they need, so their users can make sure the required modules are present. Users can do that by requiring them either explicitly, for example in the module that depends on the automatic module, or with --add-modules.

Figure 8.9 Starting with the dependency of monitor.rest (a modular JAR) on spark.core (a plain JAR), the latter needs to be placed on the module path. But what about its dependency slf4j (another plain JAR)? Here you see the resulting module graphs depending on whether slf4j is required by another modular JAR (top versus bottom row) or which path it’s placed on (middle versus right column). Looks like a clear win for the module path, but take a look at figure 8.10.

Figure 8.10 In the same situation as figure 8.9's bottom right corner, what happens if an automatic module’s transitive dependency (slf4j) that’s placed on the module path gets modularized? It’s no longer resolved by default and needs to be added manually with --add-modules.
With dependencies on platform modules checked off, let’s look at application modules. If an automatic module’s dependencies are required by an explicit module, they have to be placed on the module path and are then resolved by the module system—nothing else needs to be done. If no explicit module requires them, JARs can either be placed on the class path, where they’re rolled into the unnamed module and are hence always accessible, or be placed on the module path, where some other mechanism needs to pull them into the graph:
- Plain JARs are pulled in by the all-or-nothing approach to automatic module loading.
- Platform and explicit application modules aren’t resolved by default. You either have to require them from some other module or add them manually with
--add-modules(see section 3.4.3).
Combined with the fact that most or even all dependencies will at some point go from plain to modular JARs, these two observations attract attention: they imply that transitive dependencies on the module path work fine as long as they’re plain JARs, but disappear from the module graph as soon as they’re modularized.
Let’s focus on the second bullet point and consider modules that mon-modular dependencies need to access. If neither you nor other modules require them, they won’t make it into the module graph, and dependencies won’t be able to access them. In that case, you can either require them in your module descriptors (don’t forget to add a comment why you do that) or add them with command-line flags during compilation and at launch time. Sections 9.2.2 and 9.2.3 briefly discuss the trade-offs involved in that decision, depending on the specific scenario.
An additional bump in the road can be the types an automatic module exposes in its public API. Assume a project (a modular JAR) depends on a library (a plain JAR) with a method that returns an ImmutableList from Guava (also a plain JAR):
public ImmutableList<String> getAllTheStrings() {
    // ...
}
If you place the project and the library on the module path and Guava on the class path, you’ll get the module graph shown in figure 8.11: the project (explicit module) reads the library (automatic module), which reads the unnamed module (containing Guava). If the code now calls the method that returns an ImmutableList, the accessibility check for that type won’t end in your favor, because your module doesn’t read the unnamed one.

Figure 8.11 If a method in an automatic module (org.lib in this case) returns a type from the unnamed module (ImmutableList), named modules (your.app) can’t access it, because they don’t read the unnamed module. This crashes the application if the method declares that it returns the inaccessible type (ImmutableList). Declaring a supertype (here, most likely List) would work.
This isn’t entirely new. If ImmutableList were a nonpublic type of the library, you also wouldn’t be able to call that method due to lacking visibility. And just as in that case, this hinges on the declared return type. If the method instead declared to return a List and then chose an ImmutableList as the concrete type to return, everything would be fine. This is about which type the API declares, not which type it returns.
Consequently, if an automatic module exposes types from another JAR, that JAR needs to go onto the module path as well. Otherwise, its types would end up in the unnamed module, where they’re inaccessible to explicit modules. This would result in an IllegalAccessError due to a lacking read edges, as described in section 3.3.3.
If, despite your best efforts, you end up in a situation where a named module needs to access the unnamed module, you’re left with one option—literally. The command-line option --add-reads, introduced in section 3.4.4, can be used to add a readability edge from a named module to the unnamed module by using ALL-UNNAMED as the target value. This couples your modular code to the unpredictable class-path content, though, so it should be a last resort.
By using --add-reads, the example with Guava on the class path and an automatic module returning an ImmutableList can work out after all. If the explicit module that gets the instance of ImmutableList (and subsequently fails the accessibility check) was named app, then adding --add-reads app=ALL-UNNAMED to both compiler and runtime would make the application work.
All that said, when do you choose which path? Should you go all in on automatic modules or prefer leaving as many dependencies as possible on the class path? Read on to find out.
8.3.3 All in on automatic modules?
With the ability to place plain JARs on the module path to turn them into automatic modules, do you still need the class path? Can’t you place every JAR on the module path, turning them all into explicit or automatic modules (depending on whether they contain a descriptor)? The technical answer to that question is, yes, you could do that. Nevertheless, I don’t recommend it—let me explain why.
Plain JARs don’t make good modules
Generally speaking, plain JARs don’t make good modules:
- They may access JDK-internal APIs (see section 7.1).
- They may split packages between themselves and JEE modules (see section 7.2).
- They don’t express their dependencies.
If they’re turned into automatic modules, the module system will impose its rules on them, and you may have to spend some time fixing the resulting issues. On top of that, once a plain JAR is upgraded to a modular JAR, it’s no longer resolved by default (see table 8.2 and figure 8.10), so for every such upgrade somewhere in your project’s dependency tree, you have to go in and add it manually. The only upside of automatic modules is that they can be required by explicit modules, but if you don’t need that, you get little in return for your troubles making everything automatic.
If left on the class path, on the other hand, the JARs are rolled into the unnamed module, where
- Illegal access is by default allowed for at least one more Java release.
- Splits between JARs don’t matter, although they still do between JARs and platform modules.
- They can read all Java SE platform modules if they contain the application entry point.
- Nothing needs to be done when a plain JAR is upgraded to a modular JAR
This makes life much easier.
An automatic module’s modularized dependencies, on the other hand, should generally go onto the module path. Because they come as modular JARs, they shouldn’t need the module system to treat them as leniently as the unnamed module; if loaded as modules, they benefit from reliable configuration and strong encapsulation.
Automatic modules as a bridge to the class path
There’s a philosophical point to be made for working with fewer automatic modules: this turns them into a bridge between the modular world and the chaotic class path (figure 8.12). Modules can sit on one side and require their direct dependencies as automatic modules, and indirect dependencies can remain on the other side. Every time one of your dependencies turns into an explicit module, it leaves the bridge on the modular side and draws its direct dependencies as automatic modules onto the bridge. This is the top-down approach I mentioned earlier; we’ll look at it more closely when discussing modularization strategies in section 9.2.

Figure 8.12 Long Biên Bridge in Hanoi 1939. Photo by manhhai. Used under Creative Commons CC BY 2.0.
8.3.4 Depending on automatic modules
The sole purpose of automatic modules is to depend on plain JARs, so it becomes possible to create explicit modules without having to wait until all dependencies are modularized. There’s an important caveat, though: if the JAR’s manifest doesn’t contain the Automatic-Module-Name entry, the dependency is inherently fragile.
As section 8.3.1 explains, without that entry, the automatic module name is inferred from the filename. But depending on their setup, different projects may use different names for the same JARs. Furthermore, most projects use a Maven-backed local repository, where the JAR files are named ${artifactID}-${version}, from which the module system will likely infer ${artifactID} as the automatic module’s name. That’s problematic because artifact IDs generally don’t follow the reverse-domain naming schema defined in section 3.1.3: once the project is modularized, the module name will likely change.
Because it’s so commonly used, Google’s Guava continues to be a great example. As you saw earlier, for guava-20.0.jar, the module system derives the automatic module name guava. That’s the name the file has in Maven’s local repository, but other projects may have a different setup.
Let’s say one names JARs ${groupID}-${artifactID}-${version}, in which case the file would be called com.google.guava-guava-20.0.jar and the automatic module name would be com.google.guava.guava. A modularized Guava, on the other hand, will be called com.google.common, so none of the automatic module names were correct.
In summary, the same JAR may get different module names in different projects (depending on their setup) and at different times (before and after modularization). This has the potential to cause havoc downstream.
Think about your favorite project, and imagine that one of your dependencies referenced one of its dependencies as an automatic module with a name that doesn’t match the project’s setup (see figure 8.13). Maybe the dependency named files ${groupID}-${artifactID}-${version}, whereas you use Maven and name them ${artifactID}-${version}. Now the dependency requires an automatic module ${groupID}.${artifactID}, but the module system will infer ${artifactID} in your project. That would break the build—and although there are ways to fix it (see section 9.3.3), none of them are pleasant.

Figure 8.13 The dependency org.lib requires Guava by the automatic module name it got in the build, which is com.google.guava.guava. Unfortunately, on the system, the artifact is called guava.jar, so the module name guava is derived. Without further work, the module system will complain about missing dependencies.
And it’s getting worse! Stick with that same project, and mentally add another dependency that requires the same automatic module but with a different name (see figure 8.14). This is the modular diamond of death described in section 3.2.2: a single JAR can’t fulfill requirements for modules with different names, and multiple JARs with the same content won’t work due to the rule against split packages. This situation needs to be avoided at all costs!

Figure 8.14 Compared to figure 8.12, the situation has gotten worse. Another dependency, com.framework, also depends on Guava, but it requires it with a different name (guava). Now the same JAR needs to appear as two differently named modules—that ain’t gonna work.
In both cases, it may look as if the critical mistake was to require a plain JAR by a module name that’s based on its filename. But that’s not the case—using this approach is fine for applications and in other scenarios where the developer has full control over the module descriptors requiring such automatic modules.
The straw that broke the camel’s back was publishing modules with such dependencies to a public repository. Only then could users be into a situation where a module implicitly depends on details they have no control over, and that can lead to additional work or even unresolvable divergences.
The conclusion is that you should never publish (to an openly accessible repository) modules that require a plain JAR without an Automatic-Module-Name entry in its manifest. Only with that entry are automatic module names sufficiently stable to rely on.
Yes, that may mean you can’t yet publish a modularized version of your library or framework and must wait for your dependencies to add that entry. That’s unfortunate, but doing it anyway would be a great disservice to your users.
Summary
- An incremental modularization will often use the class path and the module path. It’s important to understand that any JAR on the class path, plain or modular, ends up in the unnamed module and that any JAR on the module path ends up as a named module—either as an automatic module (for a plain JAR) or an explicit module (for a modular JAR). This allows the user of a JAR (instead of its creator) to determine whether it becomes a named module.
- The unnamed module is a compatibility feature that makes the module system work with the class path:
- It captures class-path content, has no name, reads every other module, and exports and opens all packages.
- Because it has no name, explicit modules can’t refer to it in their module declarations. One consequence is that they can’t read the unnamed module and can hence never use types that are defined on the class path.
- If the unnamed module is the initial one, a specific set of rules is used to ensure that the right set of modules is resolved. By and large these are the non-JEE modules and their dependencies. This lets code from the class path read all Java SE APIs without further configuration, thus maximizing compatibility.
- An automatic module is created for each JAR on the module path. Its name is defined by the
Automatic-Module-Nameheader in the JAR’s manifest (if present) or derived from its filename otherwise. It reads every other module, including the unnamed one, and exports and opens all packages. - It’s a regular named module and as such can be referenced in module declarations, for example to require it. This allows projects that are being modularized to depend on others that haven’t been yet.
- An automatic module’s dependency can be placed on the class path or the module path. Which path to use depends on circumstances, but placing modular dependencies on the module path and plain ones on the class path is a sensible default.
- As soon as the first automatic module is resolved, so are all others. Furthermore, any module that reads one automatic module reads all of them due to implied readability. Take this into account when testing out dependencies on automatic modules.