
My Workflow
What follows is an outline of my workflow, along with my rationale and some other thoughts. Bear in mind the bit about finding what works for you. If you can adapt some of this to your own needs, or gain a better understanding of the workflow concept, then this discussion has been a successful one; however, it is definitely not a tutorial in any way.
I use two cameras, a compact point-and-shoot and a DSLR. The compact shoots only JPEG images, and the DSLR offers the standard choice of RAW or JPEG. Many photographers advocate always using RAW if the option is available because it allows for greater flexibility in editing. I use RAW for mission-critical work, if possible, and JPEG for other things (such as blog posts). The much smaller file sizes of the latter format give a speed advantage that, to me, is worth the loss of flexibility. You may well think that losing editing possibilities and some quality is a strict no-no under all circumstances. There is really no right or wrong answer. This applies to just about everything in a workflow.
As a rule of thumb, the earlier in the workflow process that any decision can be made, the better. I like to delete unwanted images as I go, while the pictures are still in the camera. By and large, I’ll know quickly if a photograph has potential or if it is likely to just take up space on my hard drive for years to come. I delete the unwanted images before they ever get to the hard drive. This probably cuts my processing time in half because it is easier to hit the delete button twice on my camera than to later separate 20 or so keepers from a group of 200 images on the computer. I find the thought of whittling down images from hundreds to a couple dozen to be overwhelming.
The next job is to transfer the images from the memory card to the computer. Since I diligently delete as I go, there are only a few images to import. I use Adobe Lightroom for this. Lightroom is set up to automatically detect a memory card and import files into a folder. I rename the folder to something meaningful. I then do a second transfer of the files from the memory card to an external hard drive using the computer operating system. This means I have a working set of images within Lightroom plus a backup set on a hard drive that I can attach to any computer and work on in case of emergency. I do not delete the images from my memory card at this stage because space is not critical, and leaving them alone provides a third, albeit temporary, backup. Again, this is a matter of choice; many photographers prefer to work with a clean card every time they get their camera out. In fact, memory cards have come down in price so much that some photographers use them just once and then store them with the client’s file after transferring the images. If I were a wedding photographer, I would definitely go this route.
I always want to be sure that I am not working on an original copy of a photograph because there is nothing worse than editing a photograph and then deciding to reject the edit, only to find that you have destroyed the original. Making a separate backup as previously described ensures that you have an intact original, but with Lightroom you have another fail-safe: nondestructive editing. This means that whatever you do in Lightroom, or in another application that can be opened via Lightroom, it is always possible to retrieve the original photograph. One benefit of shooting in RAW format is that it’s impossible to edit over the original—work is always done on a copy. When it comes to your original images, redundancy is never a bad thing.
So far I have described importing the photographs and backing up, the boring but essential parts of the process. Now is the fun part, which is making the most of the images. Before starting to edit, I do one more pass to reject any shots that I thought might be okay when I saw them on the camera’s LCD screen, but that do not work as well when viewed on a larger monitor. I reject about a quarter of the remaining images at this stage, which leaves me about 10–15 keepers from an average shoot.
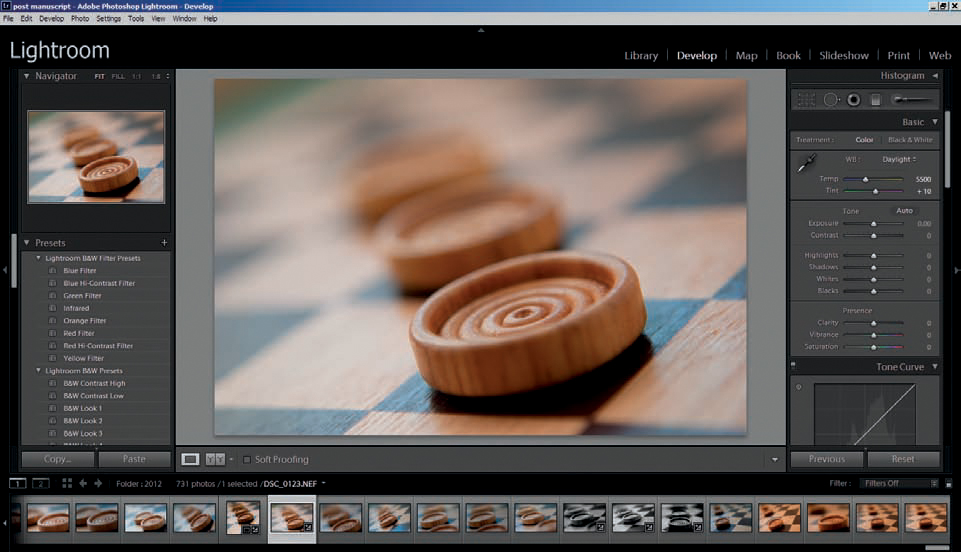
Adobe Lightroom. A major advantage of this type of software is the nonlinear workflow. Any image can be worked on by highlighting the bottom strip and adjusting the settings to the right. The software will remember whatever changes have been made, so no saving is required. This makes it very easy to move quickly between images.
This is the point at which I start to think about the end use of the image. Certain types of shots may suit my blog or social networking projects, while others may have potential as stock photographs or even prints.
Now I start to edit the individual photographs. The main advantage of a nonlinear editor such as Lightroom is speed, especially when applying changes to more than one photograph. If, say, I’d set my exposure slightly low during the shoot, it would take only a few seconds to compensate for this across the entire set of images. Even if I were editing 200 photographs at the same time, it would not take longer. It is also very easy to generate multiple copies of a photograph, so if both a monochrome and a color version were required, a couple of mouse clicks would do the trick. Saving files can be done individually or in bulk, with all of the parameters, such as size, sharpening, output folder, and so forth, preset. Saving 15 or 200 edited files takes little more than a few seconds.
As far as editing options go, I rarely need anything that isn’t doable in Lightroom because it covers all of the basic editing functions to a professional standard. Contrast, saturation, sharpening, noise reduction, cropping, spot removal, and curves, along with some more creative options such as vignetting and split toning, are available. Sometimes I need to do something that is beyond Lightroom‘s scope, and setting up other editors (including Adobe Photoshop) for round-tripping is straightforward. Occasionally, I use some other software for adding a border or for more esoteric artistic effects, but the end result is always returned to Lightroom, where images can be exported along with the rest of the edits.
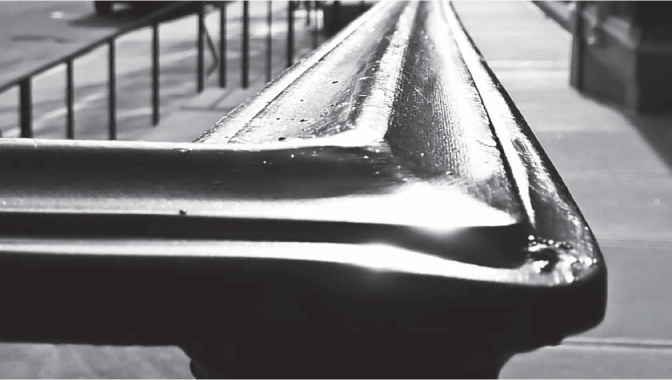
A handrail from an unusual perspective makes for a simple composition. The photograph was shot in color and reduced to black-and-white in Lightroom.

An image does not have to be perfect to have impact. Technical perfection and impact often have to be balanced.

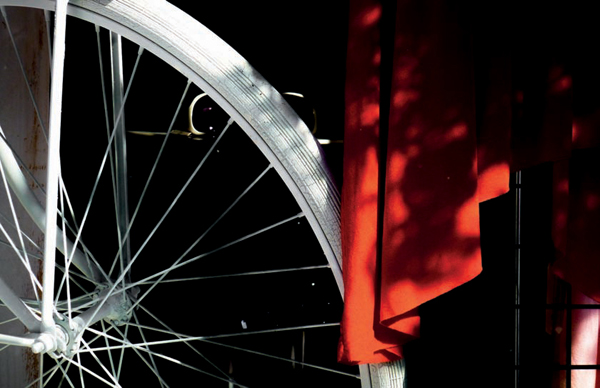
Split- or dual-toning has been applied to this image in Lightroom. Dual tone is a process where dark tones and light tones are given different colors. The process is usually applied over a monochrome image, but in this case a little of the original color was left in.
This image has been edited to make the darker tones black. This technique reduces visual clutter and is a simple task with plenty of flexibility when done in Lightroom.

To highlight the die’s transparency, the local contrast was boosted. When you’re editing, a proactive approach works best. It is always good to know which characteristics you want to emphasize.
Photography is about seeing, and that cannot be emphasized enough.
There are some good free workflow tools out there, the best of which is probably Picasa. This application, owned by Google, has come a long way and now offers high-quality editing and cataloging. Editing is faster and more flexible in Lightroom, but Picasa will provide more than enough tools and options for most users, and the results are very good. However, if you intend to output a lot of images to print, Lightroom (ideally along with Photoshop) is the way to go.
The most important thing about your workflow is that it has to suit you. This probably seems like stating the obvious, but the Internet is full of articles whose authors think they have the only solution. If you find a method that suits you and provides the results you like, stay with it and don’t feel obliged to follow someone else’s lead. The only thing that is non-negotiable, as far as I am concerned, is backing up the original files from the camera and keeping them safe, preferably on two different drives. Regard your native image files as you would negatives, if film were the medium, and protect them by backing up.
There is a difference between looking and seeing . We look at things whenever our eyes are open, but we only really see things when we make a conscious effort to do so.