
Some Cheap Studio Equipment Alternatives
Some photographers have their own studio so they can completely control their working environment. Landscape photographers may have to wait a long time for the sun to peek out from behind a cloud or for mist to lift before pressing the shutter-release button, but studio photographers have no such problem. If something is not right, they can change it, and the thing they will most likely want to change is the lighting. The basic unit of studio lighting is the strobe, or flash, used either alone or in combination. Strobes work by giving off a short burst of light on a given signal that coincides with the press of the shutter-release button. Studio photographers have many different tools at their disposal to modify the light produced by the strobes, such as soft boxes, reflectors, and other devices.
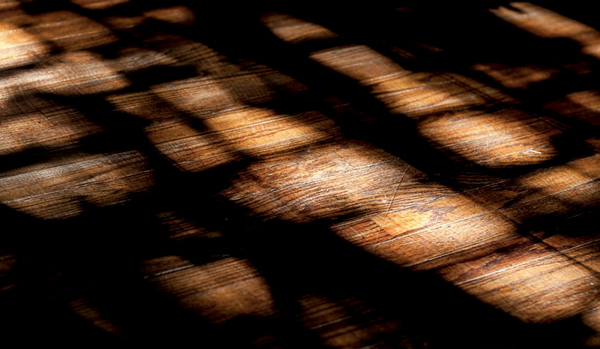
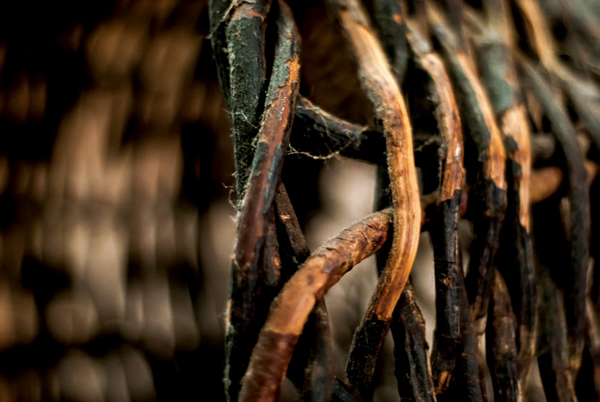
Two photographs of completely different things with a very similar feel because they were photographed in the same room at the same time of day
The problem with this equipment is that it’s extremely expensive. Setting up a working studio with even the minimum amount of equipment will run you at least several thousand dollars, and more likely several tens of thousands of dollars. This obviously means that setting up a well-equipped studio is beyond the reach of most people for whom photography is not a major source of income.
Fortunately, there are cheaper do-it-yourself alternatives for most of the equipment that a professional uses. The alternative setup that I will describe next may not look as sleek, elegant, or downright expensive as a professional’s equipment, but it will enable you to take extremely good photographs that are perfectly acceptable for publication. The cost is closer to a hundred dollars than tens of thousands, so even if you decide that the studio environment is not for you, you will not have to take a massive financial hit. If, however, you find that you really enjoy working in a controlled environment, just about everything you learn will be transferable to a more traditional studio setup.
The Lights
Construction lights are a great source of cheap lighting. I recommend getting two pairs on stands and a single one that is self-supporting but not on a stand. These will set you back less than $100 and are sufficient for lighting one or two people or most objects. You can find these lights in just about any home maintenance store. There are a few things you should know about this particular type of light, none of which is a problem for me, but your opinion may differ.
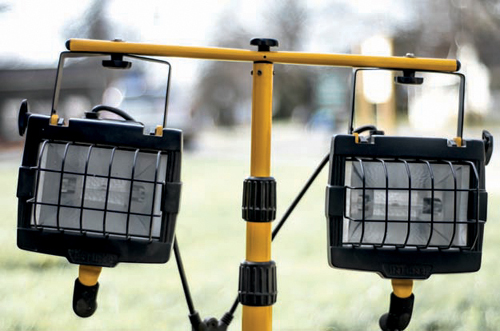
A pair of construction lights
Construction lights are a continuous light source, as opposed to the momentary burst of a strobe or camera flash. This is a great advantage because continuous lighting—or solid lighting, as it is more generally referred to—completely takes the guesswork out of the situation. The shadows and other effects can be seen before the shutter-release button is pressed, rather than predicted and then corrected if needed.
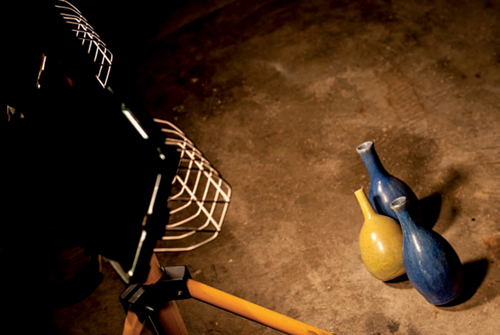
Construction lights illuminating vases
Tungsten bulbs continually burn, and can become very hot. I know photographers who have used these lights on cold location shoots as much for their heating qualities as for light. The lights have metal guards on the front, so with reasonable care, there should not be a safety issue. If you are working with models, comfort and unwanted perspiration could be an issue. You would definitely want to be in an air-conditioned room if you use these during a Texas summer.
This image was shot using construction lights with no diffuser
The next issue is more technical and concerns what is referred to as the temperature of the light. This has nothing to do with heat, but rather the way a camera sensor sees different types of lighting. I will go into a little more detail about this later, but the important thing for now is that different types of lighting, such as tungsten and daylight, do not work well together. An image shot with different types of light will look weird, and parts of it will display an unwanted color cast. This means that any room used as a studio has to be blacked out. Daylight coming into the room will spoil the photograph. The exception is when the intended output is monochrome, in which case the lighting sources can be mixed without making any difference. Blacking out the studio is not an issue with strobes because strobes are designed to have the same color temperature as daylight.
A Simple Diffuser
The light from a construction lamp is very harsh. A diffuser is simply a screen that scatters the light and makes it softer. A translucent plastic shower curtain can make for an excellent diffuser and is big enough for using with full-length model shots. Obviously, patterned shower curtains won’t work unless you are looking for some interesting special effects. Plastic plumbing pipes can be made into an excellent lightweight frame, and an adhesive hook-and-loop fastener is perfectly adequate for securing the shower curtain to the frame.
A Simple Reflector
A plastic hula hoop supporting a sheet of aluminum-coated bubble wrap (such as the stuff used for ceiling insulation) works well. Simply attach the bubble wrap to the hula hoop with duct tape.
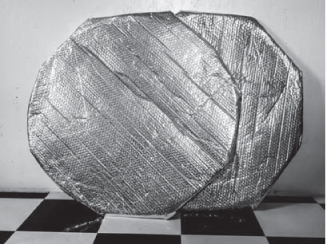
These reflectors are about four feet across and are exceptionally lightweight
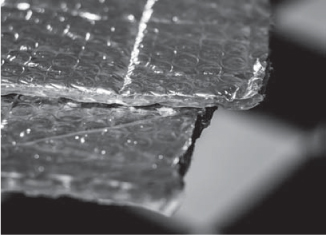
Aluminum-coated bubble wrap
A Cheap Tripod
A tripod is essential for any studio setup. I will go against conventional photography wisdom here, though, and advise against spending a small fortune on one. If you need to steady a camera on a 45-degree slope in gale-force winds, then yes, you are going to have to spend serious money, but in a room where outdoor elements are not an issue, a cheap tripod will do just fine. I’m still using one that I purchased ten years ago for around $20, and it does exactly what it has to do.
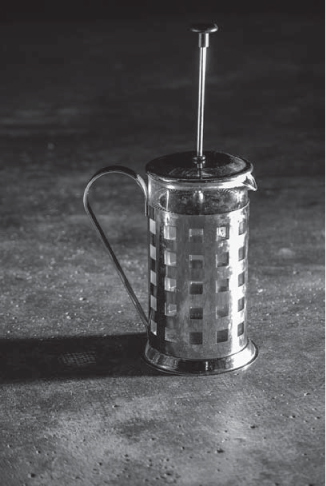
Tabletop or Product Photography
Tabletop and product photography is technically demanding, but it can be done well with a compact camera and some cheap equipment that was not originally designed for photography. If you want to photograph something to sell online, then this section is for you. Clean, accurate photographs with minimal shadows and loads of detail work best for selling stuff. In photographic terms, this means diffused light (to soften the shadows), a low ISO (no room for artistic interpretation here), and absolutely no movement from the camera when the shot is taken.
Product photography setup
The equipment required is as follows: two desk lamps with daylight-equivalent bulbs, a white semitransparent storage box, and a sheet of heavy white paper. If you cannot get your hands on a storage box, you can use a cardboard box with the sides cut out and replaced with parchment paper.
1. Place the storage box on one of its long sides with the opening toward you.
2. Cut the white paper to size and stick it to the inside of the box in such a way that there is no crease or seam.
3. Place a lamp on each side so they shine through the sides of the box.
4. Place the object to be photographed on the white paper, ideally behind the line of the lamps.
5. Put the camera on a tripod. Make sure image stabilization is turned off and the timer delay is turned on. Note that it is possible to take the shots handheld with image stabilization on, but the quality will take a bit of a hit.
6. Set the camera’s ISO to its native setting. Note that this is not always the lowest setting. Settings lower than native are usually indicated on the display and are used when there is too much light. These artificially low settings tend to produce more noise.
7. Experiment with the zoom, focal length, and distance from the camera to the object to get the best shot. Try to avoid wide-angle shots because the resulting distortion is generally not desirable with this type of photography.
8. If you are shooting a lot of highly reflective objects, it is probably worth investing in a light tent, which has a small hole for the camera lens assembly to poke through, which will stop the camera from being reflected in the object. A basic but perfectly serviceable tent can be purchased for around $30.
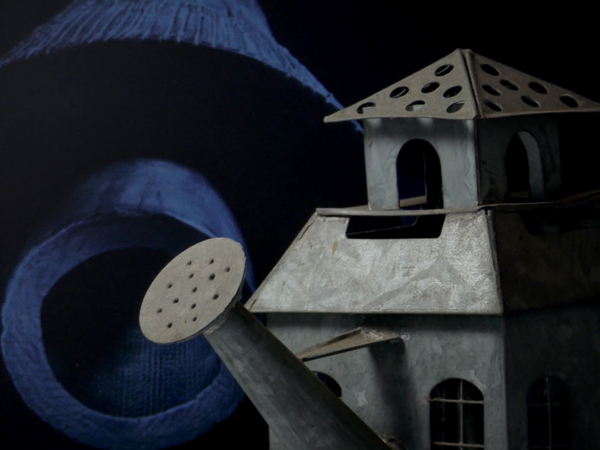
A slightly unusual example of mixed lighting. The watering can votive is in natural light, whereas the vase in the backgroung is an image on a laptop computer screen. The camera’s white balance is set to daylight, so it renders the votive correctly, but the vase has a blue cast.