
CHAPTER 6
SELECT AND MASK
Select and Mask has been around for a little while now and was extremely well received when it was first introduced, not least because of how it created a dedicated area within Photoshop for making selections, which simplified the process considerably.
Although I say simplified, don’t let that mislead you into thinking that it is in any way basic, because there’s some pretty impressive stuff going on under the hood. And what’s really exciting is that it seems to get better and better with each update.
That said, Select and Mask isn’t a one-stop shop for making selections (make sure you check out my “Selecting Hair: Faking It!” technique in chapter 9). It’s fantastic for making selections of hair and fur, but it does have its limitations, of course (as do all tools). It’s certainly a great addition to the workflow, and I’ll show you what I mean by that as we move on and combine tools and techniques to get the very best selections we can.
You’ve likely seen the Select and Mask option quite a lot up to this point when we’ve been using other selection tools and that’s because we can either dive into it once we’ve made an initial selection and need to work on it further, or we can go straight in and start making a selection from scratch. The choice is yours, and that’s what’s great about Photoshop: we can use it in whatever way best suits the way we prefer to work.
Right, enough talk, let’s crack on . . .
With the select_and_mask.jpg file (Figure 6.1) open in Photoshop, we’re going to use Select and Mask to make a selection of the subject’s head and feathered hat to show you how it’s able to pick up all the fine strands.
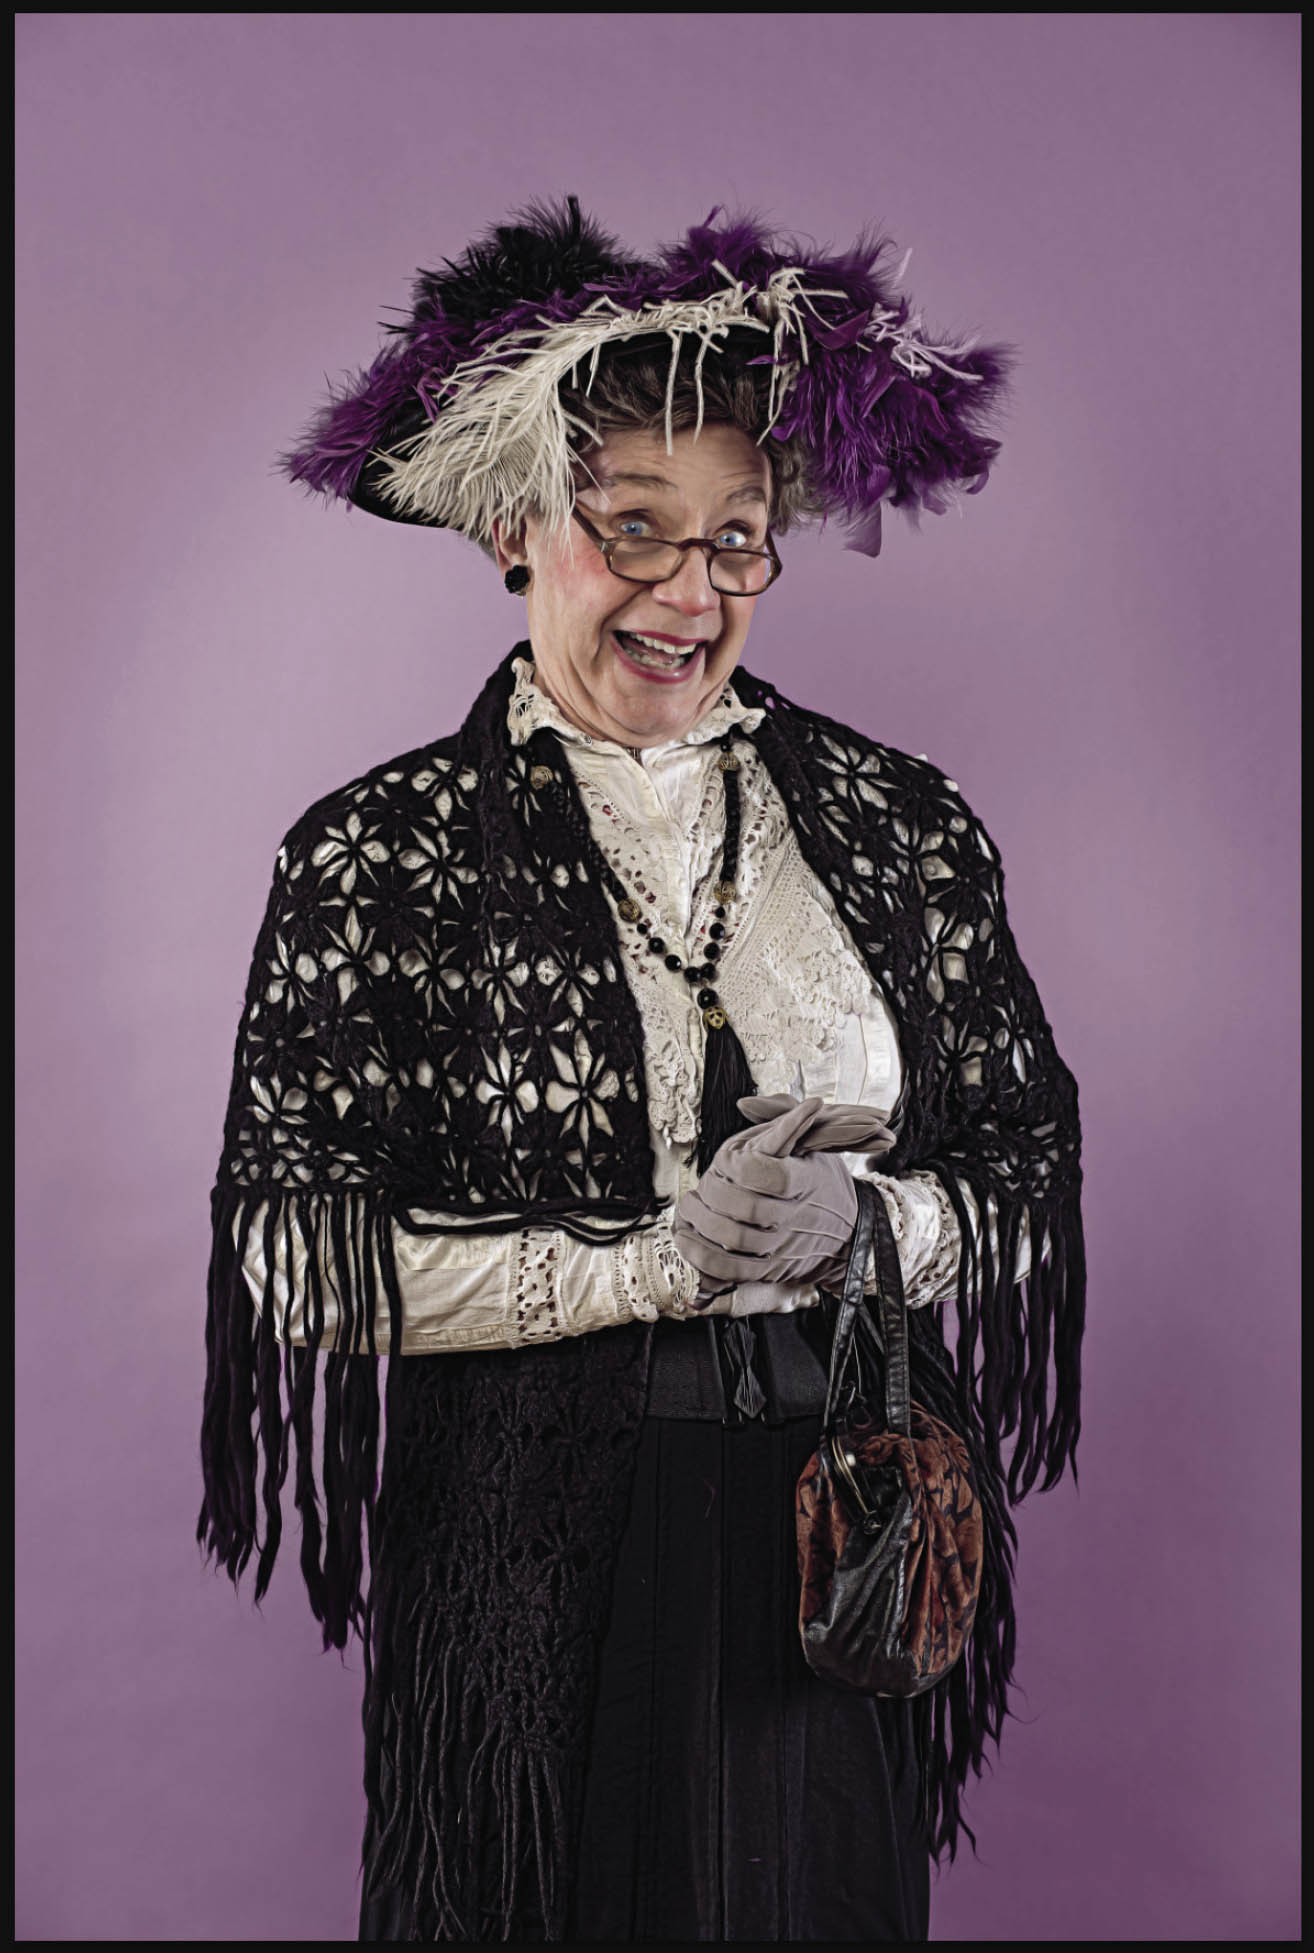
FIGURE 6.1
We could make an initial selection using something like the Quick Selection Tool, and then dive into Select and Mask, but for now we’ll just go straight in. Go to Select > Select and Mask (Figure 6.2) to open up the large Select and Mask workspace, where there are lots of options available to us (Figure 6.3).

FIGURE 6.2
NOTERecently introduced into Select and Mask is the Refine Hair command at the top of the screen. On the right image, this works incredibly well, so it’s always worth pressing it to see what results it yields. It’s early days for this new feature, but it is already producing great results—on the right image.

FIGURE 6.3
On the left side of the screen are a number of tools and on the right are a number of controls in the Properties panel. Sticking with the right side for a moment, at the very top is View Mode, which is where we can chop and change between different views to see how the selection is looking. You’ll be familiar with some of these View options already.
The option I always start with is Onion Skin (Figure 6.4). This allows us to use the Transparency slider to lower the opacity of our image so that when we start to make a selection, those areas show at 100% opacity, making them very easy to see.
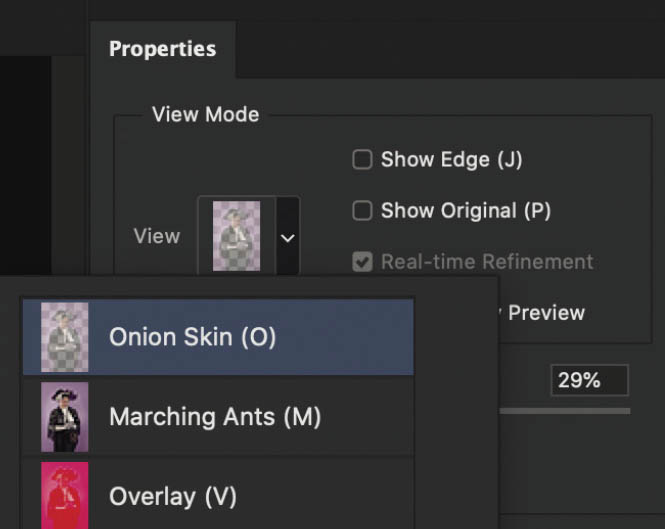
FIGURE 6.4

Download all the files you need to follow along step-by-step at: http://rockynook.com/PLSW
Further down on the right side we have the Refine Mode, where we can choose between Color Aware and Object Aware (Figure 6.5). If you hover over these options, Photoshop will inform you that Color Aware is the “Best choice for simple or contrasting backgrounds,” and Object Aware is the “Best choice for fur or hair on complex backgrounds.”
For this image, since the background is quite simple, we’ll use the Color Aware option. Later in the book we’ll go through an example with Object Aware, but regardless, it’s always worth experimenting with either to see which works best.
- 1.Using the Onion Skin View Mode, set the Transparency to around 30% (Figure 6.6).
- 2.Use the Zoom Tool (in the toolbar on the left) to make the head and hat area bigger on screen so that it’s easier to work on, and then choose the Quick Selection Tool (Figure 6.7).
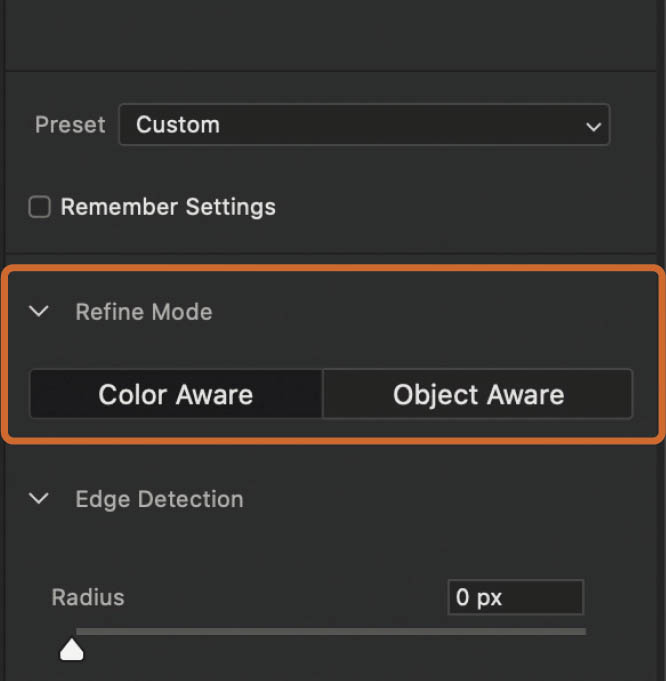
FIGURE 6.5
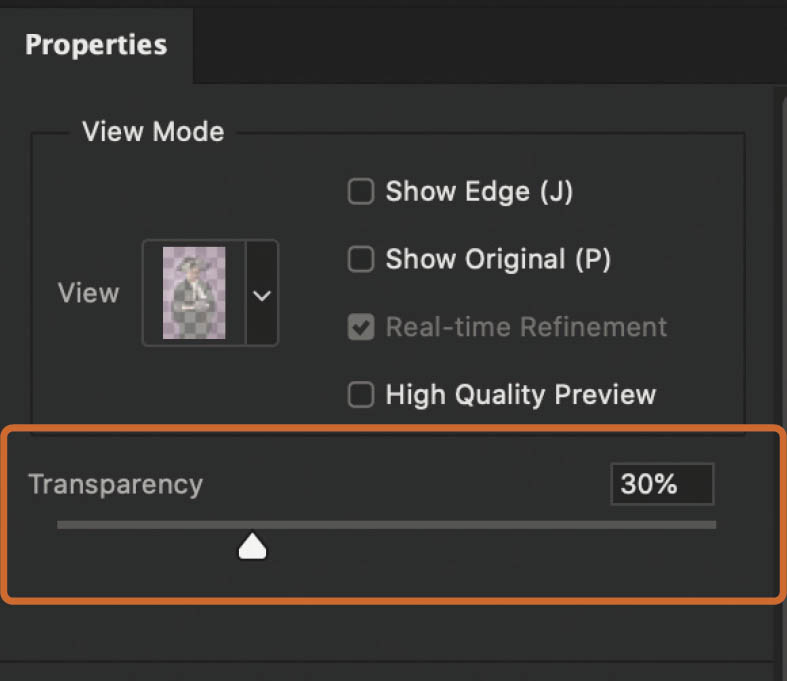
FIGURE 6.6

FIGURE 6.7
- 3.With the Quick Selection Tool, click and drag within the head and hat area, but avoid going right up to the edge, as this may cause the selection to spill over onto the background. As you drag around, notice how areas of the face and hat become clearly visible (Figure 6.8).
If you accidentally go over onto an area of the image you don’t want to include in the selection, simply hold down the Option (Mac)/Alt (PC) key and drag over that area to remove it.
![]() TIPWhen using the Quick Selection Tool, use the left square bracket key ([) to decrease its size and the right square bracket key ( ] ) to increase its size. This is really useful for getting into tight areas and also selecting large areas quicker.
TIPWhen using the Quick Selection Tool, use the left square bracket key ([) to decrease its size and the right square bracket key ( ] ) to increase its size. This is really useful for getting into tight areas and also selecting large areas quicker.
- 4.Now that we have made an initial selection, dive over to the View Mode and select Black & White to get a really clear look at the selected area (Figure 6.9). This is a great starting point, but now we need to select a lot more of the feathers. Switch back to the Onion Skin View Mode.
NOTEAt this stage, you could try pressing the Refine Hair command to see if that produces a good result.

FIGURE 6.8

FIGURE 6.9
- 5.Choose the Refine Edge Brush Tool from the toolbar on the left (Figure 6.10). Now, in the options bar, we can change the Size and Hardness of the Refine Edge Brush. For this example, I have changed the Size to 150 pixels and the Hardness to 30% (Figure 6.11).
When I use the Refine Edge Brush, I do so very carefully. I’ve seen some people brush all over the image, but I find I get the best results if I position it so that it is half on the image and half overlapping onto the area I want to select with it. Once I click down, I slowly drag around, carefully overlapping onto, in this case, the feathers (Figure 6.12).

FIGURE 6.10

FIGURE 6.11

FIGURE 6.12
- 6.Dive back into the Black & White View Mode to see the difference made by using the Refine Edge Brush. We can see that a lot more of the feathers around the outside have been selected (Figure 6.13).
It’s still not perfect by any means, so we need to do a bit of tidying up. You could try clicking on the Refine Hair option at the top of the screen to see if that improves things. If it does, then great, but if it doesn’t work so well on the image you’re working with, then just use the Undo command (Command (Mac)/Ctrl (PC) + Z) and carry on using something else.
- 7.Continuing on with our example image, grab the Brush Tool from the toolbar on the left (Figure 6.14). Once again, we can change the Size, Hardness, etc., as we would with any other brush in Photoshop, and then brush over any obvious area that the selection has missed, but DON’T use this on the feathers around the edge.
Although you don’t see a foreground and background color, by default, the brush paints in white to add to the selection, but can also paint in black. To swap between adding to and subtracting from the selection, you can manually click on the + and – icons in the top left of the screen, or temporarily hold down the Option (Mac)/Alt (PC) key as you brush.
Here, I’ve used the brush to cover areas within the head and hat so that they are now included in the selection (Figure 6.15).
NOTEAt the time of writing, there is no option to change the blend mode of the brush to Overlay so that it would work the same way as we covered in chapter 4.
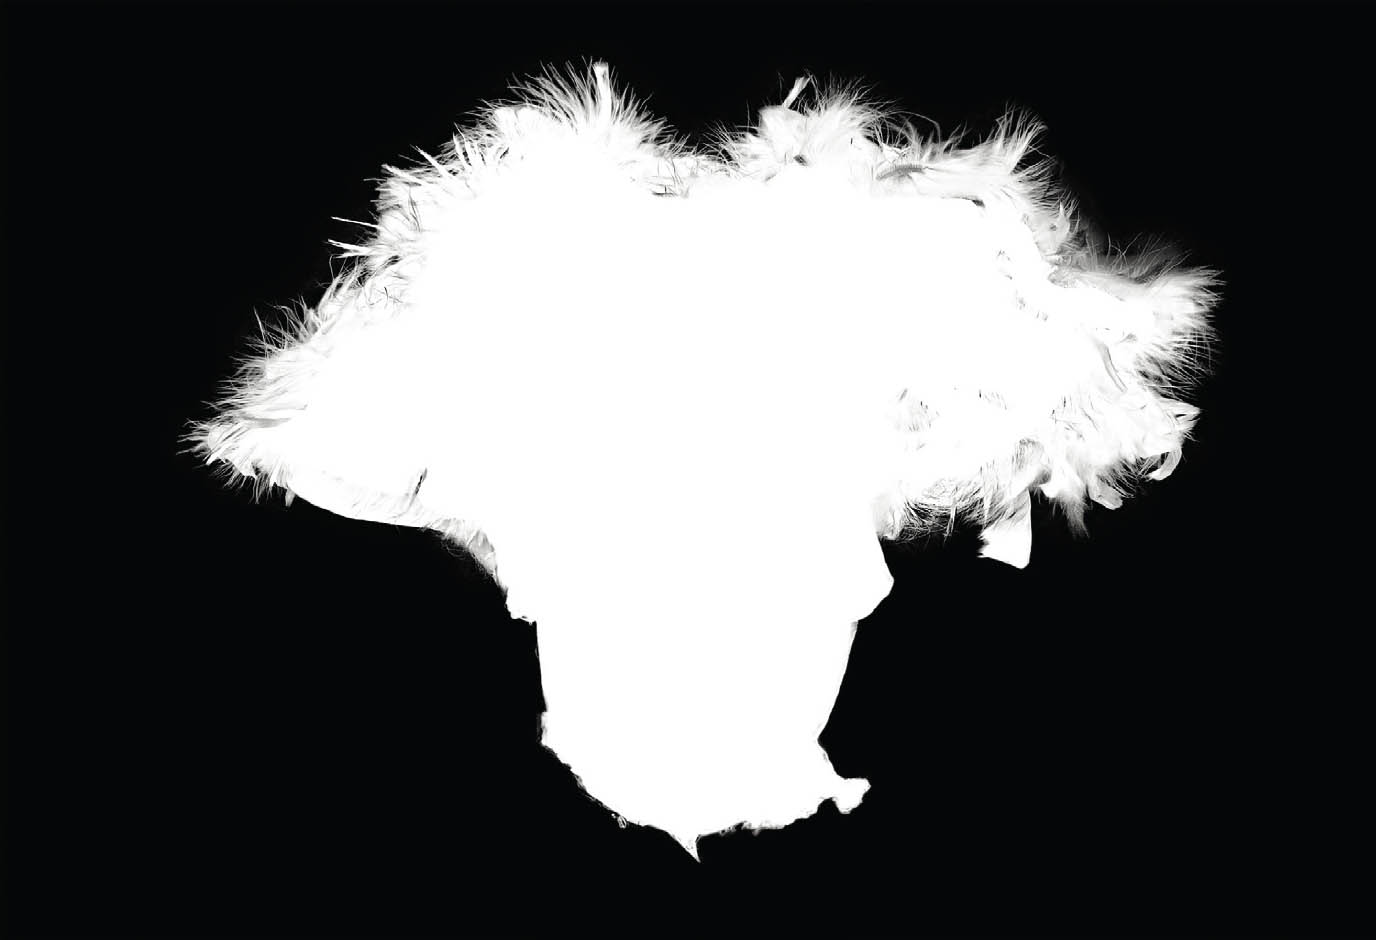
FIGURE 6.13

FIGURE 6.14

FIGURE 6.15
![]() TIPWhen working on the selection with Select and Mask, it’s always best to keep changing the View Mode to see how what you’re doing is affecting the mask.
TIPWhen working on the selection with Select and Mask, it’s always best to keep changing the View Mode to see how what you’re doing is affecting the mask.
We’re definitely managing to pick up more of the feathers now, but we can try some additional settings to see if we can improve it further.
- 8.In the Properties panel on the right, tick the Smart Radius checkbox (Figure 6.16).
Smart Radius basically tells Photoshop to take a really good look at the image and see if it can pick up any additional fine areas to add to the selection. Sometimes it works great, sometimes it doesn’t—it all depends on the image. In this case, it does seem to have picked up a little more.
We can also use the Radius slider. Drag slowly to the right to see if even more can be picked up and added to the selection.
The key here is to take things slow and do a little, then check, do a little, then check, swapping between different View Modes as you go.
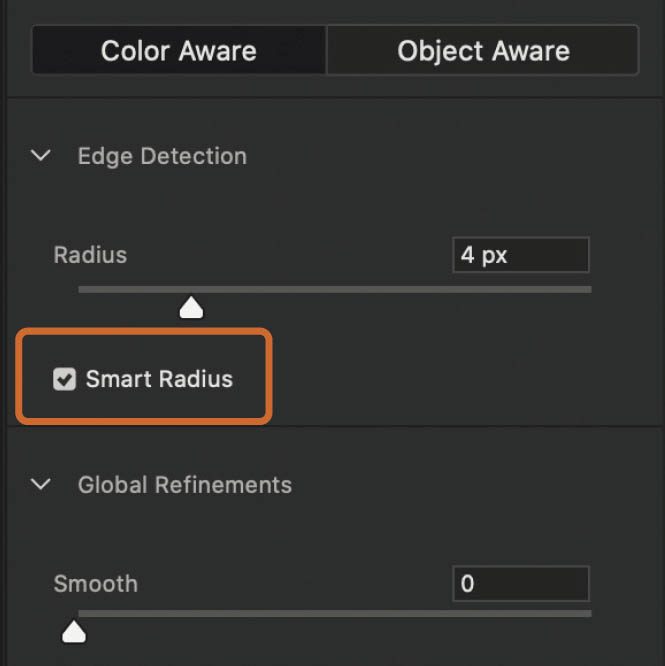
FIGURE 6.16
Looking at the image, I think we’ve picked up as much as we can, so before we take it back into the Photoshop workspace, let’s take a quick look at the other controls available to us and what they’re for.
GLOBAL REFINEMENTS
Continuing down the Properties panel on the right side of the screen, we have the Global Refinements section (Figure 6.17). There are several sliders and a couple of buttons here, which can be used as follows:
- Smooth: Use this slider to smooth jagged edges (works much like Anti-alias but with more control).
- Feather: Soften the selection edge.
- Contrast: Increase the contrast of the selection edge.
- Shift Edge: Contract or expand the selection edge.
- Clear Selection: Kind of speaks for itself, I guess.
- Invert: Select the opposite. This is the same thing as Select > Inverse within the main Photoshop workspace.
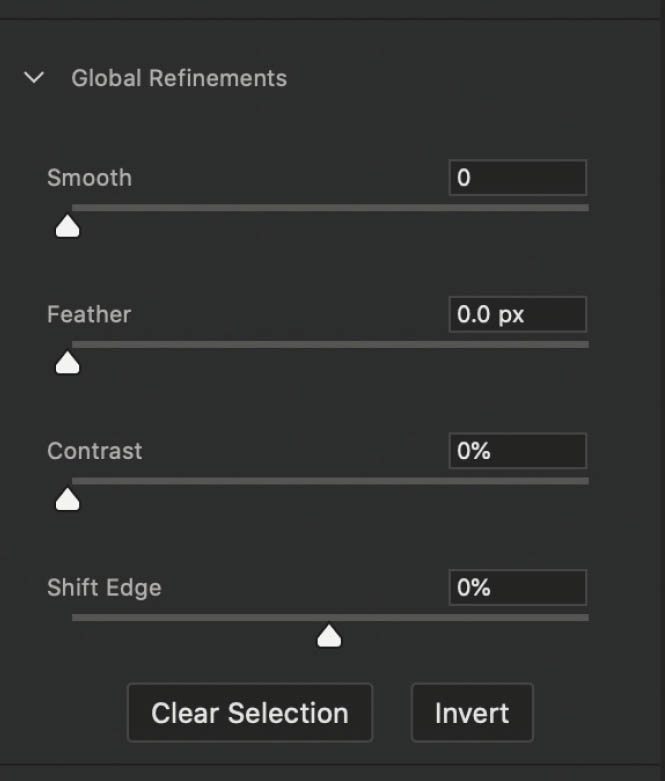
FIGURE 6.17

FIGURE 6.18
OUTPUT SETTINGS
The Decontaminate Colors checkbox is great for when you’re making a selection of an object that was maybe photographed on a green screen or blue screen and the light has reflected around it (Figure 6.18). The checkbox and Amount slider together control how much of the green or blue (or whatever color) is removed.
OUTPUT TO
Here is where we can choose what we want to do with our selection when we send it from Select and Mask back into the main Photoshop workspace (Figure 6.19). I prefer to use the Selection option, and then once I’m back in the main Photoshop workspace, I save the selection by going to Save > Save Selection, like we did in chapter 3 (page 50).
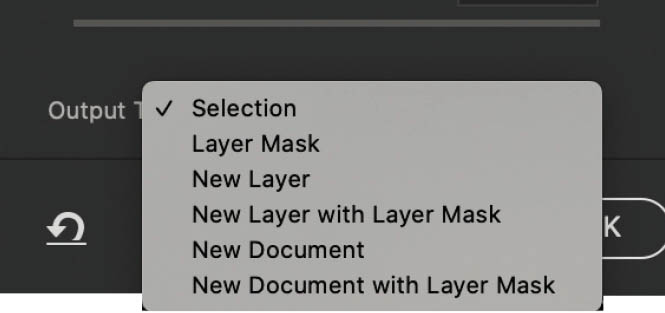
FIGURE 6.19
VIEW MODE
Back at the top of the panel where we have the View Mode, there are four checkboxes (Figure 6.20).
Show Edge: Ticking this checkbox shows the “refinement area” in whichever View Mode you are using (Figure 6.21).
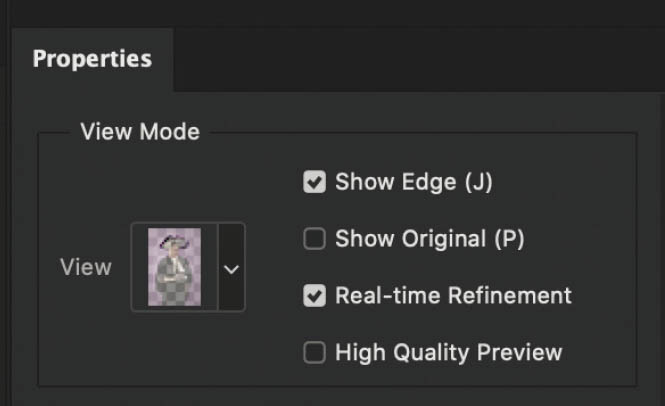
FIGURE 6.20
Show Original: This does exactly what it says—it shows the original image minus any selection made.
Real-time Refinement and High Quality Preview: Both of these can impact the speed of using Select and Mask, as they draw on the computer for more processing. I don’t tend to use these options.
Lastly, over in the toolbar on the left side of the screen, there are tools we’ve previously covered, namely: the Object Selection Tool (the Subject Selection Tool is in the options at the top of the screen), the Lasso Tool (with an expanding menu to access the Polygonal Lasso Tool), the Hand Tool, and the Zoom Tool.
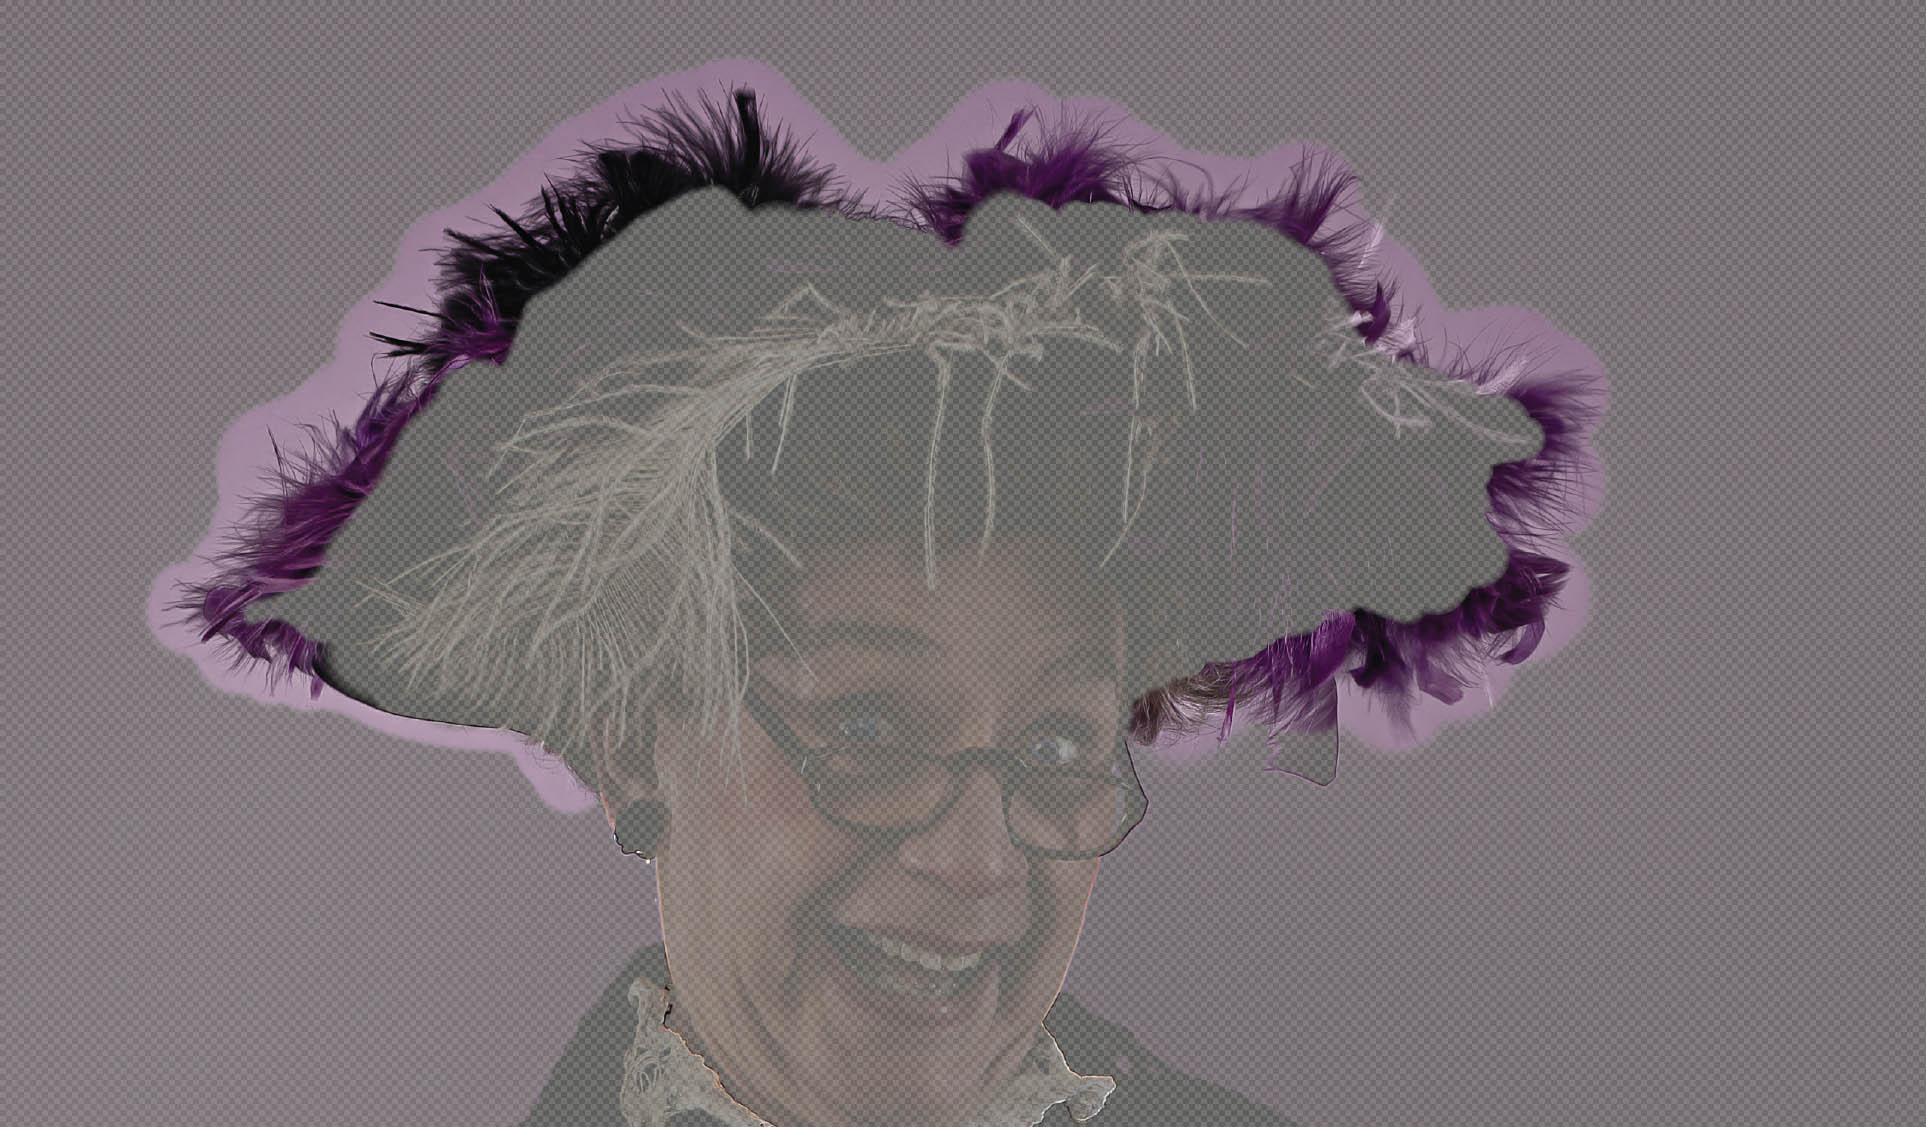
FIGURE 6.21
OUTPUTTING THE SELECTION
Now that we’ve done as much as we want to with Select and Mask, it’s time to get the selection into the Photoshop workspace. Choose Selection from the Output To menu and click OK.
We now see our image with the marching ants selection, so this is where we’ll save the selection by going to Select > Save Selection.
Next, while the selection is still visible (we can see the marching ants), add a layer mask by clicking on the Add Layer Mask icon at the bottom of the Layers panel (Figure 6.22).
The head and hat are now visible, but the rest of the image is hidden. This is because when we have an active selection and add a layer mask, the selected area is filled with white (making it visible), and the areas that aren’t selected are filled with black (making them hidden) (Figure 6.23).

FIGURE 6.22
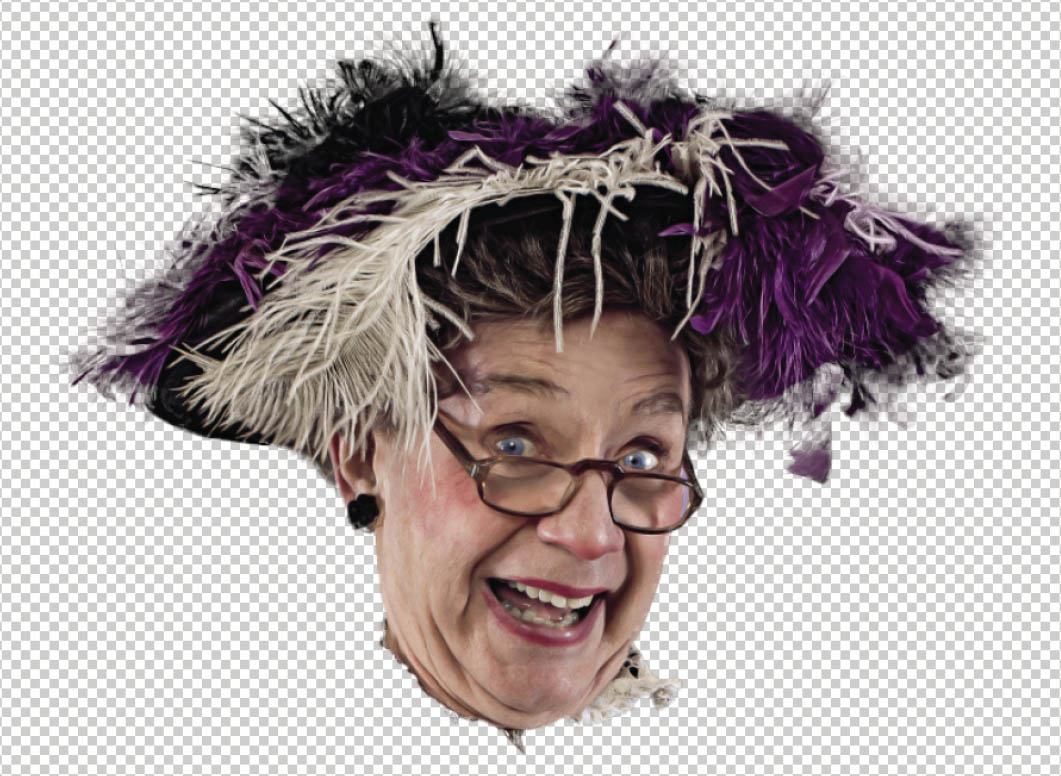
FIGURE 6.23
It can be difficult to see how good the selection/cutout is when viewing it on the transparent background, so let’s add a new blank layer to the top of the layer stack by clicking on the Add New Layer icon (Figure 6.24). Then go to Edit > Fill, choose 50% Gray from the Contents menu, and click OK (Figure 6.25). Drag this new gray layer to the bottom of the layer stack (Figure 6.26).
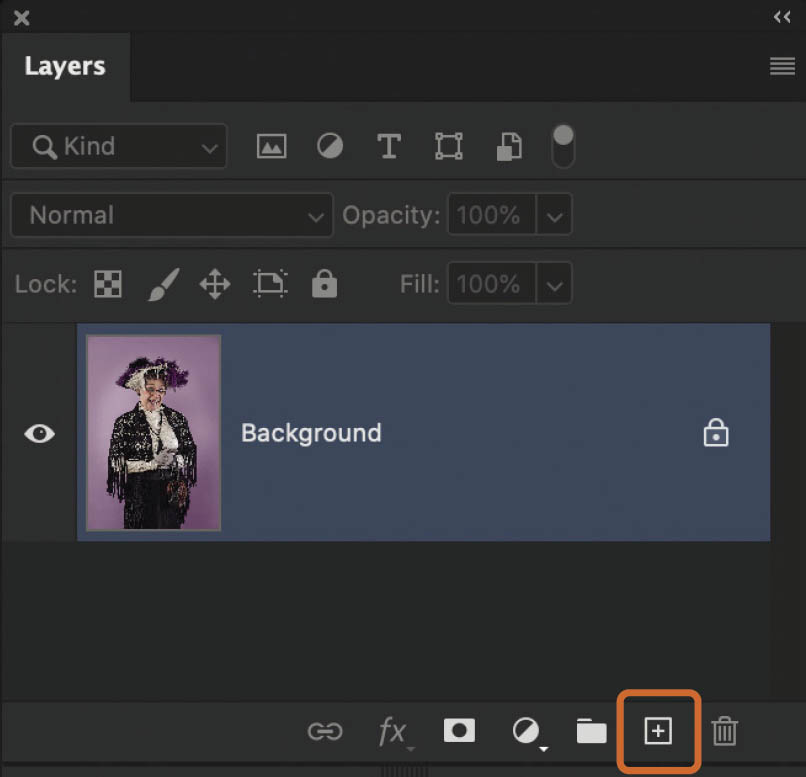
FIGURE 6.24
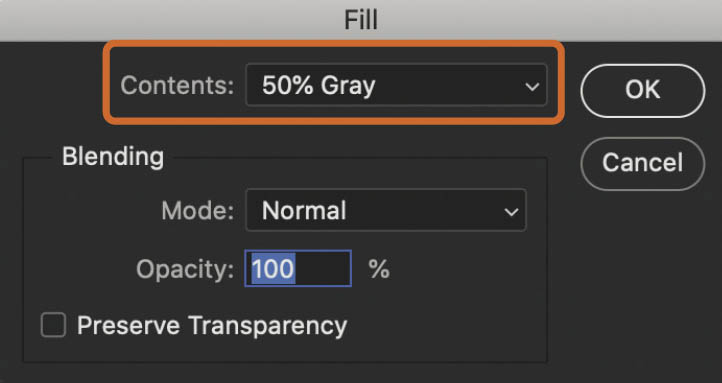
FIGURE 6.25
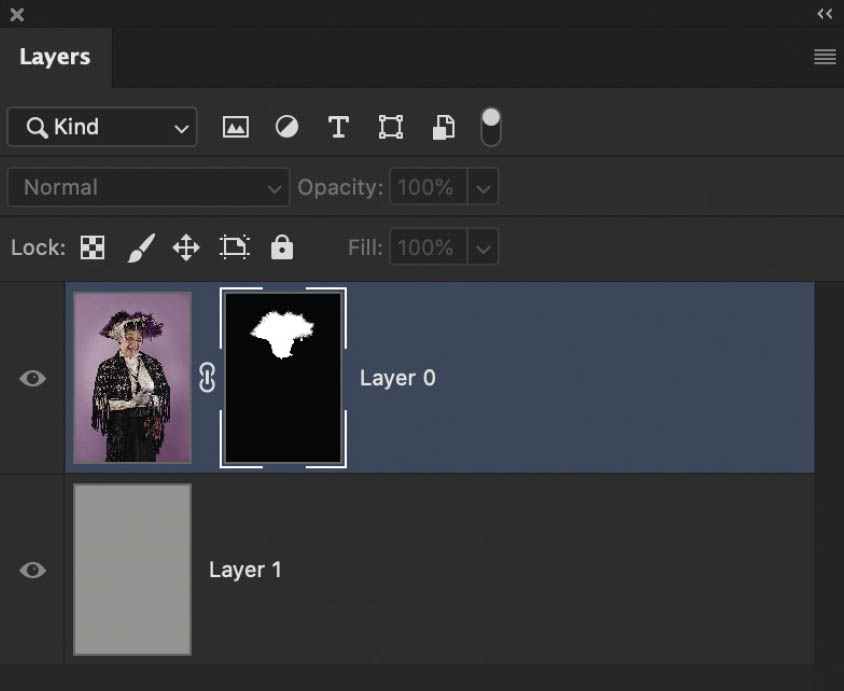
FIGURE 6.26
Now we can see the selection/cutout a lot clearer, and it appears we’ve done a pretty good job (Figure 6.27).
Let’s take a look at the layer mask now by holding down the Option (Mac)/Alt (PC) key and clicking directly on the thumbnail of the layer mask. Looking at the layer mask view, we can see there are areas that are solid white, areas that are solid black, and areas that are varying shades of gray (Figure 6.28).

FIGURE 6.27
We already know what white and black areas mean, but gray areas mean that part of the selection has transparency, which works great in this image because it means we can see through the feathers, as we would be able to do in “real life.”
In chapter 8, we’ll take a look at some techniques for cleaning up a selection even further, but make sure you also check out my “Selecting Hair: Faking It!” tutorials in chapter 9.
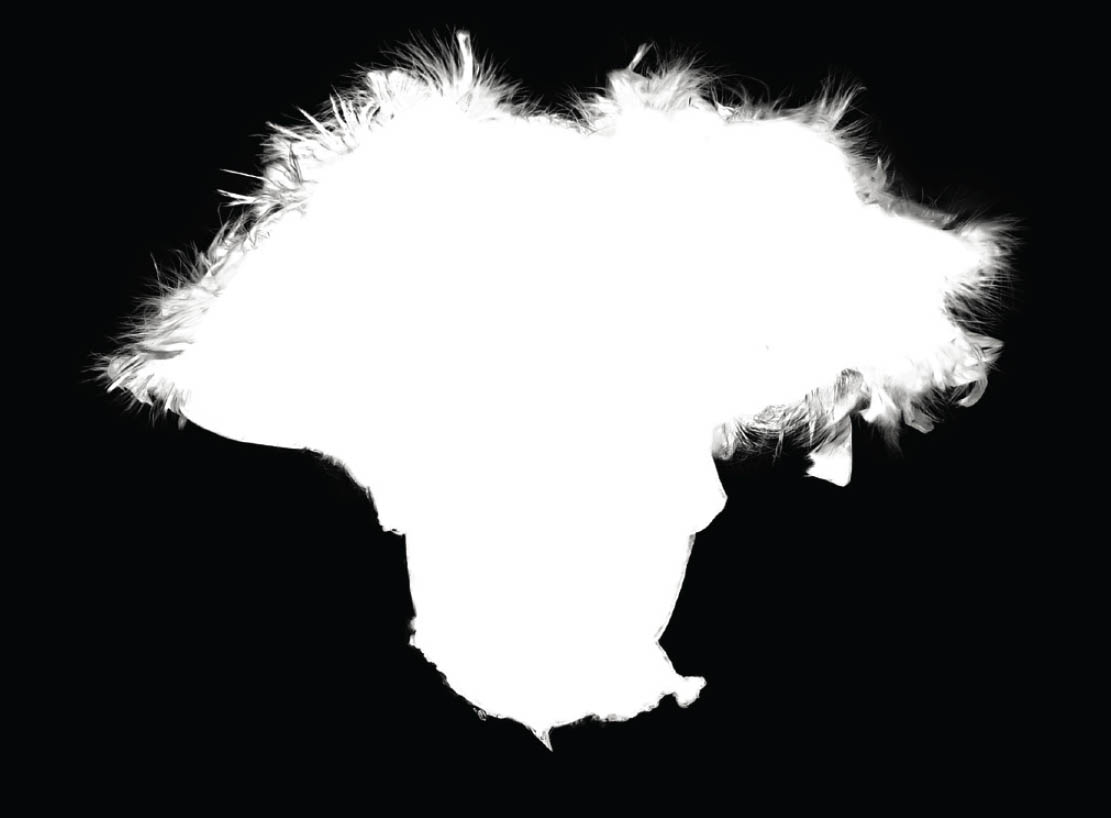
FIGURE 6.28