Overview
In this chapter, we'll cover the React library and how to build user interfaces enhanced with TypeScript. We'll look at state management solutions for React applications and styling solutions. Then, we will use Firebase, a serverless backend, to build a Hacker News-style application. By the end of this chapter, you will be able to bootstrap React applications using the Create React App command-line interface.
Introduction
React is a dominant force in web and mobile user interface development. Although it bills itself as "A JavaScript library for building user interfaces," what we often think of as React goes well beyond the core library and includes a wide ecosystem of plugins, components, and other tools. Many developers have chosen to specialize in React and it's a popular topic for code academies. Unlike Angular, React was not developed to use TypeScript and in fact there are a few other typing systems that some developers use with React. However, the popularity of both React and TypeScript made it inevitable that someone would want to marry the two, and writing React with TypeScript has become a standard way to approach user interface development.
React was developed internally by Facebook for their own use and was open sourced in 2013. In contrast to some of the more full-featured frameworks, React has always styled itself as a view library and it relies on other libraries for necessary functionality, such as state management, routing, and web requests.
React uses a declarative, component-based approach. Developers build components that represent different UI elements. These components are typically reusable and can be assembled in different ways to construct web views. Components can be made up of other components and each individual component should be rather simple. Thinking in terms of small, reusable components helps React developers write clean, maintainable code and follow the Don't Repeat Yourself (DRY) principle.
Typing React
Prior to the dramatic rise in the popularity of TypeScript, React programmers either went without any sort of type system or used libraries such as Flow or PropTypes.
Flow is another library developed by Facebook with the intent of adding types to JavaScript. It has similar goals to TypeScript but takes a different route to achieve them. Instead of being a superset of JavaScript, Flow uses comments and type annotations checked by a language server, which are then removed by a transpiler such as Babel. Since both libraries were developed by Facebook, it was common to use them together, but the popularity of Flow has waned as TypeScript has emerged as the type system of choice for web developers.
PropTypes is another library for enforcing type-checking. In this case, the library is specifically for use with React and has the narrow focus of checking types on React "props," or the parameters that are passed along with components.
TypeScript in React
While it is technically feasible to use these libraries along with TypeScript, it's not a good idea as they are all essentially trying to solve the same thing. If you're using TypeScript, it's best to avoid Flow and PropTypes.
TypeScript provides many benefits to React programmers. We can achieve all the same aims as the PropTypes library by typing our props using interfaces, and we also get the full IntelliSense experience, which will let us learn more about components and their lifecycles and even let us read developer comments, deprecation notices, and so forth.
TypeScript will help ensure proper use of our components and give us that early feedback loop that makes development much easier.
Hello, React
There are numerous books on React alone. This one chapter in a book on TypeScript cannot cover all the topics relating to React. Readers who aren't already familiar with React but wish to work with React professionally should seek sources beyond this book. That said, to give a very brief overview of how React works, components are written in some flavor of a compile-to-JavaScript language, such as TypeScript, ReasonML, or even JavaScript. The compiled script will be embedded on a web page, hooking into a page element such as a div:
import React from 'react';
import ReactDOM from 'react-dom';
export interface HelloProps {
name: string;
}
class HelloComponent extends React.Component<HelloProps, {}> {
render() {
return <div>Hello {this.props.name}</div>;
}
}
ReactDOM.render(
<HelloTypeScript name="Matt" />,
document.getElementById('root')
);
This script will be loaded into a page with an element that has an ID of root and will then print out Hello Matt. There are a lot of different ways to structure React applications. Usually, they will be composed of many, many components, each of which is put in a separate file.
React works by keeping a copy of the Document Object Model (DOM), the object tree that translates JavaScript code to a rendered browser page, in memory. This virtual DOM is updated frequently and changes are selectively applied to a render of the actual web page. The virtual DOM allows for performance optimizations and is designed to prevent slow renders or inefficient re-renders.
The Component
Inheritance patterns have existed in JavaScript since the beginning, first in the form of prototypal inheritance and then class syntax since ES2015. Some programming paradigms have recommended leveraging inheritance as the primary tool for building complex applications. For example, if we were building a website that included a profile page for a pet kitten, you might think about setting up an inheritance chain such as KittenProfilePage extends FelineProfilePage extends PetProfilePage extends ProfilePage extends Page. Indeed, some UI frameworks have attempted to implement models like this. However, in practice, this kind of thinking is quickly revealed as overly rigid, resistant to changing requirements, and forcing you into strange patterns. For example, if we have implemented whiskerCount in FelineProfilePage and we're now implementing RodentProfilePage, do we copy and paste? Does RodentProfilePage inherit from FelineProfilePage? Should we introduce WhiskeredPetProfilePage to the chain in order to share whiskerCount according to our model?
That's not to say that modern web frameworks and libraries don't use inheritance. They do! But generally, we are inheriting from a generic base component provided by the library and our inheritance chains are very short. Instead of inheritance, we focus on composition. Composition is the practice of building from many reusable components, most of which have a more general purpose. This doesn't mean that every component must be used more than once, but they are built in such a way that they could be.
This approach is embraced wholeheartedly by React. The basic building block of any React application is the component. There are a few classifications of React component.
Stateful Components
Stateful components keep track of their own state. Consider a dropdown that tracks whether or not it is open and renders accordingly. Stateful components may use the this keyword or enclose other variables for the purpose of keeping the state. In React, the setState method may be used in stateful components. A stateful component's state may be set during lifecycle events.
Typically, information about how a component should display can be kept within that component. However, more complex data, such as a user profile, will often require a state management solution that extends beyond the component. See State Management in React later in this chapter.
Stateless Components
Stateless components never use the this keyword or call setState. They may re-render based on props passed in but do not track any data themselves. All normal lifecycle methods are available and stateless components are declared in the same way as stateful components, just without anything that may alter the state.
A dropdown or accordion component could even be stateful if we decided to manage that state in a central location. We typically won't do that for simple components, but we might have some reason, such as an expand/collapse all feature.
Pure Components
Pure components are a special optimization for React. They are much like stateless components in terms of how we use them, but they are declared differently (by extending PureComponent). Pure components will only re-render when there is a change to their state or props. This is in contrast to most components, which will re-render when a parent component re-renders.
It's a good idea to experiment with pure components. They can dramatically speed up the rendering of a React application but may introduce some unexpected behaviors to those not used to working with them.
Higher-Order Components
Higher-order components (HOCs) are not a library structure but are rather a pattern of wrapping one component with another without mutating the wrapped component. A great example of an HOC is requiring users to authenticate prior to interacting with our components.
Consider the case of a site with a single login page and 99 pages of sensitive information. Following a composition model, how can we implement this? We don't want to inject the details of our authentication into every component we build. Doing that would be sloppy and impractical. We don't want to have to wrap every render with isUserAuthenticated. It would be easy to miss one. A better solution to this problem is to use an HOC. Now our components can be written independently of our authentication model.
HOCs are often described as pure functions – functions without side effects. Pure functions make many appearances in React programming and are a good model to strive for in general. HOCs are considered to be pure functions because they must not alter the components they wrap. They are not, however, pure components; a pure function is a programming concept while PureComponent is an actual part of the React library.
HOCs are a great example of the concept of composition over inheritance. Going back to the authentication example, an inheritance model would likely have us building components that inherit from RequiresAuthenticationComponent, a base component that has our auth model built in. However, with composition, we can build our components independently of our authentication system, then apply an HOC around them. Many programmers would see this as a better separation of concerns.
JSX and TSX
JSX is another innovation from Facebook. It refers to JavaScript enhanced with XML and practically it is JavaScript with HTML templates embedded into it. The following is an example of its use:
render() {
return <div>Hello {this.props.name}</div>;
}
This is a function that returns an HTML template. We must use JSX to do this. Normally, this would result in a syntax error as this is not a quoted string nor is it any recognizable object or syntax in TypeScript. JSX allows us to mix our HTML templating in with our code. Some earlier view libraries would use one file for source code and another for templating. This was often confusing to programmers as they needed to flip back and forth between the two.
It is possible to write React without using JSX but that is rarely done and won't be covered in this book. Some other languages, such as Vue, use JSX as well.
When we want to write TypeScript in JSX, we use the .tsx file extension instead of .jsx. Technically, this is still JSX. To include TypeScript in JSX, all we need to do is set the file extension accordingly and set the jsx property in our tsconfig.json file to let TypeScript know we're using JSX. Valid values for that property are react, react-native, and preserve. The first two are for targeting a web browser or mobile app, respectively, and the last means that some other transpilation step will handle the JSX.
JSX is not a part of the JavaScript or TypeScript language, but just a language extension that needs to be transpiled. You wouldn't be able to run JSX in most web browsers.
Exercise 14.01: Bootstrapping with Create React App
Create React App (create-react-app) is a library from Facebook that helps developers quickly bootstrap a new React application. It includes a library called react-scripts that helps abstract a lot of the tooling that has become standard in web development, like a linter, a test framework, and a bundler (webpack). All of those dependencies are managed by Create React App and react-scripts.
In this exercise, we'll bootstrap a new React application using Create React App. We'll run the application, examine the developer experience, and make some minor edits, then see components reload. We'll look at the production build and how that's different from the development build. Then we'll check out the built-in tests:
Note
The code for this exercise can be found here: https://packt.link/hMs3v.
- Create React App ships with a few options and has included a TypeScript option since 2018. It's very easy to create a new application. We don't even need to install anything but can use npx to run the latest version of Create React App and start an application. Enter the command line and find a directory where you'd like to create your application and type this:
npx create-react-app my-app --template typescript
- Create React App will download from the internet and set up your application, then install dependencies. Create React App will use the yarn package manager (also from Facebook) if you have it installed, otherwise it will use npm. It doesn't make very much difference which of these you use for the purposes of this book as they provide the same functionality. If you have an old version of yarn installed, you may need to update it (npm i -g yarn). If you prefer not to use yarn, all of these exercises should work fine without it:
npx create-react-app my-app --template typescript
npx: installed 67 in 4.26s
Creating a new React app in /Users/mattmorgan/mine/The-TypeScript-Workshop/Chapter14/Exercise01/my-app.
Installing packages. This might take a couple of minutes.
Installing react, react-dom, and react-scripts with cra-template-typescript...
yarn add v1.22.10
[1/4] ? Resolving packages...
[2/4] ? Fetching packages...
// […]
warning " > @testing-library/[email protected]" has unmet peer dependency "@testing-library/dom@>=7.21.4".
success Uninstalled packages.
✨ Done in 10.28s.
Success! Created my-app at /Users/mattmorgan/mine/The-TypeScript-Workshop/Chapter15/Exercise15.01/my-app
Inside that directory, you can run several commands:
yarn start - Starts the development server.
yarn build - Bundles the app into static files for production.
yarn test - Starts the test runner.
yarn eject Removes this tool and copies build dependencies, configuration files and scripts into the app directory. If you do this, you can't go back!
We suggest that you begin by typing:
cd my-app
yarn start
Happy hacking!
Note
For ease of presentation, only a section of the output is displayed here.
- The output of npx create-react-app will tell you what to do next. cd into the directory that was created, and type yarn start or npm start. Your application will automatically open in a browser window:
cd my-app
yarn start
You will see the following output:
Compiled successfully!
You can now view my-app in the browser.
Local: http://localhost:3000
On Your Network: http://192.168.7.92:3000
Note that the development build is not optimized.
To create a production build, use yarn build.
- If you navigate to http://localhost:3000, you will see the following:

Figure 14.1: Screenshot of my-app in the browser
- Examine the source code that was generated in your favorite IDE. You can find an index.tsx file that attaches the React application to a dom node and an App.tsx file, which is the main component in your application so far. Try adding a new message or creating some new components as shown here:

Figure 14.2: Screenshot of my-app after adding App.tsx
- When you type npm start, your application will run in development mode with hot reloads (meaning your page refreshes when you make a change). For running in production, that's obviously not necessary. You can see what a production build looks like by running yarn build or npm run build. You'll see some output that tells you exactly what is happening and the transpiled JavaScript will be put in a build directory. Open the directory and look at the files there. That's what a production React application looks like.
- Use Ctrl + C to stop your local server and try yarn build or npm run build to run the production build.
- Production React applications often run on static servers but they can also run on web servers. The concept of server-side rendering in React is beyond the scope of this book but is another topic you may be interested in. Your build should produce a shortened URL that will take you to an article that includes more information about deploying React applications to production:
yarn build
yarn run v1.22.10
react-scripts build
Creating an optimized production build...
Compiled successfully.
File sizes after gzip:
41.2 KB build/static/js/2.311d60e9.chunk.js
1.39 KB build/static/js/3.73a1c5a5.chunk.js
1.17 KB build/static/js/runtime-main.f12bc2d0.js
615 B build/static/js/main.fe0fc6c6.chunk.js
531 B build/static/css/main.8c8b27cf.chunk.css
The project was built assuming it is hosted at /. You can control this with the homepage field in your package.json.
- The build folder is ready to be deployed. You may serve it with a static server:
yarn global add serve
serve -s build
Find out more about deployment here:https://cra.link/deployment
✨ Done in 7.88s.
- Type yarn test or npm t (short for npm test). The Jest framework will run a test against your application. The test is very simple but can get you started writing more tests. It's a good idea to write tests for your components as the tests will give you confidence that your application is working. Writing testable code builds strong programming habits:
PASS src/App.test.tsx
✓ renders learn react link (23 ms)
Test Suites: 1 passed, 1 total
Tests: 1 passed, 1 total
Snapshots: 0 total
Time: 2.295 s
Ran all test suites related to changed files.
Watch Usage
› Press a to run all tests.
› Press f to run only failed tests.
› Press q to quit watch mode.
› Press p to filter by a filename regex pattern.
› Press t to filter by a test name regex pattern.
› Press Enter to trigger a test run.
And with that, we've covered the basics of Create React App. We've learned how we can quickly bootstrap a new application, looked at the developer experience with hot reloading, and also how to run production builds and tests.
Although Create React App gives you a lot of stuff, it's actually just the tip of the iceberg of what we'll see in the coming sections. For example, our application has no way to handle different kinds of requests or different pages. We don't have any routing. We also have no place to store data and no way to interact with any kind of backend. We'll delve into those concepts in the coming sections.
Routing
React doesn't include a solution for routing by default. That's because at its heart it is a view library. Some applications have no need for routing, but most will want the ability to render multiple pages at the very least. Some applications have complicated routing requirements that may involve "deep linking" or linking directly to a particular document. Request or query variables in a URL may contain some identifier that connects to a particular user's record.
While there are some alternatives, most React applications that use routing use React-Router, which is the official Facebook solution.
Exercise 14.02: React Router
In this exercise, we'll bootstrap another application with Create React App and then enhance it with React Router to be able to support multiple views and navigate between them:
Note
The code for this exercise can be found here: https://packt.link/EYBcF.
- To start, go to the command line where you can create another application:
npx create-react-app router-app --template typescript
cd router-app
- To add React Router, let's install the library and typings. If you are not using yarn, yarn add commands can be replaced with npm install:
yarn add react-router-dom
yarn add -D @types/react-router-dom
% yarn add react-router-dom
yarn add v1.22.10
[1/4] ? Resolving packages...
[2/4] ? Fetching packages...
[3/4] ? Linking dependencies...
warning " > @testing-library/[email protected]" has unmet peer dependency "@testing-library/dom@>=7.21.4".
[4/4] ? Building fresh packages...
success Saved lockfile.
success Saved 8 new dependencies.
info Direct dependencies
info All dependencies
✨ Done in 4.86s.
% yarn add -D @types/react-router-dom
yarn add v1.22.10
[1/4] ? Resolving packages...
[2/4] ? Fetching packages...
[3/4] ? Linking dependencies...
warning " > @testing-library/[email protected]" has unmet peer dependency "@testing-library/dom@>=7.21.4".
[4/4] ? Building fresh packages...
success Saved lockfile.
success Saved 2 new dependencies.
info Direct dependencies
└─ @types/[email protected]
info All dependencies
├─ @types/[email protected]
└─ @types/[email protected]
✨ Done in 4.59s.
Now we can start the application with yarn start or npm start. We'll be editing files as we add these routes and our application will just restart automatically, which makes for a nice developer experience.
We could begin by adding the router, but we currently have nothing to route to, so let's start by adding a few new components. Since components are the building blocks of a React application, a component can be a page. That same component could also be part of another page.
- Let's create a /src/pages subdirectory in our application to hold the new page components. In the pages subdirectory, create Add.tsx,Home.tsx, SignIn.tsx, and Signup.tsx.
To start, we'll create some very simple components to route between. In a later section in this chapter, we'll discuss the creation of function components.
- Create Add.tsx using the following code:
import React from 'react';
const Add = () => <div>Add a new story</div>;
export default Add;
- Create Home.tsx using the following code:
import React from 'react';
const Home = () => <div>You are home!</div>;
export default Home;
- Create SignIn.tsx using the following code:
import React from 'react';
const SignIn = () => <div>Sign in here</div>;
export default SignIn;
- Create SignUp.tsx using the following code:
import React from 'react';
const SignUp = () => <div>Sign up here</div>;
export default SignUp;
These basic components only return some JSX, but they are sufficient to route between. Note that without a router, we could include the components in our main App.tsx, but we cannot navigate between pages in a traditional web app sense. That is the responsibility of the router.
- So, at this point, we have components that we can't yet interact with. Let's add routing to our App.tsx.
React Router exposes a few different router types that have mostly narrow use cases. We will focus on BrowserRouter. To get started, we will add a few imports to App.tsx:
import { BrowserRouter as Router, Switch, Route } from 'react-router-dom';
By convention, we are renaming BrowserRouter to Router in our import. We will also use Switch, which gives us a declarative way to shift between different components based on the route, and Route, which lets us define the component route.
Adding our first (default) route is pretty simple. Before doing that, make sure your local dev environment is running with npm start. You should see the spinning React logo in a web browser running at http://localhost:3000.
- Now let's use the other components to build out the first route. We'll remove all the JSX that the App.tsx component is currently returning and replace it with the routing:
function App() {
return (
<Router>
<Switch>
<Route exact path="/" component={Home} />
</Switch>
</Router>
);
}
You will need to import the Home component:
import Home from './pages/Home';
Your IDE may prompt you to automatically import Home as you are typing.
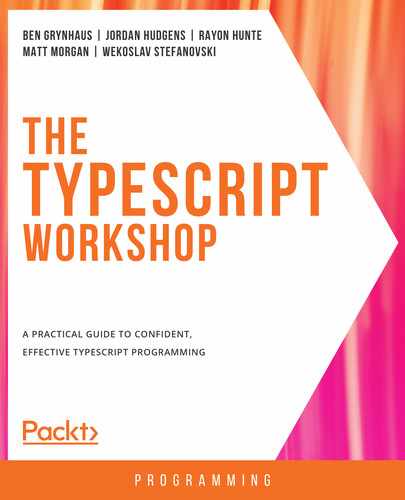
- If you've got everything working correctly, your view will refresh and you'll see the React logo replaced with You are home!.
Let's add some additional routes:
<Route path="/add" component={Add} />
<Route path="/signin" component={SignIn} />
<Route path="/signup" component={SignUp} />
- Our Home route sets the exact property. Routing in React uses a regular expression to match the path starting from the leftmost part of the path. This allows for variable query and route parameters to be matched. The exact prop forces an exact match and ensures "/add" doesn't match to "/".
- Now we can test the routing. Type http://localhost:3000/add in your browser. You should get the message Add a new story. Try visiting the other routes.
- Of course, it isn't very natural to expect users to manually type all the URLs in a browser to navigate your site. Let's add some links. We can import Link from react-router. This component will create navigation links that connect to your application routing. Because of this, Link must always be used within Router.
Link wraps some text and has a to prop, which should have the route you want to link to:
<Link to="/">home</Link>
With that, it's pretty easy to add some navigation elements:
<nav>
<ul>
<li>
<Link to="/">home</Link>
</li>
<li>
<Link to="add">add</Link>
</li>
<li>
<Link to="signin">signin</Link>
</li>
<li>
<Link to="signup">signup</Link>
</li>
</ul>
</nav>
This should give us a nice way to move between our pages. However, pasting a bunch of extra JSX into App.tsx isn't a great way to write React, so let's write a NavBar component instead.
- Add a components directory under src. We'll use this directory to hold components that aren't tied to routes:
import React from 'react';
import { Link } from 'react-router-dom';
const NavBar = () => (
<nav>
<ul>
<li>
<Link to="/">home</Link>
</li>
<li>
<Link to="add">add</Link>
</li>
<li>
<Link to="signin">signin</Link>
</li>
<li>
<Link to="signup">signup</Link>
</li>
</ul>
</nav>
);
export default NavBar;
- Now we can simply use this component in App.tsx. Here's the finished component:
import './App.css';
import React from 'react';
import { BrowserRouter as Router, Route, Switch } from 'react-router-dom';
import NavBar from './components/NavBar';
import Add from './pages/Add';
import Home from './pages/Home';
import SignIn from './pages/SignIn';
import SignUp from './pages/SignUp';
function App() {
return (
<Router>
<NavBar />
<Switch>
<Route exact path="/" component={Home} />
<Route path="/add" component={Add} />
<Route path="/signin" component={SignIn} />
<Route path="/signup" component={SignUp} />
</Switch>
</Router>
);
}
export default App;
- Check your browser now and you should see the simple navigation and be able to use it to shift between views:
Figure 14.3: List of folders in the finished component
Adding routing to a React application is easy to do. In this exercise, we showed how to add routes, navigate between them, and also how to share a common component across several routes. One of the real strengths of React is the ability to share components among other components and create reuse patterns that make putting together the building blocks of an application easy.
Routing can also include path and query parameters. Be sure to read the React Router documentation for how to add parameters to your routes.
React Components
Now let's dig into how these components work. There are several different ways to declare a component in React. You even have the choice to use JSX or not. This book will focus on creating components with function expressions, but we'll go over a few other patterns, so you'll know them when you see them.
Class Components
This style of component follows a classical (that is, relating to the programming concept of classes) pattern of component declaration. Many older examples will use class components, but they have fallen largely out of fashion due to being more verbose than other patterns. To create a class component, we import the Component class from React and extend it while creating our own class:
import React, { Component } from 'react';
interface Comp1Props {
text: string;
}
export default class Comp1 extends Component<Comp1Props> {
render() {
const { text } = this.props;
return <div>{text}</div>;
}
}
It's a good idea to create your own interface for props and the same can be done for state – for example:
import React, { Component } from 'react';
interface Comp1Props {
text: string;
}
interface Comp1State {
value: boolean
}
export default class Comp1 extends Component<Comp1Props, Comp1State> {
render() {
...
}
Props are accessed via this.props and state via this.state and this.setState. This style of programming may seem comfortable and familiar to those with a background in Java or C++, but the this keyword can be troubling to work with in TypeScript and the class-focused declaration style doesn't fit well with some of the functional programming concepts in React, so other patterns have gained popularity in recent years. For more information about the this keyword, see Chapter 3, Functions.
Function Components (Function Declaration)
It's far more common for React components to be written as function components. The same simple component from the previous section, rewritten as a function component, could look like this:
import React from 'react';
interface Comp2Props {
text: string;
}
export default function Comp2({ text }: Comp2Props) {
return <div>{text}</div>;
}
We've shaved off a couple of lines of code and come to something a bit more like a functional programming style. You won't use this very often when using function components, nor do you need to actually import the Component class. Props are simply the arguments passed into the function. State can't be handled directly here, but we will see how to manage that in the next section on React Hooks.
Function Components (Function Expression with Arrow Functions)
This book prefers this pattern as a very intuitive and declarative way of creating components. You can even create pure function components as a one-liner. First, let's write the same component again:
import React from 'react';
interface Comp3Props {
text: string;
}
const Comp3 = ({ text }: Comp3Props) => <div>{text}</div>;
export default Comp3;
Scoping rules do not allow the const and default keywords to be on the same line (avoiding absurd code such as export default const a=1, b=2, c=3;, which would otherwise be allowed), so we need to export the component on a separate line.
If we really want to slim the code down, we could write it like this:
import React from 'react';
export const Comp3 = ({ text }:{ text: string }) => <div>{text}</div>;
This is a pure function component that is stateless and has no other side effects. Most programmers prefer to use an interface for the props as it helps with readability, but that declaration can be done inline as in the preceding snippet ({ text: string }) if we really want to make the component small.
No JSX
Any of the preceding methods can use createElement. Here's a quick example of why you probably don't want to use that:
import { createElement } from 'react';
interface Comp4Props {
text: string;
}
const Comp4 = ({ text }: Comp4Props) => createElement('div', null, text);
export default Comp4;
The arguments to createElement are the element tag to create, its props, and its children. It doesn't take long to realize that creating nested elements with createElement would be substantially more difficult than using JSX, so JSX is almost always used. If we decide not to use JSX, we can use the .ts file extension instead of .tsx. This is a very small benefit!
State in Function Components
This book recommends function components over class components. We cannot access state directly in a function component, nor is there a setState method to call. However, we do have access to the excellent useState and so we hardly miss this or setState at all.
useState is part of React Hooks, available since React version 16.8. React Hooks introduced several functions that greatly enhance working with function components. Let's start by coming up with a simple component that uses the class constructor, this, and setState:
import React, { Component } from 'react';
interface Comp1Props {
text: string;
}
interface Comp1State {
clicks: number;
}
export default class Comp1 extends Component<Comp1Props, Comp1State> {
constructor(props: Comp1Props) {
super(props);
this.state = { clicks: 0 };
}
handleClick = () => {
this.setState({ clicks: this.state.clicks + 1 });
};
render() {
const { text } = this.props;
return (
<div>
{text}
<div>
<button onClick={this.handleClick}>{this.state.clicks} clicks</button>
</div>
</div>
);
}
}
We've defined interfaces for props and state as well as an event handler to count up the clicks. We are using setState to increment our counter in the state. It looks a bit weird that handleClick uses an arrow function while render does not, yet they both refer to this. This is due to the strangeness of interpreting this references in TypeScript. Without an arrow function, handleClick will not find our component when accessing this but will instead get an undefined reference. This sort of issue has cost a lot of developers a lot of time and so framework authors have sought after solutions that simply avoid language constructs that so many find confusing. Let's rewrite this component as a function component:
import React, { useState } from 'react';
interface Comp2Props {
text: string;
}
export default function Comp2({ text }: Comp2Props) {
const [clicks, setClicks] = useState(0);
const handleClick = () => setClicks(clicks + 1);
return (
<div>
{text}
<div>
<button onClick={handleClick}>{clicks} clicks</button>
</div>
</div>
);
}
This function component does exactly the same thing as the class component. Let's look at the differences. For one, we're starting to see substantial savings in terms of lines of code. The function component is 18 lines while the class component is 30.
Next, we are avoiding the troublesome this keyword. We are also avoiding having to define an interface for the state. It may seem counterintuitive, but this is actually a good thing. In class components, state, as a single object, may often combine several unrelated things into one state. State is really just a place for any and all local variables. By declaring each of these variables independently from the others, we can establish much better programming paradigms.
The useState function takes an argument, which is the default state, and returns an array of const pointing to the value and a method used to update the state. The stateful value is const because it cannot be updated without re-rendering our component. If we call setClicks, the component will re-render with a newly initialized const clicks. You can have several useState calls in a single function component. Each one manages its own part of the state independently.
Your state can still be strongly typed when using useState. In our case, TypeScript infers the type of number for clicks, based on how we've initialized it with a number. However, if we wanted to, we could add a type hint such as useState<number>(0) or useState<MyType>(0) to handle more complex types.
State Management in React
State is a bit of an overloaded term in the UI development world. Thus far, the state we've been referring to is a local state inside of a component. Going back to the clicks example, while that value could be passed to a child component via the usual means (as a prop), there's no easy way to pass the value to a parent component or some distant "cousin" component elsewhere in the DOM tree.
The management of global state is a problem much older than React. It's always been fairly simple to create some kind of widget that can internally manage its own data, but that widget gets extremely complicated when new requirements are introduced that connect the widget's data to other parts of an application. Often applications were written in an imperative fashion with hand-coded "events" to try to propagate data through some global scope. This approach can work, but bugs are common and managing change can be extremely difficult. A likely outcome of an ad hoc approach to state management is unmaintainable spaghetti code.
React does have a "brute force" approach to state management, which is that all data is stored in some parent component and passed (along with any necessary methods to update the data) to all children and all of their descendants. Doing this in a complex application can be really challenging, with long lists of props that must always be passed through. For this reason, most developers choose another solution.
Redux is a popular library introduced in 2015 that aimed to solve the problem of state management by introducing functional programming concepts such as the reducer. The concept behind Redux is that an immutable state is stored somewhere in the application. Different parts of the application can dispatch actions that will produce a new state to replace the old one. Because each version of the immutable state can be stored and is immutable (meaning nothing outside this framework can change it), it is possible to time-travel through different application states, something that can be very useful for development but may also have use in production applications, such as an "undo" feature. Redux can be used with almost any web application and is not tied to React, but it's very common to find the two of them together in an application.
Redux is powerful but receives criticism for being overly complex and using a lot of boilerplate. It also typically requires additional libraries (such as redux-saga or redux-thunk) to make asynchronous calls to a backend server. All of these libraries can be very intimidating to newcomers and even challenging to use for experienced programmers.
React Hooks provides a simpler way using React context. React context allows us to set root-level data stores and actions and make them available to components deep in the DOM tree without having to pass props all the way through (sometimes known as "prop drilling"). The difference between Redux and context is tantamount to going from class components and setState to function components and useState. Like the prior example, we are moving from a single state object and complexity managing it to multiple contexts that can be managed more simply.
Exercise 14.03: React Context
Let's get some experience with context. For this exercise, you can either bootstrap a new create-react-app instance or use the one from the previous sections. In this exercise, we'll create two new components and one provider. Technically, providers are components too, but they are actually specialized HOCs:
Note
The code for this exercise can be found here: https://packt.link/rUfr4.
- Let's start with the provider. Create /components and /providers subdirectories under your /src directory. In the /providers directory, create a file called ClickProvider.tsx. This component will manage our clicks and provide its context to descendants.
- Unlike most components, a provider will export a context and a provider. Some guides will create Context and then export Consumer and Provider. Rather than using Consumer, we will use useContext, another React Hook. When using useContext, the Consumer object is not referenced directly:
export const ClickContext = createContext();
- That's the basic signature for creating Context. We will need to add a type hint and a default value. Let's come to that in a moment after adding Provider:
export const ClickProvider = ({ children }) => {
const [clicks, setClicks] = useState(0);
return (
<ClickContext.Provider value={{ clicks, setClicks }}>
{children}
</ClickContext.Provider>
);
};
This component takes some props, which are child nodes. It uses useState to create a clicks value and an update function, then it returns Provider with the value and the function.
- This is the basic provider we need, but it's not yet good TypeScript. We need to add some more types:
interface Clicks {
clicks: number;
setClicks: Dispatch<SetStateAction<number>>;
}
interface ContextProps {
children: ReactNode;
}
- ClickContext will be the type for the value our Provider returns and ContextProps works as a basic prop type for any HOC with children. With these types, we can fill out the rest of Provider:
import React, {
createContext,
Dispatch,
ReactNode,
SetStateAction,
useState,
} from 'react';
interface Clicks {
clicks: number;
setClicks: Dispatch<SetStateAction<number>>;
}
interface ContextProps {
children: ReactNode;
}
export const ClickContext = createContext<Clicks>({
clicks: 0,
setClicks: () => {},
});
export const ClickProvider = ({ children }: ContextProps) => {
const [clicks, setClicks] = useState(0);
return (
<ClickContext.Provider value={{ clicks, setClicks }}>
{children}
</ClickContext.Provider>
);
};
- Now let's add Clicker.tsx and Display.tsx in the components directory:
import React, { useContext } from 'react';
import { ClickContext } from '../providers/ClickProvider';
const Clicker = () => {
const { clicks, setClicks } = useContext(ClickContext);
const handleClick = () => setClicks(clicks + 1);
return <button onClick={handleClick}>Add a click</button>;
};
export default Clicker;
- This component renders a button and uses the setClicks method from Provider:
import React, { useContext } from 'react';
import { ClickContext } from '../providers/ClickProvider';
const Display = () => {
const { clicks } = useContext(ClickContext);
return <div>{clicks}</div>;
};
export default Display;
Display.tsx just grabs the clicks value from the context and displays it.
- Now that we have a couple of simple components that work with our provider, let's add them to App.tsx and see how our app looks.
- Delete the default code from App.tsx and replace it with Provider and the new components:
import './App.css';
import React from 'react';
import Clicker from './components/Clicker';
import Display from './components/Display';
import { ClickProvider } from './providers/ClickProvider';
function App() {
return (
<ClickProvider>
<Clicker />
<Display />
</ClickProvider>
);
}
export default App;
Run the app and click the button several times. The counter will increment. It's not that amazing to make a counter increment on a website, but our components are nicely decoupled and this approach will scale well to much larger apps:

Figure 14.4: App displaying the click counter
In this exercise, we used React context to manage state in an application. We showed how different components can interact with the state and how it can be passed to components without the need for nested props.
React applications can contain multiple contexts or a single tree of data. React context will even keep the current state while a modified component reloads in development mode so you can keep coding without interrupting the application flow.
Firebase
Firebase is a mobile and web development platform owned by Google. Firebase includes a web API so you can add authentication, analytics, a database, and more to a web application. Firebase can be used as the backend of a modern web application, allowing developers to focus on user experience. It includes a free tier that we will use for the following exercise.
Exercise 14.04: Getting Started with Firebase
In this exercise, we'll set up a database and authentication using Firebase. We'll need to register a free account. We'll also get the required payload that we'll need to complete an activity using Firebase later in this chapter:
Note
The code files for this exercise can be found here: https://packt.link/bNMr5.
- Firebase requires a Google account, but using it doesn't require a credit card or any payment. To get started, navigate to https://firebase.google.com/ and click Get started.
You should find yourself at the Firebase console. Click Add project and work through the wizard. You can name your project whatever you like – Firebase will make the name unique if you don't.
- Don't enable Google Analytics, unless you already have an account you want to use.
You'll need to wait a minute and then you'll find yourself at your project dashboard. There you will find several services you can deploy to help build out your application. We will focus only on Authentication and Firestore.
- First, go to Authentication and click Get Started. Choose Email/Password and enable it. All the other authentication methods require additional setup steps. Go ahead and work through those steps if you like. The documentation on the Firebase website should be sufficient. Save your changes.
- Now click on Firestore Database and Create database. Choose the Start in test mode option and then choose a region to deploy to. The region doesn't really matter, but you probably want to choose something that is close to you for faster responses. Finish creating the database.
- One last thing we need to do in the Firebase console is find our app config. The way Firebase works is that a config object with a bunch of IDs will live in your app and manage connections to your Firebase backend; however, the security rules that govern which users can affect which data are all set up in the console (or the CLI, which this book doesn't cover). This config is not actually secret because if your app is set up correctly, there's nothing a malicious user can do that you haven't allowed.
- To get your app config, you first must register your app. You can add an app either from Project Overview (the </> symbol) or via the gear next to Project Overview. Add a web app, name it anything you like, and skip the web hosting option. Go into your app config (gear icon) and find the config. Go with config over CDN (content delivery network) and you'll find something that looks like this:
const firebaseConfig = {
apiKey: "abc123",
authDomain: "blog-xxx.firebaseapp.com",
projectId: "blog-xxx",
storageBucket: "blog-xxx.appspot.com",
messagingSenderId: "999",
appId: "1:123:web:123abc"
};
Hang on to that config. We will need it later, but for now we are done in the Firebase console. You may wish to return to it later to view your database, manage your users, or even upgrade or delete your apps and projects, but you won't need to do so again in this chapter.
Getting started with Firebase is easy. We'll be able to use Firebase to sign up, authenticate and track users, and store data, without having to write our own backend service.
Styling React Applications
A modern UI developer has a lot of different options when it comes to styling applications. The traditional approach of creating a few Cascading Style Sheets (CSS) files and including them is not great for scaling or for building a unified presentation layer. Modern web applications and React in particular offer so many different options for styling that we can't hope to cover all of them. Here are a few popular techniques.
Master Stylesheet
We have a styles.css file with all the styles. Styles are global and will affect all components. This can work very well for a small application but has some serious scaling problems as you add more styles and components. When new styles are added, we may start to see existing components break as they are influenced by the new styles.
Component-Scoped Styles
With this approach, we create a style for each component that needs styling and use the import keyword to add the style to your component. A build system such as webpack will prefix all of the style names so they don't "pollute" the global scope and wind up styling other components. This is the approach you get out of the box with Create React App, which uses webpack internally.
This approach works well if you can effectively use plain CSS or a stylesheet compiler like Sass. Some developers don't like it because display elements are spread across CSS and JSX files.
CSS-in-JS
CSS-in-JS is an approach that has produced popular libraries such as Styled Components and Emotion. The approach is simply that we write our CSS in our JavaScript (or TypeScript, in our case, as most of these libraries publish typings), thereby combining our styling with our display layer.
This approach works well for teams that create lots of custom components. The downside is another build dependency to maintain.
Component Libraries
Component libraries deliver fully usable components ready to be plugged into an application. Component libraries are great for building a nice-looking application very quickly. Many of them have been around for a lot of years. Some examples of component libraries are Twitter Bootstrap, Semantic UI, and Material-UI. All of these libraries publish versions designed to work with popular web systems such as Angular, Vue, and of course React.
Working with a component library is a lot like working with your own components. You import the components and use them as you would any other component. Doing this can really speed up your development cycles as you have common components ready to go. Some teams find the components from the component library too inflexible and don't like to deal with the additional dependencies.
The upcoming activity will use Material-UI for a quick and attractive build.
Activity 14.01: The Blog
Now that we have some experience with create-react-app and Firebase, let's create a blog! In this activity, we will use all the tools and techniques covered earlier in this chapter. We will use create-react-app to quickly create a React project. We will use Material-UI to design an attractive app and write some of our own function components. We will use react-router to enable routing between the different pages of our application. We'll manage state with the React context API. Finally, we'll use Firebase to have a backend service we can use to authenticate users and save and share data between visits to the blog.
Let's go through the high-level steps for creating this blog. It sounds like a lot, but it won't be all that challenging when we break it down into individual tasks:
Note
The code files for this activity can be found here: https://packt.link/qqIXz.
- Create a new React application using create-react-app, as described earlier in this chapter. You could even reuse an application you began earlier in this chapter. Start your application so you can watch the implementation appear before your eyes.
- Refer back to your Firebase application from Exercise 14.04, Getting Started with Firebase, or complete that exercise if you haven't yet. Find your config data in Firebase and follow the instructions to add the firebase dependency to your React application, then add the app-specific config from the Firebase console.
- Implement the Firebase auth and firestore services, then add React context and providers for each to maintain state.
Install react-router and material-ui to build some UI components and create some routes. Start by creating a sign-up route and page:
Figure 14.5: Landing page
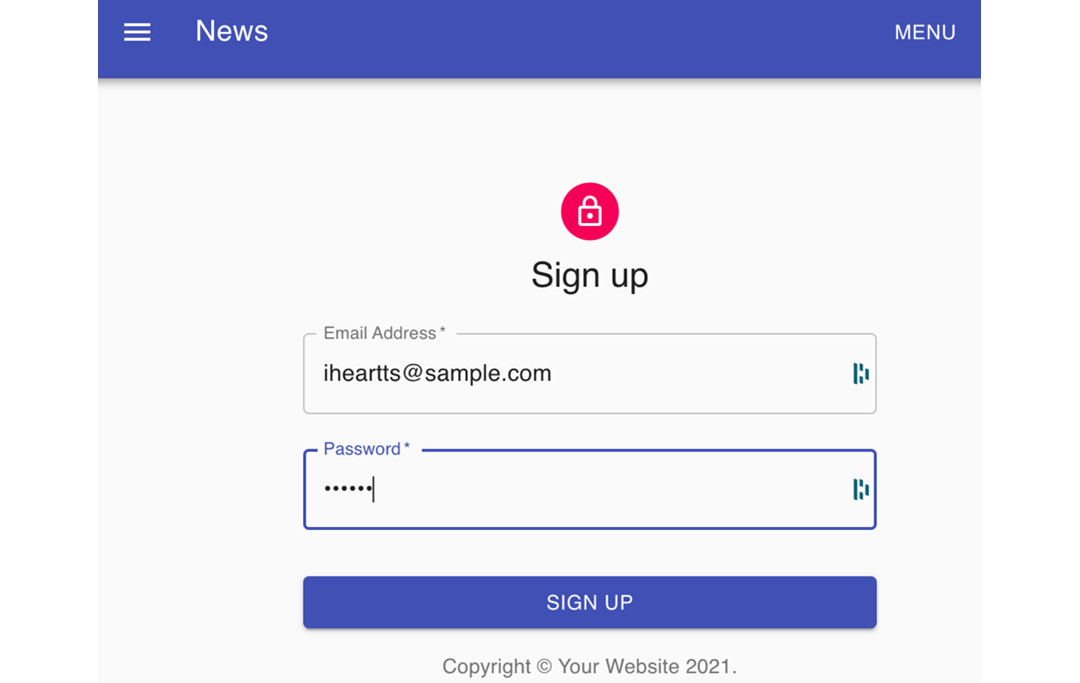
Figure 14.6: Sign-up page
- Create a route to add pages and add UI components to be able to set the title and link for a new story:

Figure 14.7: Page for adding stories
- Using your React context and provider and Firebase Firestore, persist your data to the cloud and implement other features such as comments:
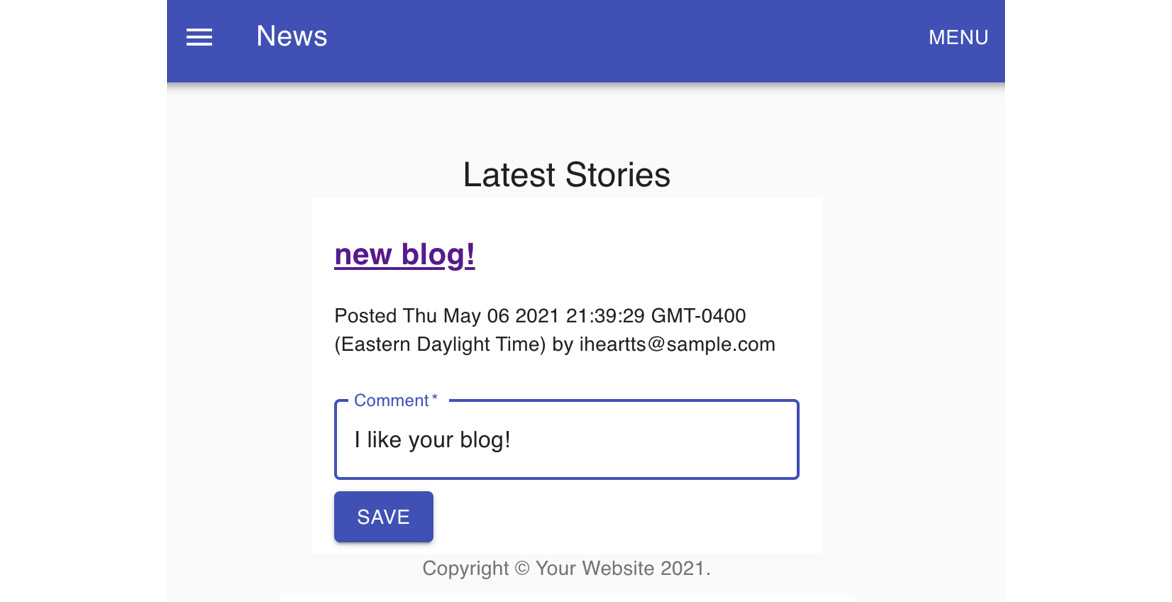
Figure 14.8: Commenting features
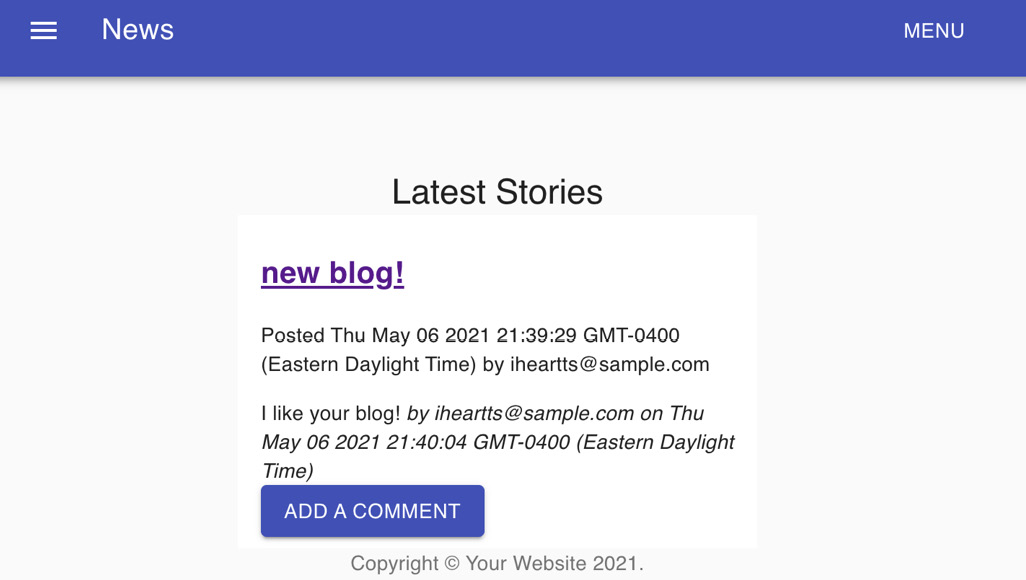
Figure 14.9: Posting a comment
If this activity took some time, don't worry. If you needed to check the solution on GitHub, don't worry about that either. This one was particularly challenging because it included so many different pieces, but if you managed to pull them all together into a working app, that's a great step forward. You've built a full-stack application with an attractive UI, authentication, and a database.
Note
The solution to this activity can be found via this link.
Summary
TypeScript is becoming a popular tool for writing web applications and while it wasn't always prevalent in React, it is now well supported. Developers no longer need to only add types to props but can gain the benefit of type safety and IntelliSense while working across all parts of an application.
React has a very rich and varied ecosystem, but many TypeScript-friendly solutions such as React Hooks and React context are becoming go-to choices to keep an application simple but powerful. With TypeScript supported in create-react-app, it's simple to get started and you can be building your app in minutes.
Developers who want to know more about React will need more than just this book, but this chapter serves to show why you want to stay with TypeScript when you write applications using React.