
Our home page shows a listing of all the blog posts, which displays excerpts, but we still need a dedicated page for each post to show their full content. By hooking into Gatsby’s APIs, we can dynamically create pages based on the blog post data.
Gatsby Node APIs
First, create a new file in the root of the project called gatsby-node.js. This is a special file that is used to implement the Gatsby Node APIs. It allows you to manipulate and query the GraphQL data and create pages based on that data.
The various functions in this file are called at different times during the build process. Here are two of these functions that we will use in the example project.
onCreateNode
This function is called whenever a new node is created in the Gatsby data structure. For example, this function will be called once for each of our Markdown files since they are nodes created by the gatsby-source-filesystem plugin we configured earlier.
We will use onCreateNode to create slugs for our blog posts. As mentioned earlier, a slug is a human-readable, URL-friendly representation of the blog post title. The slug is used to register the blog post page URL and to create links to blog posts from the index page.
onCreateNode is called with an object containing the node being created and an actions object that contains several functions that can be called to perform different actions.
createPages
After data is sourced by source plugins and transformed by transformer plugins, this function is called to give us an opportunity to dynamically create pages. Because the data model has been built before this function is called, we can run GraphQL queries to look up the data we need to create our pages.
We will create a template page that will have data passed to it, which will result in a unique page for each blog post.
createPages is called with an object containing a graphql function for querying the data and an actions object similar to the one passed to onCreateNode.
Adding the slug to the blog post data
When new blog posts are added, we will get the slug for each post and add it as a new field on the blog post data. Later, we’ll use this slug field to create the URLs for the blog post pages. The slug is based on the filename of the Markdown file.
Adding the slug
First, we require a helper function, createFilePath, from the gatsby-source-filesystem plugin. This function creates a URL from a file’s path.
Next, we implement the onCreateNode function. The argument to this function is destructured to get the node, a helper function called getNode, and an actions object containing some other actions that can be performed on the node.
We then destructure the actions object and pull out the createNodeField function, which is used to add additional fields to a node. These new fields are added under a field called fields.
This function gets called whenever a node of any type is created. We only want to perform this action when the node being created represents a Markdown file, so we check if the node’s type is MarkdownRemark. If it is, then we use createFilePath to generate the slug for the file.
Finally, we call createNodeField to add the slug field to the node.
Querying for the slug field
Dynamically creating the blog post pages
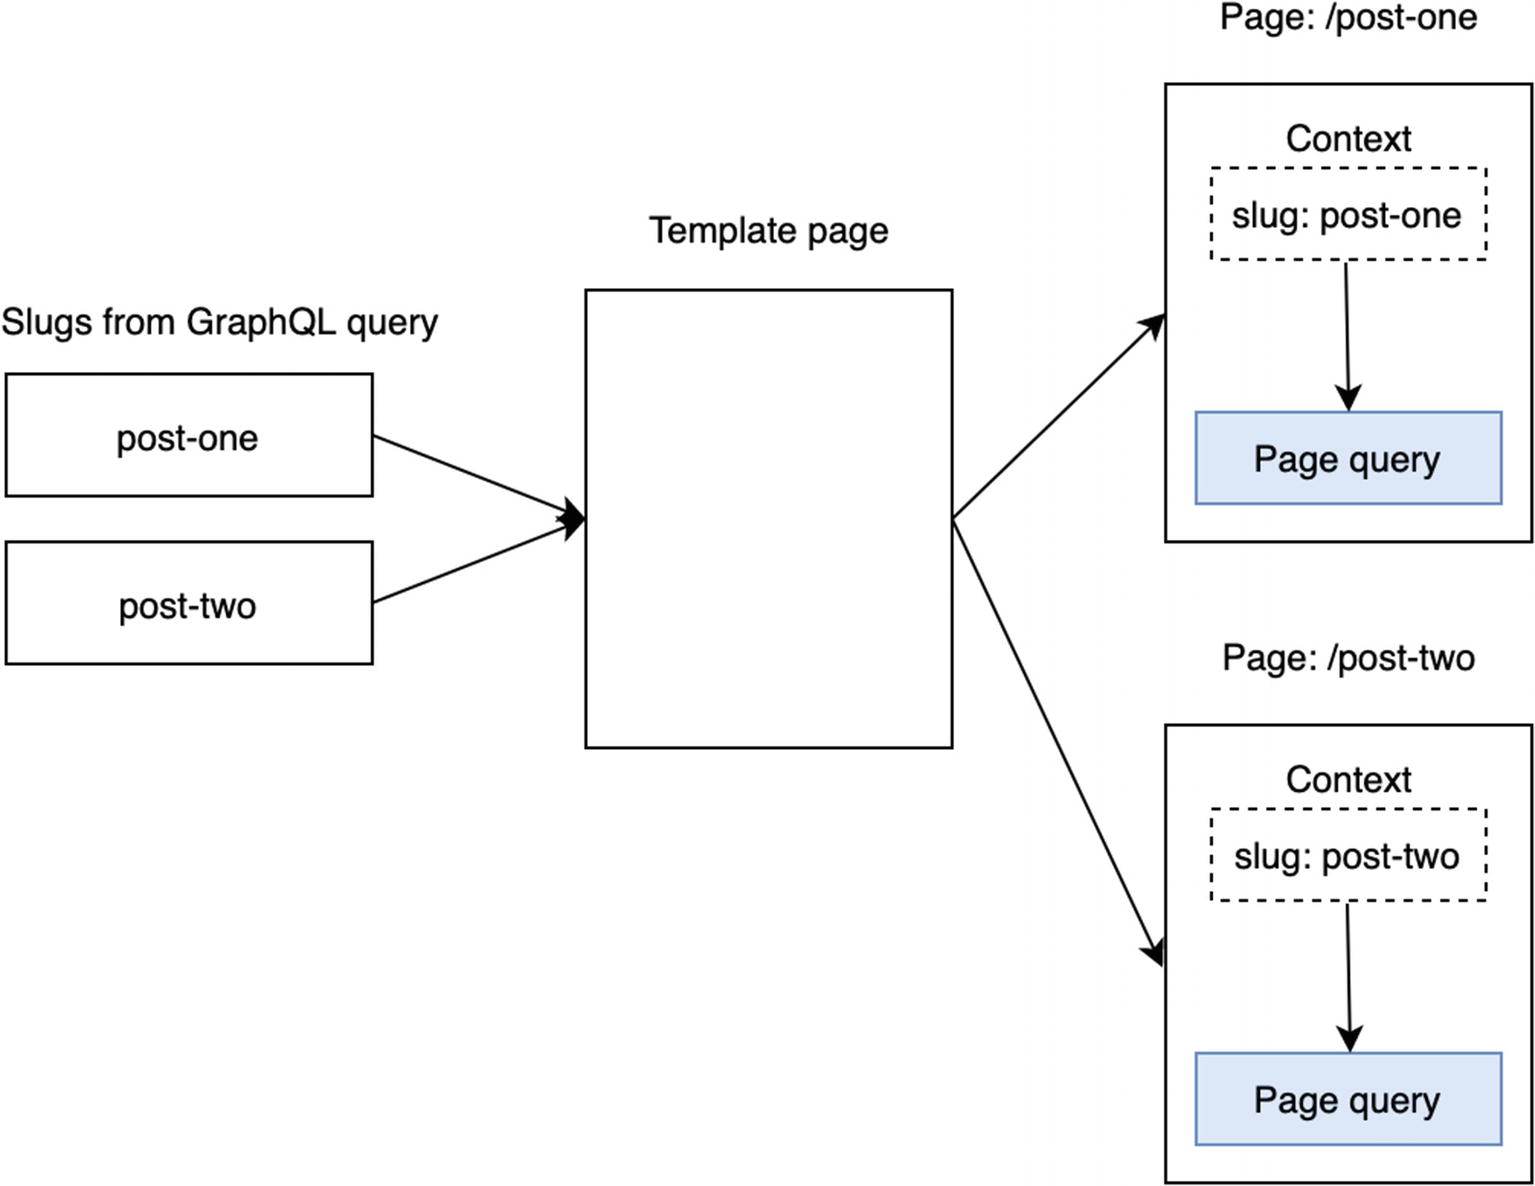
Next, we’ll tap into Gatsby’s createPages API to dynamically create blog post pages. First, we’ll create a template page that will be used as a base for the dynamically created pages. Then, we’ll perform a GraphQL query for the slugs of all the blog posts.
Each slug will be passed as a context parameter to the template page, which will be used in the template’s page query to query for the full blog post data and render it.
Creating pages from a template
Creating the blog post template
The blog post page template
The file’s default export, as usual, is the React component for the template page. There’s also a named export called query. This is the page query. The exported query will be executed by Gatsby when building the site. Note that the query takes a $slug parameter. This will receive the slug context parameter in the createPages function we’ll write next.
The slug is passed as an argument to the markdownRemark query to look up the specific blog post. We’re querying for the rendered HTML and the title from the front matter.
The page component receives the result of the GraphQL query as the data prop. We then use the values in the data prop to populate the blog post page. In particular, we use React’s dangerouslySetInnerHTML to set the rendered HTML from Remark as the inner HTML of the element.
Simple CSS module for the blog template page
Creating the pages
The updated gatsby-node.js
We’ve added the Gatsby createPages API to this file. As with onCreateNode, there is an actions property that contains various helper functions. We use destructuring to access the createPage action. Next, we perform a GraphQL query to find the slugs of all of the blog posts.
Note that this GraphQL query looks a little different than other queries we’ve seen so far. Earlier, we saw queries defined using the graphql tag on a template string. Here, graphql is a function we call to execute the query, which is supplied as a string argument.
The graphql function returns a Promise. To simplify the code a bit, we use the async/await syntax instead. This allows us to have asynchronous code written in a synchronous style.
Once we have the slugs, we iterate over the results and call createPage for each. The path is the URL of the page, the component references our template page, and the context contains a slug property. This slug value is what is passed as an argument to the page query in our blog template page, which will be used to query for the full data for each blog post.
Linking to the dynamically generated pages
The last step in the process is to update our index page so that the blog post titles link to the full post pages that we dynamically created.
Open the file src/components/BlogList.js. In this component, we have a GraphQL query for the blog posts. We need to add the slug field to this query to get the URL of each blog post page, then we need to add links to those URLs.
The updated BlogList component
The updated BlogPost component
The Gatsby Link component
Notice that we didn’t add a standard HTML link via an anchor tag. Instead, we used Gatsby’s built-in Link component. This is a special component meant to be used for navigation within a Gatsby site, which makes some optimizations and preloads some resources from the linked resources.
The optimization is very interesting. When the mouse is hovered over the link, it makes an asynchronous request for some metadata about the page being linked to.
The contents of page-data.json
componentChunkName: The filename of the Webpack chunk containing this page
path: The URL, relative to the site root
- result
data: The result of the GraphQL query that was executed at build time
pageContext: The data that was passed to the page component’s context
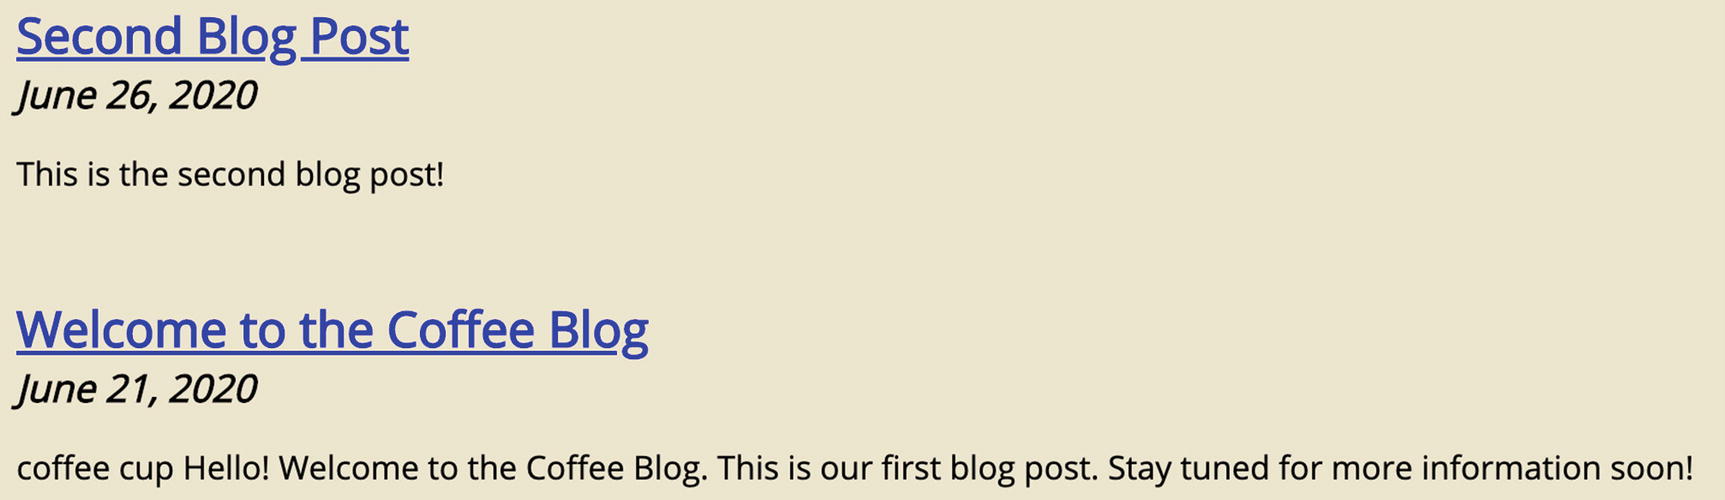
The post titles are now links
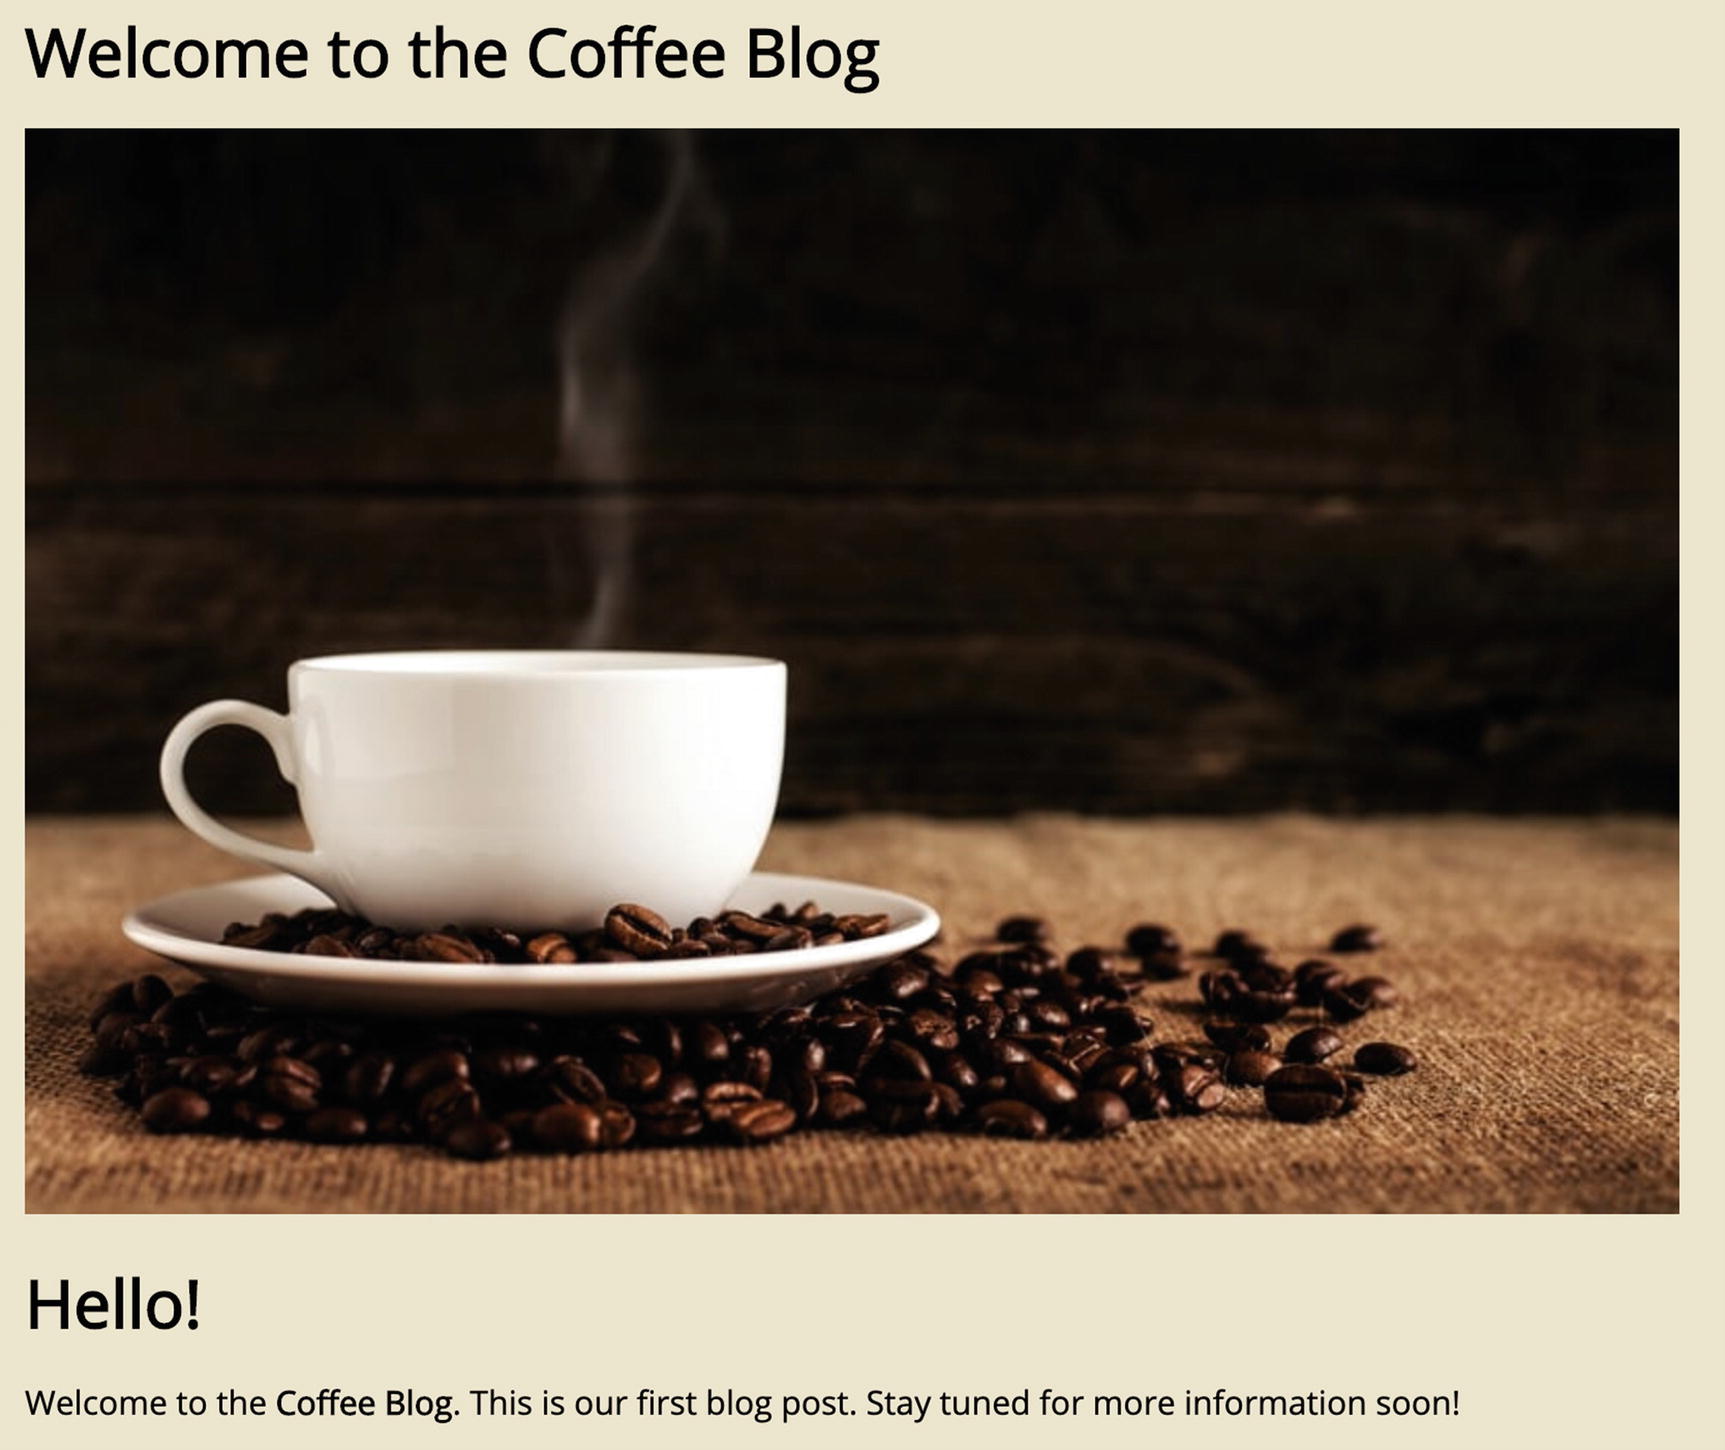
The full blog post page
One last tweak
Now that clicking a blog post title links us to the full blog post page, there is no way to get back to the index page (i.e., other than using the browser’s back button). Let’s make the header text a link back to the index page so that we have better navigation.
Adding a link to the index page

The link has the default styling
The updated CSS module for the Layout component

The restyled link
Summary
Created a template page to use for blog posts
Used this template with Gatsby’s Node APIs to dynamically create pages for blog posts
Updated the index page to link to the blog posts