10. History
In This Chapter
Choosing History panel options
Deleting, purging, and clearing history states
Creating documents from history states
Using the History panel, you can selectively restore your document to one of its previous states (in the current work session). The panel provides many more options and much more flexibility than the simple Undo command. In this chapter, you will learn how to set options for the History panel; restore your document to a previous history state; delete, purge, and clear history states; preserve states of the current work session via snapshots; and generate a new document from a state or snapshot.
Choosing History panel options
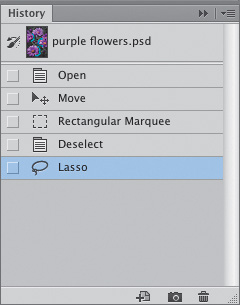
The History panel ![]() keeps a running list of the states, or edits, that you have made to the currently open document, from the “Open” unedited state of the document at the top of the list to the most recent state at the bottom. (This happens even if you don’t have the panel open.)
keeps a running list of the states, or edits, that you have made to the currently open document, from the “Open” unedited state of the document at the top of the list to the most recent state at the bottom. (This happens even if you don’t have the panel open.)
When you click an earlier state, the document is restored to that stage of the editing process. Recent states may become dimmed and unavailable when you do this, depending on whether the panel is in linear or nonlinear mode.A Before using the panel, you need to understand this difference between the two modes.
A With our History panel in linear mode, we clicked an earlier state, which caused subsequent states to become dimmed.
Choosing a mode for the History panel
To choose a mode for the History panel, choose History Options from the panel menu, then in the History Options dialog, check or uncheck Allow Non-Linear History.A We recommend keeping the History panel in linear mode (unchecking Allow Non-Linear History), particularly if you’re a newcomer to Photoshop. With the panel in this mode, if you click an earlier state and either resume image editing from or delete that state, all the subsequent (dimmed) states are discarded. Although this mode offers less flexibility, it enables you to restore your document to an earlier state with a simple, clean break.

A In the History Options dialog, uncheck Allow Non-Linear History to put the panel in linear mode, or check it for nonlinear mode.
In nonlinear mode, if you click or delete an earlier state, subsequent states aren’t deleted or dimmed.B If you resume image editing while an earlier state is selected, your next edit will show up as the latest state on the panel, and all the states in between will be preserved. That is, the latest state will incorporate the earlier stage of the image plus your newest edit. If you change your mind, you can click any intermediate state whenever you like and resume editing from there. Nonlinear is the more flexible of the two modes, but it can also be confusing.

B With our History panel in nonlinear mode, we clicked an earlier state. All the states remained available, including the recent states below the one we clicked.
Choosing other settings for the History panel
The last option in the History Options dialog, Make Layer Visibility Changes Undoable, controls whether the panel creates a “Layer Visibility” state each time you click the visibility icon for a layer on the Layers panel. We keep this option off in order to reserve space on the panel for other states. (For the snapshot options in this dialog, see page 199.)
To specify the number of states that can be listed on the History panel, go to Edit/Photoshop > Preferences (Ctrl-K/Cmd-K) > Performance and, under History & Cache, choose a History States value (the default value is 20). If the maximum number of history states is exceeded during an editing session, the oldest states are removed to make room for new ones. The maximum number of states may also be limited by other factors, including the image size, the kind of edits made to the image, and currently available system memory. Each open document has its own separate list of states.
Beware! Regardless of the current preference setting, when you close a document, all of its history states and snapshots are deleted from the panel.
Changing history states
Before changing history states, let us remind you of the difference between the two modes for the History panel. If the panel is in linear mode (the Allow Non-Linear History option is off) and you click an earlier state, all the states below the one you click will become dimmed. If you then delete the state you clicked or continue editing the image while that earlier state remains selected, all the dimmed states will be deleted (if you change your mind, you can choose Undo immediately to restore the deleted states).
If the panel is in nonlinear mode and you click an earlier state, then proceed to edit your document, the newest edit will become the latest state, but Photoshop won’t delete the prior states.
To change history states:
1. Perform some edits on an image.
2. Do any of the following:
On the History panel, ![]() click a state.A–B
click a state.A–B

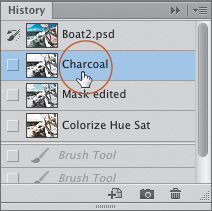
A With our History panel in linear mode, we’re clicking a prior state.

B All the states listed below the one we clicked became dimmed.
To Step Forward one state, press Ctrl-Shift-Z/Cmd-Shift-Z.
To Step Backward one state, press Ctrl-Alt-Z/Cmd-Option-Z.
![]() When you choose File > Revert, it is listed as a state on the History panel. You can restore the image to a state prior to or after the Revert state.
When you choose File > Revert, it is listed as a state on the History panel. You can restore the image to a state prior to or after the Revert state.
![]() Each time you click and change the settings for an existing adjustment layer, the panel lists those edits collectively as one new state (e.g., “Modify Levels Layer” or “Modify Curves Layer”).
Each time you click and change the settings for an existing adjustment layer, the panel lists those edits collectively as one new state (e.g., “Modify Levels Layer” or “Modify Curves Layer”).
![]() You can’t restack (change the order of) history states on the panel.
You can’t restack (change the order of) history states on the panel.
Deleting, purging, and clearing history states
This task presumes that your History panel is in linear mode (you unchecked the Allow Non-Linear History option). With the panel in this mode, if you delete a state and then resume editing your document, that state and all the subsequent ones will be discarded from the panel.
To delete a history state:
On the History panel, ![]() do one of the following:
do one of the following:
Right-click a state, choose Delete from the context menu,A then click Yes in the alert dialog. That state and all the subsequent ones will be deleted.B
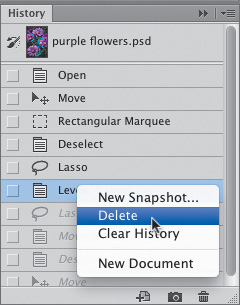
A Right-click a state and choose Delete from the context menu, then click Yes in the alert dialog.
B Because our History panel was in linear mode when we deleted a state, Photoshop also deleted all the subsequent states.
To bypass the alert, drag the state to be deleted to the Delete Current State button. ![]()
To delete previous states in reverse order without an alert appearing, click a state, then Alt-click/Option-click the Delete Current State button as many times as needed.
Note: The Undo command restores only the last deleted state.
When you purge or clear states from the History panel, the most recent state is left as the only state remaining. All snapshots are preserved (see the next page).
To purge or clear the History panel:
To clear all states from your History panel for all of the currently open documents in order to free up memory for Photoshop, choose Edit > Purge > Histories, then click OK if an alert appears. (To prevent the alert from reappearing, check Don’t Show Again.) As the alert warns you, this command cannot be undone!
To clear all states from the History panel for just the current document, right-click any state and choose Clear History. This command doesn’t free up memory for Photoshop, but it can be undone.
Using snapshots
Photoshop deletes states from the History panel if any of the following events occur: the specified maximum number of history states is exceeded, you clear or purge the panel, or you click an earlier state when the panel is in linear mode and then resume editing the document. Snapshots, which are created from a history state, remain on the panel even if any of the above-mentioned events occur. When you click a snapshot, the document is restored to the state from which it was created.
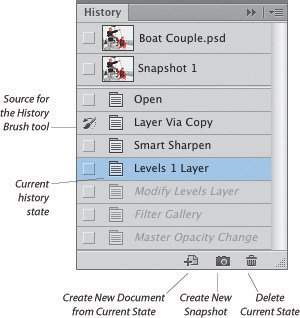
Snapshots are represented by thumbnails at the top of the panel, for easy identification.A Note that like states, all snapshots are deleted when you close your document.
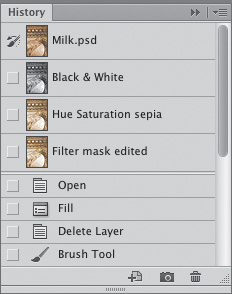
A Because the Automatically Create First Snapshot option was enabled when we opened this document, Photoshop created a snapshot of the document’s opening state (the top snapshot). During the course of editing, we added three more snapshots.
On this page, you will choose default settings for snapshots that apply to all Photoshop files. On the next page, you will create snapshots for a specific document.
To choose snapshot options:
1. From the History panel menu, choose History Options. The History Options dialog opens.B

B The History Options dialog has three snapshot options. We usually keep just the first two checked.
2. Check or uncheck any of the following options, all of which pertain to snapshots:
Automatically Create First Snapshot to have Photoshop create a snapshot each time a file is opened (this option is checked by default and we keep it that way).
Automatically Create New Snapshot When Saving to have Photoshop create a snapshot every time a file is saved. Each snapshot is labeled with the time of day it was created.
Show New Snapshot Dialog by Default to have the New Snapshot dialog appear whenever you click the New Snapshot button, enabling you to enter a name and choose a “From” option (see the next page).
3. Click OK.
If the Automatically Create New Snapshot When Saving option is turned off for your History panel, you should get in the habit of creating snapshots periodically as you work and before running any actions on your document. If you follow Method 2 (right), you can choose whether the snapshot is made from all the layers in the document, from all the layers present at a particular state, or from just the current layer.
To create a snapshot of a state:
Method 1 (without choosing options)
1. Edit your document so it contains the changes that you want to capture as a snapshot.
2. If the Show New Snapshot Dialog by Default option is off in the History Options dialog, click the New Snapshot button on the History panel; ![]() or if that option is on, Alt-click/Option-click the New Snapshot button. A new snapshot thumbnail appears below the last one, in the upper section of the panel.
or if that option is on, Alt-click/Option-click the New Snapshot button. A new snapshot thumbnail appears below the last one, in the upper section of the panel.
Method 2 (choosing options)
1. Edit your document so it contains the changes that you want to capture as a snapshot.
2. On the History panel, ![]() right-click the state to be captured as a snapshot and choose New Snapshot from the context menu.A The layer that was being edited at that state becomes selected, and the New Snapshot dialog opens.B
right-click the state to be captured as a snapshot and choose New Snapshot from the context menu.A The layer that was being edited at that state becomes selected, and the New Snapshot dialog opens.B
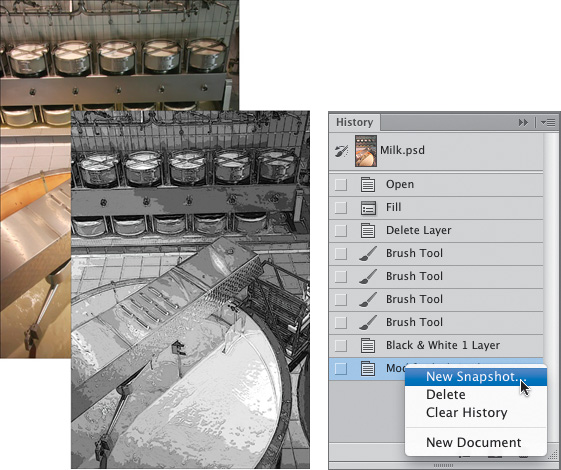
A After applying some edits to this image, we right-clicked the latest state and are choosing New Snapshot from the context menu.

B In the New Snapshot dialog, we entered a name for the snapshot and chose From: Full Document.
3. Type a name for the snapshot, then choose an option from the From menu:
Full Document to preserve all the layers that were in the document at the designated state.
Merged Layers to merge all the layers in the document at the designated state into one layer.
Current Layer to create a snapshot of just the layer that was selected at the designated state.
4. Click OK.C

C A thumbnail for the new snapshot appeared on the History panel.
5. If you didn’t create the snapshot from the latest state, click the state from which you want to resume editing your document.
![]() To rename a snapshot, double-click the name.
To rename a snapshot, double-click the name.
Creating snapshots of promising or key document states periodically while editing is a good habit to get into. With their thumbnails, snapshots are easier to identify than states, and unlike states (which Photoshop may delete to make room for new states), snapshots stay on the panel until you close your document. Compare the two different options below, noting the different effect they have on the History panel.
To make a snapshot become the newest state:
After applying some edits to your document and creating one or more snapshots, do either of the following: A–B

A This is the original image.
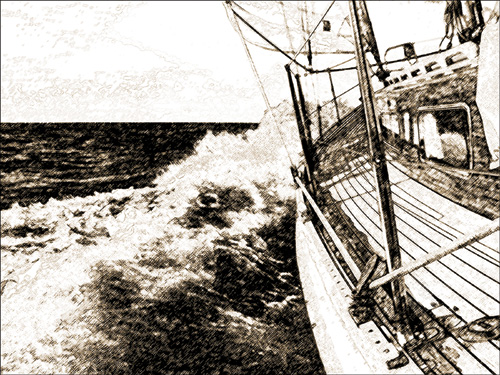
B During the course of editing the image (applying some filters), we created a few snapshots of different states.
Click a snapshot name or thumbnail.C–D If the History panel is in linear mode, the document will revert to the snapshot stage of editing, and all the states will be dimmed. If you now resume editing, all those dimmed states will be discarded.
C We clicked a snapshot.

D Now the image matches the state of the snapshot.
Alt-click/Option-click a snapshot name or thumbnail. Earlier states will remain available and the snapshot you clicked will become the most recent state. Use this method if you want to preserve access to prior edits.
![]() To delete a snapshot, drag it to the Delete Current State button
To delete a snapshot, drag it to the Delete Current State button ![]() or right-click the snapshot name and choose Delete from the context menu.
or right-click the snapshot name and choose Delete from the context menu.
Creating documents from history states
By using the New Document command, you can spin off versions of your current document (and the current state of the Layers panel) from any state or snapshot.
To create a new document from a history state or snapshot:
1. On the History panel, ![]() do either of the following:
do either of the following:
Right-click a snapshot or a state and choose New Document from the context menu.A
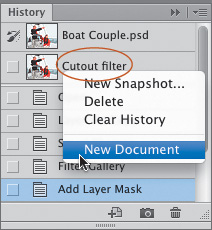
A We right-clicked a snapshot and are choosing New Document from the context menu.
Click a snapshot or a state, then click the New Document from Current State button. ![]()
2. Save the new document that appears onscreen.B The starting state for the document will be listed as “Duplicate State.”

B A new document appeared, bearing the name of the snapshot from which it was created.
3. In the original document, click the history state from which you want to continue editing.