15. Retouching
In This Chapter
Using the Replace Color command
Using the Color Replacement tool
Using the Spot Healing Brush tool
Healing areas with the Patch tool
Smoothing skin and other surfaces
Using the Content-Aware Move tool
Removing an image element with the Patch tool
Photoshop provides tools for correcting many kinds of imperfections in a photo, from smoothing pores and wrinkles to removing blemishes, unsightly power lines, and other unwanted elements. Methods are also available for correcting colors, such as whitening teeth, and for replacing colors, such as on a garment in a fashion shot.
In this chapter, you will change colors by using the Replace Color command and the Color Replacement tool; whiten teeth or eyes; correct red-eye; smooth wrinkles with the Healing Brush and Patch tools; remove blemishes with the Spot Healing Brush tool; soften skin and other textures with the Surface Blur and Gaussian Blur filters; replace pixels with the Clone Stamp tool; eliminate unwanted elements from a picture with the Spot Healing Brush tool, Patch tool, and Fill command; and move or extend areas of an image with the Content-Aware Move tool.
The following are some guidelines we recommend following when applying retouching edits:
![]() Do the small stuff first. For instance, if you need to heal blemishes or other small imperfections in a facial shot as well as smooth the skin, start with the blemishes. Next, either merge the healing layer into the image layer or select both the healing and image layers, then copy and merge (stamp) them onto a new layer (see page 165). Finally, apply skin smoothing to the newly merged layer.
Do the small stuff first. For instance, if you need to heal blemishes or other small imperfections in a facial shot as well as smooth the skin, start with the blemishes. Next, either merge the healing layer into the image layer or select both the healing and image layers, then copy and merge (stamp) them onto a new layer (see page 165). Finally, apply skin smoothing to the newly merged layer.
![]() Preserve the original pixels and keep your edits flexible. One way to accomplish this is by duplicating the image layer and editing the duplicate. For some tools, an even better option is to check Sample: All Layers on the Options bar, then apply edits to a new, blank layer. The tool will sample pixels from all the visible layers and send the results to the new layer. You can easily add strokes to, or erase your editing strokes from, that layer at any time.
Preserve the original pixels and keep your edits flexible. One way to accomplish this is by duplicating the image layer and editing the duplicate. For some tools, an even better option is to check Sample: All Layers on the Options bar, then apply edits to a new, blank layer. The tool will sample pixels from all the visible layers and send the results to the new layer. You can easily add strokes to, or erase your editing strokes from, that layer at any time.
![]() Restore some realism. After applying edits to a duplicate or blank layer, you can lower the opacity of that healing or retouching layer slightly to reveal a bit of the original, imperfect (but more natural-looking) photo.
Restore some realism. After applying edits to a duplicate or blank layer, you can lower the opacity of that healing or retouching layer slightly to reveal a bit of the original, imperfect (but more natural-looking) photo.
Using the Replace Color command
Using the Replace Color command, not only can you apply hue, saturation, and lightness adjustments, but via selection controls in the dialog, you can limit those edits to specific color areas of the image. This command works best for recoloring discrete areas that are easy to isolate.
To use the Replace Color command:
1. Optional: In an RGB document that you’re going to send to a commercial printer, choose View > Proof Setup > Working CMYK to view a soft proof of the image in simulated CMYK color.
Once you’ve made a choice from the Proof Setup submenu, you can toggle the proof on and off while the Replace Color dialog is open by pressing Ctrl-Y/Cmd-Y. Regardless of whether the Proof Colors command is on or off, the Color and Result swatches in the Replace Color dialog are going to display in RGB.
2. Click a layer (not a Smart Object) or the Background, press Ctrl-J/Cmd-J to duplicate it, and keep the duplicate layer selected.
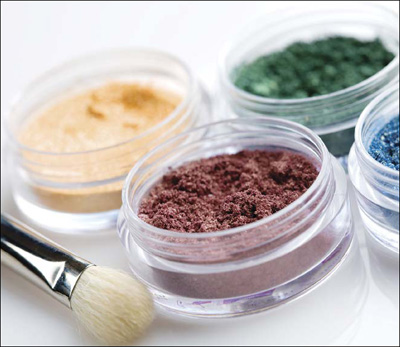
3. Optional: To confine the color selection and replacement to an area of the image, create a selection.A
A To recolor the purple eye shadow in this image, our first step was to select that area loosely.
4. Choose Image > Adjustments > Replace Color. The Replace Color dialog opens.
5. In the document, click the color to be replaced. The color you click will appear in the Color swatch at the top of the dialog.
6. Do any of the following:
To add more color areas to the selection, click the Eyedropper tool ![]() in the dialog, then Shift-click or drag either in the preview or in the document.
in the dialog, then Shift-click or drag either in the preview or in the document.
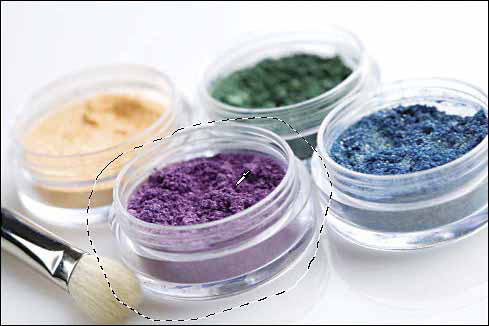
Increase the Fuzziness value to add similar colors to the selection, or reduce it to narrow the range of selected colors.B

B We opened the Replace Color dialog, then clicked the pot of eye shadow. Areas matching that color displayed as a selection in the preview window. We tried setting the Fuzziness slider to 86.
Check Localized Color Clusters to limit the selection to similar, contiguous colors. (We sometimes get similar or better results by lowering the Fuzziness value instead.)
7. If you need to subtract any areas from the selection, with the Eyedropper tool, ![]() hold down Alt/Option and click or drag in the preview or document window (this is a temporary Subtract from Sample Eyedropper tool).
hold down Alt/Option and click or drag in the preview or document window (this is a temporary Subtract from Sample Eyedropper tool).
8. To replace the colors you have selected, do either of the following:
In the Replacement area, choose replacement Hue, Saturation, and Lightness values (you can use the scrubby sliders).A The Result swatch will update as you do this. Note: A Saturation value greater than +25 may produce a nonprintable color.
A We settled on a Fuzziness value of 64, Shift-clicked more areas in the eye-shadow pot to add them to the selection, then changed the Hue.
Click the Result swatch, choose a replacement color in the Color Picker, then click OK. The sliders will shift to reflect the values of the new color.
Note: If you click a different area of the image or add to or subtract from the selection, the Color and Result swatches will change but the Replacement sliders will stay put.
![]() To toggle the selection and the image in the preview, press and release Ctrl/Cmd (or click Selection or Image below the preview).
To toggle the selection and the image in the preview, press and release Ctrl/Cmd (or click Selection or Image below the preview).
9. Optional: To save your settings (e.g., to apply to a series of similar photos), click Save, enter a name for the data file, keep the default location, then click Save.
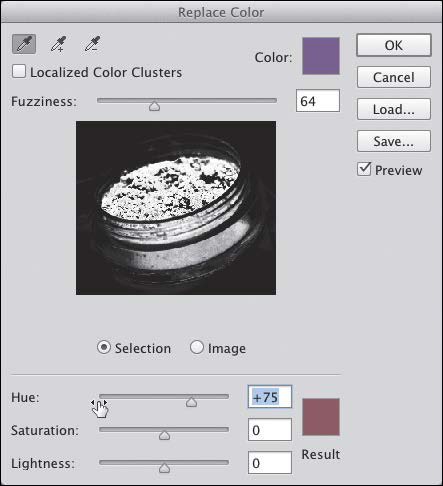
10. Click OK.B
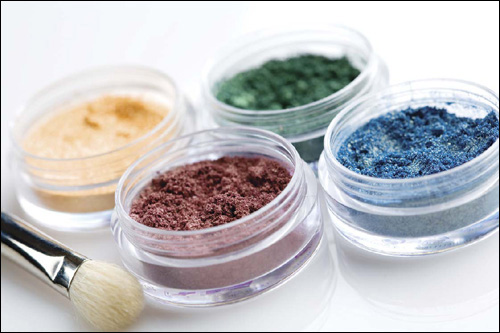
B The eye shadow that was originally purple is now reddish brown.
![]() In a CMYK document, the Replacement sliders don’t affect the value of the Black (K) component. That value is established by the CMYK Working Space, which you chose in Edit > Color Settings.
In a CMYK document, the Replacement sliders don’t affect the value of the Black (K) component. That value is established by the CMYK Working Space, which you chose in Edit > Color Settings.
![]() You can restore the original dialog settings by holding down Alt/Option and clicking Reset (Cancel becomes Reset), but be aware that you will then need to create a new selection from scratch.
You can restore the original dialog settings by holding down Alt/Option and clicking Reset (Cancel becomes Reset), but be aware that you will then need to create a new selection from scratch.
Using the Color Replacement tool
The Color Replacement tool lets you change color values in areas of an image, but instead of using a dialog, as you do with Replace Color, you apply changes manually with a brush. Unlike the Brush tool, the Color Replacement tool attempts to preserve the original texture (luminosity values) of an area as it replaces colors. This tool, like the Replace Color and Match Color commands, will be of particular interest to advertising and catalog designers.
To use the Color Replacement tool:
1. Duplicate the Background in an RGB image to preserve the original pixels, and keep the duplicate layer selected.
2. Choose the Color Replacement tool ![]() (B or Shift-B).
(B or Shift-B).
3. As the replacement color, choose a Foreground color via the Color or Swatches panel, or sample a color by Alt/Option clicking in the document.
4. If the color you chose isn’t on the Swatches panel, ![]() add it to the panel by clicking the New Swatch of Foreground Color button.
add it to the panel by clicking the New Swatch of Foreground Color button. ![]()
5. On the Options bar, choose parameters for the tool: A
A Choose settings for the Color Replacement tool from the Options bar.
On the Brush Preset picker, choose a high Hardness value and a low Spacing value.
To control which color characteristics the tool applies to the image, choose a Mode of Hue, Saturation, Color, or Luminosity. (We’ve gotten good results with Color mode.)
Click a Sampling button: Continuous ![]() to apply the current Foreground color to all pixels the brush touches (we prefer this option because it lets us replace both light and dark colors); or Once to sample the first pixel the brush clicks and apply the Foreground color only to pixels that match that initial sampled color (because this option confines the sampling to just one color, if you need to replace, say, different shades of a particular color, you would have to sample each one separately); or Background Swatch
to apply the current Foreground color to all pixels the brush touches (we prefer this option because it lets us replace both light and dark colors); or Once to sample the first pixel the brush clicks and apply the Foreground color only to pixels that match that initial sampled color (because this option confines the sampling to just one color, if you need to replace, say, different shades of a particular color, you would have to sample each one separately); or Background Swatch ![]() to replace only colors that match or are similar to the current Background color (for this option, choose a Background color).
to replace only colors that match or are similar to the current Background color (for this option, choose a Background color).
From the Limits menu, choose Discontiguous to recolor only the color that is sampled under the pointer; or Contiguous to recolor the sampled color plus adjacent pixels within the current Tolerance value; or Find Edges (our favorite option) to recolor pixels under the pointer plus adjacent pixels, while keeping the color replacement within discrete image shapes.
Choose a Tolerance value (1–100%) for the range of colors to be replaced. A high Tolerance value permits a wide range of colors to be recolored; a low value allows only pixels that closely match the sampled color to be recolored.
Optional: Check Anti-alias for smoother transitions between the original and replacement colors.
If you’re using a stylus and tablet, click the Pressure Controls Size ![]() button, and from the Size menu on the Brush Preset picker, choose Pen Pressure or Stylus Wheel.
button, and from the Size menu on the Brush Preset picker, choose Pen Pressure or Stylus Wheel.
6. Adjust the brush diameter by pressing [ or ], then drag across the areas to be recolored (A–D). Only pixels that fall within the chosen Sampling, Limits, and Tolerance parameters will be recolored.
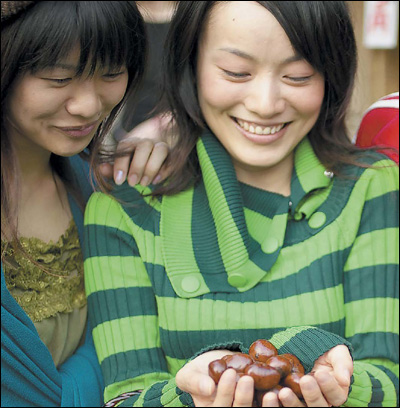
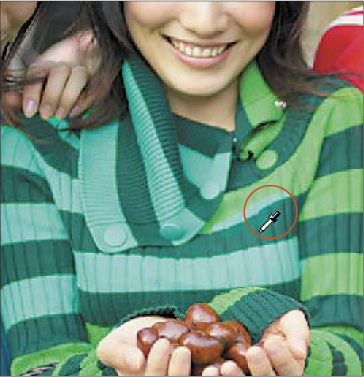
A We want to change the color of the light green stripes on this woman’s sweater to aqua blue.
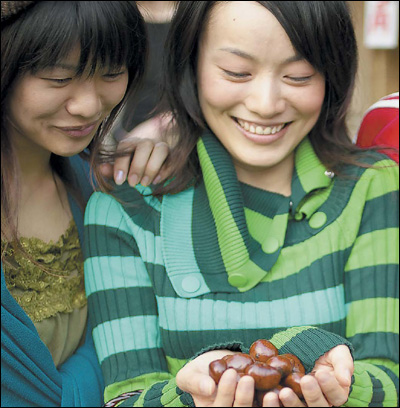
B With the Color Replacement tool and the settings shown in the figure on the preceding page, we’re “painting” over the light green areas on the woman’s sweater, to replace it with aqua blue, which is the current Foreground color.
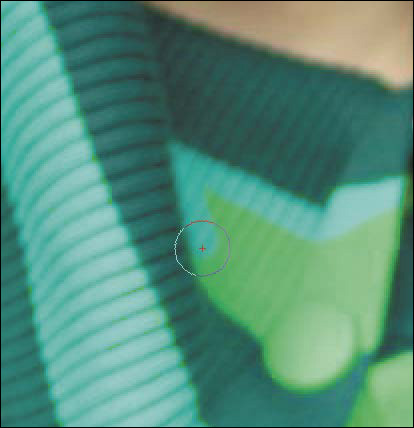
C To recolor both highlights and shadows within a stripe in a small area, we zoomed in, then used the Color Replacement tool with a Tolerance setting of 40%. Here we’re replacing colors along the edges of a stripe using a lower Tolerance setting of 15%.
D Although the Limits setting for the tool was Find Edges, it recolored some dark stripes, which was not our intention. To repair this error, we Alt/Option clicked to sample the original color in the darker stripe (as shown above). Our next step would be to apply strokes with the newly sampled color.
![]() When using the Color Replacement tool, you can change Options bar settings or the brush diameter between strokes.
When using the Color Replacement tool, you can change Options bar settings or the brush diameter between strokes.
Whitening teeth or eyes
Another use for a Hue/Saturation adjustment layer (a feature that you learned about in Chapter 12) is to whiten the teeth or the white areas of eyes in a portrait. The first step is to select the problem area(s).
To whiten teeth or eyes in a portrait photo:
1. Open a portrait photo, zoom in on the area to be corrected, then do either of the following:
Choose the Quick Selection tool, ![]() then drag to create a tight selection of the teeth A or of the white areas of both eyes.
then drag to create a tight selection of the teeth A or of the white areas of both eyes.
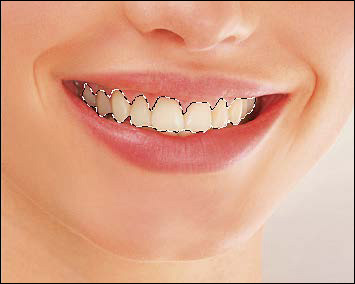
A We used the Quick Selection tool to select the teeth in this photo.
Paint a Quick Mask on the teeth by following the steps on page 189.
2. On the Adjustments panel, click the Hue/Saturation button. ![]()
3. On the Properties panel, for teeth, choose Yellows from the second menu; for the whites of the eyes, choose either Master or Reds. Reduce the Saturation value and increase the Lightness value.B
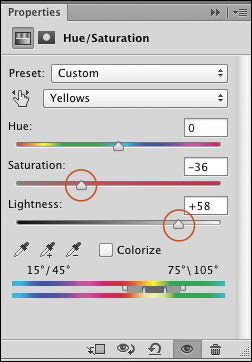
B On the Properties panel for a Hue/Saturation layer, we lowered the Saturation and increased the Lightness.
![]() Try not to overdo the whitening, or the teeth or eyes will look unnatural. To view the layer without the correction, click the Layer Visibility button on the Properties panel; click it again to re-enable the correction.
Try not to overdo the whitening, or the teeth or eyes will look unnatural. To view the layer without the correction, click the Layer Visibility button on the Properties panel; click it again to re-enable the correction.
4. Also on the Properties panel, click the Masks button, ![]() then increase the Feather value to soften the edge of the mask (the transition to the adjusted area). Try a value between 5 and 8 px).C–D You can also lower the Density value of the mask.
then increase the Feather value to soften the edge of the mask (the transition to the adjusted area). Try a value between 5 and 8 px).C–D You can also lower the Density value of the mask.
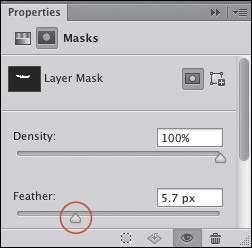
C Then we adjusted the Feather value for the mask.
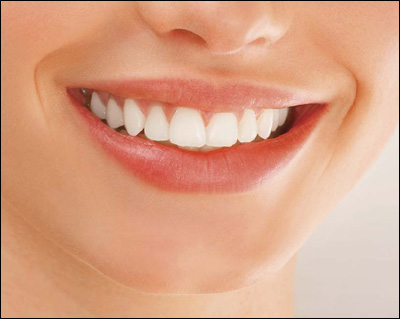
D Brighter, whiter teeth!
Using the Red Eye tool
Red-eye (red in the pupil areas) in a portrait photo results when a person in a relatively dark room looks straight into the camera lens, and light emitted by an electronic flash reflects off his or her retinas. This is less likely to occur if you use a flash bracket and an off-camera flash — and if the subject looks away from the camera. To remove red-eye from a photo that was taken without such preventive measures, you can use the Red Eye tool in Photoshop.
To remove red-eye from a portrait:
1. Open a portrait photo, duplicate the Background, and zoom way in on the eye area.
2. Choose the Red Eye tool ![]() (J or Shift-J).
(J or Shift-J).
3. On the Options bar, do both of the following:
Choose a Pupil Size for the size of the correction. You can start with the default setting of 50%, and see if you like the results. You don’t want the tool to enlarge (dilate) the pupil.
Choose a Darken Amount to control how much the tool darkens the pupil in order to remove the red. Try a setting below 30% for light-colored eyes, or above that value for dark-colored eyes.
4. Click once on the red area in each pupil. The tool should remove all traces of red, replacing it with black.A–B If not, see the next task.
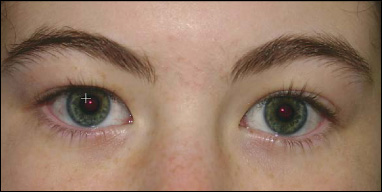
A With the Red Eye tool, we clicked once on each eye.

B Click, click, the red-eye is gone.
Note: If the tool enlarged the pupil too much, undo the results, lower the Pupil Size value, then click again. Similarly, if the red removal was incomplete or the pupil became too dark, undo the results, then try again with a different Darken Amount value.
![]() You don’t need to drag across the eye with the Red Eye tool; the tool is clever enough to find the pupil area automatically with a simple click.
You don’t need to drag across the eye with the Red Eye tool; the tool is clever enough to find the pupil area automatically with a simple click.
![]() Some photographers prefer to keep the red-eye feature of their camera off, because it delays the shutter action and they can miss the “magic moment.” Also, the subject can mistake the click of the red-eye feature for the shutter, which comes afterward.
Some photographers prefer to keep the red-eye feature of their camera off, because it delays the shutter action and they can miss the “magic moment.” Also, the subject can mistake the click of the red-eye feature for the shutter, which comes afterward.
If you notice traces of red in the irises of the eyes (the area around the pupils), you can eliminate them.
To remove redness from the irises of the eyes:
1. Zoom in on one eye.
2. Choose the Color Replacement tool ![]() (B or Shift-B).
(B or Shift-B).
3. On the Options bar, choose Mode: Color, Sampling: Once, ![]() Limits: Contiguous, and Tolerance: 30%.
Limits: Contiguous, and Tolerance: 30%.
4. Make the brush tip very small, Alt-click/Option-click a color in the iris of the eye, then apply short strokes over the remaining traces of red to recolor them with the sampled color.
5. Repeat with the other eye.
Using the Red Eye Removal Tool in Camera Raw
The Red Eye Removal tool in Camera Raw is similar to the Red Eye tool in Photoshop, except in Camera Raw, you drag before using the sliders. Choose the Red Eye Removal tool, choose a Type option of Red Eye (for humans) or Pet Eye;![]() drag across one of the eyes, including some surrounding area; then adjust the sliders. Uncheck Show Overlay (V) to view the results. Repeat for the other eye.
drag across one of the eyes, including some surrounding area; then adjust the sliders. Uncheck Show Overlay (V) to view the results. Repeat for the other eye.
Unlike the Clone Stamp tool, which merely copies a source color without blending it into the target area (see pages 318–319), the three tools discussed next will sample a texture, apply it to the target area, and blend the texture into the existing color and brightness values. With these tools, it’s easy to fix imperfections, such as facial blemishes or paper creases in a vintage photo, and the results are usually seamless.
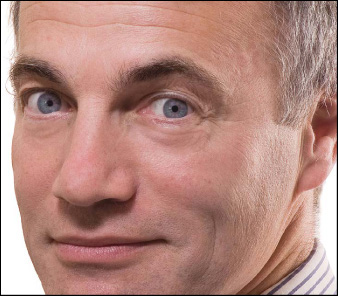
With the Healing Brush tool, you Alt-click/Option-click to sample from an unblemished or smooth area, then apply strokes in the area to be retouched.A The blemish pixels are replaced with sampled pixels.
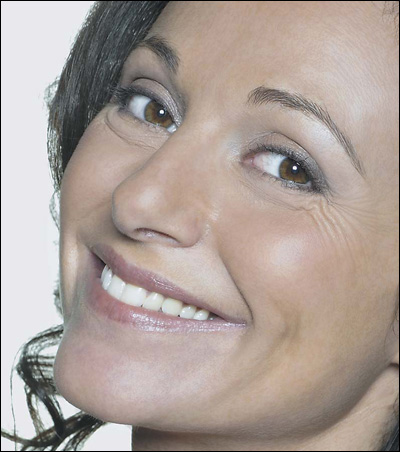
A We’re going use the Healing Brush tool to soften the wrinkles around the woman’s eyes in this photo.
With the Patch tool, you select the blemish area first, then drag the selection over an unblemished area for sampling. Here too, the blemish pixels are replaced with the sampled ones.
And with the Spot Healing Brush tool, you simply click a blemish without sampling. Pixels are replaced (almost magically!) based on data gathered from neighboring pixels.
Using the Healing Brush tool
To use the Healing Brush tool:
1. Choose the Healing Brush tool ![]() (J or Shift-J).
(J or Shift-J).
2. Create a new, blank layer in a portrait photo. (The healing strokes will be applied to this layer.)
3. On the Options bar, do all of the following: B
B We chose these Options bar settings for the Healing Brush tool.
Via the Brush Preset picker, choose a high Hardness value (you can also do this by right-clicking in the image, or by using the interactive cursor, as described on page 129). Also, in Edit/Photoshop > Preferences > Cursors, click Full Size Brush Tip, so you will be able to preview the diameter of the brush cursor.
Choose Mode: Normal to preserve the grain, texture, and noise of the area surrounding the target; or if you don’t need to preserve those characteristics, choose a different mode, such as Lighten (for subtle retouching or to correct wrinkles or creases that are very close together, to prevent them from cloning onto one another).
Click Source: Sampled.
Check Aligned to maintain the same distance between the source point and the areas that you drag across, even if you release the mouse between strokes, or uncheck this option to resample from the original source point each time you release the mouse.
From the Sample menu, choose All Layers. This setting will permit the tool to sample pixels from all the layers below the pointer (the corrected pixels will appear on the selected, blank layer).
Optional: If the document contains adjustment layers, the effects of which you want the Healing Brush tool to ignore when sampling (so the effect of the adjustments isn’t doubled), activate the Ignore Adjustment Layers When Healing button. ![]()
If you’re using a stylus and tablet, click the Pressure Controls Size ![]() button.
button.
Click the Toggle Clone Source panel button, ![]() then check Show Overlay and Clipped on the Clone Source panel so you will be able to preview the cloned pixels within the brush cursor.
then check Show Overlay and Clipped on the Clone Source panel so you will be able to preview the cloned pixels within the brush cursor.
4. Press [ or ] to scale the brush to suit the area to be healed.
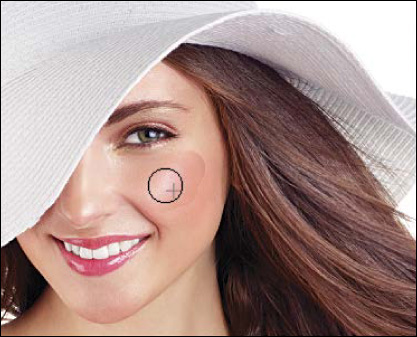
5. Alt-click/Option-click a smooth or unblemished area to sample it as the source texture.A The sampled area displays within the brush cursor.
A With the Healing Brush tool, we held down Alt/Option and clicked the area to be used as replacement pixels...
6. With the new, blank layer still selected, drag a short stroke across the area to be repaired.B When you release the mouse, the source texture will be applied to the target area and will be blended into neighboring pixels. It will render in two stages, so be patient.C

B ...then dragged across the area to be repaired. Note that the brush tip is separate from the sampling pointer.
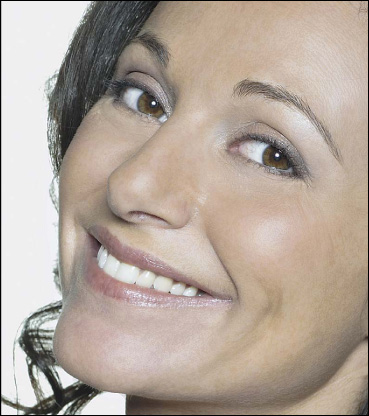
C The wrinkles around her eyes are softened.
7. Optional: To establish a new source point for further repairs, Alt-click/Option-click a different area, then apply more strokes.
8. Optional: To soften the results, lower the opacity of the healing layer slightly to blend it with the original layer.D
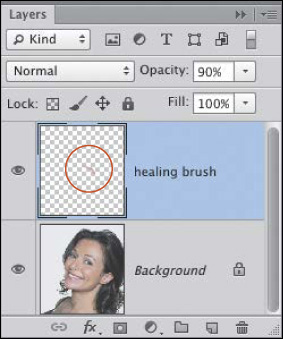
D Our retouching brush strokes are on a separate layer (labeled “healing brush”). To make the portrait look more natural, we lowered the Opacity of that layer to 90%.
![]() Because you applied the healing strokes to a separate layer, you can easily erase any mistakes. Hide the image layers below the healing layer temporarily, then with the Eraser tool, drag across any unwanted strokes.
Because you applied the healing strokes to a separate layer, you can easily erase any mistakes. Hide the image layers below the healing layer temporarily, then with the Eraser tool, drag across any unwanted strokes.
The Healing Brush tool is also handy for removing shiny hot spots, caused by harsh, uneven lighting, from a portrait. You can remove them by doing the following: Choose Mode: Darken on the Options bar for the tool, then Alt-click/Option-click to sample a medium-tone area of skin.
Create a new, blank layer, size the brush, then drag once or twice over a hot spot, letting your stroke(s) follow the natural contours of the face.
With Darken mode chosen for the tool, it repaired only the lightest area. We repeated this process on the model’s forehead and nose. (If you want to soften the results, lower the opacity of the healing layer.)
Using the Spot Healing Brush tool
The Spot Healing Brush tool heals imperfections without your having to sample a source area. With one click or a very short drag, you can zap blemishes or wrinkles, or repair a tear or crease in a vintage or damaged photo.
To use the Spot Healing Brush tool:
1. Create a new, blank layer to contain your healing strokes, and keep it selected.
2. Choose the Spot Healing Brush tool ![]() (J or Shift-J), and zoom the document to 100%.
(J or Shift-J), and zoom the document to 100%.
3. In Edit/Photoshop > Preferences > Cursors, under Painting Cursors, click Full Size Brush Tip (so you will be able to preview the diameter of the brush cursor) and check Show Crosshair in Brush Tip (to help you position the cursor).
4. On the Options bar, do all of the following:
Choose a Mode. To preserve skin tones, try Normal or Lighten mode. (When used in Replace mode, the tool may pick up unwanted facial details in the stroke, such as hair or eyelashes.)
To help preserve existing tonal values in the image, such as in skin tones, click Type: Content-Aware (for more about this option, see page 320).
Check Sample All Layers to allow the brush to sample pixels from all the layers below the pointer.
5. Position the pointer above the area to be repaired, press [ or ] to make the brush just slightly wider than that area, then drag once across it in a short stroke.A–B Repeat to repair other problem areas.
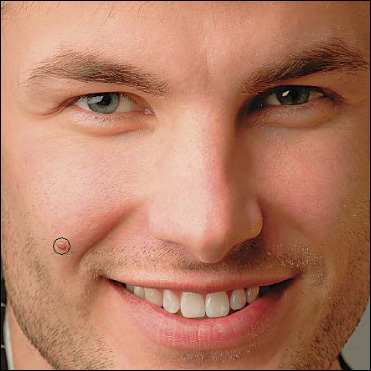
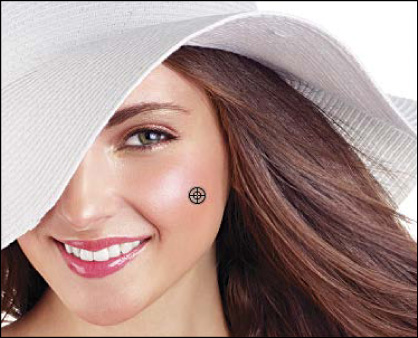
A With the Spot Healing Brush tool, we clicked a blemish.
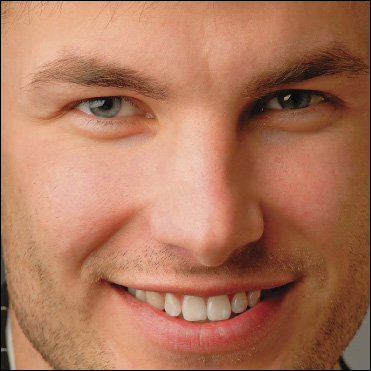
B The blemish disappeared.
6. Optional: For a more subtle result, lower the opacity of the healing layer slightly.
7. Because you applied Spot Healing strokes to a separate layer, you can show and hide those edits (or erase any unwanted strokes with the Eraser tool) at any time.
Healing areas with the Patch tool
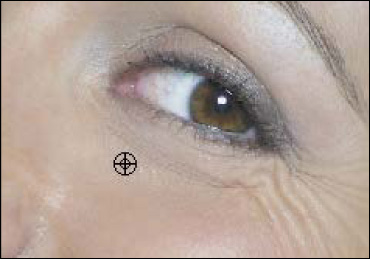
The Patch tool is also a good choice for retouching bags or wrinkles below the eyes in a portrait and for repairing rips, stains, or dust marks in a scanned image (such as a vintage photo).
To retouch an area using the Patch tool:
1. Press Ctrl-J/Cmd-J to duplicate the Background, and keep the duplicate layer selected.
2. Choose the Patch tool ![]() (J or Shift-J).
(J or Shift-J).
3. On the Options bar, click Patch: Normal and Source.
4. Drag a selection around the entire area to be repaired.A You can Shift-drag to add to the selection or Alt-drag/Option-drag to subtract from it.

A With the Patch tool (Normal setting), we selected the area to be repaired.
![]() If you’re retouching an under-eye area, avoid selecting any of the lower eyelid.
If you’re retouching an under-eye area, avoid selecting any of the lower eyelid.
5. Drag from inside the selection to the area to be sampled.B When you release the mouse, imagery from the sampled area will appear within the original selection, and will be blended with the luminosity and texture of original pixels. Deselect (Ctrl-D/Cmd-D).C

B We dragged from the selected area to a nearby area for Photoshop to sample.
C Photoshop blended pixels from the sample area into the original selection area.
6. Optional: If the results of the Patch repair look too smooth or slick, lower the opacity of the duplicate layer (try 70% or 80%) to reveal some of the original image.D
D We repeated the same steps for the left eye, then lowered the layer Opacity to 70% to soften the effect.
![]() See also the tip on page 324. (The Patch tool is also used on that page.)
See also the tip on page 324. (The Patch tool is also used on that page.)
Smoothing skin and other surfaces
Using the Surface Blur filter, you can easily smooth out unwanted textures, such as skin pores in a portrait or grainy paper in a scanned photo or drawing.
To smooth surfaces with the Surface Blur filter:
1. Press Ctrl-J/Cmd-J to duplicate the Background in an image that needs some surface smoothing.A Right-click the duplicate layer and choose Convert to Smart Object.
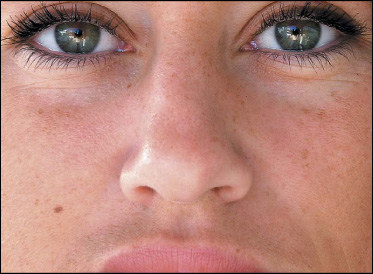
A The pores on this woman’s skin look too prominent.
2. Choose Filter > Blur > Surface Blur. The Surface Blur dialog opens. Check Preview.
3. Choose a low Threshold value (try 3–6) to blur only low-contrast areas, such as the cheeks and forehead in a portrait, while preserving the contrast in key details, such as the eyes and mouth.
4. Adjust the Radius just to the point that the desired degree of smoothing is reached. To soften skin (e.g., cheeks, forehead), try a value of 6–12.
5. Readjust the Threshold to increase or decrease the amount of blurring in the low-contrast areas. Bear in mind that too much smoothing can make a surface look artificial — but then again, this whole task is a lesson in artifice!
6. Click OK.B To edit the settings at any time, double-click the Surface Blur listing on the Layers panel (under Smart Filters); the filter dialog reopens.
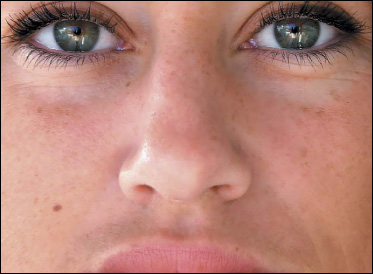
B The Surface Blur filter successfully smoothed the skin texture while keeping the facial features crisp (we chose a Radius setting of 9 pixels and a Threshold setting of 6 levels for our 300 ppi file). Compare the cheeks and under-eye areas in this image with those in the preceding one.
7. Optional: To soften the overall filter effect, lower the opacity of the Smart Object.
8. Optional: To selectively reveal details from the unaltered layer, click the mask thumbnail for the Smart Filters listing. Choose the Brush tool ![]() (B or Shift-B). On the Options bar, choose a Soft Round brush and an Opacity of 80–90%. Choose black as the Foreground color and size the brush cursor, then draw strokes on key details, such as the lips, eyes, eyebrows, or hair in a portrait.C To reveal the surface blur effect in any areas that you masked unintentionally, paint with white.
(B or Shift-B). On the Options bar, choose a Soft Round brush and an Opacity of 80–90%. Choose black as the Foreground color and size the brush cursor, then draw strokes on key details, such as the lips, eyes, eyebrows, or hair in a portrait.C To reveal the surface blur effect in any areas that you masked unintentionally, paint with white.
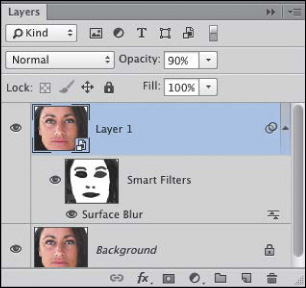
C Finally, we lowered the opacity of the Smart Object and painted with black on the Smart Filters mask to reveal some of the sharp facial details from the underlying layer.
![]() If you want to use the Spot Healing Brush or Healing Brush tool to retouch areas of the Smart Object, check Sample All Layers on the Options bar and work on a new, blank layer. If you want to use the Patch tool, double-click the Smart Object thumbnail to access the embedded image.
If you want to use the Spot Healing Brush or Healing Brush tool to retouch areas of the Smart Object, check Sample All Layers on the Options bar and work on a new, blank layer. If you want to use the Patch tool, double-click the Smart Object thumbnail to access the embedded image.
![]() To learn about Smart Filters, see pages 360–364.
To learn about Smart Filters, see pages 360–364.
Here we show you how to soften a skin texture with an extra degree of control. You will apply the Gaussian Blur filter twice, in each case using a mask and a layer blending mode to control the visibility of the smoothing effect, first in the light areas, then in the dark areas.
To smooth skin with the Gaussian Blur filter:
1. Open an RGB photo of a face.A Press Ctrl-Alt-J/Cmd-Option-J to open the New Layer dialog. Rename the duplicate layer “blur darken,” then click OK.
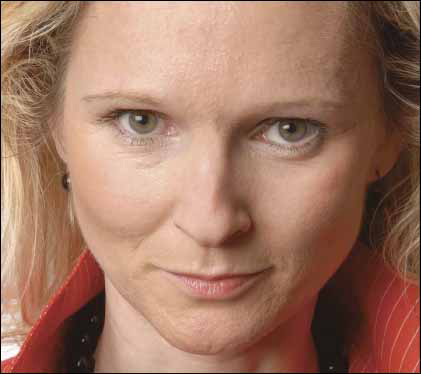
A In the original image, the pores of the woman’s skin look too pronounced.
2. Choose Filter > Blur > Gaussian Blur. In the dialog, drag the cheek or forehead area into view, then move the Radius slider until the skin starts to look smooth and blurry. Press, then release, on the preview to judge the blur effect.B Click OK. Don’t be concerned that the facial features now look too blurry.
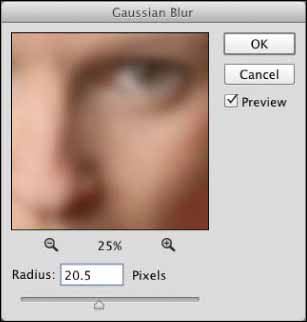
B In the Gaussian Blur dialog, we chose a Radius value of 20.5 pixels.
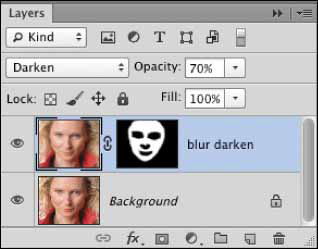
3. Choose Darken as the blending mode for the “blur darken” layer (to smooth only lighter areas), then lower the layer opacity setting until a hint of texture marks reappear in the skin.
4. Alt-click/Option-click the Add Layer Mask button ![]() on the Layers panel to add a black mask, and keep the new mask thumbnail selected.
on the Layers panel to add a black mask, and keep the new mask thumbnail selected.
5. Choose the Brush tool ![]() (B or Shift-B), a Soft Round tip, Normal mode, and 100% Opacity, and press X to make the Foreground color white. Apply strokes to areas where you want to reveal the smoothing effect, such as on the cheeks, forehead, chin, and nose (A–B).
(B or Shift-B), a Soft Round tip, Normal mode, and 100% Opacity, and press X to make the Foreground color white. Apply strokes to areas where you want to reveal the smoothing effect, such as on the cheeks, forehead, chin, and nose (A–B).
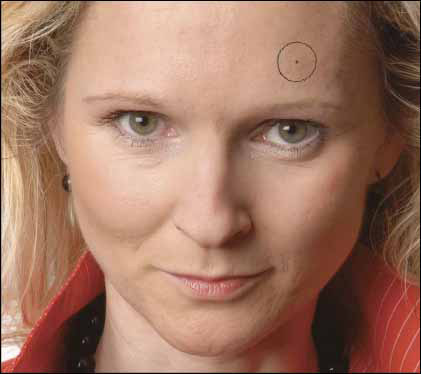
A We chose Darken as the blending mode for the “blur darken” layer, lowered the layer Opacity to 70%, Alt/Option clicked the layer mask thumbnail, then applied brush strokes to reveal the smoothing effect on the cheeks, forehead, chin, and nose. Because the layer blending mode is Darken, the effect can be seen only in the lighter areas.
B The smoothing effect is visible only where we added white areas to the layer mask, and is hidden by the black areas that are masking the rest of the face.
If you paint over any facial features unintentionally, such as the eyes or eyebrows, press X to make the Foreground color black, and paint over your strokes.
![]() Press [ to reduce the brush diameter to paint over small areas, such as between the eyes and eyebrows or between the nose and lips, then press ] to enlarge it again.
Press [ to reduce the brush diameter to paint over small areas, such as between the eyes and eyebrows or between the nose and lips, then press ] to enlarge it again.
6. Press Ctrl-Alt-J/Cmd-Option-J to duplicate the “blur darken” layer. The New Layer dialog opens. Rename the duplicate layer “blur lighten,” then click OK.
7. Change the blending mode of the “blur lighten” layer to Lighten (to smooth only darker areas), then increase or reduce the layer opacity until any dark texture marks on the skin look softer. The skin should now look smoother.
8. To put the top two layers in a group, Shift-click the “blur darken” layer, then press Ctrl-G/Cmd-G (C–D).
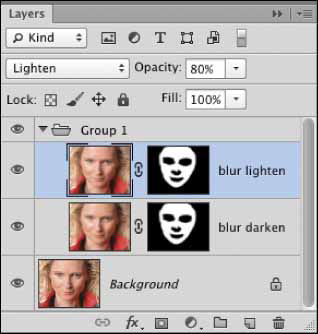
C We duplicated the “blur darken” layer, renamed the duplicate “blur lighten,” chose Lighten as the blending mode, and changed the layer Opacity to 80%. Finally, we put the two blur layers in a group.
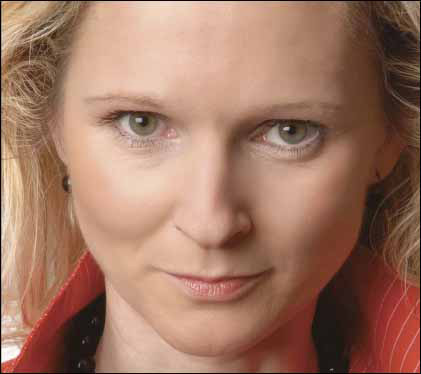
D Now the skin on the woman’s forehead, cheeks, and nose looks smoother, while the eyes, eyebrows, lips, and hair still look sharp.
9. Optional: To restore a bit of “reality” to the portrait, click the group listing, then lower the opacity of the group until the desired amount of skin texture is revealed.
Retouching by cloning
The Clone Stamp tool lets you clone pixels either within the same document or between documents. Use it to remove distracting elements from an image, such as the metal pipe shown in our example, or to duplicate an element, such as leaves or a texture.
To retouch a photo by cloning imagery:
1. Open an RGB document, and if desired, open a second RGB document from which to clone. If you open two documents, display them both by choosing a tiling option from the Window > Arrange submenu.
2. Choose the Clone Stamp tool ![]() (S or Shift-S).
(S or Shift-S).
3. On the Options bar, do the following: A
A We chose these settings for the Clone Stamp tool from the Options bar.
On the Brush Preset picker, choose a Soft Round brush.
Choose Normal as the blending Mode.
Choose an Opacity percentage.
Choose a Flow percentage to control the rate of application.
Check Aligned to maintain the same sampling point even if you release the mouse between strokes (to clone a large area seamlessly); or uncheck Aligned to resample from the original source point each time you release the mouse (to clone the same area numerous times, separately).
From the Sample menu, choose All Layers to allow the tool to sample pixels from all the visible layers that are directly below the pointer (the new pixels will appear on the blank layer that you create in step 5).
Optional: If the source document contains adjustment layers, the effects of which you want the Clone Stamp tool to ignore when sampling (so the effect of the adjustments isn’t doubled), activate the Ignore Adjustment Layers When Cloning button. ![]()
Optional: If you have a stylus and tablet, you can activate the Pressure for Opacity button ![]() and/or the Pressure for Size button.
and/or the Pressure for Size button. ![]()
4. Click in the source document (it can be the same document or a second one), then Alt-click/Option-click a point from which to clone.B–C For seamless cloning, pick an area that looks very similar to the area being repaired.
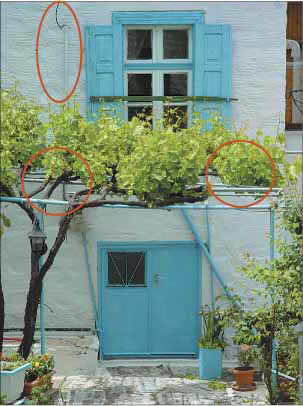
B This is the original image. Our objective was to remove the metal pipes from the side of the building and add more leaves to fill in the front of the trellis.
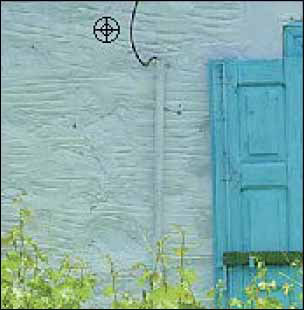
C We Alt/Option clicked with the Clone Stamp tool to sample a blank area of the wall.
5. Click in the target document (it can be the same document as the source or a different one). Create a new, blank layer, and keep it selected.
6. In Edit/Photoshop > Preferences > Cursors, under Painting Cursors, click Full Size Brush Tip (so you will be able to preview the brush diameter).
7. Press [ or ] to scale the brush, then click or drag in very short strokes to make the cloned pixels appear.A–B Imagery from the source point will display within the brush cursor. Note: If the whole layer displays in the overlay as you clone, show the Clone Source panel, ![]() then check Clipped.
then check Clipped.
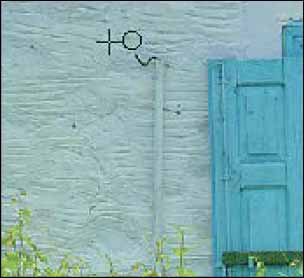
A We’re dragging with the Clone Stamp tool to replace the wire and pipe with pixels from the blank wall.
![]() To prevent noticeable (tacky!) seams from appearing in a cloned texture, either apply short strokes or just click, and sample multiple times.
To prevent noticeable (tacky!) seams from appearing in a cloned texture, either apply short strokes or just click, and sample multiple times.
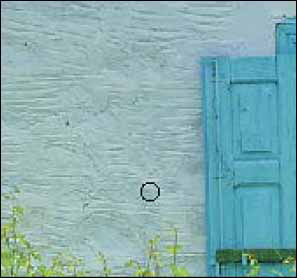
B We’re continuing to sample the wall and clone away the pipe.
8. Optional: To establish a new source point for further cloning, Alt-click/Option-click a different area in the source document.C–D You can also change settings for the Clone Stamp tool between strokes.
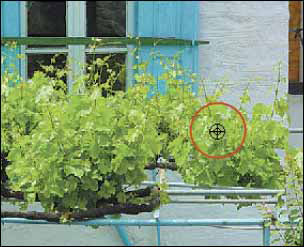
C We’re sampling the vine leaves because we want to add more leaves to the front of the trellis.
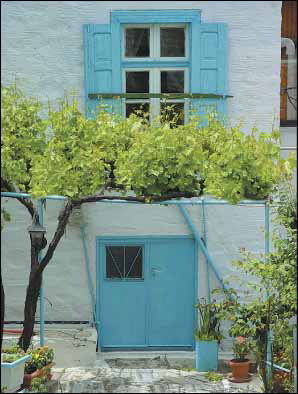
D Compare this new, improved image with the original one, on the preceding page.
![]() To create a “double-exposure” effect, with the original pixels partially remaining, lower the Opacity percentage for the Clone Stamp tool.
To create a “double-exposure” effect, with the original pixels partially remaining, lower the Opacity percentage for the Clone Stamp tool.
![]() To keep track of multiple source documents while using the Clone Stamp tool, use the Clone Source panel (see pages 282–283).
To keep track of multiple source documents while using the Clone Stamp tool, use the Clone Source panel (see pages 282–283).
Using the Content-Aware Option of The Spot Healing Brush Tool
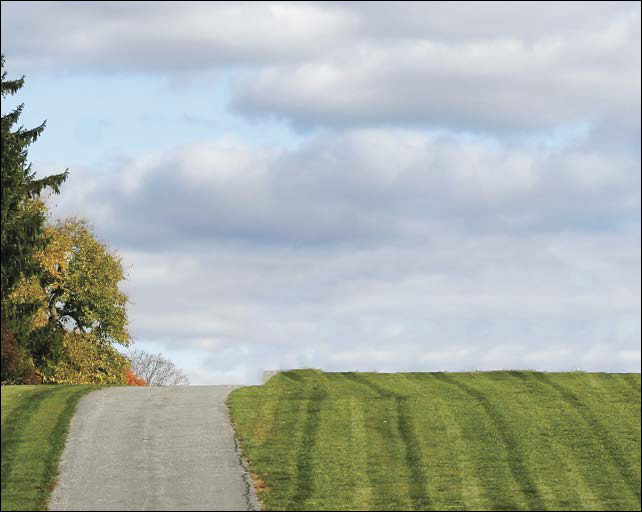
For a quick, easy, and powerful way to remove an “object” from a photo, try using the Spot Healing Brush tool, ![]() with its Content-Aware option (Options bar). This tool works better if the object being removed is surrounded by many small, random shapes (such as foliage, water, or clouds in a landscape) A–B than if the surrounding area contains isolated, distinct objects. This tool and option also work well for repairing tears or scratches in a vintage photo.
with its Content-Aware option (Options bar). This tool works better if the object being removed is surrounded by many small, random shapes (such as foliage, water, or clouds in a landscape) A–B than if the surrounding area contains isolated, distinct objects. This tool and option also work well for repairing tears or scratches in a vintage photo.
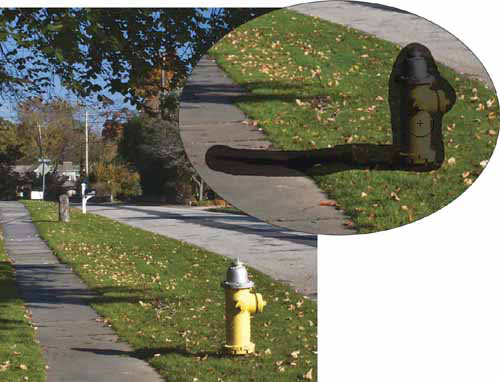
A To remove the fire hydrant from this image, for the Spot Healing Brush tool, we chose a brush Hardness of 100% (to let Content-Aware healing — not the brush — blend the edges), Normal mode, and Content-Aware. With a medium-sized brush and one continuous stroke, we covered the hydrant and its shadow.
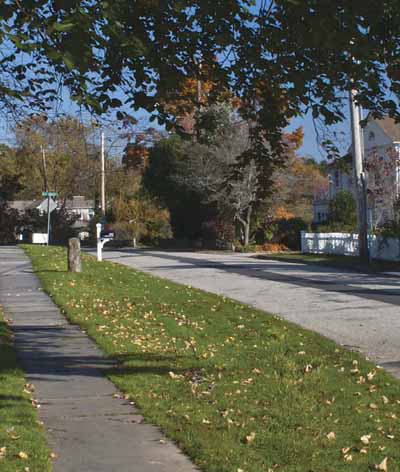
B We sat back while the Spot Healing Brush tool analyzed and sampled pixels from neighboring areas to use as replacement pixels for the hydrant... Poof! That was as easy as retouching gets.
Same Feature, Different Results
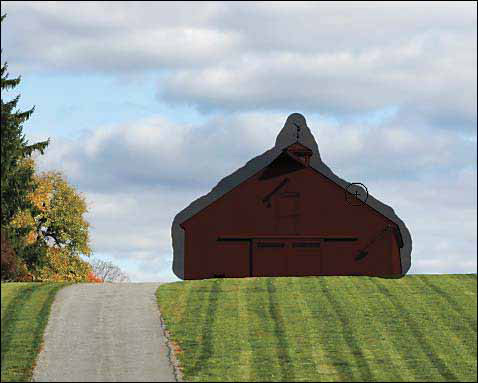
To zap the red barn from this photo, we followed the same steps as described in figureA, above.
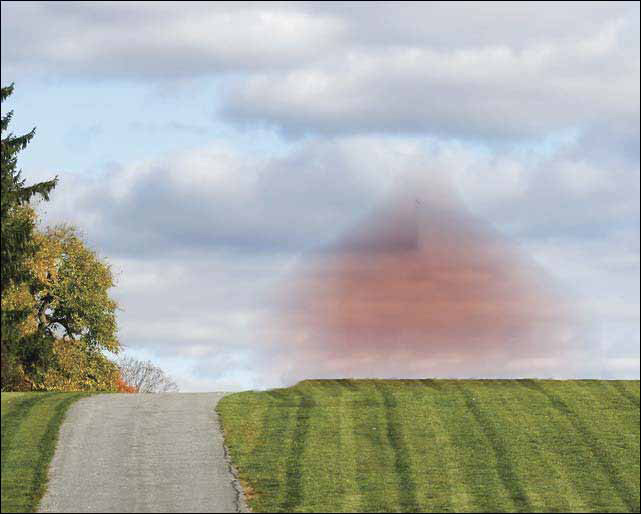
Unfortunately, in this case, the automatic healing process of the tool left behind a red tint.
We undid the prior results, then used the same tool, except this time with Replace mode chosen (on the Options bar) instead of Normal. Success!
Applying a Content-Aware fill
Sometimes the Content-Aware option of the Fill command does a seamless (or almost seamless) job of removing a distinct shape from a nondistinct background. You can tweak the results with the Clone Stamp, Healing Brush, or Patch tool (or if the Fill results are unsatisfactory, undo and use one of those tools instead).
To replace an image element with a Content-Aware fill:
1. Duplicate the Background in an image (Ctrl-J/Cmd-J), then hide the Background. Keep the duplicate layer selected.
2. Optional: Add a layer mask to the layer, and with the Brush tool and black as the Foreground color, stroke over any areas in the background that you want to prevent Photoshop from sampling as replacement pixels. Click the layer thumbnail.A
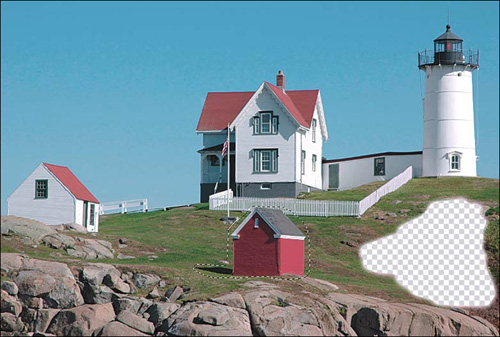
A Our goal was to eliminate the red shed from this image. To prevent Photoshop from sampling the bushes and rocks on the right side, we hid those areas via a layer mask. Next we selected the shed loosely with the Lasso tool.
3. Loosely select the element in the image to be removed, then choose Edit > Fill.
4. Choose Use: Content-Aware, check Color Adaptation for enhanced color blending,![]() choose Mode: Normal and Opacity: 100%, then click OK.B
choose Mode: Normal and Opacity: 100%, then click OK.B
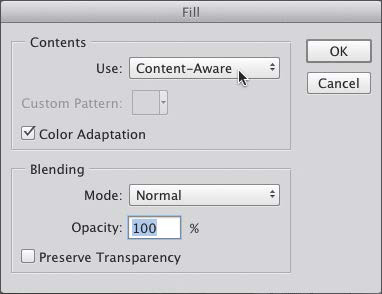
B We chose these options in the Fill dialog, then clicked OK.
5. If you created a mask in step 2, deactivate it by Shift-clicking the mask thumbnail.C
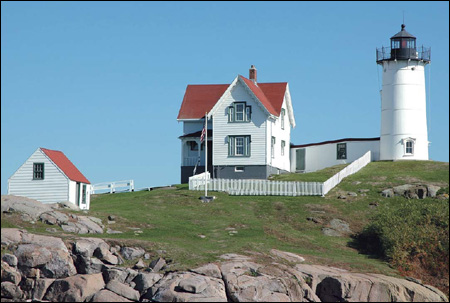
C We deactivated the layer mask. The Fill command removed the shed and a small section of the fence, and replaced that area with random grass and stone textures.
Using the Content-Aware Move tool
The Content-Aware Move tool can be used to reposition, or to create an extension of, an element in an image. Photoshop will use Content-Aware calculations either to fill in the exposed areas or to camouflage the seams, blending pixels into the texture and colors of the destination area.
To move or reshape an image element with the Content-Aware Move tool:
1. Create a new, blank layer and keep it selected.
2. Choose the Content-Aware Move tool ![]() (J or Shift-J). On the Options bar, check Sample All Layers.
(J or Shift-J). On the Options bar, check Sample All Layers.
3. Drag loosely around the element to be moved or extended.A To add areas to the selection, hold down Shift while dragging; to subtract areas, hold down Alt/Option while dragging.
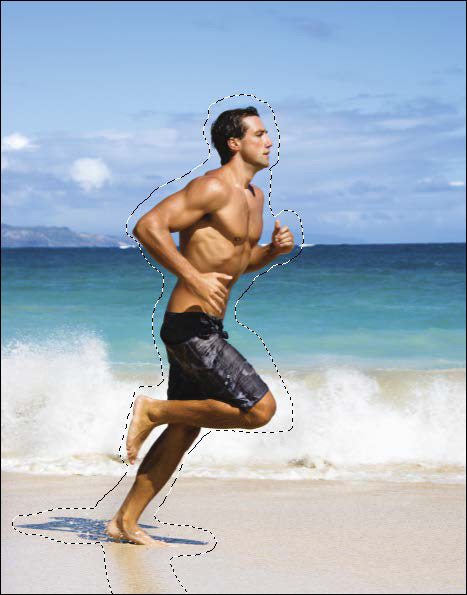
A With the Content-Aware Move tool (Mode: Move), we dragged to loosely select the jogger and his shadow, ...
4. Do either of the following:
To move the selected area, choose Move from the Mode menu on the Options bar, then drag the selection, preferably to an area that looks like the original setting.B
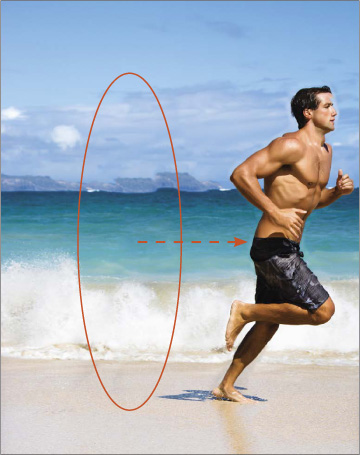
B ... dragged the selected area to the right, then hid the selection border. Using a Structure value of 1 and a Color value of 0, the jogger is misshapen and has a color halo, and obvious patches are left in the areas that Photoshop filled in (the sand, sea spray, water, and horizon).
To extend the object, choose Extend from the Mode menu, then drag the selection in the direction in which you want it to be enlarged.
5. The tool will send the selected pixels (and any areas that it filled in) to the new, blank layer. From the Adaptation menu ![]() on the Options bar, choose a Structure value (1–5) to control how loosely or strictly the repositioned and replacement pixels blend into the image; the higher the Structure value, the more strict the replacement. Also choose a Color value (0 –10); the higher the Color value, the more accurate the color matching (A).
on the Options bar, choose a Structure value (1–5) to control how loosely or strictly the repositioned and replacement pixels blend into the image; the higher the Structure value, the more strict the replacement. Also choose a Color value (0 –10); the higher the Color value, the more accurate the color matching (A).![]() To apply a setting, press Enter/Return or click outside the menu. The settings can be changed only while the selection is still active.
To apply a setting, press Enter/Return or click outside the menu. The settings can be changed only while the selection is still active.
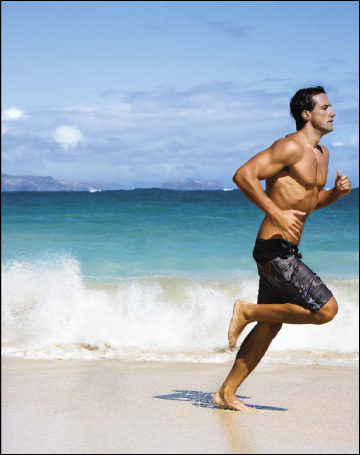
A Using a Structure value of 4 and a Color value of 5, the replacement pixels look more seamless. The clouds, mountains, spray, and water look more realistic, and there is no color halo around the jogger.
6. Deselect (Ctrl-D/Cmd-D). See also B–D.
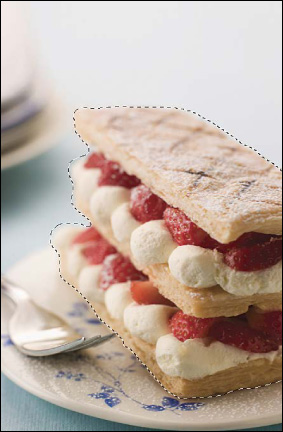
B With the Content-Aware Move tool, we selected the pastry (more tightly than we selected the dude on the beach, who was on a more complex background).

C We set the tool Mode to Extend, dragged upward to create another tier of pastry, then chose a Structure value of 1 and a Color value of 0. The added crust and filling look slightly distorted.

D Here we chose a Structure value of 4 and a Color value of 4, which blended the new pastry and filling more convincingly, with less distortion. Who doesn’t like extra dessert?
![]() To hide (then show) the Content-Aware Move selection border, press Ctrl-H/Cmd-H.
To hide (then show) the Content-Aware Move selection border, press Ctrl-H/Cmd-H.
![]() We made the Content-Aware Fill, Content-Aware Move, and Patch features look almost fail-safe by displaying only our successes — but it took some trial and error. Our more dependable results were in images that had fairly simple backgrounds.
We made the Content-Aware Fill, Content-Aware Move, and Patch features look almost fail-safe by displaying only our successes — but it took some trial and error. Our more dependable results were in images that had fairly simple backgrounds.
Removing an image element with the Patch tool
Another way to replace image content is by using the Patch tool with its Content-Aware option. You draw a selection, then drag it to a source area for Photoshop to analyze as replacement pixels. To vary the results, change the Adaptation setting before you deselect.
To eliminate an image element with the Patch tool:
1. Create a new, blank layer, and keep it selected.
2. Choose the Patch tool ![]() (J or Shift-J).
(J or Shift-J).
3. On the Options bar, choose Patch: Content-Aware ![]() and check Sample All Layers.
and check Sample All Layers.
4. Drag a selection around the area to be removed.A You can Shift-drag to add to the selection or Alt-drag/Option-drag to subtract from it.
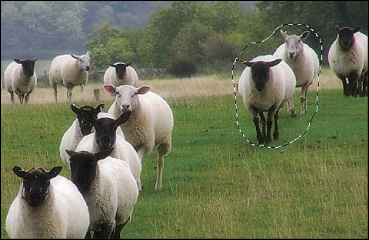
A With the Patch tool set to Content-Aware, we selected the elements to be removed.
5. Drag the selection to an area that looks most like the original background behind the object.B When you release the mouse, Photoshop will fill in the exposed area based on those sampled pixels.
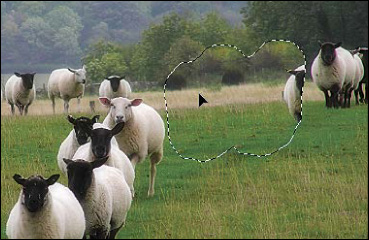
B Next, we dragged the selection to an area that looked similar to the one around the elements being removed.
6. From the Adaptation menu ![]() on the Options bar, choose a Structure value (1–5) to control how loosely or strictly the replacement pixels blend into the image.C–D
on the Options bar, choose a Structure value (1–5) to control how loosely or strictly the replacement pixels blend into the image.C–D ![]() Also choose a Color value (0 –10); the higher the Color value, the more accurate the color matching. These parameters can be changed only while the selection is still active.
Also choose a Color value (0 –10); the higher the Color value, the more accurate the color matching. These parameters can be changed only while the selection is still active.
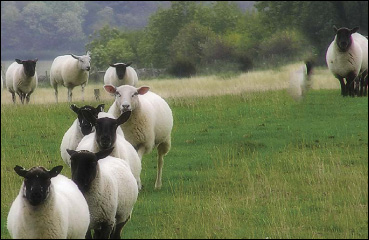
C At a Structure value and Color value of 1, remnants were left of the original elements (not ruminants, heh-heh...).
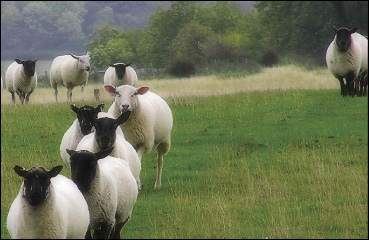
D At a Structure value of 2 and a Color value of 7, the replacement pixels make a cleaner, more believable match.
7. Deselect (Ctrl-D/Cmd-D).
![]() To hide the selection border temporarily, press Ctrl-H/Cmd-H (repeat to redisplay it). If you tried different Adaptation settings and still aren’t satisfied with the Patch results, press Ctrl-Z/Cmd-Z, then drag the selection to a different sample area.
To hide the selection border temporarily, press Ctrl-H/Cmd-H (repeat to redisplay it). If you tried different Adaptation settings and still aren’t satisfied with the Patch results, press Ctrl-Z/Cmd-Z, then drag the selection to a different sample area.