7. Cocktails, Dinner, and Decor
Wedding Stage Four
Without question, cocktail hour is the busiest time of the day. Between the family and couple portraits, candid coverage of the guests, and detail shots of the dinner area and tabletops, you generally have to fit about two hours’ worth of work into one hour. The only way to manage it is to stay organized, maintain your cool, keep an eye on the time, and just continue working through each element as it comes. Once the guests sit down for dinner, there will be a moment to catch your breath...usually!
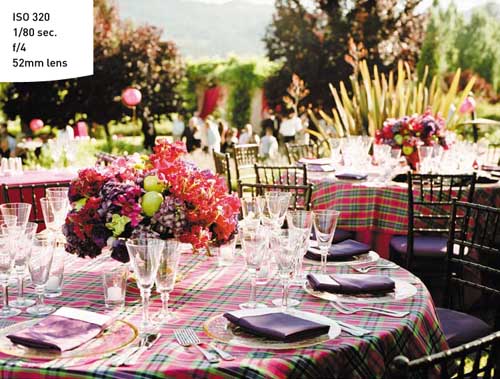
Poring Over the Picture
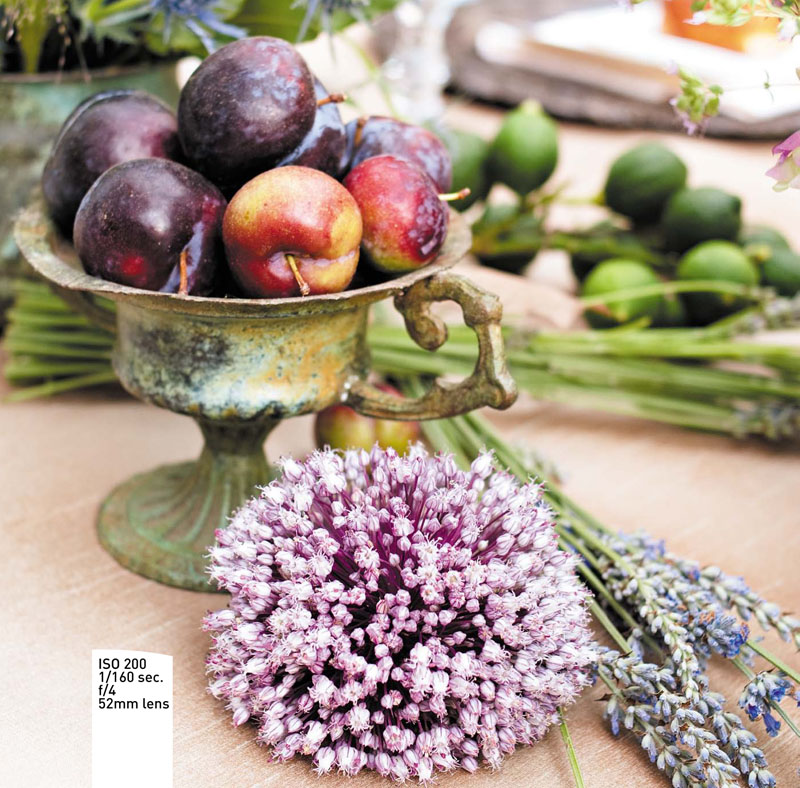
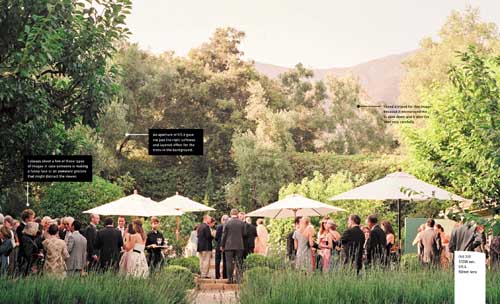
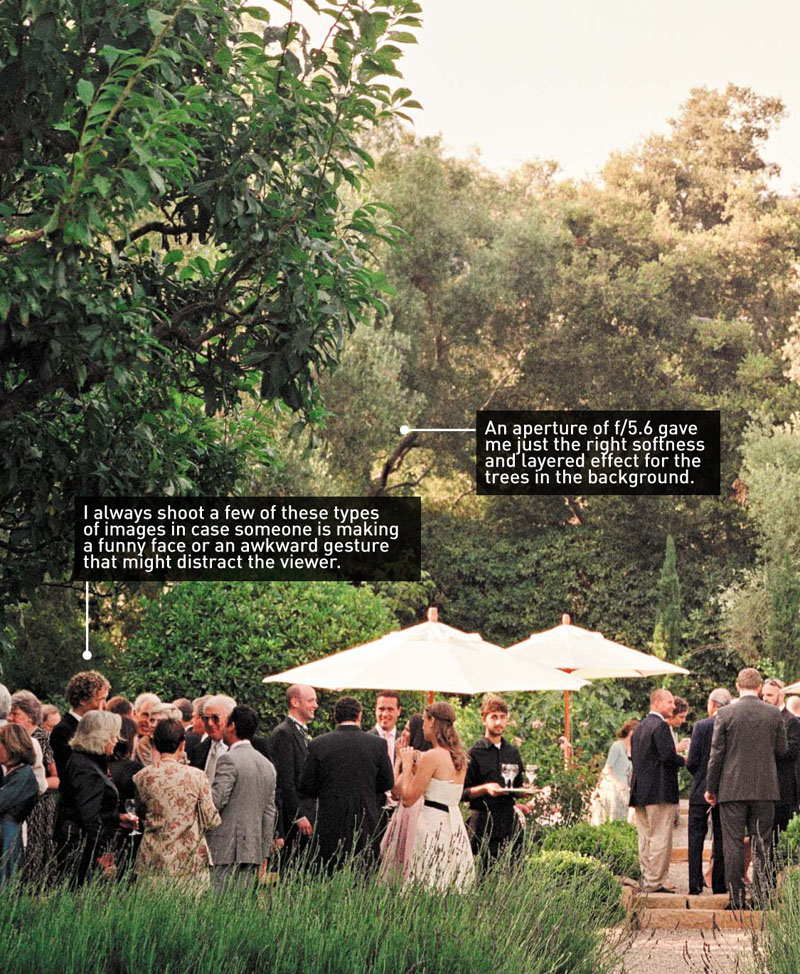
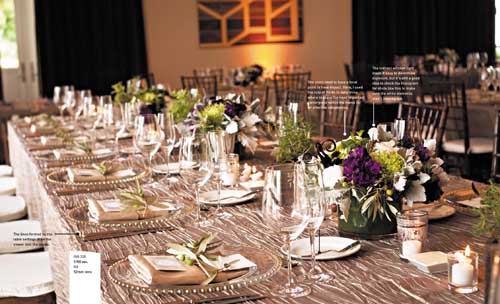
Take a step back to get an overview of the party. This really helps pull the cocktail hour images together and conveys the feeling of the event.

Poring Over the Picture
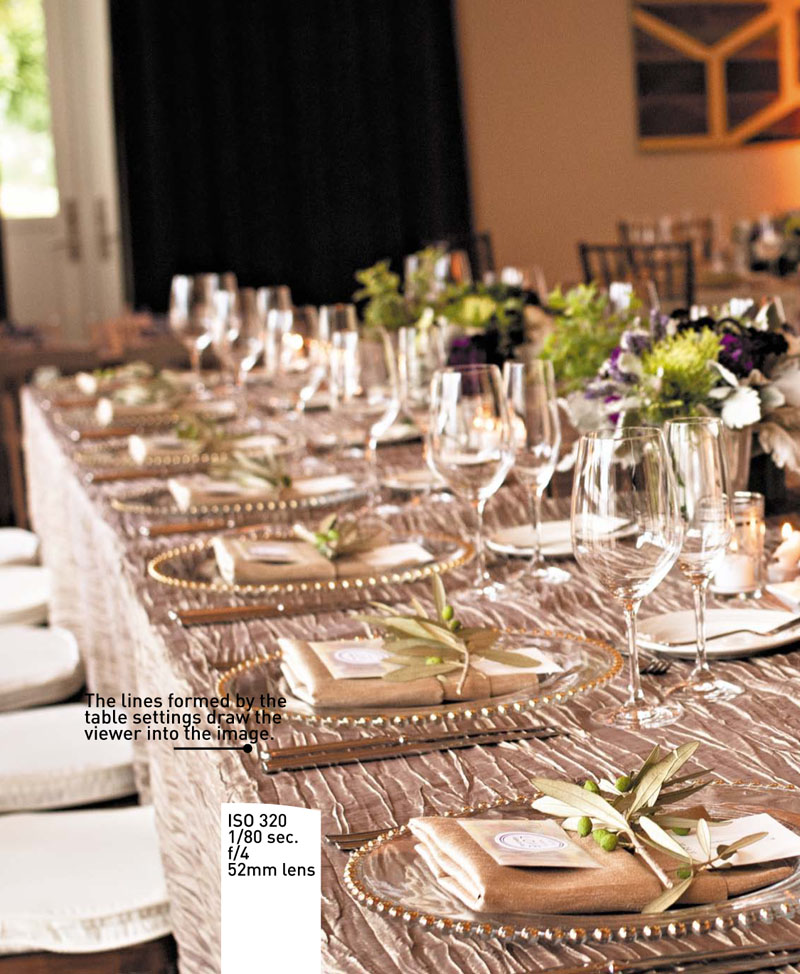
I always shoot the dinner area in its entirety and get a medium shot of a whole table first, while the area is still clear of guests. If timing is tight, I can shoot close-ups of the table elements even as guests begin to enter.
Cocktail-Hour Candids
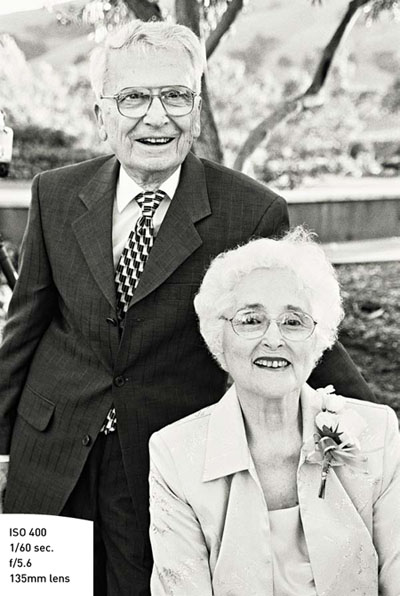
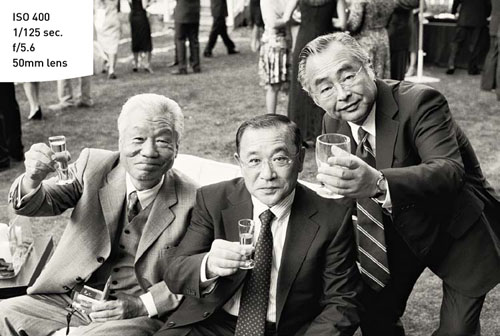
Cocktail hour is often the best opportunity to get casual, candid photos of the wedding guests. I work very quickly and try to document everyone there. By this point in the day, I know who the key players are—family, close friends, members of the wedding party, and so forth—and I give them a little extra emphasis (Figure 7.1). I shoot both very natural, candid portraits and simple, straightforward party shots, where the subjects pose and smile at the camera.
Figure 7.1. Give a little extra attention to the family members. These images will be cherished as the years pass.
Every set of guests has a unique collective personality. Occasionally, the group is quite reserved, and they disregard my presence completely. In that case, I do all my shooting as discreetly as possible and I don’t inject myself into the scene in any way. At other weddings, the guests are a bit looser and enjoy having their photos taken in various combinations, posed and smiling. And why not? They’re in a beautiful setting, they’re dressed up, and it’s a celebration. If the mood is right, I’m not shy about asking guests if they’d like a photo. I look for interesting moments, but let’s face it: Some of these shots simply aren’t the most artful images of the day. Guests love them, though, and clients love to see everyone who was there represented in the images. I just take my cue from the crowd and try to cover everyone with the most natural images possible (Figure 7.2).
Figure 7.2. Even when asking my subjects to pose, I try to keep it interesting.
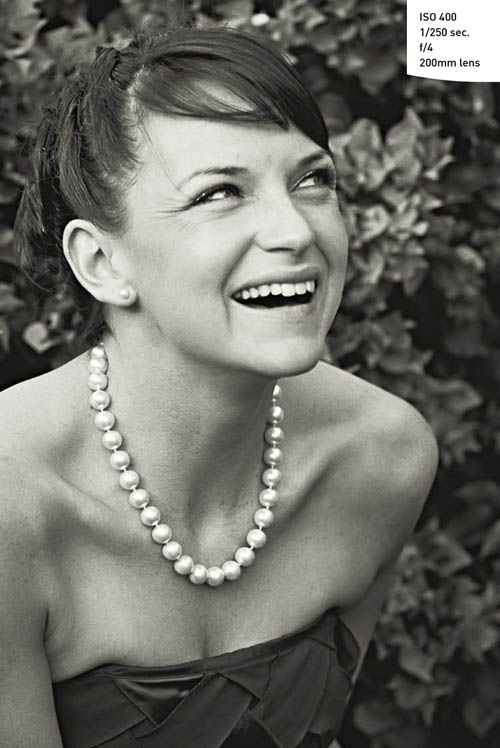
For the more discreet, candid portraits, I use a long lens and shoot very unobtrusively. Since people are busy talking and eating during cocktail hour, I often need to patiently wait a moment or two for a flattering expression—for example, when the subject laughs in the middle of conversation. Because the guests usually have no idea that they’re being photographed, the resulting images are wonderfully spontaneous and often quite striking (Figure 7.3).
Figure 7.3. Sometimes, a little patience is required to capture truly natural expressions.
Lighting
I shoot the cocktail hour with available light when possible, for all the same reasons I’ve described in previous chapters—to remain unobtrusive, to capture images that feel natural, and because, most of the time, I simply prefer the look. But if the light is very harsh or just plain unattractive (for example, bright midday sunlight, or green-toned fluorescent lights sometimes found in museums and other spaces), then I pull out the fill flash. Keep in mind that when using the flash, you’re a little more limited in the allowable distance from the subject (too far, and the flash won’t reach). And if there is anything between you and your subject (such as other people), it could block the path of the light. You need to be a little more direct in your approach, because the light needs a clear path to the subject.
As I work the area, I look for beautiful pockets of available light and interesting angles that will help transform this work from simple crowd coverage to something a little more beautiful and significant. If the cocktail hour stretches over two locations and one location has better light (for example, a hotel ballroom and an adjoining patio are both being used), I cover the whole thing but I linger in the more appealing setting, checking periodically to see if anyone new has arrived.
Lens choice
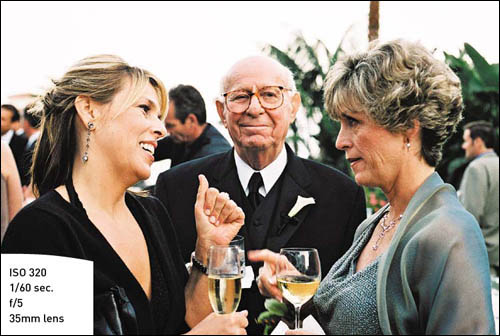
If there is ample space, I love to use my 70–200mm lens to shoot guests from a distance, usually without their realizing it. In this way, I capture very natural images (Figure 7.4). If the space is small or especially crowded, I use a wide-angle lens, such as a 28mm or 35mm (Figure 7.5). It can be fun to use an even wider lens for some novelty shots, but for the majority of my shooting, I avoid using too wide a lens because it can cause distortion and generally isn’t as flattering to people.
Figure 7.4. My 200mm lens allows me to shoot spontaneous, candid images that can be quite beautiful and capture the mood.
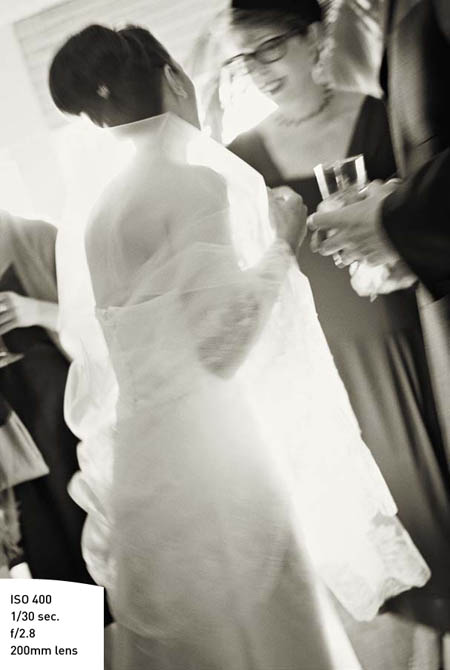
Figure 7.5. This cocktail hour was more crowded, so I used a wider lens to capture fun, expressive images.
Camera settings
If the lighting is consistent throughout the space, I shoot the cocktail hour on Manual so that I have full control over the exposure.
I set my aperture around f/4 for cocktail-hour candids because it gives me enough depth of field to keep the subject sharp and softens the background in the way that I like. If the light is low, I’m comfortable shooting them at f/2.8.
Because people are talking and moving, my preferred shutter speed is around 1/125 sec. to prevent motion blur, but if the light is low, I can stretch it to 1/60 sec.
I choose the lowest ISO possible while achieving the aperture and shutter speeds that I need. I can shoot at ISO 800 or even ISO 1000 and still get great-quality images.
Capturing a variety of perspectives
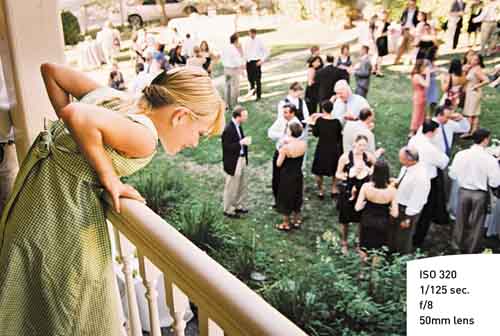
As with every part of the wedding, it’s the combination of many points of view during the cocktail hour that really tells the story. Portraits of individuals, images of groups of people engaged with one another, and long overview shots of the whole scene come together to convey a real sense of the event. Move around a lot, use a variety of lenses (wide, normal, and telephoto), and really look for unique perspectives on the cocktail hour (Figure 7.6).
Figure 7.6. The flower girl led me to this balcony view of the cocktail hour.
Details and Decor
It’s such a treat to photograph all the amazing decor at the wedding, and capturing beautiful images of these details is essential for several reasons. First and foremost, they’re a reflection of the couple’s personal style—especially nowadays, with couples individualizing their weddings in so many ways. These images are crucial to capturing the unique personality of the event. The wedding day story just wouldn’t be complete without images of all the myriad details.
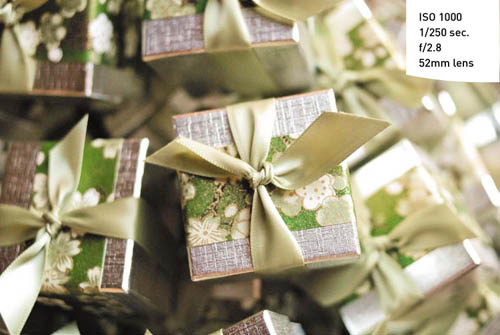
Second, these images showcase the work of the other wedding vendors—planners, florists, designers, cake bakers, rental companies, and so on. Taking care of your colleagues by providing them with wonderful images of their work is crucial to building relationships and establishing yourself within the industry (Figure 7.7).
Lastly, wedding magazines and style blogs are primarily interested in the details and decor of a wedding, so if you’d like to pursue having your work published as a way to promote your business, you need to pay attention to them!
Figure 7.7. The client, planner, and other wedding vendors will all appreciate images that highlight the wedding decor.
Lighting
I like to find either pretty outdoor spots or indoor areas with indirect window light for small items like invitations, favors, and bouquets (Figure 7.8). Be sure to avoid mixed lighting (for example, a situation where daylight from the window and tungsten from the room lights are both hitting the subject) because it creates strange color casts that are difficult (if not impossible) to correct.
If you’re using window light, reflectors can be helpful to bounce a bit of light back into shadow areas, and even if you don’t have a fancy collapsible reflector in your gear bag, you can improvise with newspapers, white napkins, or the paper on which your schedule is printed. Using the reflector is simply a matter of experimentation; position it in such a way that the light bounces from the reflector onto the subject, and then try moving and tilting it in various ways to get the effect you want.
Figure 7.8. I moved this basket of favors to a window for better light.
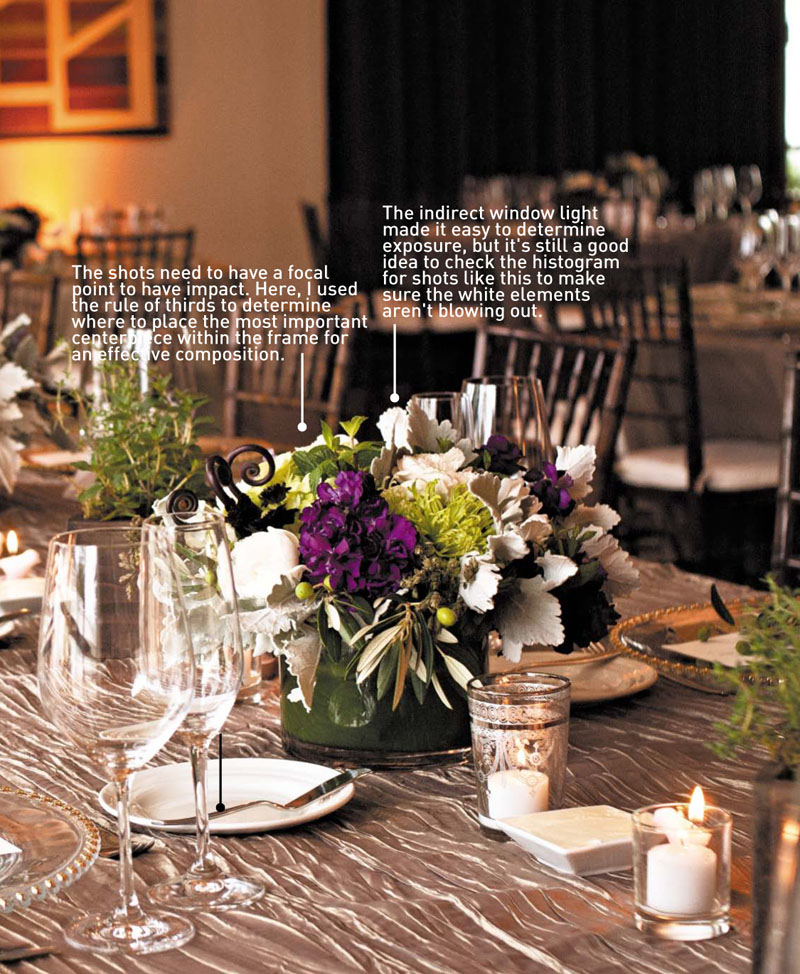
Obviously, you can’t move things like tabletops and cakes to a more favorable lighting situation—you need to work with whatever is available. I use a few strategies to improve the existing lighting. For tables in the dinner area, the first step is simply to select the best ones to highlight. For indoor locations, if the sun hasn’t set, look for a table near a window and shoot from an angle that maximizes the daylight hitting the tabletop (Figure 7.9).
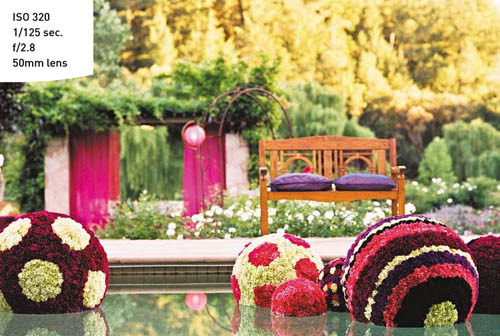
If dinner is outdoors, find the table that is the most evenly lit. If it’s half in full sun, half in shade, making a nice image will be nearly impossible. Backlighting can create a nice romantic effect, but for a crisp, clear image that really shows the details of the floral arrangements and table settings, I prefer the light to be off to the side and only slightly behind (Figure 7.10).
Pay attention to the background when selecting your table and your position. Try to eliminate distracting elements such as speakers, band equipment, and wait-staff trays.
Figure 7.9. For indoor locations, select a table that is illuminated by window light if possible.
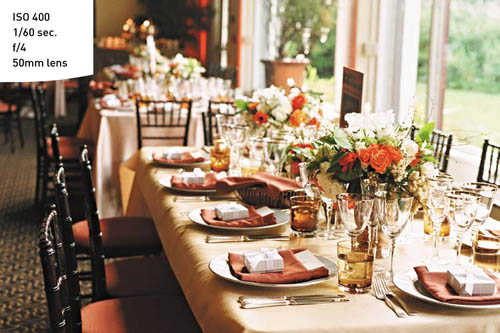
Figure 7.10. When outdoors, find a table that has the most even light. This one has some shadows, but it was late enough in the afternoon that they were softened.
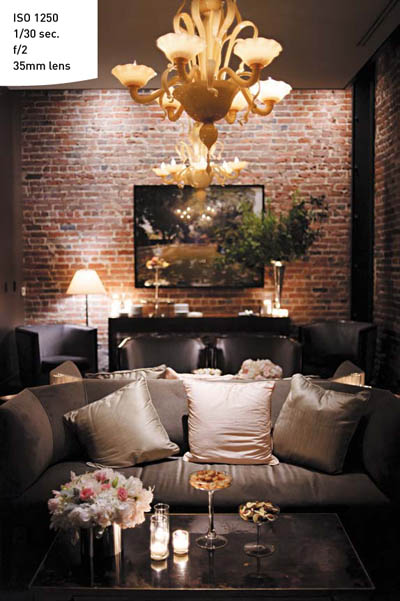
For darker rooms, if I have enough time, I use a tripod and long exposures (often several seconds) because I can shoot with a relatively low ISO to minimize digital noise in the image. The tripod also has the beneficial effect of slowing me down a bit so that I compose things more carefully. Quite often, though, I simply don’t have enough time to shoot using the tripod, so I crank the ISO up to 1000 or so and hand-hold the camera, sometimes at speeds as slow as 1/8 sec. so that I can cover things much more quickly (Figure 7.11). Use the same low-light shooting techniques described in previous chapters: try to lean against something, exhale, hold your breath, and shoot several shots in a sequence to get at least one that’s perfectly sharp.
Figure 7.11. This shot was handheld. Even a few years ago, I couldn’t have expected to get image quality this good at an ISO of 1250, but digital technology has improved dramatically (and continues to improve).
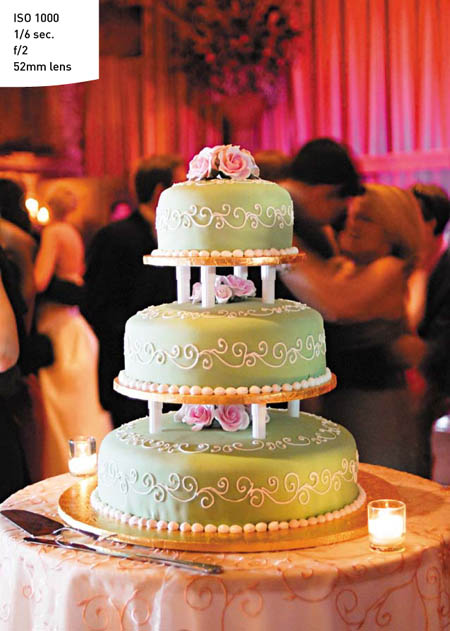
During those pre-dinner moments, my assistant is usually covering cocktail hour, so I shoot the details solo. Later on, when dinner is underway and my assistant is once again available to help me, I can use reflectors or even a video light to add some additional illumination. The video light can be especially useful if there isn’t a lot of event spot lighting on items like the cake and centerpieces (Figure 7.12). I’ll ask my assistant to hold the light off camera from the side. It pays to be on good terms with the videographer at the wedding; sometimes when shooting the dinner area, I tag along with the videographer and “borrow” his light for some of the detail work.
Figure 7.12. My assistant held the video light high and to the left of the cake for a bit of additional illumination.
Lens choice
The two most important features in the lens used for shooting details is the ability to open wide and focus close up. I love my 60mm macro lens, but its widest aperture is 2.8. When I need to shoot a lot of close-ups in a short amount of time, I need to hand-hold the camera, and if the dinner area is dimly lit, then f/2.8 just isn’t fast enough. In this situation, I often use my 35mm lens on a non-full-frame camera because it opens to f/2.0, focuses very close, and acts like a 50mm lens.
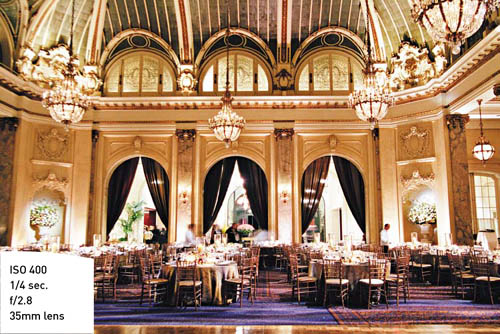
Of course, for shots of the entire room I need something wider (Figure 7.13). I often use the tripod for the overview shots, because it’s just a few setups and it doesn’t add that much time to the process (as opposed to the many individual detail shots that would be very time-consuming to frame and shoot with the tripod). I shoot the room with my 24–70mm or, if the room is small and I need a wider lens, the 17–35mm.
Figure 7.13. I used a wider lens to capture the grandeur of this room and a tripod to ensure a clean, sharp image.
Seize the day
When it comes to shooting details, shoot whatever you see, the moment you see it. Although you may plan to come back later, the schedule could change and you may not have the opportunity after all—or it may not be in the same perfect state by the time you return. Even a quick shot as you walk by of details like the guestbook or favors is better than nothing. If you have time to come back later and compose the perfect shot, wonderful. If not, at least you have it covered.
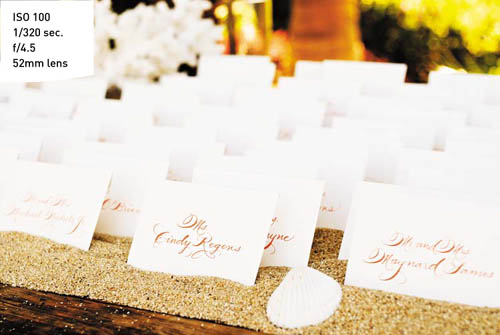
The escort-card table in particular is always a special challenge. It’s the first thing to get picked over when the ceremony is finished, so find it and shoot it beforehand if you can. If that’s not possible because of the way the post-ceremony time is scheduled, and you find that the guests have, indeed, ravaged the escort card table by the time you arrive, take whatever cards remain, arrange them nicely together, and shoot them in close-up (Figure 7.14).
Figure 7.14. If you pass by the escort-card table, shoot it immediately!
Prioritizing shots when timing is tight
The dining area and table tops are usually not photo-ready until just before guests are set to enter the room, and with everything else that needs to be done during cocktail hour, you may find yourself walking into the dining area with only five minutes to shoot. In order to maximize coverage, think about shooting from large to small:
• Shoot the entire room first. Ask waiters and other staff to step aside for a moment so you can get a clear shot. Work quickly so as not to keep them from their jobs.
• Next, pick the table with the best light and get a shot of the whole tabletop. Shoot it from eye level, from table level, and from above. (I remove my shoes and stand on a chair. From that vantage, I shoot straight down onto an individual table setting; then I move the chair back a bit to shoot the entire table from that height.) Pay attention to styling: remove any unattractive elements such as salt and pepper shakers or containers of sugar packets, and adjust the table setting so that it’s perfectly aligned.
• Last, move in on the individual table elements: centerpieces, place settings, glassware, menus, favors, and so on. You can continue to shoot the close-in details even as guests are entering. Likewise, save the cake for later. It can be shot while guests are eating, so don’t use precious pre-dinner moments on it.
Some must-get details are obvious, such as the cake and table settings. Here are a few other items to watch for:
• Views from rooms where the wedding party is getting ready
• The exterior of the church or ceremony site (Figure 7.15)
• Bride and groom escort cards
• The bar setup
• The signature drink (Figure 7.16)
• The types of wine being served
• Hors d’oeuvres
• An overview of cocktail hour
• Bride and groom chair decorations (Figure 7.17)
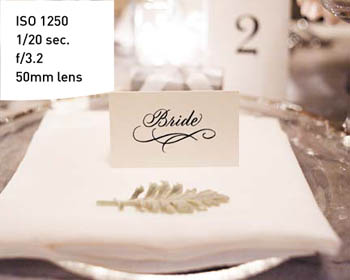
• Bride and groom place cards at the table (Figure 7.18)
• Lounge areas
• The kids’ table
• Entrees
Figure 7.15. Get some distance from the church or reception building for a scene-setting shot of the exterior.
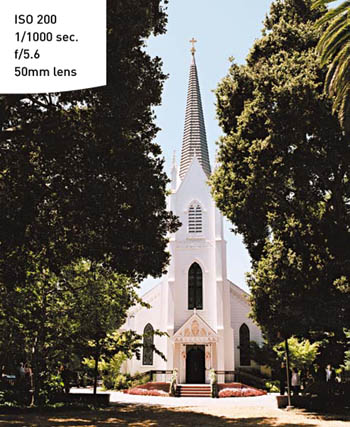
Figure 7.16. Be sure to shoot any special signature drinks.

Figure 7.17. Another easily overlooked detail: bride and groom chair decorations.
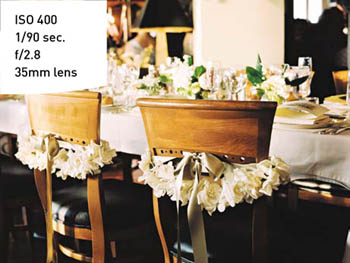
Figure 7.18. Depending on lighting, the bride’s table may not be the best choice for shooting the entire tabletop, but you should definitely get a close-up of her place card.
Moments to Watch For
When you’re shooting the cocktail hour and dinner, watch for the following moments:
• People posing for snapshots with one another: Hustle over and quickly shoot these setups from the side for images that are a bit more casual (Figure 7.19).
• The couple as they enter cocktail hour: Because this is usually their first chance to greet their guests, there are many nice moments—the couple hugging guests, the couple showing off their rings, and so on.
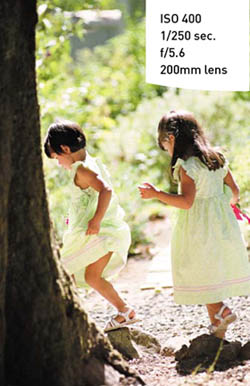
• Kids playing: Kids often provide some very sweet, fun images during this part of the day (Figure 7.20).
Figure 7.19. When I notice guests taking snapshots of one another, I hustle over and grab a quick shot of my own. The resulting images have a casual flair.
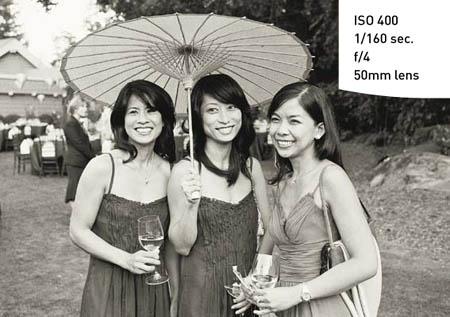
Figure 7.20. Kids often find amusing ways to entertain themselves, so be sure to keep an eye on them for photo opportunities.
Chapter 7 Assignments
Practice Party Shots
Bring your camera to any event that you can—birthdays, dinner parties, family barbecues—and simply practice shooting the guests. Shoot discreetly and get the feel of watching and waiting for that great moment. Get comfortable interacting with people to initiate the more posed party shots.
Reflect on This
There is no hard-and-fast rule for using a reflector—it’s very much a process of experimentation, moving the reflector around at different angles until you see that light is bouncing back onto the subject. Try using a reflector when the light is coming from the side, from above, and so forth. If you have a collapsible photo reflector with two sides, experiment with both to see how it changes the quality of the light. In the absence of this type of reflector, you can use a newspaper, a sheet, a white napkin, or a tablecloth.
Shoot for Variety
Mock up a tabletop near a window (a simple bouquet and one place setting will do) and spend time observing it from every angle. Notice how the look and feel change as your angle to the light changes. See how much variety you can capture with this one setup by using different lenses (macro, normal, and wide) and changing your position—both your distance from the table and your relationship to the light source. You could even use this assignment as a way to build a relationship with a floral designer—ask her to create an actual tabletop to shoot, and give her images for her own portfolio in return.
Share your results with the book’s Flickr group!
Join the group here: flickr.com/groups/weddingsfromsnapshotstogreatshots