
Getting Pictures into Your Computer
You can acquire pictures to use in your computer in several ways. You can store pictures in any folder you like. If you don’t have a preference, use the Pictures folder for your user account. You can always move or copy the pictures to another location later, should the need arise.
Getting pictures from a digital camera
Before we tell you how to get pictures from a digital camera, you should understand that we’re talking about the digital cameras that connect through a USB cable and appear as a USB mass storage device. If the method described doesn’t work for your camera, see the manual that came with that camera for details. You may have to install and use the software that came with your camera to get pictures from it, but the following steps will work with most modern digital cameras:
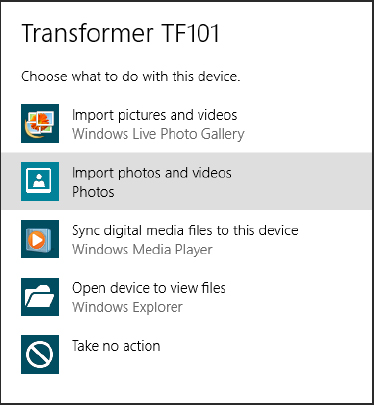
- If you see an auto start dialog box like the one in Figure 23.1, click Import Photos And Videos. Then skip to Step 4.
FIGURE 23.1 AutoPlay options for a digital camera.
- If nothing happens within a minute or so of connecting and turning on your camera, open Windows Live Photo Gallery. Click File in the toolbar and choose Import Photos Or Videos. Then click the icon for your camera and click Import.
FIGURE 23.2 Add a tag to pictures.
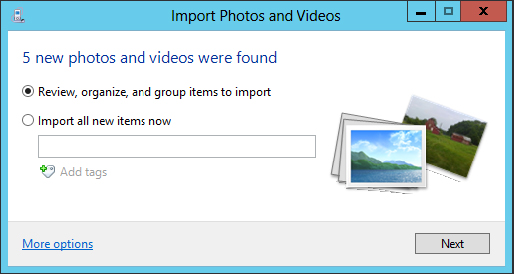
Depending on your camera and the types of pictures (and videos) you imported, Windows Live Photo Gallery might open and display thumbnails of your pictures. However, the pictures aren’t actually stored in Photo Gallery, so don’t worry if you don’t see them there. The pictures are actually in your Pictures folder as described in the section “Using your Pictures folder” later in this chapter.
Getting pictures from a memory card
If you have pictures on a memory card, and your computer has slots for those cards or a card reader attached, you can copy pictures directly from the card. Once you’ve inserted a memory card into a slot, the card is basically the same as any external disk drive. You can use all the standard techniques discussed in Chapter 28 to move, copy, and delete files as you see fit.
Exactly what happens on your screen after you insert a memory card depends on your auto start settings for cards. See Chapter 41 for more information on auto start. Regardless of what happens after you first insert a card, you can always get to its contents through your Computer folder. Here’s how:
FIGURE 23.3 Drive F: contains a memory card.
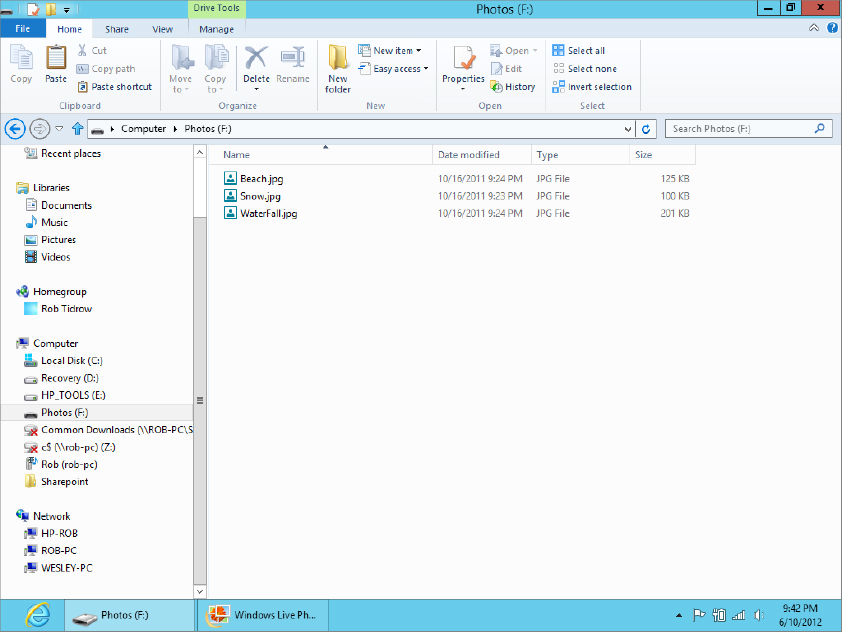
The pictures are copied to the destination folder. You can close the folder that’s open and remove the memory card. Open the destination folder to see the copied pictures.
Getting pictures from a CD or DVD
You can store pictures and copy them in many ways on CDs and DVDs. If someone sends you a CD or DVD that contains only pictures, you will likely see a prompt on the screen shortly after you put the disk into your drive. A simple way to import the pictures from that prompt is to click Import Using Windows Picture And Video Import. Then just follow the instructions that appear on the screen. If you’re prompted to enter a tag, just type in any word or short phrase that describes the pictures. All the pictures will be copied (imported) to your Pictures folder, where you can access them at any time without using the CD or DVD. But you should keep that disk as a backup.
Some commercial CDs might automatically launch some program when inserted. That might leave you wondering how in the heck you’re going to copy pictures from the disk to your computer. The trick is to simply close that program and get to the CD’s contents directly. The process goes something like this:
- If an auto start dialog box asks what you want to do with the disk, click Open Folder To View Photos and go to Step 3.
- If some program opens automatically to show the pictures, close that program and go to Step 2.
- If nothing at all happens within a minute or so of inserting the disk, continue with Step 2.
You won’t need the CD to access those pictures anymore. You’ll be able to access them directly from your Pictures folder. But keep the CD as a backup, in case you accidentally delete or destroy any of the copied pictures.
Getting pictures from a scanner
To get photographs on paper into your computer, you use a scanner. Optionally you can use a film scanner or slide scanner to get pictures from film or slides, but those are a bit more expensive than traditional paper scanners.
The first step is, of course, to install the scanner and any required software as per the instructions that came with the scanner. The second step is to read the instructions on how to work your scanner. The steps we provide here work with most, but not all, scanners and there may be differences among different products. So if all else fails here, read the instructions that came with your scanner to understand the product you own.
The standard operating procedure for more modern scanners goes like this:
- Paper Source: Select the type of scanner you have (flatbed, feeder, or film scanner).
- Paper Size: If you’re using an automatic document feeder to scan multiple items, select the size of the paper you’re scanning. Otherwise, leave this empty.
- Color Format: Choose Color, Grayscale, or Black And White.
NoteFor a black-and-white photo, choose Grayscale. The Black And White option provides only black and white with no shades of gray. Black and white, in this context, is best used only for typewritten documents (black ink on white paper).
- File Type: Choose a file format. Bitmap Image offers the highest quality at the cost of a large file size. Also, bitmap is an older format that doesn’t support tagging and metadata as well as newer formats. Better to use JPEG or PNG for a photo. Use Microsoft Document Imaging File only for typewritten documents, not photos.
- Resolution (DPI): Select your resolution dots per inch (DPI). The larger the DPI the better the quality of the scanned image, but the larger the file will be. Your best bet for color photos is 300 DPI. Use 75 DPI only for black-and-white text documents. The 150 DPI setting is okay for photos you don’t intend to print. You can’t change resolution after scanning, but you can rescan the item.
- Brightness and Contrast: Use these, if necessary, to enhance the picture’s brightness and contrast. You’ll need to do a preview scan to see the effects of any changes you make.
When the scan is complete, the picture appears in the Photo Gallery. The actual picture file is in your Pictures folder.
Using pictures you get by e-mail
Pictures that are embedded in, or attached to, e-mail messages you receive won’t show up in Photo Gallery at first. You need to save the picture(s) to your Pictures folder if you want to access and edit them using techniques described in this chapter.
Exactly how you save attachments and embedded pictures depends on your e-mail program. For most e-mail clients, it’s a simple matter of right-clicking the attachment’s icon and choosing Save As. In the case of a picture that’s visible in the body of the message, right-click the picture and choose Save Picture As. However, do keep in mind that all e-mail clients and systems are different. If you can’t figure out how to save attachments or pictures in your e-mail, search your ISP or e-mail provider’s e-mail support for attachment, or contact its technical support.
Copying pictures from websites
Needless to say, billions of pictures exist on the Internet. You can often find just the picture you’re looking for by going to a site like http://images.google.com and searching for an appropriate word or phrase.
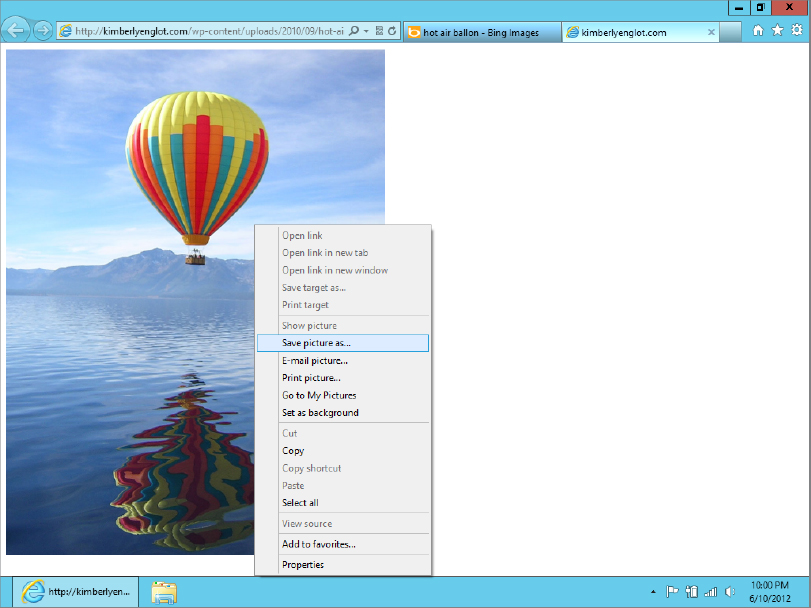
If you find a picture you can use (and you’re not infringing on anyone’s copyright in the process), you can store a copy of the picture in any folder of your choosing. If the picture you see on the screen is a link to a larger copy of the image, click to get to the larger copy of the picture. Then use whatever options your web browser provides to save a copy of the picture. Here are the steps for Internet Explorer, the web browser that comes with Windows 8:
FIGURE 23.4 Saving a picture
- To put the picture in a subfolder of the folder you just opened, double-click that subfolder’s icon.
- Change the filename of the picture to a filename of your own choosing.
- Click to the right of the Save As Type label and choose a format. (JPEG works best if you plan to use Windows Live Photo Gallery.)
A copy of the picture is saved in whatever folder you specified in Step 2.
Copy-and-paste pictures
You can copy an open picture from just about any document to any document that accepts pictures. For example, you can copy-and-paste a picture from a web page to a Microsoft Word document. You just have to make sure the picture is open (not just an icon or thumbnail). To copy-and-paste an open picture:
You can use the same technique to make a copy of a picture within a folder or Windows Live Photo Gallery. Right-click the icon or thumbnail of the picture you want to copy and choose Copy. Then right-click some empty place within the folder (perhaps after the last icon) and choose Paste. The copy will have the same filename as the original, followed by –Copy.
Taking screenshots
A screenshot is like a photo of something you see on your screen. Most of the pictures in this book are screenshots. You can create screenshots in Windows 8 in two ways. One is to use the Snipping Tool. The other is to use the Print Screen key.
The Print Screen key gets its name from the early days of computers where pressing it actually printed whatever was on your screen at the moment to paper. It hasn’t worked that way in a long time. Today the Print Screen key takes a snapshot of the screen and puts it in the Windows Clipboard where it just sits waiting for you to paste the Clipboard contents (or until you copy or cut something else to the Clipboard). You can use the Print Screen key in three ways:
- Print Screen: Takes a snapshot of the entire screen.
- Alt+Print Screen: Takes a snapshot of the active window only.
- Windows+Print Screen: Takes a snapshot of the entire screen, saves it to the PictureScreenshots folder, and names it using the format Screenshot.png, Screenshot (2).png, Screenshot (3).png, and so on.
To make a screenshot, get the screen looking the way you want. Then follow these steps:
You won’t see anything on your screen. But rest assured, the screenshot is saved as a file in whatever folder you specified in Step 7, with whatever filename you specified in Step 6. If you chose your Pictures folder in Step 7, you’ll find the file when you open your Pictures folder, described next.