
Chapter at a glance
Add
Add a Microsoft email account to the Mail app, page 216
Connect
Connect to your Facebook account by using the People app, page 227
Manage
Manage your schedule by using the Calendar app, page 233

Record
Record video and take pictures by using the Camera app, page 242
IN THIS CHAPTER, YOU WILL LEARN HOW TO
Being social is a key component of nearly everyone’s computing life. Windows 8.1 tries to meet the need for interaction with our friends, family, and coworkers by offering a few well-integrated apps: Mail, Calendar, and People. These apps are built into the operating system but are also available in the Windows Store. To complete the social experience, you can also use the Skype app so that you have all the important social tools available at your fingertips.
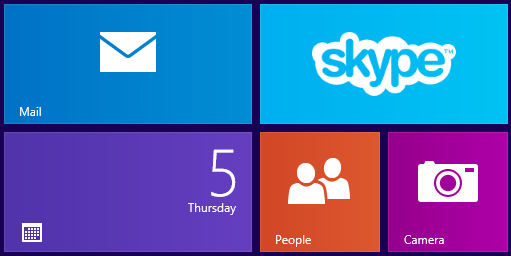
The tiles of these apps are found on the Start screen. At first, they are static and don’t display any data. When you start using the apps, their tiles automatically display live data such as updates from your friend on Facebook whose birthday is today or the schedule of your next meeting.
These apps are well integrated and, after you add an account to one of them, it can be accessed from all the others. For example, you can add your Outlook.com account to the Mail app. Then, you can view your Outlook.com calendar in the Calendar app and your Outlook.com contacts in the People app.
You can use the Camera app when you need to take pictures or record video via your webcam. With it, you can also change your Microsoft account profile picture or take a picture that is later on used as the wallpaper for the Windows 8.1 lock screen.
In this chapter, you’ll learn the basics about using the social apps included in Windows 8.1 (Mail, People, Calendar), the basics about using the Camera app and a bit about Skype and its main features.
Practice Files
The practice files you will use to complete the exercises in this chapter are in the Chapter07 practice file folder. Before you can complete the exercises in this chapter, you need to install the practice files specified in the section “Using the Practice Files” in the Introduction of this book to their default location.
The Mail app runs in full-screen mode, just like all Windows 8.1 apps. Its interface is minimalistic and focuses on browsing and reading your email messages. Unfortunately for users who are accustomed to the Desktop, it might not be easy to find your way at first, so learning the basics of navigating this app is the place to start. As you’ll see in this section and the ones that follow it, Mail is a simple app that is easy to learn.
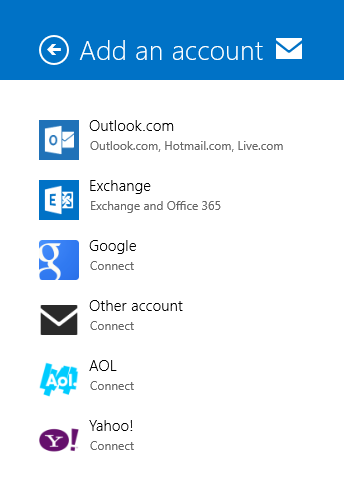
When you open the Mail app for the first time and no email accounts exist, you are asked to add them. You can add many types of email accounts: Outlook (which works with @live.com, @hotmail.com and @outlook.com email addresses), Google (if you are using a @gmail.com email address), AOL, Yahoo and other accounts, including business email accounts that use Exchange ActiveSync or IMAP for sending and receiving email messages.

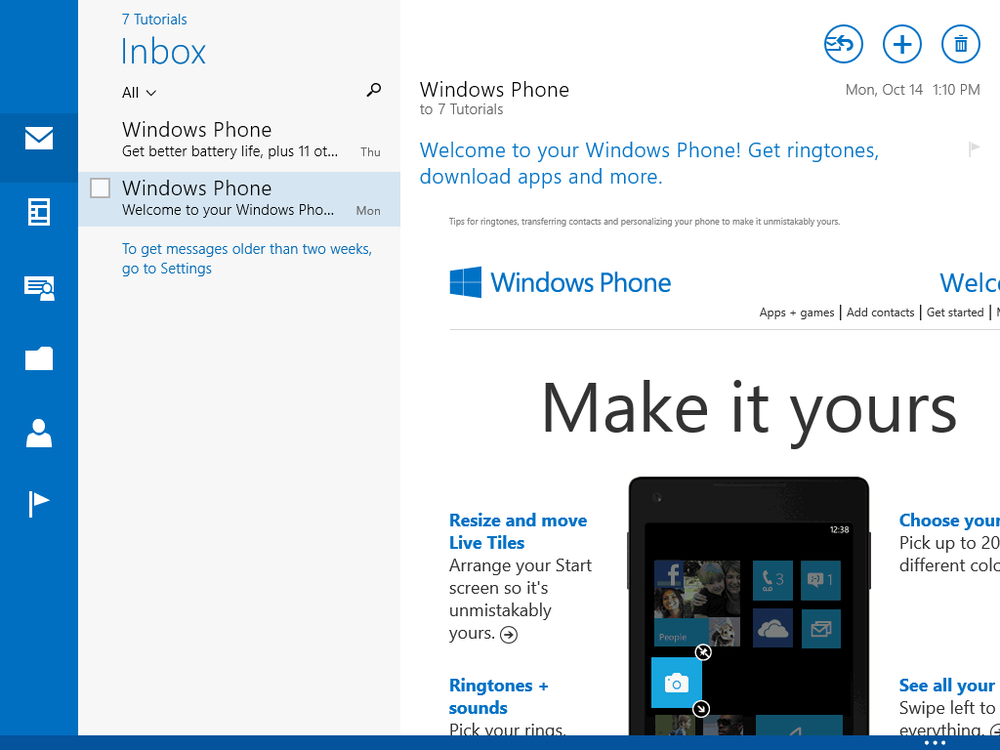
As soon as you have added email accounts, things change. The app window is then split into three columns.
In the column on the left are useful shortcuts for your Inbox, newsletters, social updates, email folders, favorites, and flagged messages. If you have set up multiple email accounts in the Mail app, on the bottom of this column you will also see the Accounts icon. Click this to switch between your email accounts. On screens with resolutions of 1366×768 or higher, the Accounts icon is replaced by the name of each email account added to the Mail app. Click the account you want to use in order to access it.
In the middle is the Inbox column, displaying the inbox folder for the selected email account. The name of the sender, the date or time of receipt, and the subject are all displayed for each message. This column can also display messages from folders other than your Inbox (Sent Items, for instance) depending on what you select in the first column.
On the right, the messages you select are displayed in their entirety.
To display a contextual menu, right-click or swipe upward from the bottom edge. This menu includes the following buttons:
Manage Folders. Opens a menu that contains options for emptying the current folder, marking the emails as read, creating a new folder, or creating a new subfolder and pinning to Start the current folder.
Select. When you use this button, the current message is selected and check boxes appear for the other messages in the current folder. You can choose other messages simply by selecting the corresponding check box.
Move. Use this button to move the selected message(s) to another folder.
Sweep. Use this button to delete the selected message plus other messages from the same sender. Your sweeping rules can also be enabled so that they are applied automatically to future messages from the same sender.
Junk. Marks the selected message as junk or spam and moves it to the Junk folder. If you are browsing the Junk folder, the button is changed to Not Junk. When pressing it, the selected message is no longer marked as junk and it is moved to the Inbox.
Flag. Use this button to flag the selected message, so that you can easily find it in the future. Flagged messages are also displayed in the Flagged folder. When selecting a flagged message, the button is renamed to Remove Flag and does what its name implies.
Mark Unread. Use this button to mark the email message that is currently open as unread.
Delete. Use this button to delete selected message(s).
Open Window. Opens the selected message in a new Mail app window.
More. Pressing this button displays a small menu with options for synchronizing your mail and printing the selected message.

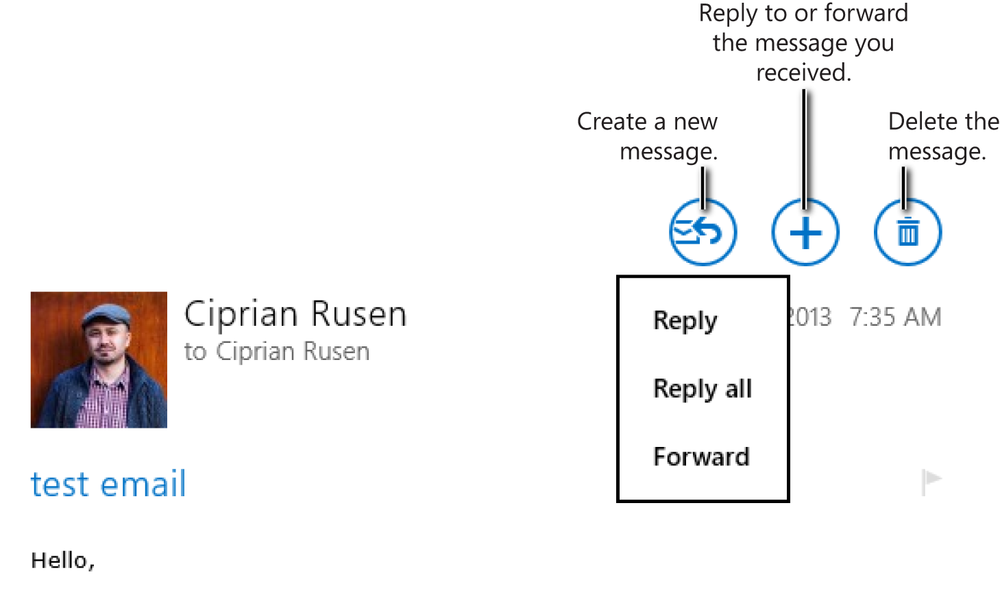
The three buttons in the upper-right corner of the window do the following:
Open a small menu with options to reply to the message or forward it to other people.
Create a new email message.
Delete the email message.
Just like with any other Windows 8.1 app, you can change the settings of the Mail app by using the Settings charm. There, you have options for grouping messages by conversation, when to mark unread messages as having been read, and lots of options for configuring each email account, how it gets synchronized, how often, and which items are synchronized, etc.
Important
One aspect that you should keep in mind is that the Mail app interface is very adaptive to the amount of screen space available. Depending on your display and its resolution, some of its buttons get merged or expanded. On High Definition (HD) displays, it will look different than on the screen shots displayed in this chapter.
You can add any number of email accounts from different email services to the Mail app. By default, it is well integrated with the popular Outlook service from Microsoft and Gmail from Google. You can also add business email accounts that use Exchange ActiveSync or IMAP for sending and receiving email messages.
The integration with Outlook.com is very good and you can add multiple email accounts to the Mail app. Outlook.com has been integrated with the older Hotmail.com and Live.com services and it is the current email service provided by Microsoft. If you have a @live.com, @hotmail.com or @outlook.com email address, when you set up the Mail app, you should choose Outlook as the type of account you want to add.
In this exercise, you’ll learn how to add a Microsoft email account to the Mail app. To demonstrate the integration with older email services from Microsoft, I will be using a sample @live.com email address.
Set Up
Ensure that your Windows 8.1 device is connected to the Internet. Then, open the Mail app and have your account details at hand (the correct email address and password).
Press Windows key+C or swipe from the right side of the screen and then select the Settings charm.
Click Accounts to open the list of accounts already added to the Mail app.
Click Add An Account to open the list of types of accounts that you can add.
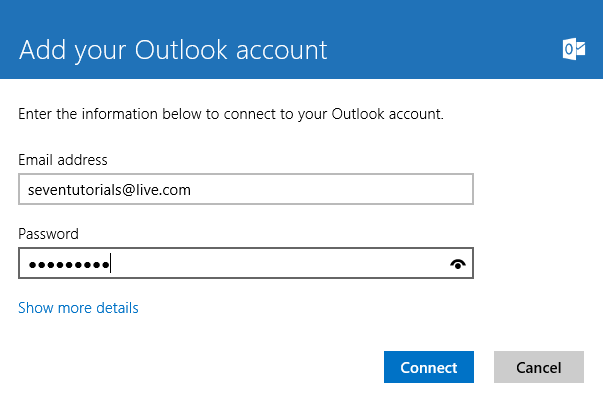
Click Outlook to open the Add Your Outlook Account window.
Type the email address and password in the appropriate boxes.
Click Connect. Wait a few seconds for the Mail app to connect to your email account and display the messages in your inbox.
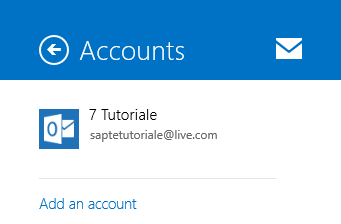
The email account you specified is now added to the Mail app and can be accessed each time you use the app.
Adding a Google account to the Mail app
You add a Google email account to the Mail app the same way you add an Outlook account except that you click Google instead of Outlook.
Many Google users use a two-step verification process that enhances the security of their email accounts and lowers the chances of unwanted people gaining access to the accounts. If this process is enabled for your Google account, you cannot use your standard Google password to add your account to the Mail app. First, you need to generate a new app-specific password just for the Mail app and use that instead of your password at step 5 in the preceding exercise.
You can generate app-specific passwords by going to your Google account, choosing Security, and then clicking Manage Your App Specific Passwords link, in the 2-Step Verification section. Choose an appropriate name for the new app-specific password and then click Generate Password.
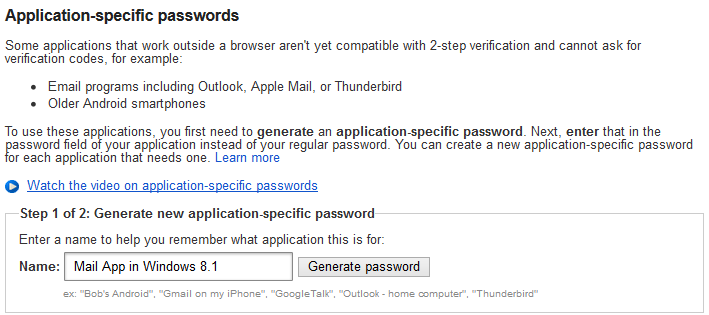
Google generates a random password that you can type in the Mail app instead of your Google mail password to access the messages in your Google account.
When sending files as email attachments, you use both inbox space and some bandwidth when uploading the file. The recipient will also use space and bandwidth.
By using the SkyDrive app, you upload a file once to your SkyDrive and then share it by email, using the Mail app, with as many people as you want. You don’t need to upload the file each time you want to send it to someone.
The people to whom you send the file can access it through a direct link that is automatically included in the message. It doesn’t fill up their inbox space, and they can download the file if and when they want.
You can share files with anyone; it doesn’t matter whether the person uses the SkyDrive service. Also, you can type the email address of the people to whom you want to send it or select them from your list of contacts stored in the People app.
In this exercise, you’ll learn how to send an email message that shares a file uploaded to your SkyDrive.
Set Up
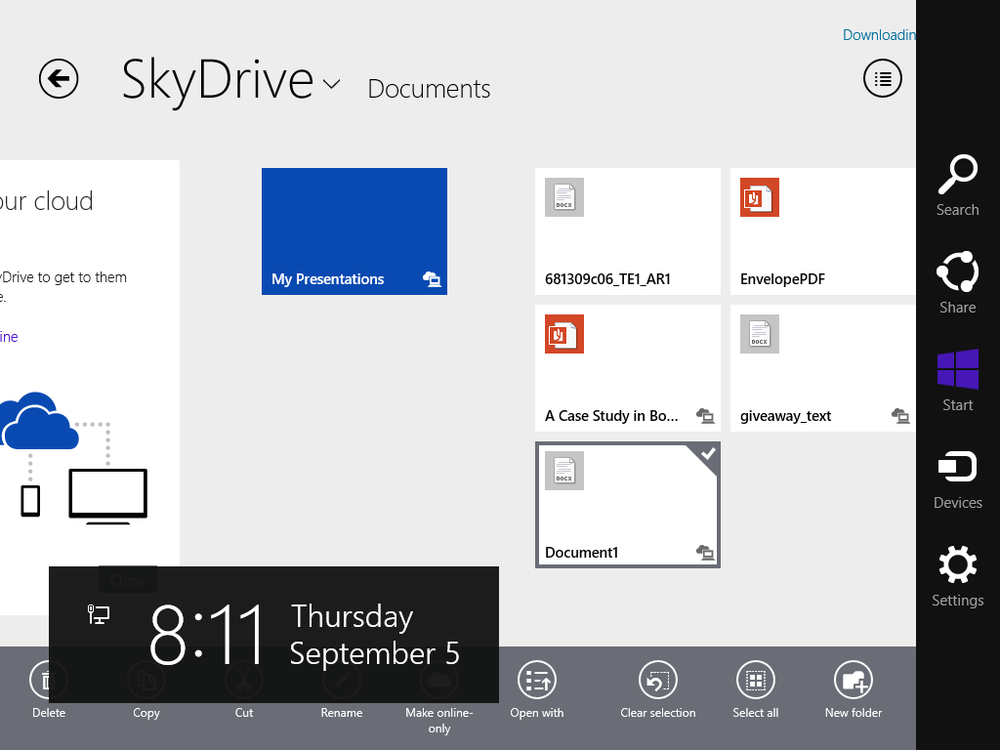
Ensure that your Windows 8.1 device is connected to the Internet. To complete this exercise, you need the Document1.docx file in the Chapter07 folder in your practice files. When this file is available, open the SkyDrive app and upload this file. After the file is uploaded to SkyDrive, follow the steps in this exercise.
In the SkyDrive app, right click the Document1.docx file; a check mark appears in the upper-right corner of its icon.
Press Windows key+C or swipe inward from the right side of the screen and then click Share.
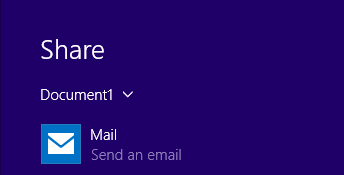
Click Mail to display the Mail app on the right side of the screen.
In the To field, type the email address of the person to whom you want to send the message.
In the body of the message, type the message that you want to send.
In the upper-right corner of the Mail app window, click the Send button.

The email message has been sent, and the recipient can access the SkyDrive file from the direct link included in the message.
The People app displays all the contacts you have for all the email accounts and services you have added in the Mail app and, through your Microsoft account, it can access social networking services such as Facebook, Twitter, and LinkedIn, as soon as you authorize your Microsoft account to access these services. You can also add your Skype account. The People app downloads all your friends and contacts and share their latest updates.
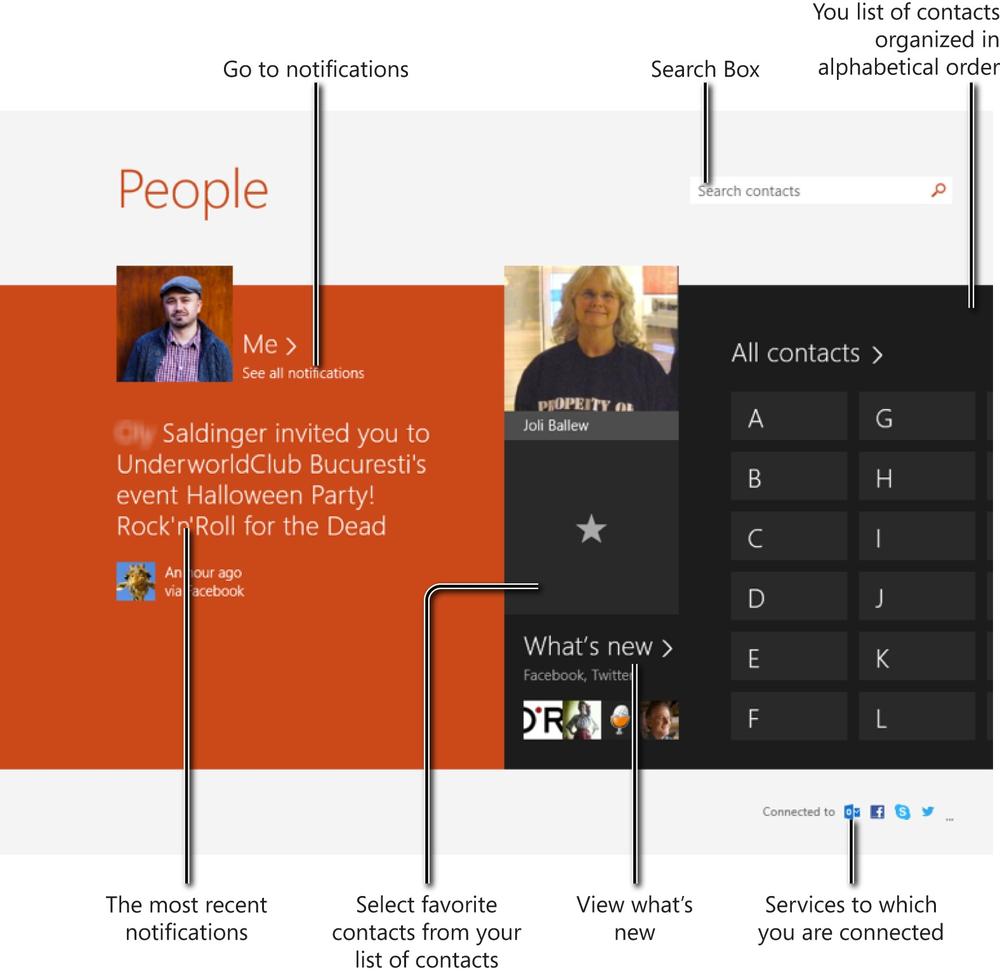
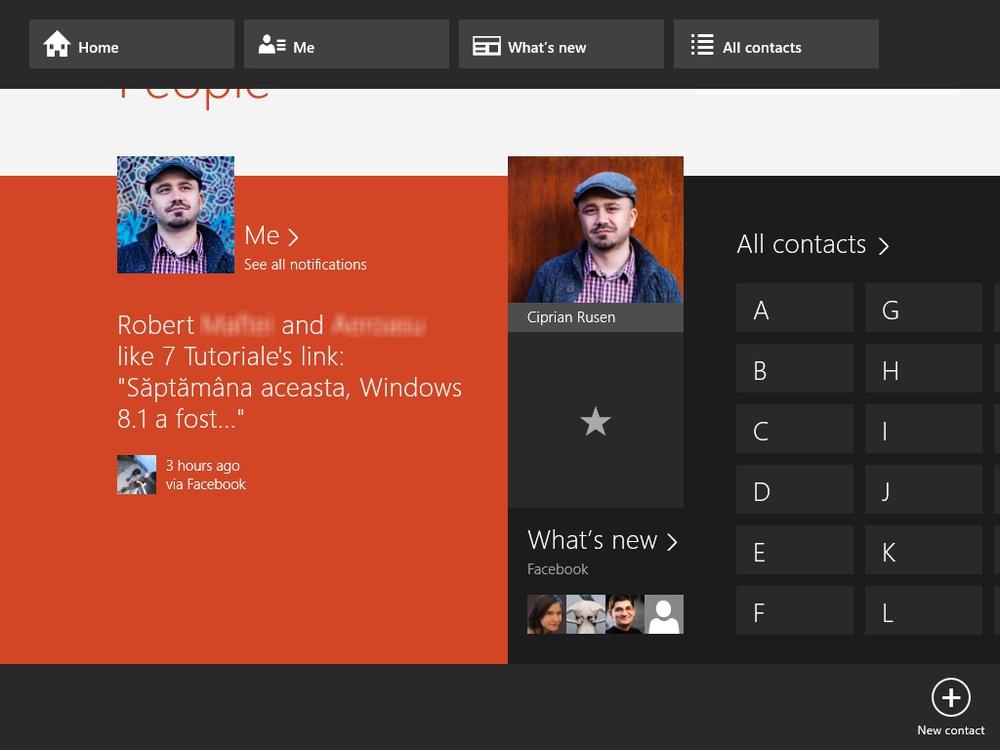
When you open the People app, you are presented with plenty of information. A column on the left named Me is for viewing notifications, including the most recent one. Next, you can view contacts you have set as favorites and their pictures. A click opens their contact details. Below that is the Favorites button, which you can use to mark other people as your Favorites. When you do that, their pictures are added next to the others, and you will be able to quickly access their contact details and their latest updates. Below the Favorites button is the What’s new section for viewing the latest posts and updates on the social networks to which you are connected. On the right, your contacts are listed, grouped in alphabetical order. In the lower-right corner, in the Connected To section, there is a list of icons that represent the accounts to which the People app is connected. In the upper-right corner is the Search box. You can use this to quickly find contacts by typing their name.
You access a contact by clicking the letter it starts with. The People app shows the contacts whose names start with that letter. Click the person you are interested in.
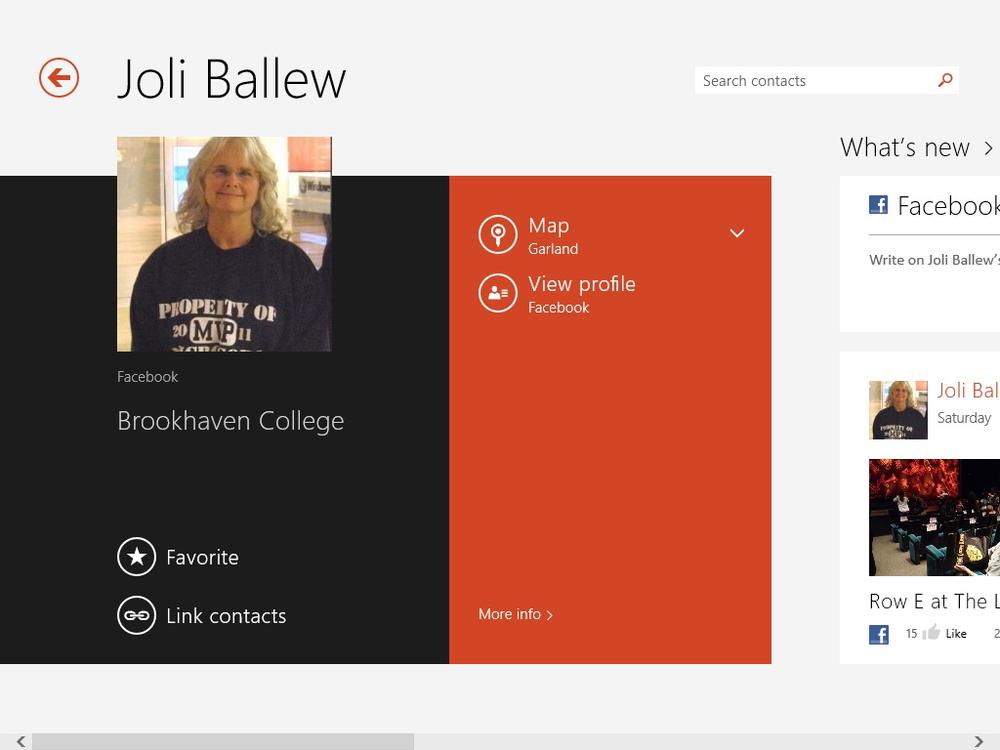
When opening a contact, you can see the contact details that have been stored and, if available, any updates from that person on the social networks to which you are connected.
To show the menu with contextual options, right-click or swipe upward from the bottom edge of the screen to display the following buttons:
Home. Returns you to the People area. It serves as a shortcut that takes you to the home screen of the People app.
Me. Shows your updates and notifications on the social networks to which you’re connected.
What’s New. Shows updates from all your contacts on all the social networks to which you’re connected.
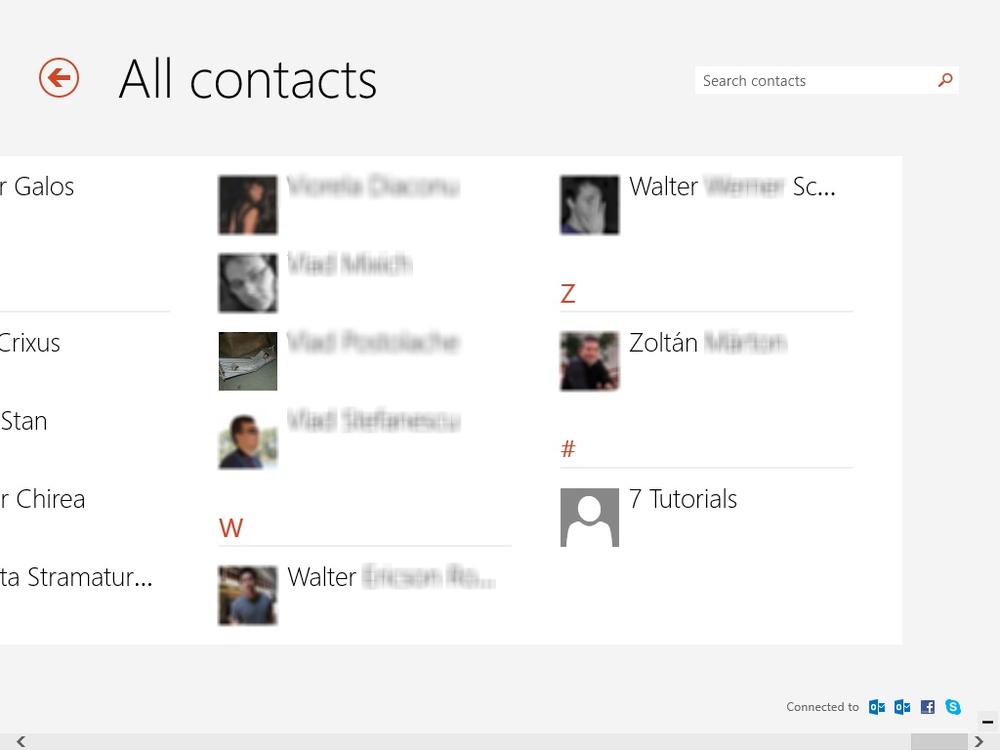
All Contacts. Opens a list with all your contacts, listed in alphabetical order.
New Contact. Click this to create a new contact.
As you can see, using the People app is relatively easy. If you integrate it with the social networks you are using, it can be a great tool for managing your connections with other people.
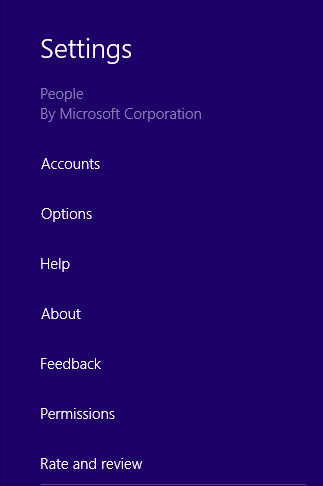
To configure the People app, use the Settings charm. From there, you can add new accounts, manage existing accounts, and set options like how your contacts are sorted and whether you would like to hide contacts from a specific list of accounts.
You can easily integrate the People app with Facebook. After you add your Facebook account, your Microsoft account is also connected to it, so your contacts will be synchronized with Facebook.
If your Microsoft account (Formerly Windows Live ID) is already connected to your Facebook account, your Facebook friends will show up in the People app, and you won’t need to add the Facebook account again.
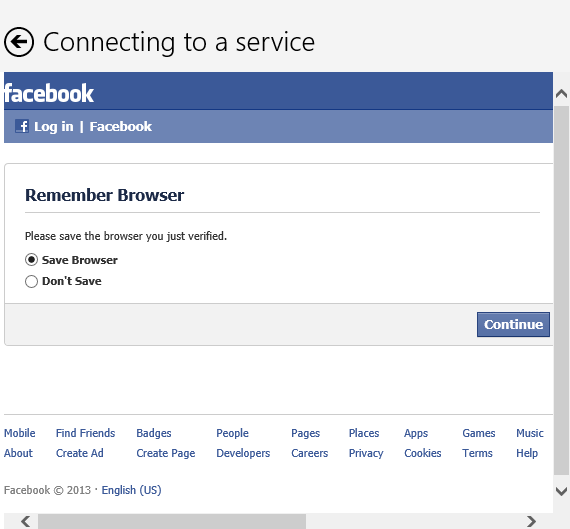
When you connect the People app to your Facebook account, Facebook asks whether to remember the browser used to access it. Because the People app will access your Facebook account often, in order to deliver the latest updates, it is best to choose Save Browser.

Last but not least, you will be asked whether you want to let Windows remember your Facebook sign-in name and password. Choosing Yes allows the People app to get the latest updates automatically, without asking for your Facebook password, each time it tries to connects to this social network to the latest data.
In this exercise, you’ll learn how to add your Facebook account to the People app.
Set Up
Ensure that your Windows 8.1 device is connected to the Internet and then open the People app.
Press Windows key+C or swipe inward from the right side of the screen and select Settings.
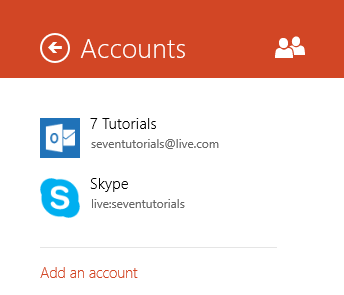
In the Settings pane, click Accounts.
At the bottom of the Accounts window that opens, click Add An Account.
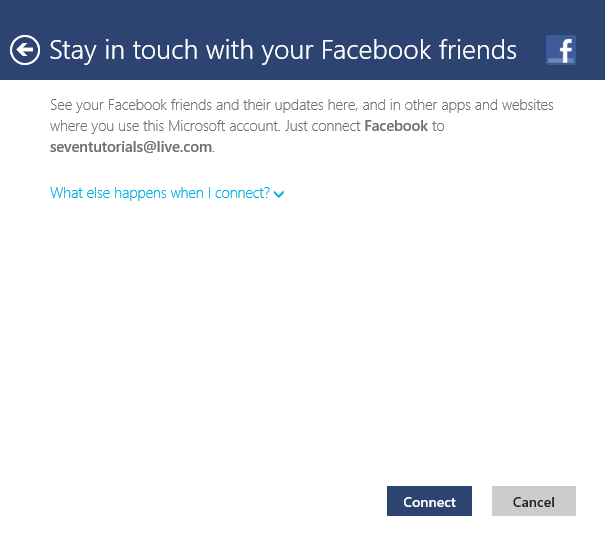
Click Facebook and then wait for a few seconds.
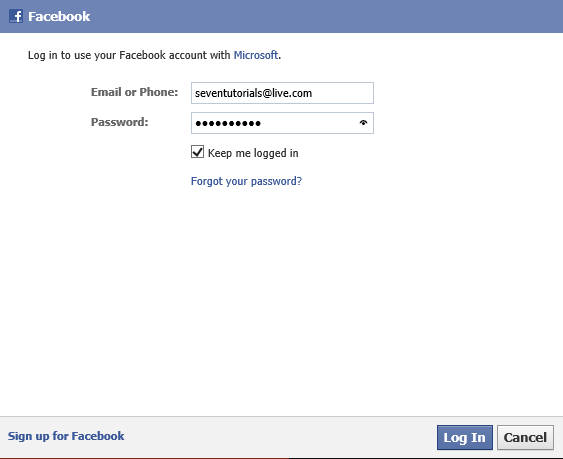
Click Connect. At the prompt, type your Facebook login details.
Type your email address and your password and select the Keep Me Logged In check box.
Click Log In.
You are asked whether you want to remember the browser you are using.
Select Save Browser and then click Continue.
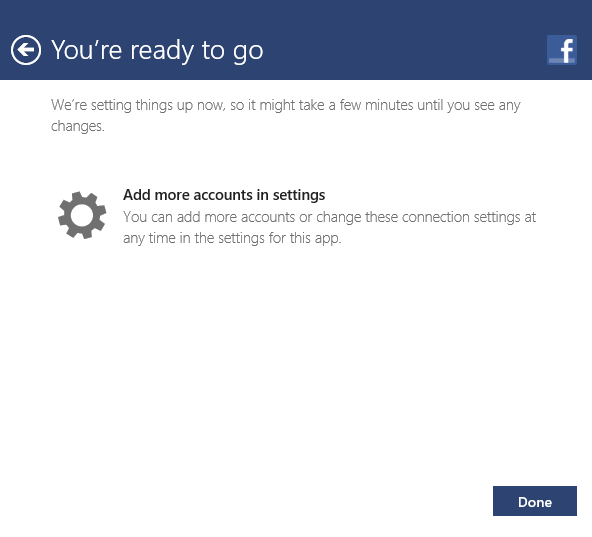
After a few seconds, you receive the announcement that you’re ready to go.
Click Done. You are then asked whether you want to let Windows remember your sign-in name and password.
Click Yes and then wait for the People app to download and synchronize your Facebook data.

The People app needs some time to synchronize with your Facebook account. Don’t be surprised if it takes minutes instead of seconds, especially if you have a slow Internet connection or many friends and updates that need to be synchronized.
You can add new contacts from the People app to all your email accounts. However, the People app cannot add contacts to the social networks to which you are connected. You have to do that by accessing the individual social networks themselves in a web browser such as Internet Explorer.
In this exercise, you’ll learn how to add a new contact to the People app.
Set Up
Ensure that your Windows 8.1 device is connected to the Internet and then open the People app.
Right-click to open a contextual menu at the bottom of the window.
Click New Contact to open the New Contact window.
In the Account list, select the account in which you want to store this contact.
Complete the contact details that you want to store.
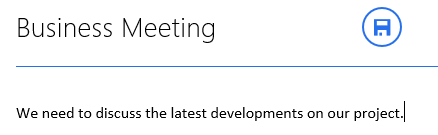
In the upper-right corner, click the Save button (the diskette icon).
The new contact’s page appears, complete with the data you just added.

The contact you created is saved and automatically synchronized with the account you selected.
Editing or deleting a contact from the People app
When you access a contact in the People app, you can view information about it, edit it, add to it, remove information from it, or delete the contact. You can also pin the contact to the Start screen, set it as a Favorite, or link it with another contact from another account. All these activities are initiated from the contact’s page or the contextual menu. To access that menu, first, open the contact that you want to edit and then right-click the screen or swipe upward from the lower edge of the screen.
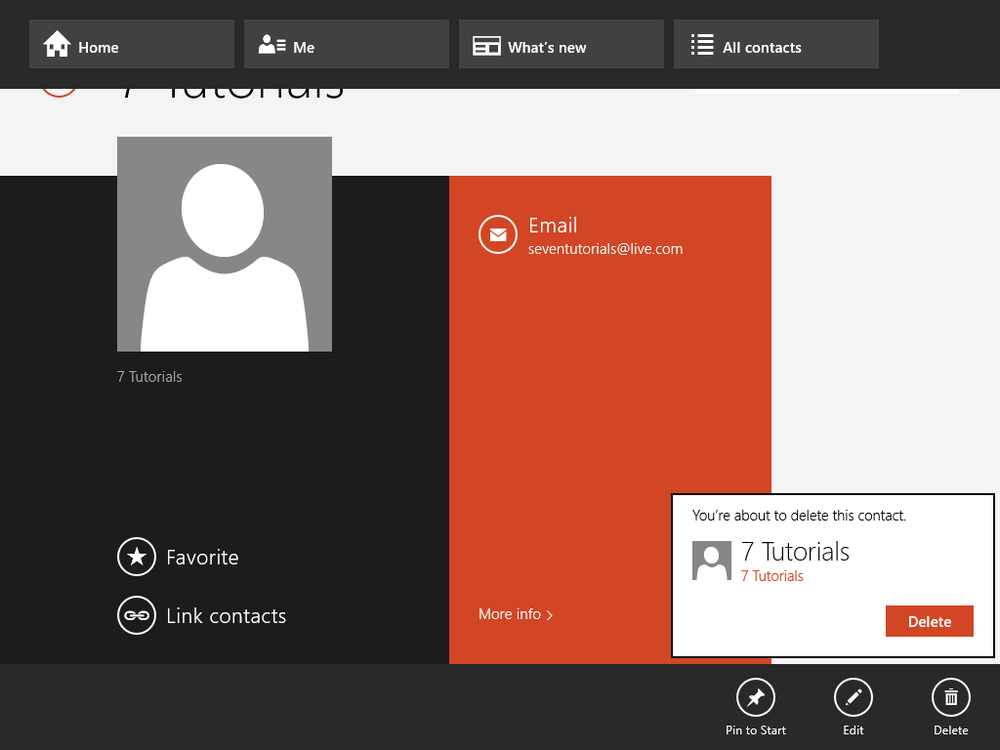
You can delete only contacts that are stored with your email accounts. To delete contacts from the social networks to which you are connected, you must access those social networks in a web browser.
The Calendar app is very simple. It automatically takes your calendar data from all the email accounts you added in the Mail app and shows all events from all accounts. When you open it, it displays the What’s Next view that shows upcoming events in your calendar.
To change how you view the calendar, right-click the screen or swipe upward from the bottom edge of the screen. A contextual menu appears, presenting several options. On the top are buttons for changing how you view your calendar: by day, by week, or by month. On the bottom is a button for synchronizing your calendar, one for changing the background of the What’s Next View and one for adding a new event to your calendar.

When selecting another view other than the default, the events are shown in different colors, each color representing the account to which the event was added. You can add new accounts or edit the permissions and different options for the Calendar app by using the Settings charm. Also, each time you add an email account to the Mail app, its calendar is synchronized automatically by the Calendar app.
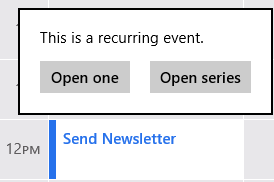
To open an event, click it. When you open a recurring event, you are asked whether you want to Open One or Open Series. If you click Open One, only the current event opens, and any changes you make effect only that specific event. If you click Open Series, you open the series of recurring events, and any changes you make will be applied to the entire series.
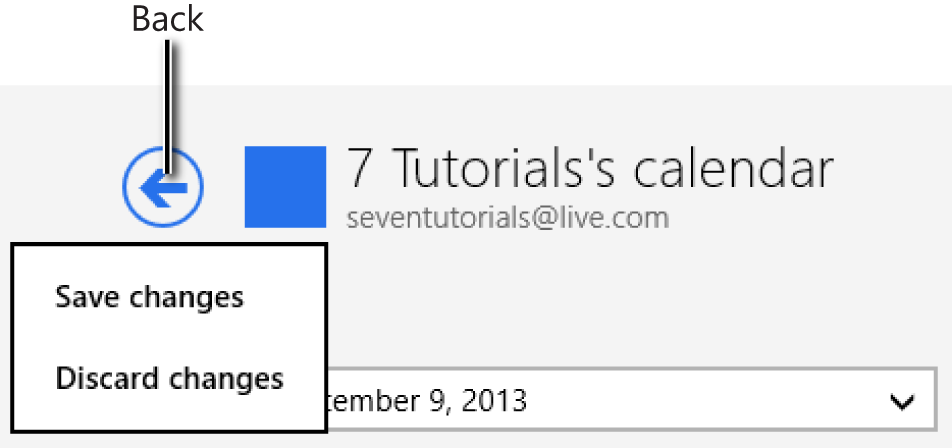
When you open the event, you can add details to it or remove details from it. To save your changes, in the upper-right corner, click the Save button (the diskette icon). To delete the event, click the Delete button (the trash-can icon).
To close the event without saving the changes you made, in the upper-left corner, click the Back button. You are asked whether you want to save your changes. Choose Discard Changes.
As you can see, the Calendar app is not complex, and you will likely become familiar with the way it works, with little effort .
Adding an event to any of your calendars is an easy task, too. However, you need to complete some information for the event to be created and saved. The Calendar app asks you to complete the following fields:
Calendar. Select the calendar on which you want this event to be saved.
When. You must fill in the date when the event is taking place.
Start. You must fill in the hour when the event starts.
How Long. Fill in the duration of the event. The default value is one hour, but if your event doesn’t last that long, it is best to change the duration to the length of time you expect it to last.
Location. In this field, you specify information about where the event takes place, but you do not have to fill in this field.
Who. Use this box to invite others to the event and share the event details. You can type the email addresses of the people you want to invite.
How Often. You can set the frequency of the event. It can be set to once or every day, every weekday, and many other values.
Reminder. Set this to specify when you want to receive a reminder about the event and for how long in advance of it you want to be reminded. You can choose one of the following values: none, at start time, 5 minutes, 15 minutes, 30 minutes, 1 hour, 18 hours, 1 day, or 1 week.
Status. Use this box to set your status during the event to show others who have access to your calendar data. The default value is Busy. Other choices include Free, Tentative, and Out Of Office.
Private. This option is useful when your calendar is shared with others. If you set the event as private, other people can’t view the details of this event.
Add A Subject. Use this box to add a name for the event.
Add A Message. Use this field to add a message to share with the people you will invite or to add any information that is useful to you or others.
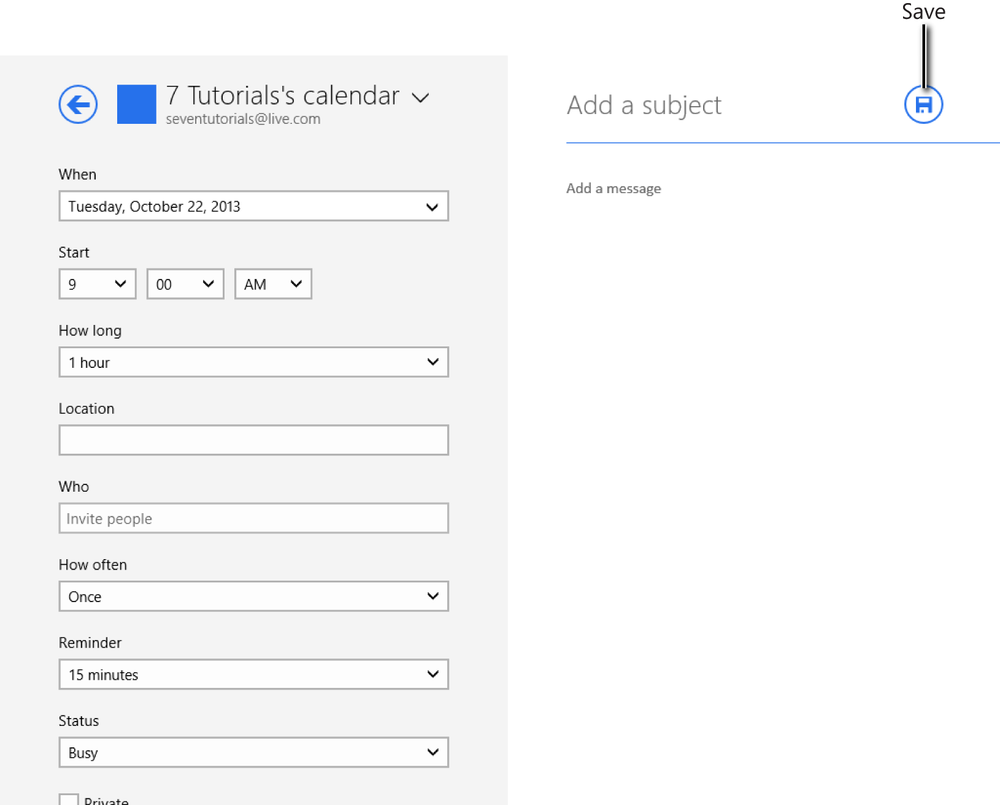
To save the event, in the upper-right corner of the window, click the Save button. If you have invited other people to the event, the Save button will change to a Send Invite button. Clicking it saves the event in your calendar and sends invitations to the people you specified in the Who field.

In this exercise, you’ll learn how to add a new event to your calendar.
Right-click or swipe upward from the lower edge to open a contextual menu at the bottom of the window.
Click the New button to open the window for creating the event.
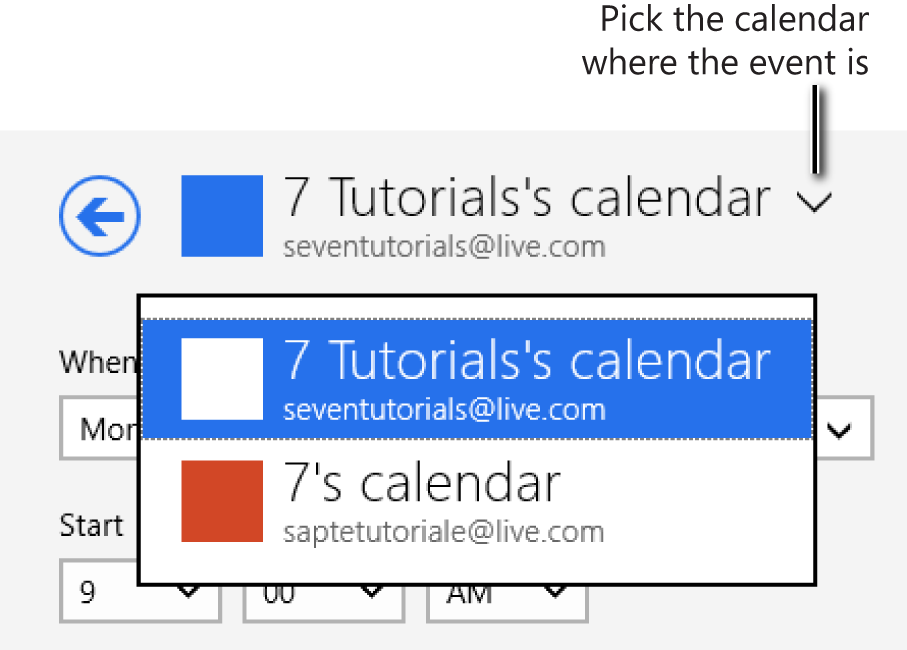
At the top of left column, click the name of the current calendar or the arrow adjacent to its name.
Select the calendar in which you want this event stored.
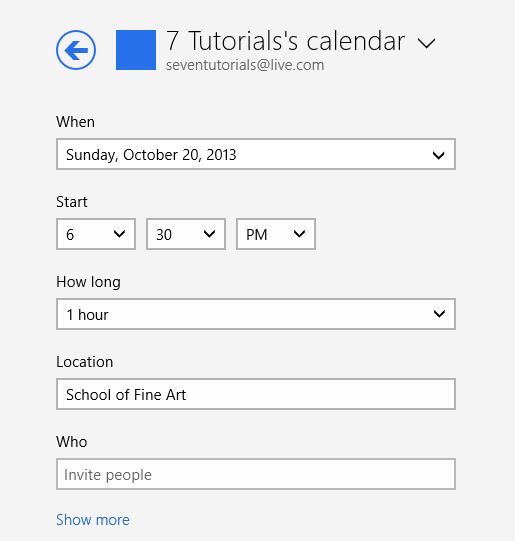
Complete all the important fields with the relevant information: When, Start, How Long, Where, and enter any people you want to invite.
Click Show More to reveal additional details to complete.
Complete any of the additional information that is useful to you.
On the right side of the window, type a name for the event and any other important details that you’d like to add.
Click the Save or Send Invite button, depending on whether you invited people to the event.

The event you have created is added to your calendar and you will be reminded about it, depending on how you set the reminder. If you invited other people they will automatically receive the invite to this event, via email.
You can use the Camera app if you have a webcam installed on your Windows 8.1–based computer or device. You can record videos, take quick pictures, or use it to change the picture of your Microsoft account.
When you start it for the first time, you are asked whether you want to allow this app to use your location. This decision is entirely up yo you, but you can still use the app even if you select Block. If you allow it to use your location, this data will be stored in the metadata of the pictures and videos taken with this app.

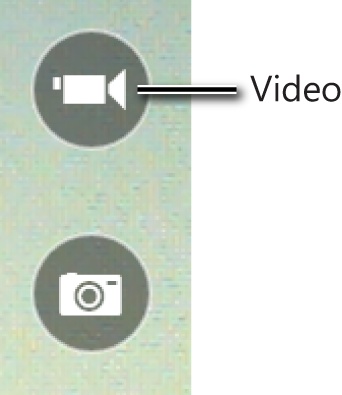
The Camera app is very simple. When you open it, it automatically turns on your camera and it displays whatever is in front of the camera. On the right are two buttons: the top button is for taking recording video and the other is for taking a picture.

The app offers some customization options. To display them, right-click in the app screen or swipe upward from the bottom edge of it. On the menu that appears, there are only two buttons: Timer and Exposure. After taking several pictures or recording videos with the Camera app, a third button the Camera Roll appears. It can be used to access the pictures and videos that you took with this app.
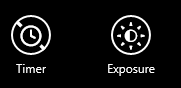
You use the Timer button to set a time when you want to take a picture or make a recording. You use the Exposure button to set a custom exposure level for your camera. Other cameras with more advanced support for Windows 8.1 might provide more configuration options. For most cameras though, only these two buttons are available.
To take a picture, click the Picture button on the right. To start recording video, click the Video button above it. When you start recording video, the Video button turns into a Stop button.

Click it to discontinue recording. All of the pictures and videos made with the Camera app are stored in your Pictures library, in a folder named Camera Roll. You can browse the files within that folder by using File Explorer or the Camera app itself.
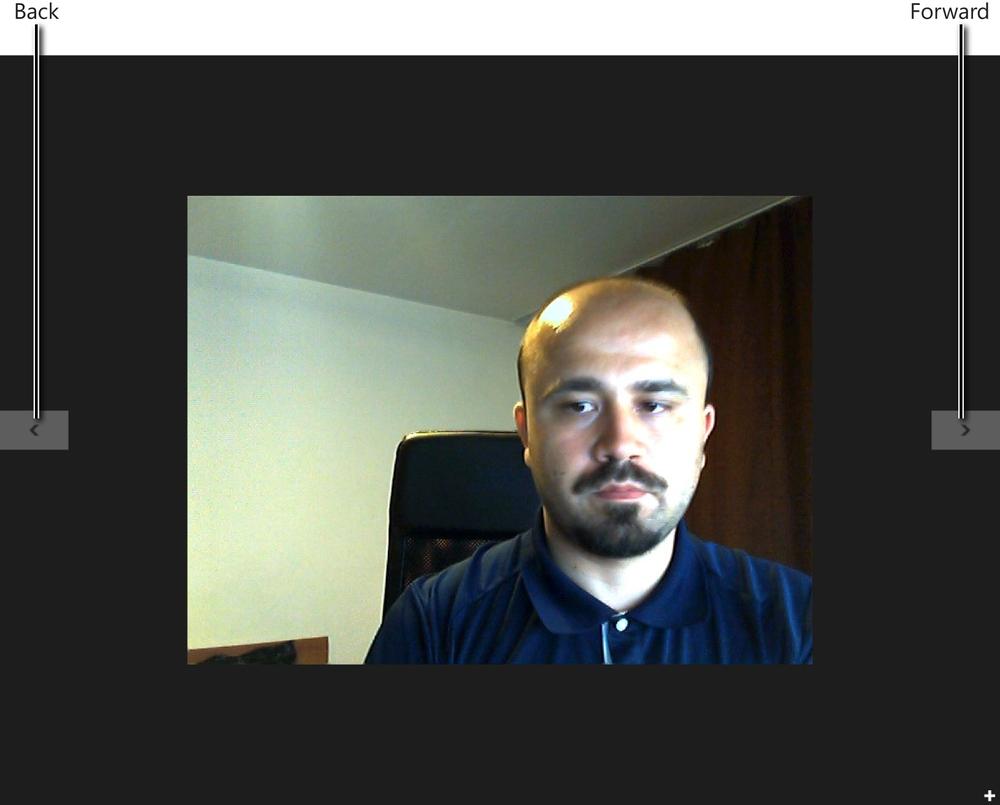
As soon as you have taken your first picture or made a video recording, you will see a Back arrow on the left side of the Camera app window. Click it to display the latest recording or picture you have taken. Then, the Forward arrow appears on the right. Use these arrows to browse through the files recorded by the Camera app.
Although it might not be obvious at first, the Camera offers app also some basic editing tools. When you view the pictures taken with this app, right-click to bring up a contextual menu that presents these tools.

You have plenty of options from which to choose:
Camera. This button takes you to the main screen of the Camera app.
Delete. Click this to delete the current picture.
Open With. Use this to specify another app or program with which to open the current image.
Set As Lock Screen. Sets the current picture as the wallpaper for the lock screen.
Slide Show. This starts a slideshow with all the pictures and videos recorded by the Camera app. To stop a running slideshow, on your keyboard, press the Esc key.
Rotate. Use this button to rotate the pictures 90 degrees clockwise.
Crop. Use this tool to trim the picture to a smaller size.
Edit. This button displays additional editing options, such as: Auto Fix, Basic Fixes, Light, Color, and Effects.
When you view the videos recorded with the Camera app, right-click to bring up a contextual menu that presents tools specific to editing video. There are fewer tools available for video, as compared to the tools for editing picture, but they are useful nonetheless:
Camera. This button takes you to the main screen of the Camera app.
Delete. Click this to delete the current video.
Open With. Use this to specify another app or program with which to open the current image.
Slide Show. Starts a slideshow with all the pictures and videos recorded by the Camera app. To stop the slideshow, on your keyboard, press the Esc key.
Trim. Use this to cut the video’s length.

In this exercise, you’ll learn how to record a video with the Camera app and view it.
Click the Video button on the right to start recording.
After you have recorded what you want, click the Stop button on the right.
The Back button appears on the left side of the screen.
Click the Back button.
Wait for the video you just recorded to play back to you.
When the video has ended, on the right side of the screen, click the Forward button.
I’m sure you’d agree that the Camera app is really easy to use.
Windows 8 bundled a Messaging app that could be used to chat with your friends in the People app. In Windows 8.1 this app has been phased out and replaced by Skype. You can use it with your old Skype account or with your Microsoft account. By default, Skype signs in with your Microsoft account. If you also have a Skype account you can merge both of them and get access to your credit and all your contacts.
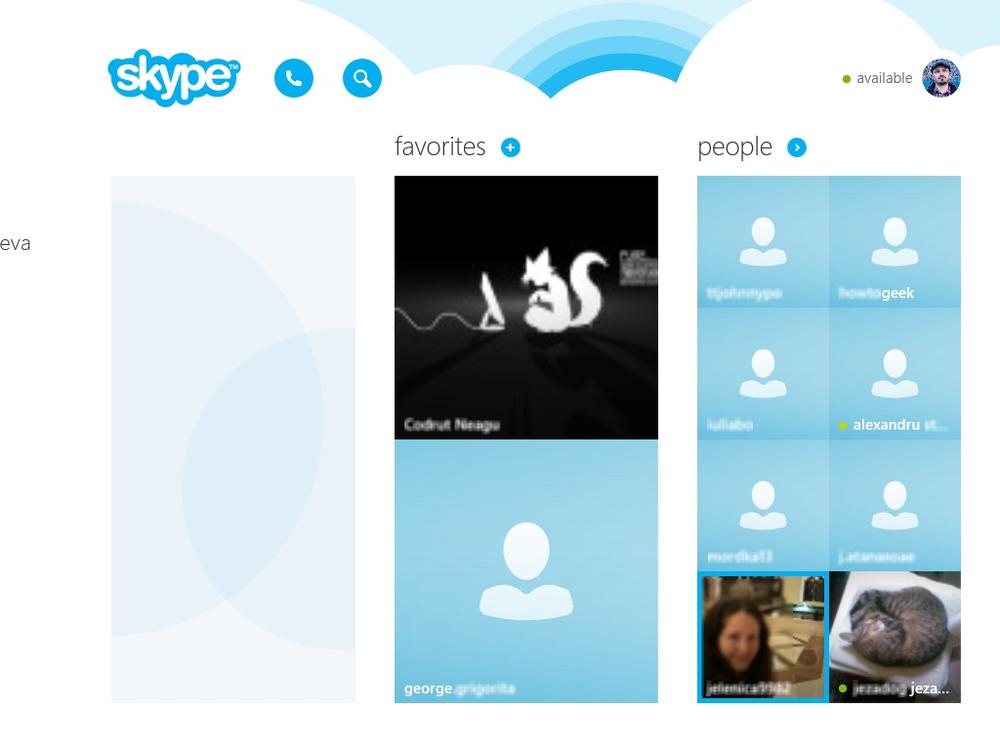
When compared to the former Messaging app, Skype is more complex and delivers more features, including video conversations and the ability to exchange attachments with the people to whom you’re conversing. You can also use Skype to call phones internationally, by using your Skype Credit or active subscription. To chat with a person, simply click on his or her name. In the chat window, you can type a message or call that person using the call button.
During a call, you can also add more participants to your voice or video conversation.
Using the Yammer app
If your company is using Yammer, you can find the Yammer app in the Windows Store, for free.
Search for it and install it on your Windows 8.1 computer or device. With Yammer you can keep in touch with your company’s social network.
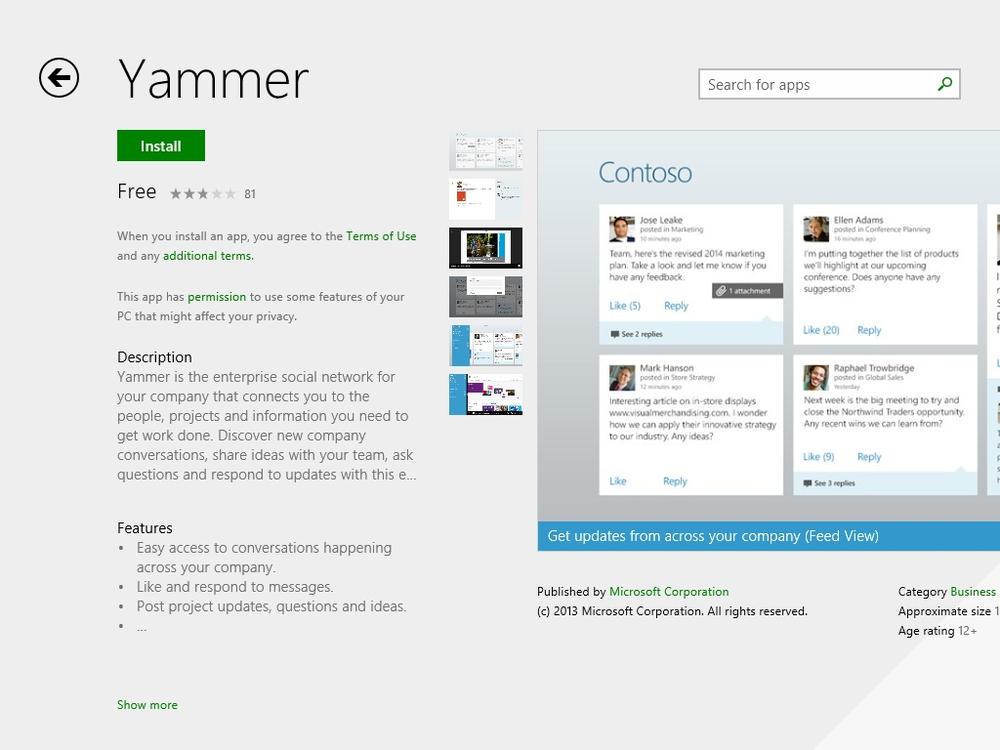
You can easily access the updates posted by your colleagues at work, “like” or respond to messages, post your own updates, preview documents and images, as well as share content with your coworkers.
The Mail, Calendar, and People apps are well integrated and easy to use, even with a mouse and keyboard.
When you add an account in the Mail app, you can access it from the other apps.
You can lower your inbox space usage by using SkyDrive to share email attachments.
You can access the latest updates from your Facebook friends by using the People app.
Using the Camera app, you can quickly record videos, take pictures, and perform basic editing tasks.