
Chapter at a glance
Personalize
Personalize the Start screen with colors and designs, page 57

Name
Name a group of tiles on the Start screen, page 62
Boot
Boot to the desktop, page 77
Use
Use the new Start button, page 78

IN THIS CHAPTER, YOU WILL LEARN HOW TO
Now that you have Windows 8.1 set up and know your way around the lock screen, Start screen, and desktop, it’s time to personalize the computer further so that it suits your exact wants and needs. In this chapter, you’ll learn how to personalize the Start and lock screens to your own specifications. You’ll also learn to personalize the desktop and associated elements, boot directly to the desktop or the Apps View, navigate Control Panel, and even switch to a different power plan. After you’ve worked through this chapter, your computer will be distinctively yours.
You learned quite a bit about the Start screen in Chapter 1. You learned how to move tiles around and configure the Weather app to learn your location and to show up-to-date information from cities you select. There’s probably quite a bit you’d still like to change, though. You might want to remove tiles for apps that you don’t use and add tiles for those you do, configure how large or small a tile appears on the Start screen, and change the background and design on the Start screen, to name a few. You might also want to disable some of the Live tiles or name a group of tiles.
In this exercise, you’ll personalize the Start screen with a new background color and design.
Set Up
Start your computer and unlock the lock screen. You need to have access to the Start screen. You do not need any practice files for this exercise.
While on the Start screen, access the charms. A quick way to do this is to press Windows key+C.
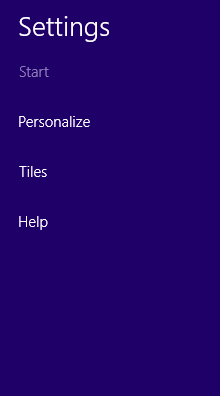
Click Settings.
Click Personalize.
The Personalize options become available.
In the section at the top of the Personalize pane, click any design.
Click any Background Color.
Personalization options are applied.
Tip
If you are using a local user account, you should switch to a Microsoft account if you want the changes you make on the Start screen to follow you from computer to computer. This is possible only if those other computers can access the Internet to download your profile information, and only if you sign in on those computers by using your Microsoft account, though.
Troubleshooting
If, when you access the Settings charm you see Personalization instead of Personalize in the resulting pane, you aren’t accessing the Settings charm from the Start screen. Try again, but this time, from the Start screen.
You can opt to use the background you’ve applied to your desktop to your Start screen. When you do, the Windows 8.1 experience is more unified and seamless. It makes the Start screen look like an overlay to your desktop, which is often a better way to become accustomed to Windows 8.1 if the Start screen seems confusing to you. To make this change select the last thumbnail that appears in the Personalize pane. Here, a background showing a sand dune is applied to both the desktop (not shown) and the Start screen (shown). Note the last thumbnail in the Personalize pane is selected.

Now you can personalize your Start screen to hold only the tiles you use often. To remove an unwanted app tile (or tiles), right-click it and then, on the toolbar that appears across the bottom of the screen, click Unpin From Start. This toolbar also contains charms to perform other tasks, as well. What else you see when you right-click an app depends on the tile or tiles you’ve selected. You might see Resize, Turn Live Tile On, or Turn Live Tile Off. If you right-click multiple tiles, you also see Clear Selection.
Tip
Uninstall is an option on the toolbar that appears when you right-click a tile. Don’t uninstall anything yet, though; you might decide later that you want to use the app.

A Live tile has information that changes often. You might have noticed that the News app scrolls through the latest headlines or that Mail scrolls through received emails. This information is dynamic, or live; thus the name “Live” tile. You might want to disable the live feature of some of those tiles if the constant flipping bothers you or if you don’t need to view updated information when you access the Start screen. You might not want onlookers to see information you’re acquiring, either. You can disable a Live tile by using the same technique you learned earlier to remove tiles you don’t want: right-click the Live tile that you want to turn off and then click Turn Live Tile Off. The tile will remain, but updates will no longer appear.
Tip
You might want to make a tile live, too. For instance, when Calendar is configured as live, appointments and events appear there as the day and time draws near.
Ideally, you should add tiles for apps that you use often if those tiles aren’t already available on the Start screen. This requires a few more steps than removing a tile or repositioning one, but it’s still easy.
Troubleshooting
If you uninstall an app and decide that you want it back, check the Windows Store. You just might find it there.
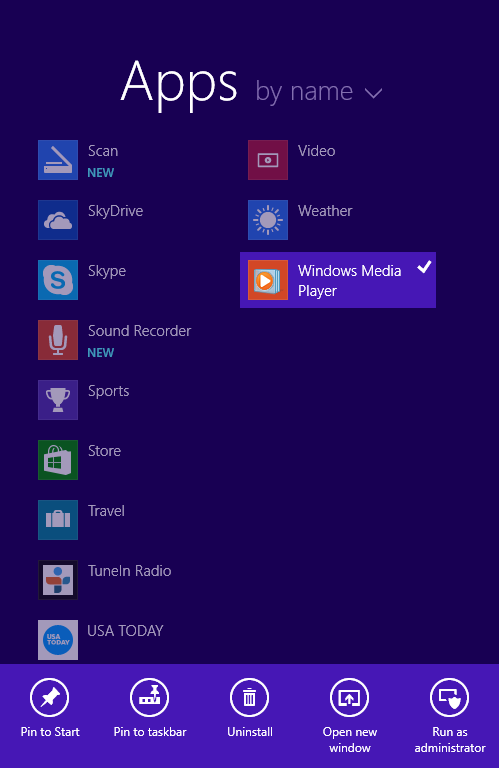
In this exercise, you’ll add a tile to the Start screen for Windows Media Player, Control Panel, and your favorite Windows desktop app.
Set Up
Start your computer and unlock the lock screen. You need to have access to the Start screen. You do not need any practice files to complete this exercise.
Troubleshooting
If you can’t find Windows Media Player in Step 2, click the down arrow next to Apps while in Apps view and click By Category. Then scroll to the Desktop category; it will be in there.
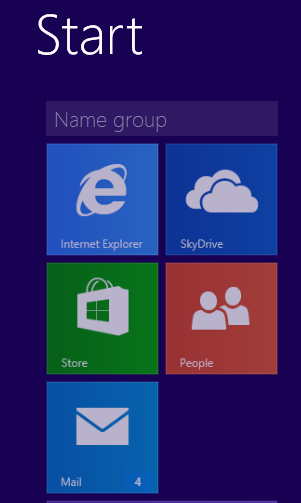
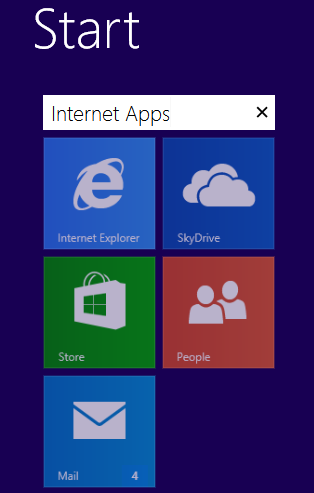
Although there are more things you can do to personalize the Start screen than what has been introduced here, one unique option is to name a group of tiles. Before you start though, drag a few app tiles so that some similar tiles are grouped together. You might put Mail, Internet Explorer, SkyDrive, Store, and People in a group, for example. These are all loosely related by their reliance on an Internet connection. It’s up to you; you can group your tiles as desired.
In this exercise, you’ll name a group of tiles on the Start screen.
Set Up
Start your computer and unlock the lock screen. You need to have access to the Start screen. You do not need any practice files to complete this exercise.
Right-click an empty area of the Start screen and then click Customize.
Just above the group of tiles you want to name, click Name Group.
Type the desired name, press Enter on the keyboard to apply it, and then click an empty area of the Start screen to close the Customize options.
The new group name is applied.
See Also
Chapter 3 shows you more personalization options, including how to resize app tiles, uninstall apps, and unpin app tiles from the Start screen.
You learned a little about the lock screen in Chapter 1, including that it’s more functional than any lock screen you might have encountered in previous Microsoft operating systems. You also learned that you can select a new background from PC Settings, and that the lock screen offers the time and date, and has tiles that represent some of your apps. You probably know that you can’t click and engage those tiles, but you can get a quick glance at what’s been updated since you last used your computer. For example, after you’ve set up Mail, its tile displays a number, notifying you of how many new email messages are currently unread. You might also see a Calendar tile, a People tile, and others, depending on how Windows 8.1 is currently configured.
In this exercise, you’ll change the notifications that appear on the lock screen
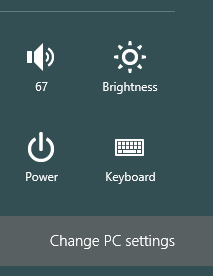
Access the charms and click Settings.
In the Settings pane, click Change PC Settings.
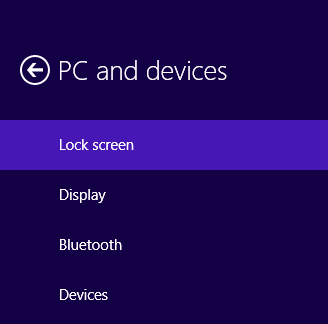
If a back arrow appears in the upper-left corner, click it, and then click PC And Devices.
The PC And Devices pane appears and lock screen is selected.
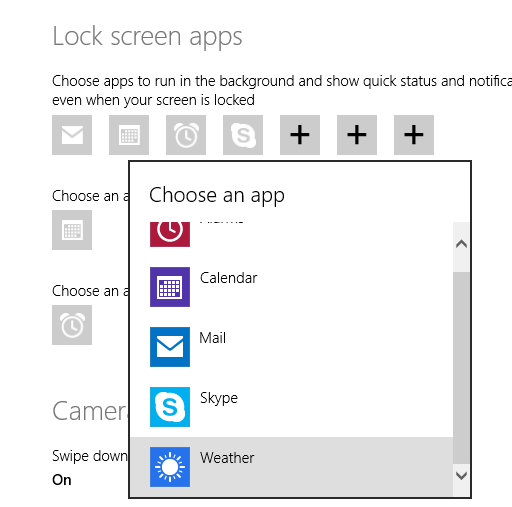
In the right pane, scroll to locate the Lock Screen Apps section. Click a + sign under Choose Apps To Run In The Background And Show Quick Status And Notifications, Even When Your Screen Is Locked. Click Weather.
To view detailed information for an app on the Lock screen, click the icon in the Choose An App To Display Detailed Status section, and then select the desired app. (You can only have one app at a time enabled.)
To view detailed information for an alarm on the Lock screen, click the icon in the Choose an app to show alarms section, and then select the desired app. You may only have one available, Alarms.
Press Windows key+L to access the Lock screen and review your changes.
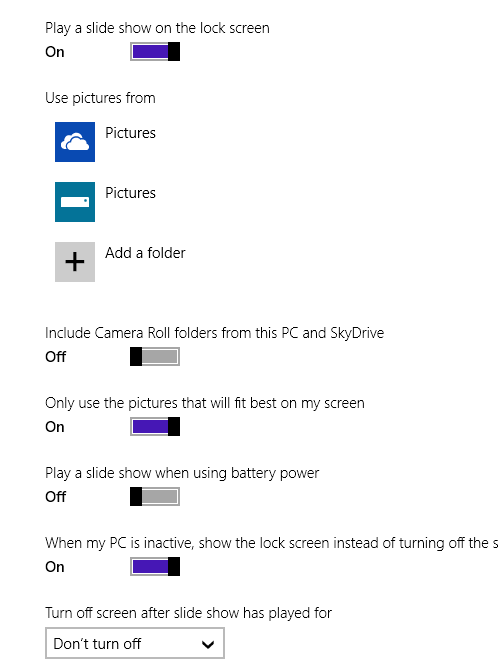
There is more to configure on the Start screen than just what notifications appear. You can also opt to display a slide show of photos on the lock screen and choose the folder from which the photos are selected. You can change the options so that the slide show will (or will not) run while a laptop is using its battery. (You won’t be able to configure a slide show if you don’t have any photos on your computer, though.) Beyond that, you can configure if you want to be able to use the camera from the lock screen (which you access by flicking downward), or, if you want to disable that feature. You configure the slide show and other lock screen features in PC Settings.
Your user account is associated with your specific user profile and is what defines you when you log on to your computer. This profile defines where your files are saved, what your Start screen design and color are, if you use SkyDrive, and how the tiles are arranged on the Start screen, among other things. You have several options for your user account, but the most common (and the one we suggest heartily) is the Microsoft account. The other most common type is the local account.
Important
There are other kinds of accounts that are used by businesses and corporations beyond local and Microsoft accounts. If you need one of these types of accounts, your company’s network administrator can give you the information you need to create it.
A local user account is an account that’s available only from your own, personal computer. The settings you configure for your applications, apps, desktop and taskbar, backgrounds, Internet Explorer Favorites, app configuration on your Start screen, and other customizations are applied to and available from only your local computer. Your user profile is stored on your local computer and available only from there. If you use only one computer and you don’t really care to use many apps, this should be fine. However, if you use multiple Windows 8–based computers (one at work, one at home, and perhaps a laptop when you’re on the back porch) or use a Windows 8-based tablet or a Windows phone, you will want to consider using a Microsoft account instead. If you don’t, you’ll need to create a user name and account for each computer you use, you won’t be able to download apps, and your settings won’t be synchronized across the computers that you use. You also won’t be able to access SkyDrive through the various built-in options either.
A Microsoft account is a global and roaming user account. Your profile is stored on the Internet in the cloud, and your user profile is accessible from the other computers, tablets, and devices running Windows 8–based operating systems. This means that all your settings, preferences, and configurations are available from any computer to which you can log on by using this account, provided that the particular computer is connected to the Internet and can access that profile. The purpose of storing your user profile on the Internet is so that you can move from computer to computer or device to device and have the same experience on one as you do on the other. In this scenario, any changes you make while logged on are saved to your profile, too, so if you make a change to say, your laptop’s Start screen, that change will be applied when you next log on to your desktop computer, provided you’ve logged on to those devices with your Microsoft account and that you indeed do want to synchronize these types of settings. (You might notice a slight delay in loading your profile after logging on to a computer with your Microsoft account.)
Tip
A Microsoft account is an email address such as [email protected] or [email protected], but it does not have to be from either of these domains. You might already have a Microsoft account. A Windows Live ID, an Outlook.com email address, a Live.com email address, or a Hotmail.com email address are Microsoft accounts. You can sign up for an account at www.live.com if you don’t have one.
Troubleshooting
A Microsoft account synchronizes only your personal settings and preferences. It’s a user profile. You can’t access apps you’ve installed on another computer running Windows 8 or 8.1, print to a remote computer’s local printer, or use your home computer’s webcam from another computer, for instance. You’re not accessing your computer remotely with this feature; you’re accessing only your user profile, which is stored on a server on the Internet.
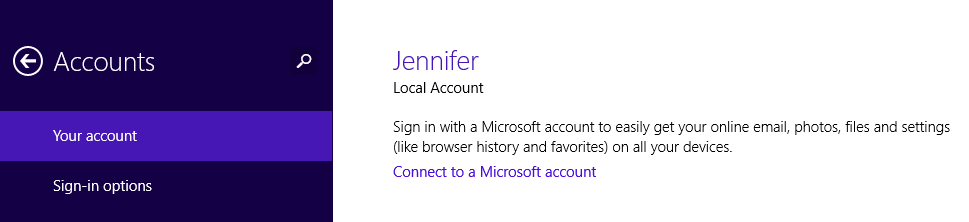
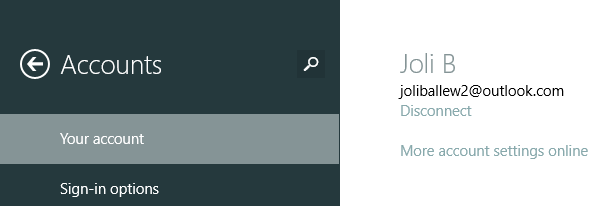
You switch from a local account to a Microsoft account from PC Settings. You can access PC Settings by using the Settings charm. From the PC Settings screen, click Accounts. From the Your Account tab, click “Connect to a Microsoft account” and follow the prompts.
If you currently use a Microsoft account and want to switch to a local account, the option is in the same place (PC Settings, Accounts). However, to switch to a local account you’ll need to first Disconnect from your current Microsoft account. Then, just follow the prompts to create a new, local account.
Tip
By default, when you use a Microsoft account, certain settings are synchronized to the cloud. If you don’t want a specific setting to synchronize among computers, you can turn off syncing for that one item. Some of the options include synchronizing desktop personalizations, app data, and web browser favorites, open tabs, home pages, and so on. In PC Settings, click SkyDrive and Sync Settings to make the changes.
After you’ve decided what type of account to use and applied the change if applicable, you can make other changes to your user account to customize it further. The changes will be saved to your user profile. One item to change is your user account picture. You’ll need to have access to a picture you’d like to use to apply it, so if you don’t yet have any pictures on your computer or network (or if your computer does not have a built-in camera or web cam you can use to take one), return here when you do.
In this exercise, you’ll change the picture associated with your user account.
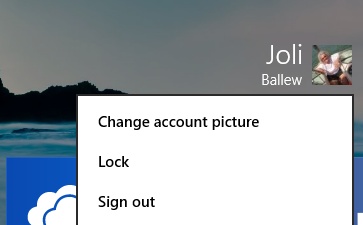
On the Start screen, in the upper-right corner, click your User Name.
Click Change Account Picture.
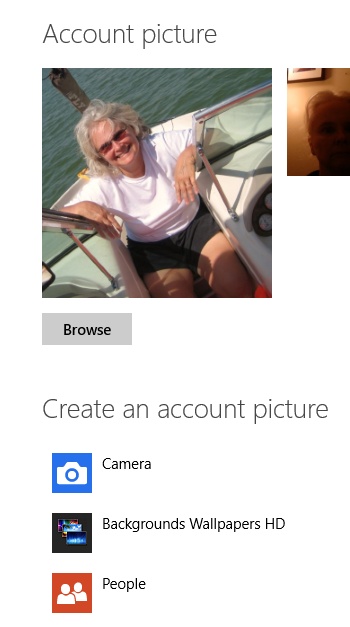
To take a new picture, click Camera (if applicable).
Click once on the screen to capture the photo.
Drag the box to crop the photo.
Click OK.
To use an existing picture, click Browse.
If you see an image you’d like to use, click it and select Choose Image.
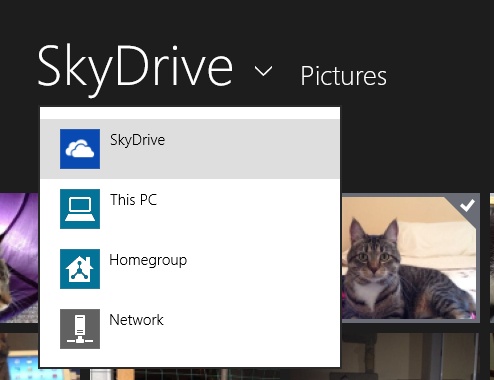
If you don’t see the picture you want to use, do the following:
Click This PC and then choose the folder or subfolder that contains the picture you want. SkyDrive is an option and has been selected as shown in the illustration that follows.
Click Go Up and the Files down arrow as needed while navigating.
When you locate the image, click it and select Choose Image.
You learned about the desktop in Chapter 1. There, you discovered that the desktop still exists in a form very similar to what you’re likely already used to if you’ve spent any time with other Windows-based computers. You can personalize the desktop in the same ways, too. You can apply a new background and set a screen saver, for instance. You can have the background consist of a slide show of pictures you select. You can opt to apply a theme, which is a group of settings that, when combined, provide a motif. One theme, Flowers, combines backgrounds, screensavers, window colors, and sounds and is available from the Windows 8.1 desktop Personalization options. You can just choose a new background, too; there are many beautiful pictures from which you can choose or you can use one of your own.
See Also
Learn how to boot your computer directly to the desktop later in the chapter in the section “Booting to the desktop.”
In this section, you won’t learn how to personalize every aspect of the desktop; that could fill an entire chapter, if not more! You will learn how to select a new background and apply a theme, and from there you can surmise how to make additional changes.
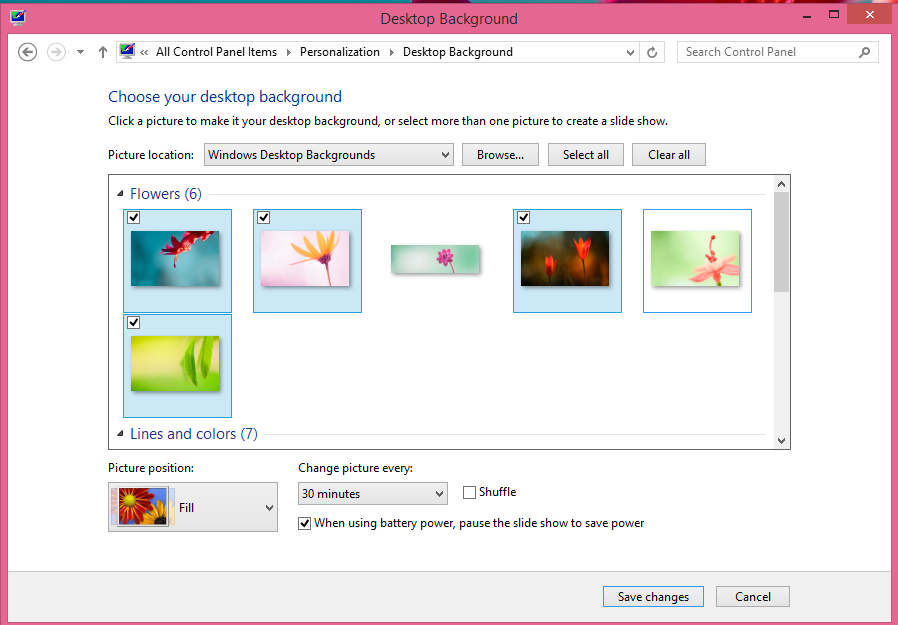
In this exercise, you’ll apply the Flowers theme and customize which backgrounds you want to appear.
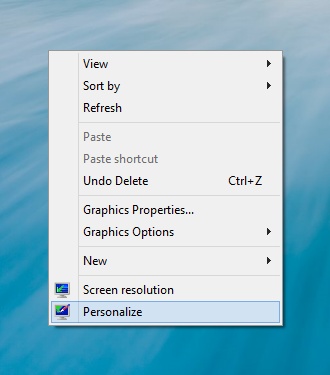
Right-click the desktop and then click Personalize.
In the Windows Defaut Themes section, click Flowers.
The Flowers theme is immediately applied, and new colors are associated with windows and the taskbar.
Click Desktop Background (not shown).
Use Change Picture Every to select an option.
Click Save Changes.

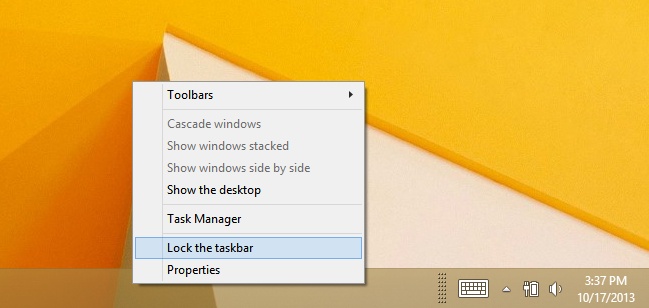
The taskbar is the transparent bar that runs across the bottom of the screen when you’re using the desktop. It can be almost any color if you’ve applied a theme. By default, it’s locked and can’t be moved. To unlock it, right-click the taskbar and then, on the shortcut menu that appears, click Lock The Taskbar (the option Lock The Taskbar should not have a check beside it) and now you can drag it to a different area on the screen. You might prefer the taskbar on the left side of the desktop, for instance (or across the top).
Beyond unlocking and then dragging the taskbar to a new place on the screen, you can also do the following:
Reposition buttons. Drag icons from one area of the taskbar to another.
Pin icons. Pin items to the taskbar, including icons for desktop apps, documents, folders, and more.
Auto-hide the taskbar. Auto-hide the taskbar to keep it off the screen when it’s not needed.
Change taskbar button size and grouping. Use small or large taskbar buttons and choose to group or not group like icons when the taskbar is full.
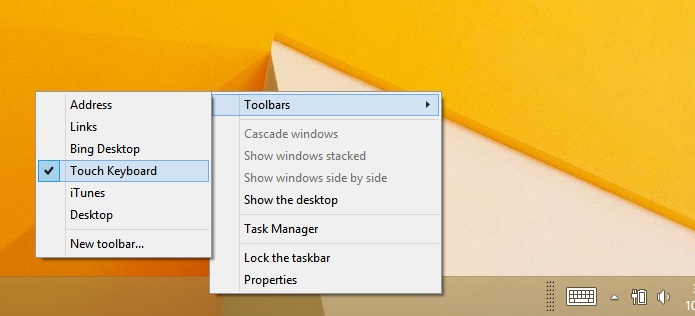
Show or hide toolbars. Show or hide toolbars, including the Address, Links, Touch Keyboard, and Desktop toolbars.
Enable Peek. Enable or disable Peek, a feature outlined in Chapter 1 with which you can look at the desktop by temporarily making all open windows transparent. You use Peek by positioning your mouse in the lower-right corner of the screen. Peek is disabled by default. Click in the lower-right corner to access the option to enable it.
Customize the notification area. Select which icons and notifications appear on the taskbar.
Use jump lists. Configure how you want to use jump lists. Jump lists can show recently opened apps or recent items you’ve opened in an app.
Try some of these features:
Reposition the taskbar. Right-click the taskbar and then, on the shortcut menu that appears, clear the Lock The Taskbar check box, if applicable. Drag the taskbar to the left side of the screen. Repeat to position it again at the bottom.
Show hidden buttons. Drag any slider, if possible, to view hidden taskbar buttons.
Test Peek. Open any window or multiple windows. Position your mouse in the lower-right corner of the screen. If the windows turn transparent, Peek is turned on. If they do not, Peek is turned off.
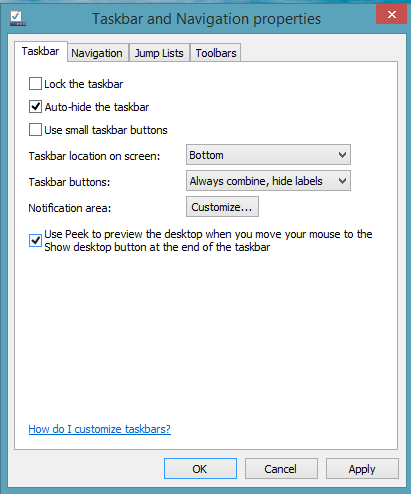
In this exercise, you’ll configure the taskbar by using the Taskbar Properties dialog box.
On the taskbar, right-click an empty area, and then click Properties.
In the Taskbar And Navigation Properties dialog box, on the Taskbar tab, select or clear the desired choices, and then click Apply.
Tip
From the Taskbar And Navigation Properties dialog box, on the Taskbar tab, next to the notification area, click Customize to change how you are notified of system events and to hide or show icons there. Refer to Chapter 14 to learn more about this.
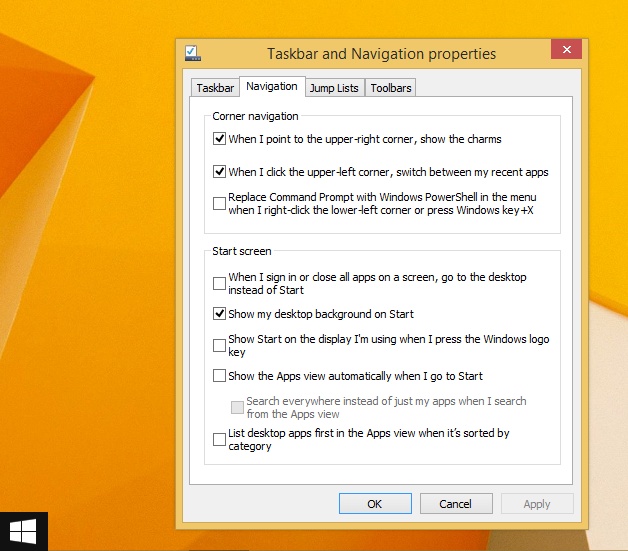
Click the Navigation tab, make the desired choices, and then click Apply.
Click the Jump Lists tab, make the desired choices, and then click Apply.
Click the Toolbars tab, make the desired choices, and then click OK.
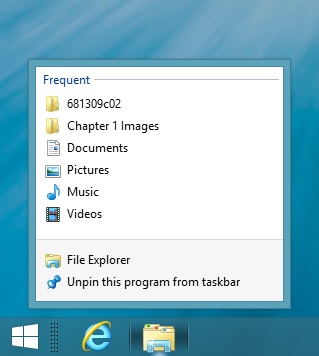
If you looked closely at the Navigation tab in the previous exercise when you configured the taskbar’s properties, you might have noticed the When I Sign In Or Close All Apps On A Screen, Go To The Desktop Instead Of Start option. By selecting this option, you can boot your computer directly to the desktop if you want to bypass the Start screen when you power on computer, unlock it, or wake it from sleep. It’s okay to make this change if you want to; you’ll still be able to access the Start screen anytime you like by clicking the new Windows Start button. The option to go directly to the desktop and the Start button are both shown here.
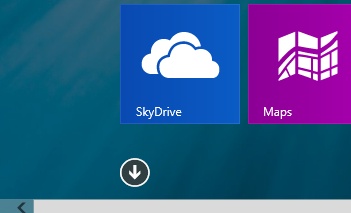
You can also boot your computer directly to the Apps view screen. This is the screen that appears when you click the down arrow while on the Start screen, showing all of the apps installed on your computer. The option to do this is also in the taskbar’s Properties dialog box in the Navigation pane. The option that you want to select is Show The Apps View Automatically When I Go To Start.
There just isn’t enough space in a single chapter to cover all the personalization options available in Windows 8.1. However, you can access all the options from a single location—Control Panel—and you can certainly explore and configure these settings to the extent you’d like. You can’t harm your computer by changing these options, but you might make it look quite a bit different from what you’ll see in this book.
In this exercise, you’ll first view all the Appearance And Personalization options and then change the screen resolution.
Position the cursor in the lower-left corner of any screen.
Right-click the Start button and then click Control Panel.
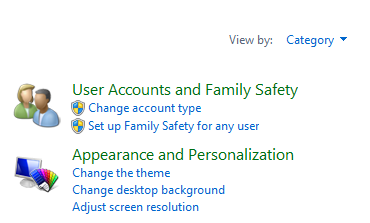
Verify that the View By is Category and then click Appearance And Personalization.
All the personalization options appear.
In the Display list, click Adjust Screen Resolution.
Configure settings as desired and then click Apply.

Clean Up
Continue to explore the options as time allows, clicking the Back arrow as needed for navigation.
As you explore Control Panel, you’ll see that clicking some options, such as Change The Theme or Change Desktop Background, open windows that you’ve already explored in this chapter. You’ll also notice that you have access to the available fonts and to folder options with which you can view hidden files or state how you’d like to open icons. If you’ve used a Windows operating system before, these will look familiar. You’ll also see a Back arrow and an Up arrow so that you can return quickly to the previous screen as you explore.
A power plan is a group of settings that defines when your monitor goes to sleep and when the computer goes to sleep. Sleep occurs after a specific amount of idle time, and it protects your computer from prying eyes, from running down a laptop’s battery, and from simply being “on” all the time. In the case of laptops and tablets, there are two sets of settings: one for when the computer is plugged in, and one for when it’s running on battery power. One of the ways to get to these settings is from Control Panel, in the Hardware And Sound section, in Power Options.
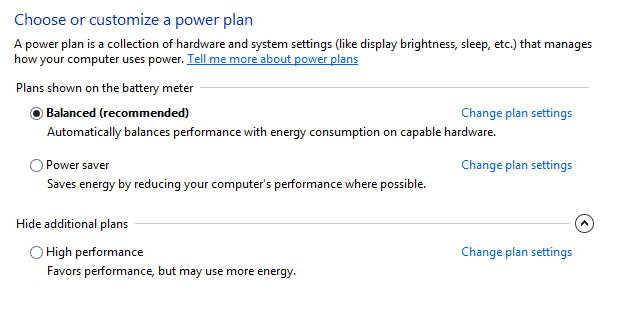
There are three power plans (but you can create your own quickly by editing any of them). On a desktop computer, the settings are as listed here. These same settings are applied to laptops that are plugged in to a wall outlet. However, laptops have a second set of settings for when the laptop is running on battery power.
Balanced. This is the default plan. The display turns off after 10 minutes; the computer goes to sleep after 30 minutes.
Power Saver. This plan is the best for minimizing power usage. The display turns off after five minutes; the computer goes to sleep after 15 minutes.
High Performance. This plan is best when you need all the computing power you can obtain. The display turns off after 15 minutes; the computer never goes to sleep. To access this plan, you must click the arrow by Show Additional Plans.
You can change aspects of any plan. For instance, if you like the Balanced plan but would rather the display and computer go to sleep after 30 minutes instead of 10, you can easily make the change. You can restore the defaults for a plan with a single click, too. You can create your own power plan from scratch. However, the three default plans will likely suffice with a little tweaking.
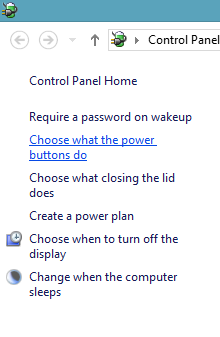
From the same window where you switch or configure power plans, you can perform other power-related tasks. You can choose what a Power button does when you press it, for instance. If you have a laptop, you can configure what happens when you close its lid. If your computer has a Sleep button, you can configure what happens when you press it. The options for each of these include Do Nothing, Sleep, Hibernate, and Shut Down.
Tip
On a laptop, you can switch power plans easily from the notification area on the taskbar. Just click the power icon one time to view the options.
In this exercise, you’ll choose a power plan, and then you’ll choose what happens when you press the Power button on your computer. This exercise requires that you use a laptop.
From any screen, right-click the Start button.
Click Power Options.
Select a plan to use or, leave Balanced (Recommended) selected.
In the left pane, click Choose What The Power Buttons Do.
Make your choices as desired. Click the down arrows to access the options.
Click Save Changes.
Close the Power Options window.

You can personalize the Start screen by removing tiles you won’t use, adding tiles you will use, and repositioning them as desired.
The lock screen can offer up-to-date information about running apps.
You can use a local user account or a Microsoft account when you log on to your Windows 8.1–based computer or tablet. With a Microsoft account, you can synchronize information among your devices, including backgrounds, Internet Explorer Favorites, and preferences, among others.
You can personalize your user account with a picture.
Using personalizations options, you can easily change the desktop, taskbar, and notification area when working on the desktop.
You can configure your computer to boot directly to the desktop or Apps view.
It’s possible to set a new resolution, and perform other personalization tasks from Control Panel.
Power plans are configurations that determine when your computer sleeps and when the display dims.