
Chapter 8: Nexus One: An Unlockable Device
In this chapter:
• Information about the Nexus One
• Rooting the Nexus One
This walkthrough applies skills learned in the first part of the book. An unlocked device makes it easy to send files to the root file system and start the customization of your phone. This chapter will make a good read not only for owners of the Nexus One device but also for beginning Android hackers. It is included here as a reference to help you understand the application of the commands and skills from the first part of the book. Read through this walkthrough to understand the process of rooting an unlockable device and the general application of ADB and Fastboot commands from the SDK.
The Nexus One is a Google phone with a vanilla (unaltered) version of Android. It is considered a developers’ phone and it can be unlocked using the Fastboot command. The Nexus One was built by HTC and sold by Google. OEMs and carriers usually take a version of Android and modify it to include or exclude features and applications before shipping it on a specific model of device. The Nexus One was designed specifically to highlight an Android installation that had not been altered by an OEM or carrier. The phone continues to be popular among developers and those who value the ease of rooting and developing in an unaltered Android environment.
The XDA forum for the Nexus One can be found at http://forum.xda-developers.com/forumdisplay.php?f=556.
Root Methods Available
The following root methods are available for the Nexus One:
• the Z4Root one-touch root application, which does not unlock the device
• ASHMEM exploits using psneuter
• Fastboot unlocking of bootloader.
This walkthrough uses the Fastboot unlocking method. The Nexus One was intended to be unlocked and used as a developer phone. The Nexus One XDA forum and the Nexus One wiki (http://forum.xda-developers.com/wiki/index.php?title=Nexus_One) contain all of the methods and files needed for the walkthrough here.
There are methods for rooting and running custom ROMs on the Nexus One that bypass unlocking the bootloader. The primary reason for using a method that leaves the bootloader locked is to avoid the loss of warranty coverage that comes from unlocking it. However, if you unlock the Nexus One, the process is simpler and you will have a learning experience with a developer-class device.
Resources Required for this Walkthrough
Before following the steps in this walkthrough, you should download the following files from the device-specific forum at XDA (http://forum.xda-developers.com/forumdisplay.php?f=556):
• Android SDK for the ADB and Fastboot commands
• the Nexus One superboot image file (a boot image with root access that will be written to the boot partition) appropriate to your Android build (to determine the build, open Settings and About This Phone; the build number should resemble “ERE36B”)
• the superuser binary
• the SuperUser.apk application
• the BusyBox binaries.
Walkthrough
The skills discussed in Chapter 3 are used here to unlock the bootloader and flash a new bootloader using Fastboot.
This walkthrough is for Android 2.3.3. If your Nexus One uses Android 2.3.4, you will need the procedure listed at http://nd1razor.blogspot.com/2011/07/how-to-root-android-234-nexus-one.html. If your device uses any other version of Android, you will need to research the specific variations from the process in this walkthrough.
The basic steps of rooting the Nexus One and then getting a custom ROM onto it are similar to the other walkthroughs in this book:
1. Unlock the bootloader.
2. Flash a new bootloader with an unlocked file system.
3. Install the BusyBox binaries.
4. Install the superuser binary.
5. Install the Superuser.apk application to control what has root access from the device.
You can unlock the bootloader on the Nexus One with a simple command from Fastboot on your PC. You need to realize though that this method of unlocking the bootloader is unique to unlockable devices. With other devices in this book, you must jump through many hoops just to get the bootloader unlocked. A bootloader from the OEM that is not locked down makes the process of customizing your phone as simple as the walkthrough here.
Unlocking the bootloader on your Nexus One voids the warranty. It is currently not possible to relock the Nexus One bootloader, though progress has been made by developers. You can always go back to a stock version of Android and a stock ROM but unlocking the bootloader is a one-way street. If you want to keep the bootloader locked, you can use the psneuter method to root your Nexus One (http://forum.xda-developers.com/wiki/Nexus_One/Guides_%26_Tutorials#Root).
You should note that some unlockable devices can be relocked. The Xoom, for instance, can be relocked as long as the bootloader and the ROM are both signed with the OEM’s signature.
Placing the Nexus One in Fastboot Mode
The first step is to place the phone in a mode that will accept commands from the Fastboot protocol. This is typically called Fastboot or Fastboot mode. The Nexus One has an intermediate mode called HBOOT, which allows you choose between Fastboot and booting into recovery. To force the Nexus One into HBOOT, start with the phone switched off and follow these steps:
1. Connect the device to your PC with the USB cable.
2. Press and hold the trackball at the bottom of the phone.
3. Without releasing the trackball, press the power button to turn the phone on. Hold the trackball until the white HBOOT screen appears.
4. Verify that the status indicator reads fastboot usb.
You can also use the volume buttons to select the bootloader option, boot into the bootloader and then select the recovery. For the unlock procedure, you need only the default Fastboot mode.
5. Start a command prompt window on your PC and navigate to the folder where the Fastboot command is installed (usually C:Program Files (x86)Androidandroid-sdk-windows ools).
6. Enter the following command:
fastboot devices
This command works in a similar way to the ADB devices command. It reports any attached Fastboot devices. The output of the command should look like Figure 8-1.
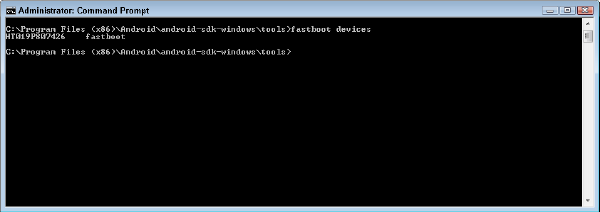
Figure 8-1: The fastboot devices command showing an attached HTC device (the Nexus One) in Fastboot mode
If fastboot devices does not return the attached devices, verify connectivity and that the Nexus One shows fastboot usb on the HBOOT screen.
7. Enter the following command:
fastboot oem unlock
This command starts the unlock query on the Nexus One. Select the “Yes, unlock bootloader and void your warranty.” option.
The Nexus One will reboot and the boot screen will display an unlocked padlock at the bottom.
Flashing a Boot Partition
Next you must flash a boot partition that will allow full root access to the file system.
1. Extract the superboot image file to your Fastboot folder. This makes it easier to type the Fastboot command.
2. Reboot the Nexus One into Fastboot mode by powering it on while holding down the trackball.
3. Open a command prompt window on your PC and navigate to your Fastboot folder.
4. Enter the following command:
fastboot flash boot <buildnumber>.boot.img
This command writes the boot image file that you downloaded to the boot partition.
When the flash is complete, the Nexus One should reboot. If it does not, enter: fastboot reboot.
Getting Full Root Access
The next steps are to install the commands to give the Nexus One full root access and superuser control of the file system. You push several binaries to the file system with ADB then change the permissions on the binaries so they can be executed.
Make sure the Nexus One is in Debug mode. Refer to Chapter 3 for instructions on putting your phone into Debug mode. The click path for Debug mode is Settings → Applications → Development → Debug.
1. Navigate to the folder to which you downloaded the superuser and BusyBox binaries and the SuperUser.apk application.
2. Enter the following command:
adb push su /system/bin/
3. Enter the following command:
adb push busybox /system/bin/
Next, log into the Android shell and change the permissions on these files so they can be executed. If you need a refresher on navigating and using the ADB shell or the chmod command, turn back to Chapter 3 and review the activities there. To make the binaries executable, follow these steps:
1. Open a command prompt window on your PC and verify that you have ADB connectivity with your device. (Refer to Appendix A for instructions on setting up and using ADB.)
2. At the command prompt, enter the following command:
adb shell
This will drop you into the interactive ADB shell. You can verify it by the # prompt in the command shell.
3. At the hash prompt, enter the following command:
chmod 4755 /system/bin/su
4. Enter the following command:
chmod 4755 /system/bin/busybox
5. Finally use the change owner command to make the superuser binary belong to root. Enter the following command:
chown root /system/bin/su
After the core binaries are installed and the permissions changed, you need to install the SuperUser application (written by ChainsDD), which provides a control mechanism for applications that request superuser access. Navigate to Google Play and download SuperUser.apk.
At this point, your Nexus One is unlocked, rooted and ready for more customization.
Installing a Custom Recovery
There are a couple of ways to install the custom recovery. The manual way is to download the recovery image file and use Fastboot to flash it to the recovery partition. To manually flash a custom recovery, follow these steps:
1. Connect the Nexus One to your PC and open a command prompt window on your computer.
2. Enter the command adb reboot-bootloader.
3. Verify that the Nexus One reboots into Fastboot USB mode.
4. From your PC command prompt, run the following command:
fastboot flash recovery <recoveryimagename.img>
Wait for the flash to complete.
5. Enter the command fastboot reboot-bootloader to reboot the device back into the bootloader.
6. Use the volume up and down buttons to highlight the “bootloader” option and press the power button.
7. The bootloader looks for an update.zip file and then allows you to select the “recovery” option with the volume and power buttons. The Nexus One boots into recovery.
There is a far easier way to install a custom recovery, though the manual way is more edifying. Koushik Dutta has created an application, RomManager, that is a companion to the ClockworkMod recovery. RomManager not only provides an excellent way to install the ClockworkMod recovery but is also a way to download and flash custom ROMs.
Download the RomManager application from Google Play. (Purchase the full version as the benefits are many and the developer is both trustworthy and hardworking.)
To use the RomManager application to install the ClockworkMod recovery, follow these steps:
1. Start RomManager and select the “Flash Clockwork” option.
2. Select your device from the list of supported devices that RomManager detects. RomManager will request superuser permissions and the SuperUser application will present you with a pop-up box.
3. Select the “Allow” and “Remember” options. The RomManager will install the ClockworkMod recovery.
4. When the successful flash has occurred, select the “Reboot into recovery” option. Your Nexus One will boot into the ClockworkMod recovery.
At this point, you should use the backup option to back up the entire Nexus One.