
Chapter 2. First Things First: Import Your Footage into iMovie
Before you can do any editing, you need some video to work with, and that’s where this chapter comes in. In it, you’ll learn how to import your raw footage, and, with a little help from iMovie, how to keep your clips in good order.
Importing Video
When you import raw footage into iMovie, it winds up in a sort of folder known as an event. Why? Because Apple figures that most of what you record revolves around events in your life, like vacations, weddings, and graduations. And if, over time, you import hours of footage, you (and iMovie) need some way to organize all that material. That’s why, when you import footage from, say, your iPhone, iMovie asks you to assign that video to an event (or to create an event to assign it to).
You’ll learn all about events in the next chapter, but for now, it’s time to import your clips to iMovie.
Importing Basics
You can get your raw footage from a lot of sources, only one of which is a camcorder (do they even make those anymore?). For example, iPhones, iPads, and iPod Touches shoot video, as do almost all digital still cameras. Most cameras store your footage as files, but some older cameras store it on tape or even on a DVD.
But no matter the source, any importing you do involves five initial steps:
Connect the device to your Mac.
How you connect it depends on what you’re connecting, but to do any importing, you have to connect a device to your Mac. That applies even if you want to import a movie that’s on your Mac’s hard drive—even your drive’s connected.
Click Import in the iMovie toolbar.
The Import button is a giant downward-pointing arrow at the top of the iMovie window. (Alternatively, you can press ⌘-I.) Once you do, iMovie opens the Import window.
Choose the source of your raw footage.
iMovie lists all the possible sources of video on the left side of the Import window: cameras, hard drives, and memory cards. Select the device you’re importing from.
Select your movie file.
Once you select a source, iMovie shows all of the files in that source—the different scenes you’ve shot. Preview the specific clips you want to import by selecting each one and watching it in the Viewer.
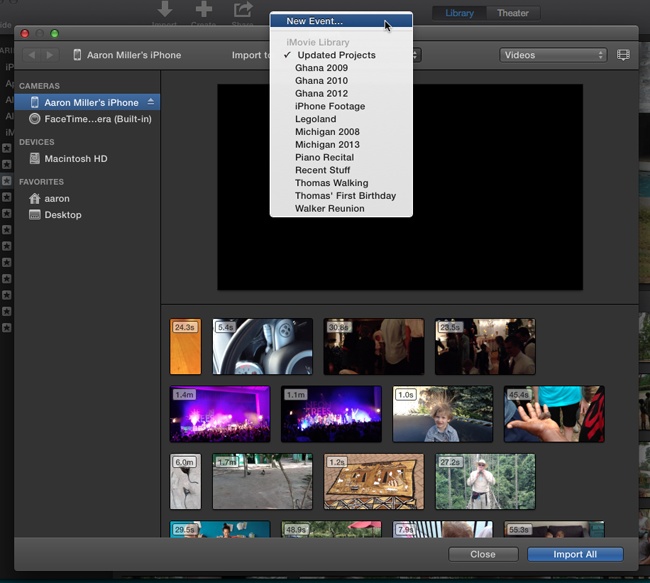
In the “Import to” drop-down menu, pick the event where you want to store your footage.
Once you select your movie file, your instinct might be to click the highlighted Import Selected button in the bottom-right corner of the window. Don’t! You first need to tell iMovie in which event you want your footage stored. Otherwise, you might stash your movie in the wrong place.
At the top of the Import window and smack-dab in the middle is the “Import to” menu. Use it to choose (or create) the destination event for your footage. Figure 2-1 shows this menu at work and explains what you need to do.
The following descriptions explain the details of importing from a particular source, picking up from where these five steps leave off.
From an iPhone/iPad/iPod Touch
Apple calls the iPhone the most popular camera on the planet, and, considering how convenient it is to capture those random moments with it, the claim certainly has merit. Whether you’re shooting with an iPhone, iPad, or iPod Touch, iMovie can import its footage for you.
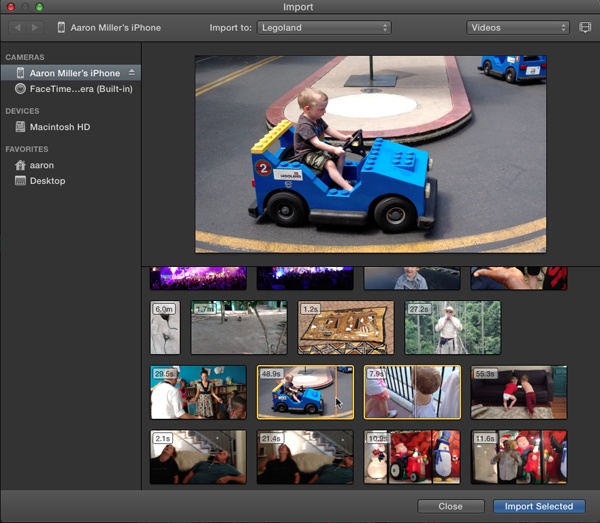
With your iDevice connected and the Import window open, iMovie
displays your video clips using sample frames (Figure 2-2), and denotes
the length of each clip with a little time indicator in the corner.
You can preview a clip by moving your cursor over it without
clicking: The viewer window above “plays” your footage as you skim.
(See Skim Filmstrips for more on skimming.) You
can also play back a clip in full by selecting it and then clicking
![]() in the viewer window (the playback button
appears only when you mouse over the window).
in the viewer window (the playback button
appears only when you mouse over the window).
You can select and import photos, too. To see your source-material options, go to the drop-down menu in the top-right corner of the Import window and choose Videos, Photos, or Photos and Videos. To adjust your preview options, click the filmstrip icon beside the drop-down menu. There, you can change the size of the clips for easier previewing, show the audio waveforms (Remodel Your Workspace) that go along with a clip, or tell iMovie to show or hide clips you’ve already imported.
Note
Once you import a clip from your iDevice, iMovie hides it from the list of available clips the next time you try to import video. This is convenient—unless you want to import a clip again. In that case, you can override the factory setting by clicking the filmstrip icon in the top-right of the import window and turning off Hide Imported Clips.
Once you’re ready to start importing clips, follow these steps:
Select the clips you want to import.
Select a clip by clicking it. A yellow border confirms your selection. (If you don’t select any clips, then iMovie imports all the clips on your iDevice.)
Click Import Selected (or Import All).
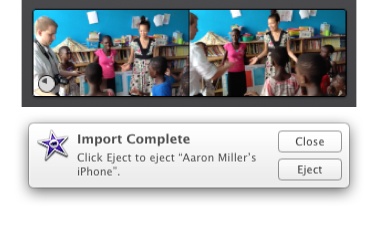
Once you do, iMovie displays the destination event you selected as it fills it up with your footage. It displays a little progress disc in the bottom-left corner (Figure 2-3, top).
Don’t disconnect your iDevice right after you click the Import button—it takes some time to transfer the video files to your Mac. When iMovie finishes importing, it lets you know (Figure 2-3, bottom).
From a Camera or Camcorder
These days, pretty much all digital cameras shoot both photos and video. That means everything from a fancy digital SLR to the humble point-and-shoot can be a video camera. Video quality is another question entirely, because not all cameras are created equal.
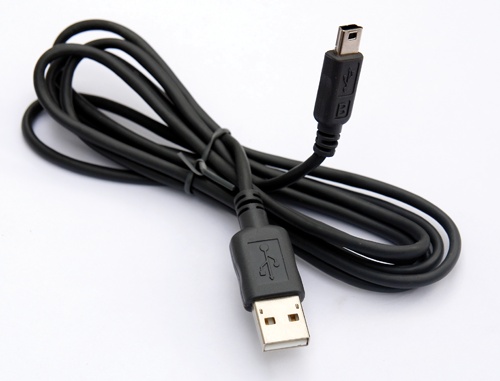
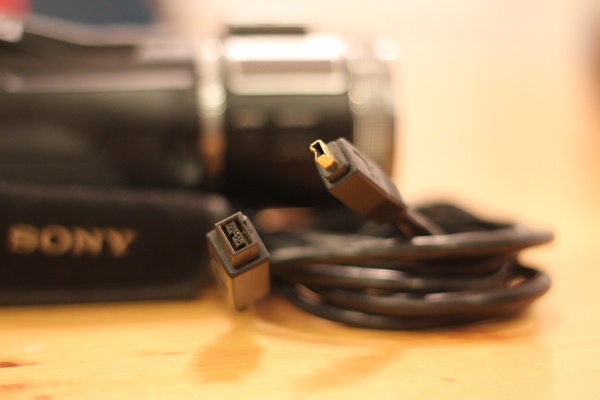
Whatever camera you use, you probably connect it to your Mac with a USB cable, which comes with your camcorder (see Figure 2-4). (You can also pop out your camera’s memory card, as described in the next section.)
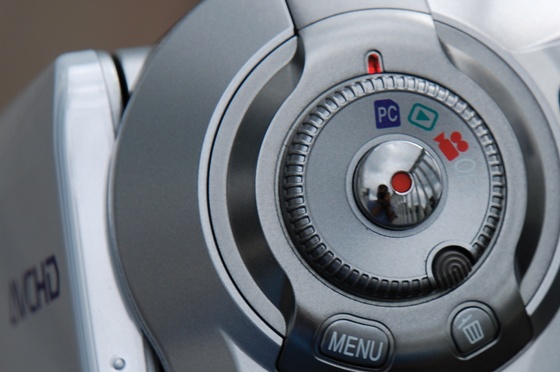
Your camera may also need to be in a particular setting to talk to your Mac. The wording might vary and some cameras may sense the connection automatically, but every camera or camcorder has a mode for making PC or Mac connections (Figure 2-5).
Once you set up your Mac so it can see your camera, the camera shows up in the Import window’s list of sources. From that point on, importing from your camera is identical to importing from an iPhone, iPad, or iPod Touch—follow steps 1 and 2 in the previous section.
Tip
Every modern camera can talk to iMovie, but if you’re considering a camera purchase and want to be sure, Apple offers a list of iMovie-compatible cameras at http://help.apple.com/imovie/10/cameras/.
From an SD Card
Almost every recent Mac model comes with an SD card slot. (An SD card is the little postage-stamp-sized memory card most digital cameras use to store your photos.) Having a slot in your Mac means you can take the SD card out of your camera and plug it right into your computer, saving you the trouble of using a cable to connect.
Importing from an SD card works just like importing from a camera; the card shows up in iMovie the same way a connected camera does. If, instead of that, the card shows up as a drive, nestled in with the hard drives connected to your Mac, you probably don’t actually have any videos or photos on the card.
From a Tape Camcorder or DV Deck
Browsing and picking individual clips from a camera is a relatively new convenience. Once upon a time, people recorded video onto tapes. The most popular of these was the MiniDV tape, and you may have a drawer full of them. The convenience of flash-based storage like SD cards put DV tapes out to pasture.
Luckily, as historical as this format has become, iMovie can still speak the ancient tape language. You’ll need a few things to get this to work.
The first is a DV-based camera or deck. You may still have your old MiniDV camera around; as long as it still operates, it should work with your Mac. Alternatively, you can use a DV deck, which is a box dedicated to reading DV tapes. Either of these should have a Firewire connection on it, which brings you to the next thing you need.
Because pretty much every DV-tape-based camera and deck uses Firewire to connect to your Mac, you’ll need a Firewire cable. Firewire connections come in two flavors: Firewire 400 and Firewire 800. This latest version of iMovie doesn’t work on Macs with Firewire 400 connections (they’re too old), so if you have a Firewire port on your Mac, it’s probably the 800 variety (Figure 2-6).
The big end of the cable goes into the Firewire jack on the
side or back of your Mac; it’s marked by a radioactive-looking
![]() symbol. The small end goes into your camera
or deck.
symbol. The small end goes into your camera
or deck.
If you have a Mac with no Firewire port of any kind, then you’ll need an adapter. Apple sells one for current Macs (those that have Thunderbolt connections) for $30.
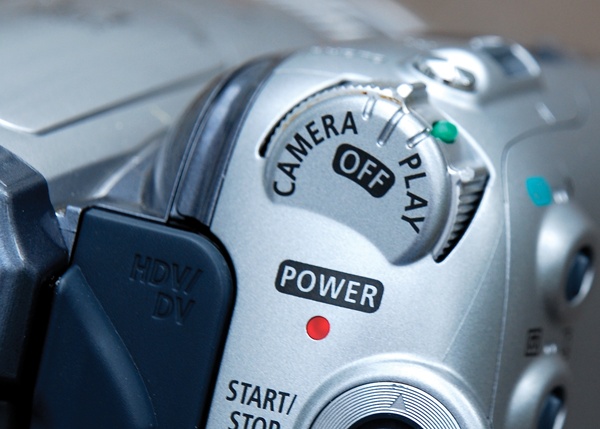
You’ll also need to set your camcorder to playback mode,
labeled Play, VCR, VTR, or just ![]() (Figure 2-7). Once you do
that, follow steps 1–4 on From an iPhone/iPad/iPod Touch, and then follow the steps
outlined next.
(Figure 2-7). Once you do
that, follow steps 1–4 on From an iPhone/iPad/iPod Touch, and then follow the steps
outlined next.
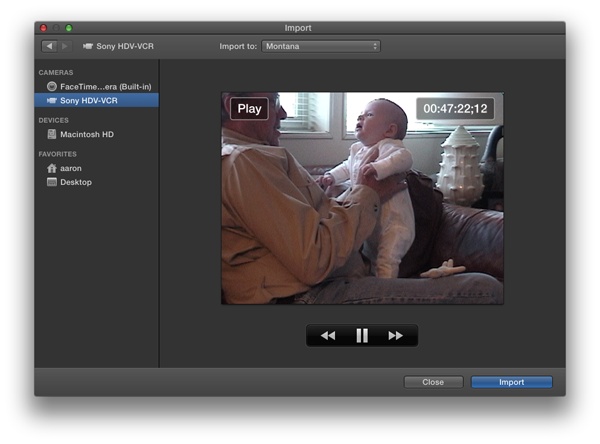
Cue the tape to the right spot.
This may be at a certain moment, like when everyone starts singing “Happy Birthday,” or it may just be the beginning of the tape if you’re importing the whole thing. You can use the playback controls on the camera, or the ones in the iMovie Import window (Figure 2-8).
iMovie starts to play the tape, importing it as it goes. You can’t import any faster than the tape can play back (one of the reasons people ditched tape-based camcorders), so if you’re capturing 10 minutes of footage, it will take 10 minutes to import it. As iMovie captures your clip, it tells you how much it’s taken in, measured in minutes and seconds.
Click Stop Import.
You can stop the import whenever you want. If you let iMovie import the rest of the tape, it stops on its own at the end of the tape. Most tapes can hold an hour (or more) of footage, so if you’re importing an entire tape, don’t bother hanging around until it’s done. When you finish importing, close the Import window.
The footage you import shows up in your chosen event. You’ll also notice a handy feature when iMovie finishes importing footage: The program automatically creates an individual filmstrip (clip) for each scene you shot. So an hour’s worth of tape doesn’t wind up as a single, mega-chunk of video—instead, you wind up with 30 or 40 individual clips, just the way you shot them.
That’s because, behind the scenes, iMovie studies the date and time stamp that digital camcorders record on every frame of video. When iMovie detects a break in time, it assumes that you stopped recording, if only for a moment, and therefore considers the next piece of footage a new shot. It turns each new shot into a new clip.
Note
DV tapes don’t age well. If your imported video looks pixelated in strange ways, or if iMovie doesn’t break clips apart correctly, an old tape is probably the culprit. Unfortunately, there’s no way to fix this. Yet another reason tape-based camcorders lost to more modern ones. (And a reason to get those old DV tapes imported sooner rather than later.)
From a DVD Camcorder
DVD camcorders, like tape-based cameras, are also historic these days, but more like historical oddities. In general, DVD camcorders were a mess. They were fussy, took a long time to “initialize” and “finalize” a blank DVD, each disc didn’t hold very much footage, and the recorded discs had a short lifespan.
This latest version of iMovie recognizes only two DVD camcorder models, the Sony HDR-UX20 and Sony HDR-UX20E. You can import from these two cameras the same way you do for an iPhone, iPad, or iPod Touch (see From an iPhone/iPad/iPod Touch). Any other DVD-based camera requires a prior version of iMovie.
From the Finder
If you have video clips on your Mac that you want to bring into iMovie for editing, you don’t need a camera or anything. You just need to import the files.
The easiest way to do that is to drag them in from the Finder. Position the iMovie window so you can see your movie files in the Finder, and then drag the files directly onto an event in iMovie’s Event list. iMovie then copies the clips to that event.
Alternatively, you can use the Import window to find and select your clips. In the window, you can see the hard drives connected to your Mac. Select one and you see a file browser just like the one in the Finder, except that it also lists how long your clips are (Figure 2-9). Select one or more clips and click Import Selected to copy them into the chosen event. (You can choose more than one clip by holding down the ⌘ key as you click each one.)

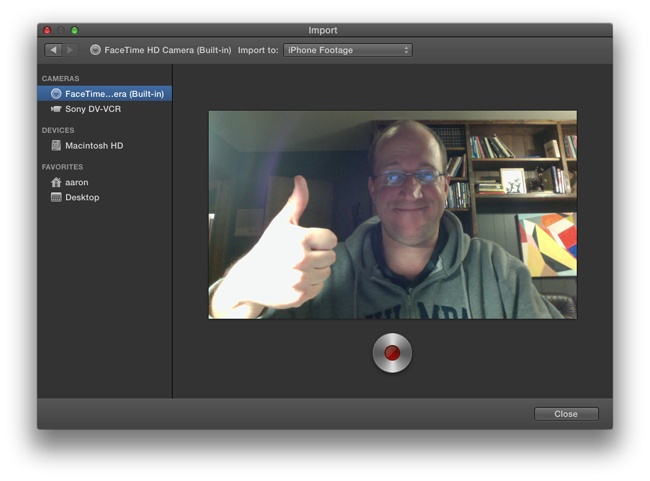
Record Live with the iSight Camera
Every Mac laptop and iMac has a tiny video camera built in, just above the screen. This is your iSight camera, the one you use for things like Facetime chats or PhotoBooth shoots. iMovie can use this camera to capture video live, direct into your chosen event.
Tip
iMovie doesn’t recognize external webcams, even if you can use them with other software on your Mac. For now, it’s your built-in iSight or nothing.
Follow steps 1–4 on From an iPhone/iPad/iPod Touch, and then click the big, red button to start recording (Figure 2-10). Click it again to stop. You can do this repeatedly for multiple takes; iMovie sticks each recording in the event you chose. Close the Import window when you’re done.
Importing Old Analog Tapes
We live in a new age, with digital everything, but millions of precious moments are trapped on VHS, VHS-C, or 8mm cassettes—that is, analog tapes instead of digital.
These days, people buy only digital camcorders. So how do you import and edit footage you shot before the digital era? Some local businesses might offer a digitizing service, but those cost money. Fortunately, it’s fairly easy (and free) to digitize old footage if you have the right equipment. That equipment consists of a DV-tape camcorder that has analog inputs—in other words, older model video cameras that record to MiniDV tapes and that have red, white, and yellow input jacks (also known as RCA jacks). You’ll also need a device capable of playing your old analog tapes, like a VCR or another old camcorder—and this unit has to have red, white, and yellow output jacks. Finally, you’ll need an RCA cable (the kind that has red, white, and yellow plugs on both ends) to connect the recording and playback devices.
Note
When you use the approach that follows, iMovie won’t be able to chop the video into individual scenes automatically, as it does with digital video. That’s because old analog camcorders didn’t stamp every frame of every shot with an invisible time code, so iMovie doesn’t know when you started or stopped your camcorder.
Then:
If connected, unplug the FireWire cable from the DV-tape camcorder.
Most camcorders’ analog inputs automatically switch off if you hook up a FireWire cable.
Plug the RCA cable into the Audio Output and Video Output jacks on the side of the VCR or old camcorder. Connect the opposite ends of the cable to the Audio Input and Video Input jacks of your DV-tape camcorder.
Put a blank tape in your DV-tape camcorder.
Tip
If both your old camcorder and your DV camcorder have S-video connectors (round, dime-sized jacks), use them instead. S-video connections offer higher-quality video than RCA connections. (Note that an S-video cable doesn’t conduct sound, however. You still have to connect the red and white RCA cables to carry the left and right stereo sound channels.)
Switch both camcorders to VTR or VCR mode.
You’re about to make a copy of the older tape by playing it into the DV-tape camcorder.
By now, every fiber of your being may be screaming, “But analog copies make the quality deteriorate!” Relax. You’re only making a first-generation copy. Actually, since you’re making a digital copy, you lose only half as much quality as you would with a normal VCR-to-VCR duplicate. In other words, you probably won’t be able to spot any deterioration. And you’ll have the footage in digital format forever, ready to make as many copies as you want without further degradation.
Press the Record button on the DV-tape camcorder, and press Play on the VCR or old camcorder.
You can monitor your progress by watching your DV-tape camcorder’s LCD screen. Remember that a DV cassette generally holds only 60 minutes of video, compared with 2 hours on many previous-format tapes. You may have to change DV cassettes halfway through the process.
Note
Prior versions of iMovie support an analog-to-digital converter—a box that sits between your Mac and your VCR or older camcorder. This approach, and other analog-rescuing tricks, are covered thoroughly in past editions of this book.
After you record your old video onto your DV tape, import that tape by following the steps on From a Tape Camcorder or DV Deck. It’s not the most elegant solution to digitizing old videos, but you’ll never have to do it again.