Chapter 18. iMovie for iOS: The Lay of the Land
Twenty years ago, editing video on a computer was a very big deal. Of course, those computers were incredibly expensive and required lots of training. But with the advent of iMovie, video editing came to the masses. Normal people could edit video on computers they could actually afford. iMovie was, historically speaking, a major breakthrough.
Today, you don’t even need a computer to edit video. Thanks to an app called iMovie for iOS, you can cut clips on an iPhone, iPad, or iPod Touch. This is real video editing, too, not just clip-trimming. You can add titles, slo-mo effects, soundtracks, and transitions. If that doesn’t blow you away, consider that you can do all of this on the same device you used to film your movie.
There are some limits. You won’t find as many tools in iMovie for iOS as you will in the Mac version. (Notice how this section of the book is decidedly thinner?) You get fewer options for titles, transitions, sound and video effects, and themes. But in exchange for those sacrifices, you get a video editor that’s easy to use and that fits in your pocket. (Unless you use an iPad or have small pockets.)
Download iMovie
iMovie for iOS, like other iPhone and iPad apps, comes from the App Store. Tap the App Store icon on your touchscreen gadget and type “iMovie” into the store’s search box (or scroll to the bottom of the Featured page and tap the link “Apps Made by Apple.” You’ll see a list that includes iMovie.)
For any iDevice bought after September 2013, iMovie is free. If you bought your iPhone or iPad before then, the app will set you back $4.99. In either case, tap the “Free” or “$4.99” button, and then type in your Apple ID and password to start the download (Figure 18-1). iMovie shows up on your home screen, nestled in with your other apps.
Note
iMovie is big: over 500 MB in size. Downloading and installing it takes a while, depending on the speed of your Internet connection. And you need a WiFi connection—Apple doesn’t let you download apps bigger than 100 MB using a cellular network.

If you have, for example, both an iPhone and an iPad, you only have to buy iMovie once (though you have to download it twice). Pay once, use it on all iDevices that use the same App Store account. And iMovie is a “universal” app, which means it works great on Apple gear of all sizes.
Note
This book uses illustrations from the iPad version of iMovie, but all the same buttons, features, and functions appear in the iPhone and iPod Touch version, too.
This book covers the latest version of iMovie for iOS (version 2.0). If you’re using an older version, update it. (That means you need to be running iOS 7, too.)
Note
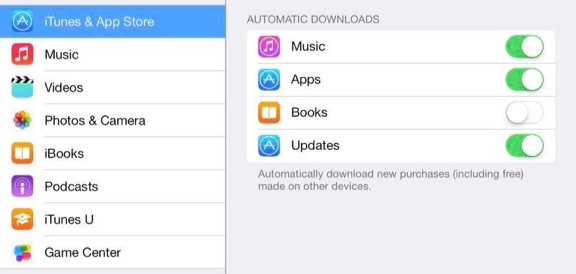
Occasionally, Apple updates iMovie to squash bugs or add new features. To make sure you always have the latest and greatest version of iMovie on your device, turn on the auto-update feature (explained in Figure 18-2).
The Video Browser
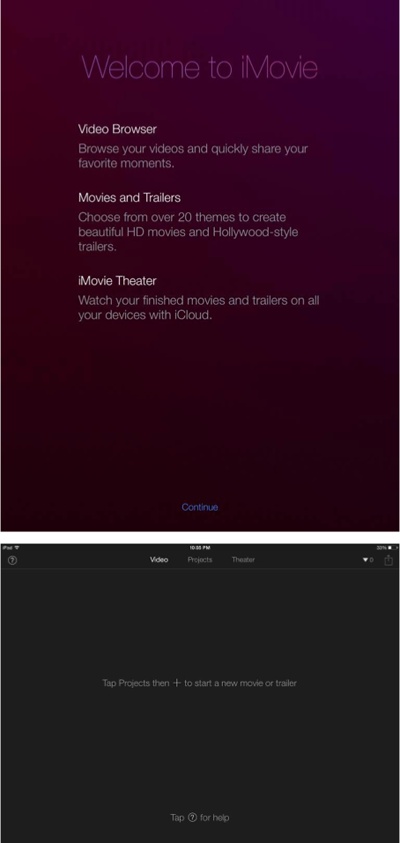
When you open iMovie for the first time, you see the Welcome screen (Figure 18-3, top). Tapping Continue takes you to iMovie’s Video Browser (Figure 18-3, bottom). If you haven’t shot any movies with your device, this screen is bare, but it fills up as you capture video.
If you have used iMovie before, open it and select Video at the top of the screen to see the Video Browser.
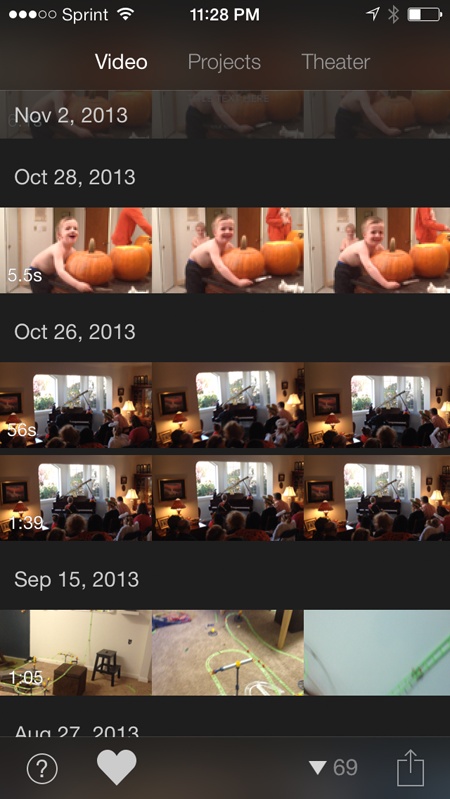
The Video Browser looks much like the Event browser in iMovie for the Mac (Chapter 2). It shows you all the clips in your device’s photo library, sorted by date (Figure 18-4). Each clip’s duration appears on the left.
You can browse all your footage from this screen and even mark clips as Favorites (Playback). You can also share a video clip from here (Share Movies, Trailers, or Clips).
Playback
To play a clip, tap it in the Video Browser. iMovie displays a playback screen showing the first frame of the clip and a filmstrip of the complete clip underneath (Figure 18-5).
Tap the Play button to play back the clip. (Make sure you hit the button head-on—tapping anywhere else closes the screen.) Once playback begins, tap anywhere on the screen to stop it.
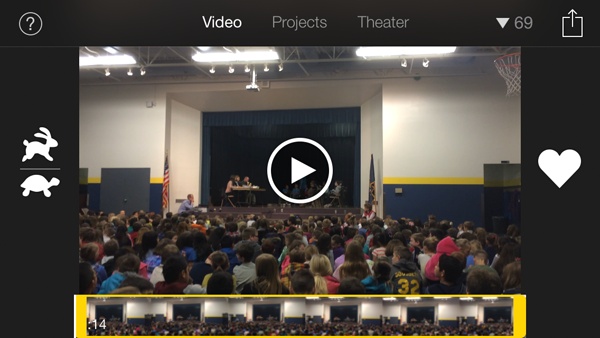
If the normal playback speed doesn’t suit you, use the rabbit and tortoise buttons (Figure 18-5) to quickly move through long, boring bits, or to slow down scenes with a lot of action. Neither button permanently changes the speed of your clip. (To do that, see Re-Edit a Clip.)
Tap-Hold Scrubbing
iMovie just wouldn’t be iMovie without the ability to scrub video. To scrub through a clip, drag your finger on the filmstrip; the playhead follows your finger. You can scrub forward or backward.
Scrubbing is a fast way to move around a clip at random, previewing the interesting bits as you go: Scrub to the part of a clip you want to see, tap Play in the preview screen, and then, if you like what you see, mark that passage as a Favorite (see the next section). Tap the screen again to stop playback and scrub to a different spot. This approach makes quick work of long clips.
Favorites
Scrubbing is most useful when you have a lot of footage to review. You’re looking for moments that you actually want to include in your movie. Once you find them, you can save yourself mountains of time by marking them as Favorites. You’ll thank yourself later, when you assemble your movie from a slew of clips.
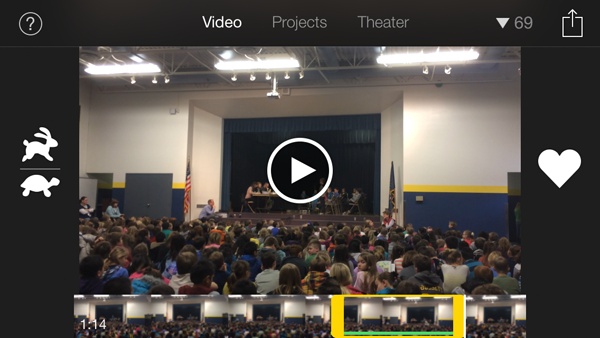
Marking a selection as a Favorite is a two-part process. First, you isolate the part of the clip you want by adjusting the yellow border around it, and then you tap the Favorite button.
To make part of a clip a Favorite, first select the clip to call up the yellow editing border. Then, drag either end of the border until you isolate the juicy center of your footage. As you drag, the preview window displays a closeup of the current frame so you can make sure you’re “cutting” the clip where you want.
Once you select the right spot—like the moment when little
Petey steps up to the plate and knocks that tee ball to Timbuktu—tap
the ![]() button to the right of the preview screen
(Figure 18-6). A
green strip along the bottom of the selection confirms that you
marked it as a Favorite.
button to the right of the preview screen
(Figure 18-6). A
green strip along the bottom of the selection confirms that you
marked it as a Favorite.
To unmark a Favorite, select the entire clip (you don’t have
to zero in on the segment you chose) and then hit ![]() .
.
Sort Clips
As you shoot footage, it won’t take much time before your Video Browser fills up with clips, making finding the ones you want to add to your movie tricky. You can aid your search two ways:
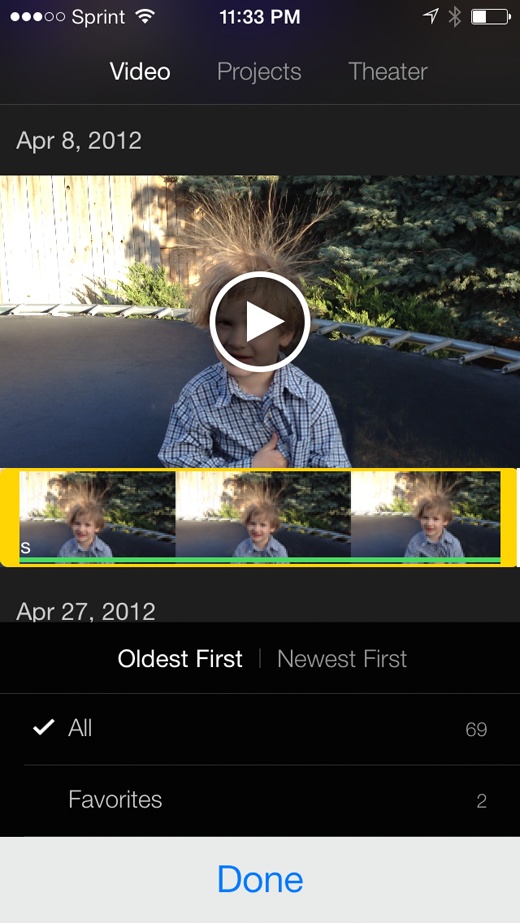
Sort by Date. iMovie helps you find clips by sorting your footage by date. At the outset, the newest clips appear at the top. (After all, these are the ones you’ll most likely need when you go into iMovie.) You can reverse the order and put older clips at the top by tapping
 in the toolbar (Figure 18-7) and
choosing Oldest First. If you change your mind, tap the same
button and then choose Newest First.
in the toolbar (Figure 18-7) and
choosing Oldest First. If you change your mind, tap the same
button and then choose Newest First.Only Show Favorites. If you’ve invested time in marking favorite footage, you can see just your “best of” clips by tapping
in the toolbar and then choosing
Favorites. To see all your clips again, choose All.
Import Video
Eventually you may want to edit some footage on your iDevice that isn’t already on your device. For example, your brother may have been the only one brave enough to film your dad lighting the charcoal grill while everyone else ducked for cover. You can get that footage on your gadget two ways: Import it from your computer, or pull it in from another iDevice. Follow either approach and you can end the family reunion video with a—literal—bang.
Note
Video comes in all different file formats, but iMovie iOS can edit only video that will actually play on an iDevice. In general, that means video files whose names end in either .mov or .mp4.
Import Video from Your Computer
To get a video file from your computer onto an iPad, iPhone, or iPod Touch, use iTunes. (To get the video on your computer in the first place, see the options in Chapter 2.)
The easiest way to transfer a video file from your computer to an iDevice is to save the file in a folder on your desktop.
On your Mac, open the Finder and select File→New Folder to create a folder where you can store your video file(s). Name it something like “Video File Transfers.”
Save your movie as a file in the folder you just created.
You can get the video as a file by importing it from a camcorder (see Chapter 2), or importing it into iMovie and then saving it as a file (click the Share icon in the iMovie toolbar and then select File). If you saved the video in iPhoto or Aperture, just drag it from those applications and drop it in the folder. The same is true for video files you get from other sources, like an email message or an iMessage. For other applications, look for a Save As or Export function in the file menu.
The goal is to get your video file in the desktop folder you just made.
Connect your iDevice to your computer via USB cable, and then open iTunes.
If you sync by WiFi, you don’t have to connect your device first—proceed to step 4. If you don’t know what WiFi syncing is, plug your gadget into your computer with the USB cable that came with it.
Look for the name of your gadget under “Devices” in the left-hand column of iTunes.
It might appear as iPhone, iPad, iPod Touch, or, if you named your device, something like “Seth’s iPad.” Click its name to select the device.
Choose Photos from the list of media types at the top of the iTunes screen.
It’s not the most obvious approach, but clicking Photos gives you the option to sync video files to your iDevice, too.
Tell iTunes where your video is.
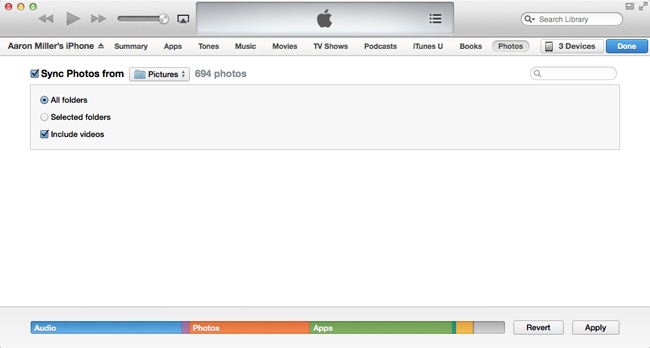
Turn on “Sync Photos from” and then turn on “Include videos.” In the drop-down menu to the right of “Sync photos from,” select “Choose folder” (see Figure 18-8).
Figure 18-8. Syncing video files to your iDevice means using the Photo syncing feature in iTunes. Choose the folder where you stored the clips you want to sync to your iPhone, iPad, or iPod Touch, and then turn on the “Include videos” checkbox. iTunes syncs the video files in that location to your iDevice when you click Sync or Apply.When the navigation window opens, browse to the folder you created in step 1 and then click Open.
iTunes transfers the videos in that folder to your iDevice; it displays how many files it’ll sync beside the drop-down menu.
In the bottom-right corner of iTunes, click the Apply or Sync button.
Depending on the last time you synced your iDevice, it might take awhile to run the backup and sync new media. Once that’s done, the video file will be on your iOS device.
Open iMovie on your device, and the clip should appear in the Video Browser, available for any movie project as well.
Transfer Video from One iDevice to Another
You can share video files between Apple devices in several ways. Here are the most useful, from the most to the least simple:
Note
Most of these choices involve tapping the ubiquitous Share
button on your iDevice (![]() ). Sometimes it means “Share with someone
else,” and other times it means “Share with another app on my
device.”
). Sometimes it means “Share with someone
else,” and other times it means “Share with another app on my
device.”
AirDrop. If both the sending and receiving devices offer AirDrop—a super-easy way to wirelessly transfer files between Apple devices—this is probably the best way to go.
Note
To use AirDrop, you need an iPhone 5 or later, a fourth-generation iPad or later, any iPad Mini, or at least a fifth-generation iPod Touch. And both devices need to be running iOS 7 or later.
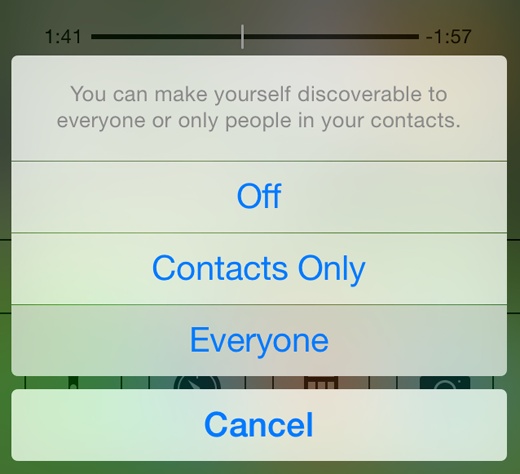
On the destination device, slide your finger up from the bottom of the screen to call up the Command Center. Tap the AirDrop button and make sure it’s set to be seen by the other device. (The easiest way to do that is to set AirDrop to “Everyone”—see Figure 18-9.) That device name should appear in the list iMovie displays when you choose the Share button. Tap it and the other device is asked to confirm the transfer. Click Accept on the destination device; the video clip copies itself over into the Camera Roll.
iMessages. If your device doesn’t offer AirDrop, Apple’s iMessages service works great, too, with one caveat: You can send files up to only 100 MB in size—about a minute of video shot on an iPhone or iPad.
On the device with the video clip, select the file and then tap the Share button. If your clip is small enough, choose Messages, and then enter the iMessage contact information for the other device (usually an email address or a phone number). Click Send and the clip shows up on the other device. Press the Play button. In the screen that plays the video, find and tap the Share button again. Choose Save Video, and the clip will appear in iMovie the next time you open it.
Dropbox, or some other third-party file-sharing service. All kinds of companies let you easily share files between devices by way of a free storage locker on the Web. Dropbox is one of the most popular, there’s an iOS app for it, and it offers storage large enough (2 GB) so you can share at least some video files. All the services provide simple instructions for transferring files to and importing them from the online locker. Once you have the clip on your iDevice, use the Share button to save it.
Email. Remember email? You can always email a file between iPhones, iPads, or iPod Touches, and then use the Share button to save it to the destination device. The only drawback to email—and it’s a big one for video files—is that most Internet service providers limit the size of file attachments. If you’re sharing an HD-quality clip, you’ll have room for only a few seconds’ worth of footage.
Save the file to your computer, and then sync it to your iOS device. If all else fails, you can sync video files from an iDevice to your computer and then to another iOS device using the steps described on From iTunes to iPad, iPhone, iPod Touch, or Apple TV. Either save to and import from the same folder on your computer, or use different folders. If you do the latter, you need to manually copy the video file from one folder to the other.