
Chapter 3. Events
In the last chapter, you learned that iMovie stores your raw footage in Event libraries, the repositories for the clips you’ll use as you build your movie. Now that you’ve imported some footage, it’s time to learn how you (and iMovie) work with events as you craft your film, and how you handle everyday housekeeping for events—to rename, merge, move, or delete them.
How Events Work
iMovie stores two types of files in an event: source material and projects. Source material includes everything you need to create your movie, like the raw footage you imported earlier, along with any songs and photos you want to use (you’ll learn how to import those in Chapters Chapter 11 and Chapter 12). A project is your movie-in-progress, described in Chapter 4.
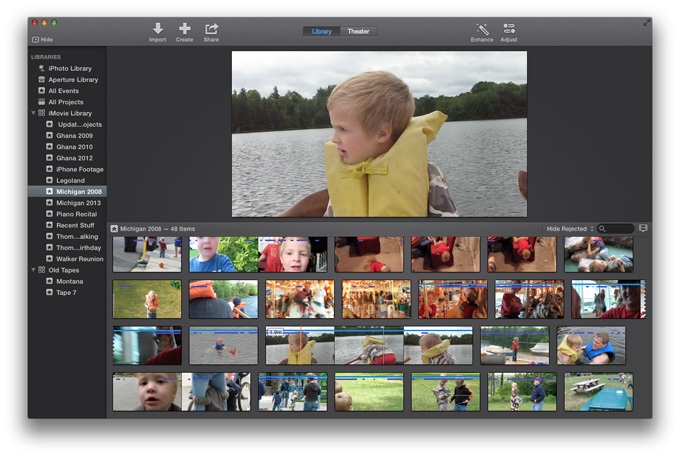
Right now, your events include the individual clips you imported in the last chapter. To see what an event looks like, go to the iMovie Library (under Libraries on the left side of the iMovie window) and click an event name. iMovie displays all the clips inside that event in the Event browser on the right (see Figure 3-1).
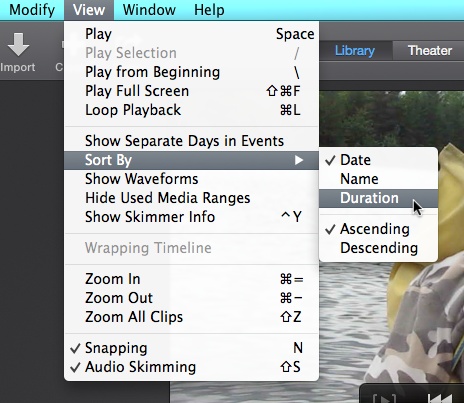
iMovie starts out sorting your clips by date, oldest to newest. You can change that sort order by choosing View→Sort By and then selecting from the submenu (Figure 3-2). You can sort your footage by date, clip name, or clip duration. With any of these options, you can reverse the sort order (oldest to newest, reverse alphabetical, or longest to shortest) by choosing Descending from the same submenu.
Note
iMovie automatically sorts your events in the Event library by date, based on the timestamp of the footage in the event. You can change the sort order by selecting an event and choosing View→Sort Events By.
Review Event Footage
To see what’s in a clip, iMovie gives you a couple of options. First, you can skim a clip to get a general idea of what it holds. To do that, drag your mouse cursor across the clip. As you do, iMovie shows you the clip in the Viewer, playing it back just as fast (or slowly) as you drag the mouse.
To play the clip at normal speed, click a spot and press the space bar. iMovie previews your clip in the Viewer. To watch a clip from the beginning, click anywhere in the clip and press the key. iMovie starts playing the clip from the beginning at normal speed.
Tip
If you combine footage from multiple days into a single event (like a family trip to Legoland), iMovie can divide clips within that event by the days on which you shot them. To turn on this feature, choose View→“Show Separate Days in Events.” Now, iMovie sorts your footage in your preferred way (View→Sort By), but within single days. So if you chose to sort your clips by duration, you’ll see your clips listed from shortest to longest for each day, not just shortest to longest in one big event pile.
Rename an Event
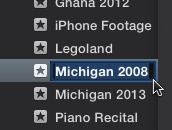
To rename an event, click it once in the Libraries list to select it. Then, showing a bit of patience, click it again and wait a fraction of a second. When you do, iMovie highlights the old moniker, ready for you to type in a new one (Figure 3-3).
Merge Events
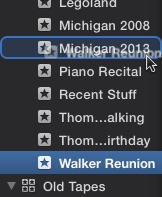
You can merge events, too. For example, if you filmed your kids during the month of May, and created a new event each time you imported a day’s footage, you might want to group all those clips into a single event, called something like May Madness. To do that, grab an event and drop it onto another one (Figure 3-4). The grabbed event shows up in the event where you dropped it. If you like, rename the event to reflect the grouped footage.
Move Individual Clips to Another Event
To move a misplaced clip to its proper event, select the clip in the Event browser (using the techniques described on Select by Dragging) and drag it onto the name of the correct event.
Tip
If, instead of moving a clip, you want to copy it from one event to another so that it lives in both events, hold down the Option key as you drag the clip to the new event. A green + sign appears along with your cursor, telling you that you’ll be making a copy of the clip instead of moving it.
This works with multiple clips as well. Just remember that copying clips doubles the number of the files on your hard drive, taking up more space as a result.
Delete an Event or Event Footage
To delete an event (and regain some disk space in the process), select the event and then choose File→“Move Event to Trash” (or press ⌘-R). iMovie moves the event to a hidden trash folder (described on Project Properties) and deletes it for good when you quit iMovie.
To get the event back, choose Edit→Undo (⌘-Z). Just be sure to do that before you quit iMovie. (See Aspect Ratios: The Missing Manual to read up on the mighty Undo.)
To delete individual clips from an event, use the same technique.
iMovie Libraries
You know how you can put papers into folders, and then folders into a filing cabinet? In the same way, you keep your video clips in events, but you also have a larger container for all those events: libraries.
iMovie starts you out with just one library, called, fittingly enough, iMovie Library (that’s where you reviewed your events at the beginning of this chapter). You can create more libraries (see the next section) or keep all your stuff in the iMovie Library, but the bottom line is that every scrap of footage you import goes into an event, and iMovie stores those events in a library.
iPhoto and Aperture Libraries
While iMovie includes just one stock library when you first use the program, you may see a few others as you start working. If you use either of Apple’s photo-management programs, iPhoto for casual photographers and Aperture for pros, iMovie automatically detects these libraries and adds them to its Libraries list, making it simple to pull still images or clips from either program into your projects (see Chapter 12).
The Content Library
In addition, once you start working on a film (Chapter 4), iMovie reveals a second library at the bottom of the Libraries list: the Content Library. It includes all the elements Apple gives you to enhance your movie: transitions, titles, maps, backgrounds, and audio tracks. (You’ll find each of these components discussed in detail in the chapters to come.)
Note
To understand why iMovie needs these files handy, read how iMovie edits movies by reference on The Concept of iMovie Projects.
Create Your Own Library
iMovie’s iMovie Library may be all you need for a video project or two, but you might find additional storehouses helpful in keeping your projects organized. For example, you may have a bunch of home movies on your Mac, along with a collection of banjo lessons you posted to YouTube, and footage of your brother’s wedding. You could create a library for each of these events, making it easy to pick up a project where you left off, or to send the library to, say, your brother.
Being able to share a library is one good reason to create one. For example, once your brother’s wedding is over, you can copy the library from your Mac to your brother’s, and he’ll have all the elements that went onto his wedding movie: the raw footage, finished videos, photos, and music. When he opens the library in iMovie, he and his wife can enjoy the memories.
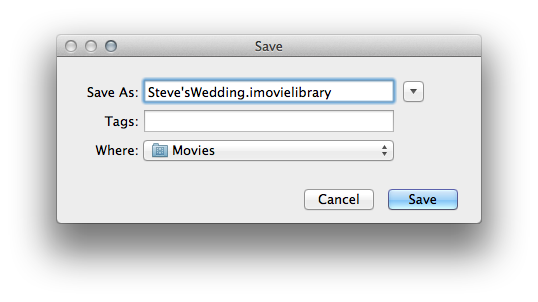
Fortunately, iMovie lets you create as many libraries as you want. To create a new one, choose File→Open Library→New. iMovie displays the Save window you see in Figure 3-5, where you name the library and choose a location for it on your hard drive (your Mac’s Movies folder is the default).
Work with More Than One Library
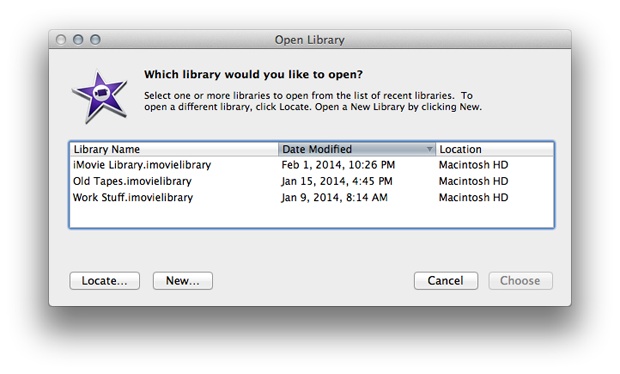
You can work with more than one library at a time. To open a library, choose File→Open Library. If you’ve opened the library before, its name shows up in the drop-down menu; select it to go to that library. To open a library you’ve created but haven’t worked with before, choose Other, and then click the Locate button (Figure 3-6). That brings up a file chooser where you specify the library (which can be somewhere on your Mac or on any other drive connected to it). Find and select the library you need and then click Open.
Once you open a library, it shows up in the Libraries list on the left-hand side of the iMovie window.
If you’re done with a library and want it out of your way, select it in the Libraries list and choose File→Close Library.
Note
In Chapter 5 (Phase 3: Build the Storyboard), you’ll learn how to use footage from different libraries in a single movie project. In the meantime, don’t worry if you close a library that your current project uses—your movie plays back normally, just as though the library were still open.