
Now let’s get started with your application. In Xcode, create a new Window-based Application iPhone project and name it TouchTracker.
First, you will need a model object that describes a line. Create a new NSObject and name it Line. In Line.h, declare two CGPoint instance variables and two properties:
#import <Foundation/Foundation.h>
@interface Line : NSObject {
CGPoint begin;
CGPoint end;
}
@property (nonatomic) CGPoint begin;
@property (nonatomic) CGPoint end;
@end
In Line.m, synthesize the properties:
#import "Line.h" @implementation Line @synthesize begin, end; @end
Next, create a new NSObject called TouchDrawView. In TouchDrawView.h, change the superclass to UIView. Also, declare two collection objects: an array to hold complete lines and a dictionary to hold lines that are still being drawn. We’ll talk about why we use two different collection objects when you write the code to use them.
#import <Foundation/Foundation.h>
#import <UIKit/UIKit.h>
@interface TouchDrawView : UIView
{
NSMutableDictionary *linesInProcess;
NSMutableArray *completeLines;
}
- (void)clearAll;
@end
In your Hypnosister project, you instantiated your custom view programmatically. In TouchTracker, you will instantiate a custom view from a XIB file. Open MainWindow.xib.
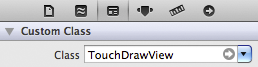
From the object library, drag an instance of UIView onto the window. In the identity inspector, set its class to TouchDrawView, as shown in Figure 20.2.
Views created programmatically are sent initWithFrame:, views that are unarchived from a XIB file are sent initWithCoder:. Thus, for TouchDrawView, you will override initWithCoder: instead of initWithFrame:.
In TouchDrawView.m, take care of the creation and destruction of the two collections:
#import "TouchDrawView.h"
#import "Line.h"
@implementation TouchDrawView
- (id)initWithCoder:(NSCoder *)c
{
self = [super initWithCoder:c];
if (self) {
linesInProcess = [[NSMutableDictionary alloc] init];
// Don't let the autocomplete fool you on the next line,
// make sure you are instantiating an NSMutableArray
// and not an NSMutableDictionary!
completeLines = [[NSMutableArray alloc] init];
[self setMultipleTouchEnabled:YES];
}
return self;
}
Notice that you explicitly enabled multi-touch events by sending the message setMultipleTouchEnabled:. Without this, only one touch at a time can be active on a view. If another finger touches the view, it will be ignored, and the view will not be sent touchesBegan:withEvent: or any of the other UIResponder messages.
In the dealloc method, release the objects you created.
- (void)dealloc
{
[linesInProcess release];
[completeLines release];
[super dealloc];
}
Now override the drawRect: method to create lines using functions from Core Graphics:
- (void)drawRect:(CGRect)rect
{
CGContextRef context = UIGraphicsGetCurrentContext();
CGContextSetLineWidth(context, 10.0);
CGContextSetLineCap(context, kCGLineCapRound);
// Draw complete lines in black
[[UIColor blackColor] set];
for (Line *line in completeLines) {
CGContextMoveToPoint(context, [line begin].x, [line begin].y);
CGContextAddLineToPoint(context, [line end].x, [line end].y);
CGContextStrokePath(context);
}
// Draw lines in process in red
[[UIColor redColor] set];
for (NSValue *v in linesInProcess) {
Line *line = [linesInProcess objectForKey:v];
CGContextMoveToPoint(context, [line begin].x, [line begin].y);
CGContextAddLineToPoint(context, [line end].x, [line end].y);
CGContextStrokePath(context);
}
}
Finally, write a method that will clear the collections and redraw the view in TouchDrawView.m.
- (void)clearAll
{
// Clear the collections
[linesInProcess removeAllObjects];
[completeLines removeAllObjects];
// Redraw
[self setNeedsDisplay];
}