Chapter 8. Securing the Mail Transport
Introduction
Chapter 7 contains recipes that use the AUTH SMTP extension to provide strong authentication of the end points in a mail exchange. In this chapter, the recipes use the SMTP STARTTLS extension for both strong authentication and encryption.
While encryption is one of the primary benefits of the SMTP STARTTLS extension, it is important to remember that this is not end-to-end encryption. Mail can take multiple hops before it is delivered. Some intervening hops may not use STARTTLS. Additionally, the mail message is still stored as clear text by both the sender and the recipient. STARTTLS only provides encryption for mail passing over a single hop between two sendmail systems configured for STARTTLS.
Chapter 7 explained how sendmail relied on the Simple Authentication and Security Layer (SASL) to provide the security tools necessary for AUTH authentication. STARTTLS relies on the Transport Layer Security (TLS) protocol for both authentication and encryption.
Transport Layer Security
TLS is an Internet standard
protocol, defined in RFC
2246, The TLS Protocol Version 1.0. TLS is based
on the Secure Sockets Layer (SSL) protocol that was originally
developed by Netscape for web security. The manner in which TLS is
used to secure mail transport is defined in RFC 2487, SMTP
Service Extension for Secure SMTP over TLS. The SMTP
extension that supports TLS is called STARTTLS.
The receiving system advertises support for STARTTLS in its response
to the client’s EHLO command. The
connecting system requests TLS security by issuing the
STARTTLS command in response to the advertisement.
TLS uses public key encryption, which is also called asymmetric encryption. It is asymmetric because it uses two different keys. A public key that is made available to the world and a private key that is kept secret. Anything encrypted with the public key can only be decrypted with the private key, and anything encrypted with the private key can only be decrypted with the public key. Four keys are needed to authenticate both the TLS client and the TLS server: the client’s public and private keys and the server’s public and private keys.[1]
The certificate
A TLS public key is distributed in a file called a certificate. It is called a certificate because it is certified to contain a valid public key by a digital signature. There are a few different techniques used to sign the certificates used by sendmail.
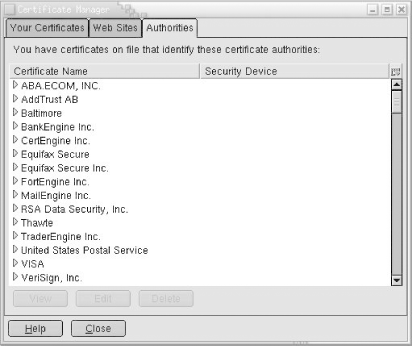
First, there are commercial certificate authorities (CAs). For a fee, a commercial CA will sign your certificate request creating a signed certificate. A CA is trusted to provide reasonable assurance that the certificate is correct and represents the organization it claims to represent. Commercial CAs are well established because they have been signing certificates for web sites for a number of years. Using a commercial CA to sign sendmail certificates is easy, and it has the added benefit of supporting a global customer base—certificates signed by a commercial CA are accepted around the world. Because many web sites want access to a global customer base, they use commercial CAs. In fact, a list of trusted commercial CAs can be obtained from any web browser. Figure 8-1 shows the list of CAs displayed by Netscape.
An alternative to using a commercial CA is to create a private CA. Creating a private CA is more complex than using a commercial CA, and it limits the customer base to those sites that are willing to accept certificates from the private CA. While a private CA is inadequate for a web site that must support a global customer base, it is a viable solution for sendmail security because mail security is often used between a limited number of partners. Recipe 8.1 shows you how to build a private CA, and Recipe 8.3 uses that CA to create the certificates used in the other recipes.
Finally, it is possible to create a self-signed certificate, which is not signed by any type of CA. sendmail does not accept self-signed certificates for authentication because, without the certification of a recognized CA, there is no way to verify the certificate’s information. sendmail does, however, accept self-signed certificates for encryption. In fact, if you only want encryption, the TLS client doesn’t need a certificate at all. However, using a CA increases the utility of the STARTTLS protocol because it adds strong authentication to basic encryption.
If the sendmail system is also a web server, it may already have a commercially signed certificate that can be used for sendmail. If not, use openssl to create certificates. To have a sendmail certificate signed by a commercial CA, create a certificate signing request (CSR)—also called a certificate request—and send it to the commercial CA for signing. (See the web site of the CA you select for the exact details.) If you run a private CA, create the CSR and use the private CA to sign it. Recipe 8.2 and Recipe 8.3 show examples of creating a CSR and of signing it to produce a signed certificate.
Certificates contain much more than just a public key. Use openssl to examine the contents of a certificate, as in this example:
# openssl x509 -noout -text -in rodent.pem
Certificate:
    Data:
        Version: 3 (0x2)
        Serial Number: 2 (0x2)
        Signature Algorithm: md5WithRSAEncryption
        Issuer: C=US, ST=Maryland, L=Gaithersburg, O=WroteTheBook,
               CN=chef.wrotethebook.com/[email protected]
        Validity
            Not Before: Jan 28 16:25:58 2003 GMT
            Not After : Jan 28 16:25:58 2004 GMT
        Subject: C=US, ST=Maryland, L=Gaithersburg, O=WroteTheBook,
                CN=rodent.wrotethebook.com/[email protected]
        Subject Public Key Info:
            Public Key Algorithm: rsaEncryption
            RSA Public Key: (1024 bit)
                Modulus (1024 bit):
                    00:b0:91:de:51:14:19:91:61:39:ed:23:61:ef:9d:
                    e4:44:9f:ff:6a:fd:5c:cc:e8:bd:79:1f:2d:bc:eb:
                    ca:66:da:86:fb:99:17:79:07:94:dd:94:90:aa:6a:
                    44:55:ff:ec:65:e9:4e:41:b1:e9:e9:c4:09:89:81:
                    47:2b:a1:bd:a0:0b:bf:9c:c5:5e:39:de:c5:49:a3:
                    e6:5c:af:9e:32:eb:ae:63:80:7f:c6:ad:12:d0:87:
                    01:db:06:a3:93:bf:41:9f:51:81:4f:09:fa:da:e3:
                    ca:69:dc:35:4f:cd:43:fd:ab:6c:51:3d:24:97:60:
                    bd:bf:e8:91:9c:5a:f4:b2:df
                Exponent: 65537 (0x10001)
        X509v3 extensions:
            X509v3 Basic Constraints:
                CA:FALSE
            Netscape Comment:
                OpenSSL Generated Certificate
            X509v3 Subject Key Identifier:
                76:6E:60:D0:EE:B4:62:49:84:46:04:7C:44:E6:F8:9E:CF:84:B6:DC
            X509v3 Authority Key Identifier:
                keyid:3C:D9:71:02:66:8A:D4:AD:3C:07:FD:57:2A:C5:03:C2:B8:7D:FF:D5
                DirName:/C=US/ST=Maryland/L=Gaithersburg/O=WroteTheBook/
                       CN=chef.wrotethebook.com/[email protected]
                serial:00

    Signature Algorithm: md5WithRSAEncryption
        c4:45:4a:e4:01:eb:0b:83:c4:26:c5:de:9e:06:8f:7a:b6:2d:
        f0:f3:63:dd:ba:1c:22:2d:f9:ac:3d:92:04:c4:4f:a8:9c:d1:
        7c:de:a7:6d:94:10:62:cb:69:c6:ba:8f:09:e7:a9:49:18:97:
        4b:aa:50:b9:0a:c9:49:59:0d:65:b6:44:1a:d6:88:6c:bd:d9:
        3e:89:e6:1c:76:c8:54:69:7f:b4:9d:7a:a7:de:92:12:cc:f5:
        43:e5:e5:da:b0:34:9d:cf:ee:b9:65:a1:a8:d7:cc:aa:96:12:
        10:7f:2b:99:94:79:f3:b4:bf:0a:58:54:65:7f:98:36:be:a5:
        22:de
Several important pieces of information can be seen in this display. Foremost, of course, is the public key. It is the 1024-bit RSA public key that appears about halfway through the display. This is the key used to encrypt the session information sent to the system holding the private key—the session information includes the session key that will be used to encrypt the mail.
The system that owns this certificate is identified by the Subject
field. The Subject field contains
the distinguished
name (DN) of the remote host. The DN is a formal name that
can contain several fields. In this example, the DN contains a
country code (C), a state code (ST), a locality (L), an
organizational name (O), and a common name (CN). Inside the sendmail
configuration, the DN of the subject is found in the
${cert_subject} macro, and the CN of the subject
is found in the ${cn_subject} macro. In the
example, the certificate belongs to the host
rodent.wrotethebook.com.
The CA that signed the certificate is identified by the Issuer field,
which contains the DN of the CA. Inside the sendmail configuration,
the DN of the CA is found in the ${cert_issuer}
macro, and the CN of the CA is found in the
${cn_issuer} macro. In the example,
chef.wrotethebook.com is the private CA that is
created in Recipe 8.1.
At the bottom of the display is the digital signature of the
certificate created by the CA. It is an MD5 digest of the
certificate, which is stored in the sendmail configuration in the
macro ${cert_md5}. The digest is encrypted by the
CA’s private key. sendmail uses the
CA’s public key to decrypt the digest. If sendmail
successfully decrypts and verifies the digest, it stores
OK in the macro ${verify} and
considers the certificate valid for authentication.
The ${verify} macro
can contain any one of several different
values depending on the result of the verification process. The
possible values for the ${verify} macro are:
-
FAIL The certificate failed the verification process.
-
NONE STARTTLS is not being used. Thus no verification was performed.
-
NOT A certificate was not requested from the remote host. If the local system does not request a certificate from the remote system, verification is not performed.
-
NO No certificate was provided by the remote host. Therefore, there was no certificate to verify.
-
OK The certificate was successfully verified.
-
PROTOCOL A protocol error occurred.
-
SOFTWARE The STARTTLS handshake failed.
-
TEMP A temporary error occurred.
Once again, refer back to the certificate displayed by the
openssl
x509 command. Near the
top of the output, the TLS version number is identified in the
Version field of the certificate. Inside the sendmail configuration,
the TLS version number is stored in the
${tls_version} macro.
As we have seen, several sendmail macros can be traced directly back
to the TLS certificate. Two other important TLS related macros get
their values from the session encryption used for the email
connection. ${cipher} identifies the type of
encryption used for the connection, and
${cipher_bits} contains the number of bits of
encryption used for the connection. All of the important TLS
encryption and authentication data is available for use inside the
sendmail configuration.
Using the access database with TLS
The best way to control how TLS security information is applied on your system is through the access database. These are the access database records that provide control over a TLS connection:
-
CERTISSUER: Authorizes relaying based on the DN of the CA that signed the certificate. Recipe 8.5 and Recipe 8.6 provide example of using the
CERTISSUER: record.-
CERTSUBJECT: Authorizes relaying based on the DN of the host that presented the certificate. Recipe 8.6 covers the use of this record.
-
TLS_Srv: Defines the minimum security required for an outbound TLS connection. Recipe 8.7 and Recipe 8.9 show how to use the
TLS_SRV: record.-
TLS_Clt: Defines the minimum security required for an inbound TLS connection. Recipe 8.8 and Recipe 8.9 contain examples of the
TLS_Clt: record.-
TLS_Rcpt: Defines the minimum security required for mail sent to the specified recipient. Recipe 8.10 uses this record.
-
Try_TLS: Controls whether the
STARTTLScommand is issued to the specified remote TLS server. See Recipe 8.11 for an example of how this record is used.-
Srv_Features: Controls whether STARTTLS is advertised to the specified remote TLS client, and whether the specified remote TLS client is required to present a certificate. See Recipe 8.12 and Recipe 8.13 for examples of this record.
sendmail provides hooks into the rulesets that process the access database entries related to STARTTLS:
LOCAL_TLS_CLIENTis a hook into thetls_cltruleset that processesTLS_Clt: database records.LOCAL_TLS_SERVERis a hook into thetls_srvruleset that processesTLS_Srv: access database records.LOCAL_TLS_RCPTis a hook into thetls_rcptruleset that processesTLS_Rcpt: records.LOCAL_TRY_TLSis a hook into thetry_tlsruleset that processesTry_TLS: records.
These hooks provide access to the full range of sendmail’s capabilities, including all of the information that sendmail has at the time that the access database records are being processed. Anything that cannot be done within the confines of the standard database record formats can probably be done through a custom ruleset. The power and simplicity of using the access database to control delivery over a TLS connection make custom TLS rulesets largely unnecessary. However, if you have an application for a custom ruleset, sendmail provides all of the tools you need to roll your own.
OpenSSL
The sendmail implementation of STARTTLS depends on OpenSSL for authentication, encryption, and support tools. Before any of the recipes in this chapter can be used, OpenSSL must be installed.
Modern systems often include OpenSSL in order to provide web security. Our sample Red Hat Linux system includes an OpenSSL RPM file, as this simple command shows:
$ rpm -q openssl
openssl-0.9.6b-18
If your system includes OpenSSL, you can proceed. If it is not
installed, install the version provided by your Unix vendor using the
vendor’s package management tools. If your Unix
vendor does not provide OpenSSL, download the source from
http://www.openssl.org/source/or
ftp://ftp.openssl.org/source/. The source comes
as a gzipped tarball. Unzip and restore the
tarball. Go to the newly created directory and run
config and then make to
compile the source code. Then run make
test and make
install to install OpenSSL. If you have any
problems compiling the source, see the INSTALL
file delivered with the source code.
Additionally, sendmail must be specially compiled to support STARTTLS. If your sendmail binary was not compiled with STARTTLS support, recompile sendmail as described in Recipe 1.6 and Recipe 1.7.
8.1. Building a Private Certificate Authority
Problem
Your organization has decided not to use a commercial CA and has asked you to create a private CA to sign and manage certificates for sendmail.
Solution
Select a directory in which to place the CA directory structure
(/etc/mail/certs is a common choice). Change to
that directory and run the CA script provided
with the OpenSSL distribution. Use the -newca
command-line option of the CA script.[2] The
script allows you to enter a certificate filename to work with an
existing CA certificate. In this case, we are not working with an
existing CA certificate, so just press the Return key to create a new
CA. When
prompted for a PEM passphrase, enter
the password that will be required whenever the certificate authority
is used to sign a certificate request. Finally, enter the
distinguished name of the system that is acting as the CA. Here is an
example:
#cd /etc/mail#mkdir certs#cd certs#/usr/share/ssl/misc/CA -newcaCA certificate filename (or enter to create) Making CA certificate ... Using configuration from /usr/share/ssl/openssl.cnf Generating a 1024 bit RSA private key ...............++++++ .............++++++ writing new private key to './demoCA/private/./cakey.pem' Enter PEM pass phrase:SaytheSECRETword! Verifying password - Enter PEM pass phrase:SaytheSECRETword! ----- You are about to be asked to enter information that will be incorporated into your certificate request. What you are about to enter is what is called a Distinguished Name or a DN. There are quite a few fields but you can leave some blank For some fields there will be a default value, If you enter '.', the field will be left blank. ----- Country Name (2 letter code) [GB]:USState or Province Name (full name) [Berkshire]:MarylandLocality Name (eg, city) [Newbury]:GaithersburgOrganization Name (eg, company) [My Company Ltd]:WroteTheBookOrganizational Unit Name (eg, section) []: Common Name (eg, your name or your server's hostname) []:chef.wrotethebook.comEmail Address []:[email protected]
The CA script creates a directory structure it calls demoCA, which contains the files needed for a private CA. Change the name demoCA to something that sounds less temporary, for example, to the directory name CA:
# mv demoCA CAChange to the new directory structure. Tighten the security on the private directory, which holds the certificate authority’s private key:
#cd CA#chmod 0700 private
Copy the openssl.cnf file to the CA directory. The copy will be used by the private CA when signing sendmail certificates. To distinguish it from the original openssl.cnf file, the copy is renamed sendmailssl.cnf when it is copied to the CA directory:
# cp /usr/share/ssl/openssl.cnf sendmailssl.cnfFinally, edit the sendmailssl.cnf file to point to the newly created CA directory structure. Change the line:
dir = ./demoCA # Where everything is kept
to read:
dir = /etc/mail/certs/CA # Where everything is kept
The private CA can now be used to sign certificates as described in Recipe 8.3.
Discussion
It is not absolutely necessary to build a private CA just to create the certificates needed by STARTTLS. Introduction to this chapter describes alternative ways to obtain signed certificates. This recipe should not be taken as a recommendation for creating a private CA. It is incorporated as a recipe in this chapter because building a private CA is the most complex method of signing certificates, and thus it is the method most in need of a recipe to explain how it is done. Before you decide to build a private CA, evaluate the alternatives to make sure you choose the approach that is most suitable for your situation.
The complexity of creating a private CA is substantially reduced by
the CA script provided with the OpenSSL
distribution. The CA script accepts several
different command-line arguments, but the one that is most useful for
a sendmail system is the -newca option.
-newca causes the script to create the directory
structure and files needed by a CA. It also causes the script to
build the private key and the certificate that will be used by the
CA. An ls of the directory created by the
CA script shows the following:
#lscacert.pem certs crl index.txt newcerts private serial #ls privatecakey.pem
The directory created by the CA script contains
three files:
- serial
This file contains the serial number that will be used for the next certificate signed by the CA. The CA script stores the serial number 01 in the initial serial file. The serial number is incremented every time a certificate is signed.
- index.txt
This file maps the serial number assigned to a certificate to the subject of the certificate. The serial number is identified by its numeric value, and the certificate subject is identified by its distinguished name. Initially, this file is empty. Data is added to the file each time a certificate is signed.
- cacert.pem
This file is the certificate created for the certificate authority by the CA script. (See Introduction for information on the format of certificates.) This public key will be distributed to the sendmail systems that recognize this CA, and it will be referenced in their configurations. When you create a private CA to sign certificates for sendmail, it is common to make this the root CA in the sendmail configuration. See the
confCACERTdefine in Recipe 8.4 for an example.
The private key associated with the CA certificate is stored in the
private subdirectory and is named
cakey.pem, as the second ls
command in the example shows. The private key is kept safe on the CA.
It is never distributed to, or used on, any other system. The
cakey.pem file is encrypted and can only be used
by someone who knows the PEM passphrase provided to the
CA script when the
cakey.pem file was created. In the example in
the Solution section, the PEM passphrase is
SaytheSECRETword!. The passphrase is required in
Recipe 8.3 when the CA is used to sign
certificates.
In addition to the files just described, the directory created by the CA script contains four subdirectories:
- private
This directory is used to hold private keys. The CA script places the certificate authority’s private key here. In the Solution section, the permissions on this directory are changed to 0700.
- newcerts
This directory holds copies of all the certificates signed by this CA. The certificates in this directory are identified by serial numbers. This directory is empty when created by the CA script. Files are added to the directory by the signature process.
- crl
This directory holds certificate revocation lists. The CA script creates this directory to be empty. See Network Security with OpenSSL, by Viega, Messier, and Chandra (O’Reilly), for information on CRLs.
- certs
This directory can be used to hold certificates. However, the CA script does not place the CA’s certificate in this directory.
This recipe recommends adding a copy of
openssl.cnf to the files and directories created
by the CA script. The
openssl.cnf configuration file is read by
openssl every time it is executed.
openssl is used to create and sign certificates,
and it will be used in subsequent recipes in this chapter. To
simplify customizing the OpenSSL configuration for sendmail
certificate management, and to avoid any possibility of interfering
with the OpenSSL configuration used by the web site administrator, we
copy openssl.cnf to
sendmailssl.cnf. The new name is intended to
make it clear that this configuration is used only by the sendmail
CA. We then edit the sendmailssl.cnf file to
point to /etc/mail/certs/CA as the directory
used by the default CA. This recipe assumes that the private CA is
being used exclusively for sendmail certificate management. Because
this CA is used exclusively for sendmail, it makes sense to create a
sendmail-specific OpenSSL configuration. Recipe 8.3 uses the newly created
sendmailssl.cnf file.
See Also
Recipe 8.2 and Recipe 8.3 are both directly related to this recipe. Introduction to this chapter contains important information about certificates and certificate authorities. The sendmail book discusses certificates in Section 10.10.2. The config manpage provides information on the openssl.cnf file. Network Security with OpenSSL, by Viega, Messier, and Chandra (O’Reilly), provides information about certificates, certificate authorities, and certificate revocation lists.
8.2. Creating a Certificate Request
Problem
You must create a certificate request before the CA can sign it, and thus provide you with a signed certificate.
Solution
On the sendmail host, create a directory to hold the certificate and private key. Here is an example:
#cd /etc/mail#mkdir certs
Change to the new directory. Use the openssl
req command to create an unsigned X.509
certificate and a private key. When prompted for the distinguished
name, enter the DN of the sendmail host for which the certificate is
being created. In this example we create a certificate for
crab.wrotethebook.com:
#cd /etc/mail/certs#umask 0066#openssl req -nodes -new -x509 -keyout key.pem -out newcert.pemUsing configuration from /usr/share/ssl/openssl.cnf Generating a 1024 bit RSA private key .++++++ ...................++++++ writing new private key to 'key.pem' ----- You are about to be asked to enter information that will be incorporated into your certificate request. What you are about to enter is a Distinguished Name or a DN. There are quite a few fields but you can leave some blank For some fields there will be a default value, If you enter '.', the field will be left blank. ----- Country Name (2 letter code) [GB]:USState or Province Name (full name) [Berkshire]:MarylandLocality Name (eg, city) [Newbury]:GaithersburgOrganization Name (eg, company) [My Company Ltd]:WroteTheBookOrganizational Unit Name (eg, section) []: Common Name (eg, your name or the server's name) []:crab.wrotethebook.comEmail Address []:[email protected]
Next, use openssl
x509 to
generate a certificate signing request from the certificate and key
pair created above. The newcert.pem file created
above is a temporary file that can be removed after the CSR is
created:
#openssl x509 -x509toreq -in newcert.pem -signkey key.pem -out csr.pemGetting request Private Key Generating certificate request #rm -f newcert.pem
Send the CSR, csr.pem in this example, to the CA. The CA signs the sendmail host’s certificate request. Recipe 8.3 shows how this is done using the private CA created in Recipe 8.1.
The CA returns a signed certificate to the sendmail host, along with a copy of the CA’s certificate. On the sendmail host, place the sendmail host’s signed certificate and the CA’s certificate in the certificate directory created in the first step. Create a symbolic link to a hash of the CA’s certificate using the following command:
ln -sca_filename`openssl x509 -noout -hash <ca_filename`.0
In the command above, replace ca_filename
with the filename of the CA’s certificate. sendmail
uses the hash created by this command for certificate verification.
Run this command, replacing ca_filename
with the name of the new CA certificate file, every time a CA
certificate is added to the directory identified by the
confCACERT_PATH define. Recipe 8.4 discusses the
confCACERT_PATH define.
Discussion
Most of the work in this recipe is done on the sendmail host. However, it doesn’t have to be. All of the files necessary to request a signed certificate for crab.wrotethebook.com can be generated on any system that has OpenSSL installed. The advantage of creating the CSR on the sendmail host is that the private key is created there and never has to leave the system, making it easier to maintain private key security. The disadvantage is that the administrator of crab.wrotethebook.com needs to use the complex openssl commands to build the CSR. Many sites prefer to have one CA administrator who creates the certificate and key for each sendmail host on the CA server and then distributes the signed files to the sendmail systems. The approach you use is mostly a matter of organizational style.
The only thing that must be created on the sendmail host is the directory that will hold the certificate and the private key. The name of this directory, the name of the certificate file, the name of the key file, and the name of the CA certificate file, are all important values used to configure sendmail for STARTTLS, as can be seen in Recipe 8.4.
The openssl
req command in the
Solution section
creates
a new, self-signed X.509 certificate (-new
-x509). The certificate is written to a file named
newcert.pem (-out
newcert.pem). The private key associated with the
certificate is stored in a file named key.pem
(-keyout
key.pem). The
key.pem file is not encrypted with DES
(-nodes). This is important. If the private key is
accidentally placed in an encrypted file, the sendmail administrator
is prompted for the password to decrypt the file every time sendmail
needs to access the private key. This could cause the sendmail system
to hang during the boot process until the password is entered.
The openssl
x509 command
processes an X.509 certificate. In this case, the command converts an
X.509 certificate to a certificate request
(-x509toreq). The certificate that is being
converted is the newcert.pem file created in the
first step (-in
newcert.pem
-signkey key.pem). The CSR is
written to a file named
csr.pem (-out
csr.pem).
The CSR file is sent to the CA. The CA uses that file as input to the signature process and returns another file, which is the signed certificate. Often, one file is sent to the CA and one is returned. The Solution section, however, also mentions a second file—the CA’s certificate. This certificate may not be sent from the CA as part of the signature process. There may be some other means for obtaining that file. Regardless of how the CA certificate is obtained, a hash should be made from the CA certificate as shown in the last step of the Solution. sendmail uses the hash during certificate verification.
See Also
Recipe 8.3 covers signing the certificate request created in this recipe.
8.3. Signing a Certificate Request
Problem
When you operate a private CA for sendmail, you are responsible for signing the certificate requests of the sendmail hosts.
Solution
On the CA, use the openssl
ca
command to sign the certificate signing request provided by the
sendmail host. When prompted for the PEM passphrase, enter the
password created for the private CA. Answer
“yes” to the two questions, and the
certificate is signed. Here is an example in which the CSR created in
Recipe 8.2 is signed on the CA created in
Recipe 8.1:
#openssl ca -config ./sendmailssl.cnf -policy policy_anything -out cert.pem -infiles csr.pemUsing configuration from ./sendmailssl.cnf Enter PEM pass phrase:SaytheSECRETword! Check that the request matches the signature Signature ok The Subjects Distinguished Name is as follows countryName :PRINTABLE:'US' stateOrProvinceName :PRINTABLE:'Maryland' localityName :PRINTABLE:'Gaithersburg' organizationName :PRINTABLE:'WroteTheBook' commonName :PRINTABLE:'crab.wrotethebook.com' emailAddress :IA5STRING:'[email protected]' Certificate is to be certified until Jan 27 19:50:16 2004 GMT (365 days) Sign the certificate? [y/n]:y1 out of 1 certificate requests certified, commit? [y/n]yWrite out database with 1 new entries Data Base Updated
The CSR sent from the sendmail system is an intermediate file that is no longer needed. Delete the unneeded file:
# rm -f csr.pemSend the signed certificate to the sendmail host. In this example, we send the file cert.pem to the sendmail host. We named the certificate file cert.pem because it is a neutral name well suited to textbook examples. However, the certificate filename is whatever you choose to make it, and it should be something descriptive. For example, the certificate was signed for the host crab.wrotethebook.com so we could have given it the name crab.wrotethebook.com.cert.pem.
Also, send the sendmail host a copy of the CA’s certificate. Assuming that this is the CA created in Recipe 8.1, the CA certificate file sent to the sendmail host would be cacert.pem.
Discussion
The openssl
ca command is used
to sign certificates. In the Solution
section, the openssl command signs the
csr.pem file from Recipe 8.2 (-infiles
csr.pem), producing a signed certificate in a file
named cert.pem (-out
cert.pem).
This openssl command references the special
OpenSSL configuration file (-config
./sendmailssl.cnf) that was created in Recipe 8.1 for the private sendmail CA. If the
configuration file is not identified on the command line using the
-config option, the openssl
command uses the openssl.cnf file. The OpenSSL
file provides default values used when creating and signing
certificates; it defines the pathnames of the files and directories
required by a CA, and it defines the certificate signing policies. By
default, the openssl.cnf file, and the
sendmailssl.cnf file that Recipe 8.1 created from it, contain two signature
policies:
- policy_match
Signature policies define what information must be provided by the DN of the subject before a certificate will be accepted for signing. policy_match requires that a common name be provided. Additionally, it requires that country, state, and organization names be provided, and that these names match the country, state, and organization names used in the certificate of the CA. It makes the organizational unit name and the email address optional. policy_match is the default if no
-policyargument is provided on theopensslcacommand line.- policy_anything
This policy requires that a common name be provided. It makes all other DN fields optional.
This recipe uses -policy
policy_anything, which is commonly used when
signing sendmail certificates. After all, the administrator is shown
the DN and asked whether or not the certificate should be signed. If
the administrator deems that the DN does not contain enough
information for email security, the administrator can refuse to sign
the certificate. However, in this specific example,
policy_match could have been used and it would
have worked. Remember, this is a private CA. We know that the
country, state, and organization names used in the DN of the CA match
the values in the DN of the server. Yet,
policy_anything makes a better example because
it is more flexible and deals with a larger variety of
configurations. Most sendmail administrators use
policy_anything and that is why it is included
in this recipe.
After signing the certificate request, the CSR (csr.pem) is deleted. The certificate cert.pem is sent to crab.wrotethebook.com along with the CA’s certificate cacert.pem. The sendmail host will reference both of these certificates in the STARTTLS configuration.
See Also
Recipe 8.1 covers creating the private CA
used to sign the certificate in this recipe. Recipe 8.2 creates the certificate request signed in this
example. Introduction to this chapter contains important
information about certificates and certificate authorities. The
sendmail book discusses certificates in Section
10.10.2. The config manpage provides information
on the openssl.cnf file. The
req manpage documents the
openssl
req command. The
x509 manpage documents the
openssl
x509 command, and the
ca manpage covers the openssl
ca command. TCP/IP Network
Administration, Third Edition, by Craig Hunt
(O’Reilly), provides examples of using
openssl commands in Chapter 11.
Network Security with OpenSSL, by Viega,
Messier, and Chandra
(O’Reilly), provides information about certificates,
certificate authorities, openssl.cnf, and the
openssl command.
8.4. Configuring sendmail for STARTTLS
Problem
You have been asked to configure sendmail to offer STARTTLS service for transport layer security.
Solution
STARTTLS requires that OpenSSL is properly installed and configured. See Introduction for information on installing OpenSSL. It also requires a copy of sendmail compiled with STARTTLS support, as described in Recipe 1.6 and Recipe 1.7. Additionally, the sendmail host needs a certificate if it will be accepting inbound STARTTLS connections. Use OpenSSL to create the certificate, as described in Recipe 8.2 and Recipe 8.3.
Create a sendmail configuration with defines pointing to the files that contain the host’s certificate, the host’s private key, the root CA certificate file, and the directory where CA certificates are stored. Here are examples of the defines:
dnl Point to the CA certificate directory
define(`confCACERT_PATH', `/etc/mail/certs')
dnl Point to the root CA's certificate
define(`confCACERT', `/etc/mail/certs/cacert.pem')
dnl Point to the certificate used for inbound connections
define(`confSERVER_CERT', `/etc/mail/certs/cert.pem')
dnl Point to the private key used for inbound connections
define(`confSERVER_KEY', `/etc/mail/certs/key.pem')
dnl Point to the certificate used for outbound connections
define(`confCLIENT_CERT', `/etc/mail/certs/cert.pem')
dnl Point to the private key used for outbound connections
define(`confCLIENT_KEY', `/etc/mail/certs/key.pem')
Build the sendmail.cf file, copy it to /etc/mail/sendmail.cf, and then restart sendmail, as described in Recipe 1.8.
Discussion
This recipe provides a full STARTTLS configuration. A system configured with all of these defines can act as a TLS server or client and can perform both encryption and authentication. The six defines point sendmail to the files necessary for this full range of service:
-
confCACERT_PATH Sets the value for the
CACERTPathoption in the sendmail.cf file. TheCACERTPathoption points to the directory in which certificate authority certificates are stored. It is very common for this directory to be the same one that holds the server and client certificates.-
confCACERT Sets the value for the
CACERTFileoption, which points to the certificate of the root certificate authority. The value provided to this define is the full pathname of the file that holds the CA certificate.-
confSERVER_CERT Sets the value for the sendmail.cf
ServerCertFileoption, which holds the full pathname of the file containing the server certificate used for inbound connections.-
confSERVER_KEY Sets the value for the
ServerKeyFileoption. TheServerKeyFileoption points to the file that holds the server’s private key.-
confCLIENT_CERT Sets the value for the sendmail.cf
ClientCertFileoption, which holds the full pathname of the file containing the client certificate used for inbound connections.-
confCLIENT_KEY Sets the value for the
ClientKeyFileoption. TheClientKeyFileoption points to the file that holds the client’s private key.
If OpenSSL is installed, sendmail is compiled with STARTTLS support,
and these defines point to valid certificates, sendmail will
advertise STARTTLS in response to the SMTP EHLO
command. A simple telnet test shows that
STARTTLS is ready for use:
#telnet localhost smtpTrying 127.0.0.1... Connected to localhost. Escape character is '^]'. 220 chef.wrotethebook.com ESMTP Sendmail 8.12.9/8.12.9; Fri, 22 Aug 2003 12:01:37 - 0400ehlo localhost250-chef.wrotethebook.com Hello IDENT:6l4ZhaGP3Qczqknqm/KdTFGsrBe2SCYC@localhost [127.0.0.1], pleased to meet you 250-ENHANCEDSTATUSCODES 250-PIPELINING 250-EXPN 250-VERB 250-8BITMIME 250-SIZE 250-DSN 250-ETRN 250-AUTH DIGEST-MD5 CRAM-MD5 250-STARTTLS 250-DELIVERBY 250 HELPQUIT221 2.0.0 chef.wrotethebook.com closing connection Connection closed by foreign host.
If your system doesn’t advertise
STARTTLS in response to the
EHLO command, check the logfile to make sure that
all file permissions are correct. If they are, try increasing the
LogLevel to 14 to log additional STARTTLS
debugging information. See Recipe 1.10 for
information on setting the LogLevel.
This recipe shows a system configured with both client and server certificates and keys. Many systems are configured as both clients and servers for STARTTLS because mail is often forwarded by one system to another. When the system receives inbound mail, it acts as a STARTTLS server. When it forwards that mail on to another system, it acts as a STARTTLS client. Therefore, the system needs to act as both a STARTTLS server and a STARTTLS client. Normally such a system uses the same certificate and key for both its client and server roles.
A STARTTLS client will attempt to use STARTTLS
whenever the server offers it. Running the
sendmail command with the -v
option shows the STARTTLS client side of this sample configuration.
An example of this is seen in the following code:
#sendmail -Am -v -tTo: [email protected] From: [email protected] Subject: First STARTTLS testCtrl-D[email protected]... Connecting to chef.wrotethebook.com. via esmtp... 220 chef.wrotethebook.com ESMTP Sendmail 8.12.9/8.12.9; Fri, 22 Aug 2003 12:01:37 - 0400 >>> EHLO rodent.wrotethebook.com 250-chef.wrotethebook.com Hello rodent.wrotethebook.com [192.168.0.3], pleased to meet you 250-ENHANCEDSTATUSCODES 250-PIPELINING 250-EXPN 250-VERB 250-8BITMIME 250-SIZE 250-DSN 250-ETRN 250-AUTH DIGEST-MD5 CRAM-MD5 250-STARTTLS 250-DELIVERBY 250 HELP >>> STARTTLS 220 2.0.0 Ready to start TLS >>> EHLO rodent.wrotethebook.com 250-chef.wrotethebook.com Hello rodent.wrotethebook.com [192.168.0.3], pleased to meet you 250-ENHANCEDSTATUSCODES 250-PIPELINING 250-EXPN 250-VERB 250-8BITMIME 250-SIZE 250-DSN 250-ETRN 250-AUTH EXTERNAL DIGEST-MD5 CRAM-MD5 250-DELIVERBY 250 HELP >>> MAIL From:<[email protected]> SIZE=97 [email protected]. com 250 2.1.0 <[email protected]>... Sender ok >>> RCPT To:<[email protected]> >>> DATA 250 2.1.5 <[email protected]>... Recipient ok 354 Enter mail, end with "." on a line by itself >>> . 250 2.0.0 h0UGn9P7001230 Message accepted for delivery [email protected]... Sent (h0UGn9P7001230 Message accepted for delivery) Closing connection to chef.wrotethebook.com. >>> QUIT 221 2.0.0 chef.wrotethebook.com closing connection
The client (rodent) connects to the server
(chef) and issues an EHLO
command. In response to that command, the server advertises that
STARTTLS is available. The client then issues a
STARTTLS command to open the TLS connection. The
server responds with the message:
220 2.0.0 Ready to start TLS
Immediately after the response, the test shows another
EHLO message. Many system administrators are
confused by this. Don’t be. The STARTTLS negotiation
takes place “outside” of the email
exchange. STARTTLS creates the encrypted tunnel through which the
mail travels. The first EHLO, the
server’s STARTTLS advertisement,
the client’s STARTTLS command,
and the server’s TLS ready response are all used to
create the tunnel. The second EHLO command and all
that follows it are part of the standard SMTP protocol exchange,
which is sent inside the encrypted tunnel. Note that this SMTP
protocol exchange is displayed by the sendmail
-v command as clear text. The mail stream is only
encrypted on the network. Within the end systems, the mail stream is
clear text.
The effect of the STARTTLS protocol can be indirectly observed in the
headers of the mail message that passed through the encrypted tunnel.
The following headers are from the test message sent by the
sendmail
-Am
-v
-t command used above:
Return-Path: <[email protected]>
Received: from rodent.wrotethebook.com (rodent.wrotethebook.com
    [192.168.0.3])
        by chef.wrotethebook.com (8.12.9/8.12.9) with ESMTP id h0UGn9P7001230
        (version=TLSv1/SSLv3 cipher=EDH-RSA-DES-CBC3-SHA bits=168 verify=OK)
        for <[email protected]>; Thu, 30 Jan 2003 11:49:10 -0500
Received: (from root@localhost)
        by rodent.wrotethebook.com (8.12.9/8.12.9) id h0UGvpSD010157;
        Thu, 30 Jan 2003 11:57:51 -0500
Date: Thu, 30 Jan 2003 11:57:51 -0500
Message-Id: <[email protected]>
To: [email protected]
From: [email protected]
Subject: First STARTTLS test
The Received: header generated by
chef.wrotethebook.com, which is the STARTTLS
server in this exchange, shows the TLS characteristics of the link
over which the mail was received. The header displays the version of
the TLS protocol that was used for the connection, the type of
encryption used for the connection, the number of bits used for the
encryption, and whether the client’s certificate was
verified. Because this information is only placed in the header when
TLS is used for the connection, it tells us that the client is
properly configured to use TLS when communicating with this server.
See Also
Recipe 8.2 and Recipe 8.3 cover how certificates and keys are created. Chapter 1 provides additional information on compiling sendmail. The sendmail book covers STARTTLS in Section 10.10.
8.5. Relaying Based on the CA
Problem
You have been asked to configure sendmail to grant relaying privileges to STARTTLS clients that present a certificate signed by a trusted certificate authority.
Solution
Make sure that OpenSSL is installed as described in Introduction and that sendmail is compiled with STARTTLS support as shown in Recipe 1.6 and Recipe 1.7.
Identify each trusted certificate authority
in the access
database using CERTISSUER: entries. The key field
of each entry begins with the CERTISSUER: tag
followed by the distinguished name of the CA. The return value of the
entry is the keyword RELAY, indicating that any
host presenting a certificate signed by the trusted CA is granted
relaying privileges.
Create a STARTTLS sendmail configuration and add the
access_db feature. Here are samples of the
defines that configure STARTTLS and the FEATURE
macro that enables the access database:
dnl Point to the CA certificate directory
define(`confCACERT_PATH', `/etc/mail/certs')
dnl Point to the root CA's certificate
define(`confCACERT', `/etc/mail/certs/cacert.pem')
dnl Point to the certificate used for inbound connections
define(`confSERVER_CERT', `/etc/mail/certs/cert.pem')
dnl Point to the private key used for inbound connections
define(`confSERVER_KEY', `/etc/mail/certs/key.pem')
dnl Point to the certificate used for outbound connections
define(`confCLIENT_CERT', `/etc/mail/certs/cert.pem')
dnl Point to the private key used for outbound connections
define(`confCLIENT_KEY', `/etc/mail/certs/key.pem')
dnl Enable the access database
FEATURE(`access_db')
Rebuild the sendmail.cf file, copy the new sendmail.cf file to /etc/mail, and restart sendmail. Recipe 1.8 provides an example of these steps.
Discussion
TLS can provide strong authentication of the end points and encryption of the data stream. Despite these important security features, establishing a STARTTLS connection is not, by itself, enough to grant relaying privileges. A test shows this:
#sendmail -Am -v -tTo: [email protected] From: [email protected] Subject: Attempt to relay after successful TLS connectionCtrl-D[email protected]... Connecting to chef.wrotethebook.com. via relay... 220 chef.wrotethebook.com ESMTP Sendmail 8.12.9/8.12.9; Fri, 22 Aug 2003 12:01:37 - 0400 >>> EHLO rodent.wrotethebook.com 250-chef.wrotethebook.com Hello rodent.wrotethebook.com [192.168.0.3], pleased to meet you 250-ENHANCEDSTATUSCODES 250-PIPELINING 250-EXPN 250-VERB 250-8BITMIME 250-SIZE 250-DSN 250-ETRN 250-AUTH DIGEST-MD5 CRAM-MD5 250-STARTTLS 250-DELIVERBY 250 HELP >>> STARTTLS 220 2.0.0 Ready to start TLS >>> EHLO rodent.wrotethebook.com 250-chef.wrotethebook.com Hello rodent.wrotethebook.com [192.168.0.3], pleased to meet you 250-ENHANCEDSTATUSCODES 250-PIPELINING 250-EXPN 250-VERB 250-8BITMIME 250-SIZE 250-DSN 250-ETRN 250-AUTH EXTERNAL DIGEST-MD5 CRAM-MD5 250-DELIVERBY 250 HELP >>> MAIL From:<[email protected]> SIZE=102 AUTH=craig@rodent. wrotethebook.com 250 2.1.0 <[email protected]>... Sender ok >>> RCPT To:<[email protected]> >>> DATA 550 5.7.1 <[email protected]>... Relaying denied 503 5.0.0 Need RCPT (recipient) >>> RSET 250 2.0.0 Reset state craig... Connecting to local... craig... Sent Closing connection to chef.wrotethebook.com. >>> QUIT 221 2.0.0 chef.wrotethebook.com closing connection
In response to the first EHLO command, the server
advertises STARTTLS. The client then issues a
STARTTLS command, and the server responds that it
is ready. This indicates that an encrypted session will start. The
second EHLO command is the first SMTP command in
the encrypted session. It is followed by a MAIL
From: and a RCPT
To: command. Notice the response to the
RCPT
To: command.[3] The message is rejected with a
“Relaying denied” error, even
though it comes in the midst of an encrypted session. Clearly, TLS
does not, by itself, authorize relaying. It is up to the sendmail
administrator to decide when and how TLS authentication data should
be used. One way to use TLS data is through the
access database.
The ${verify} and
${cert_issuer} macros are used in the
Local_Relay_Auth ruleset to authorize relaying.
${verify} contains OK when
sendmail is able to verify the CA signature on the certificate
received from a remote site. sendmail takes the distinguished name of
the CA that signed the certificate from the Issuer field of the
certificate and stores it in the macro
${cert_issuer}. If ${verify}
equals OK, sendmail searches the
access database for a
CERTISSUER: entry that matches the
${cert_issuer} value. If a match is found, the
action specified by the CERTISSUER: entry is
taken. If no match is found, processing continues normally. Here is
an example of adding a CERTISSUER: entry to the
access database:
#cd /etc/mail#cat >> access CERTISSUER:/C=US/ST=Maryland/L=Gaithersburg/O=WroteTheBook/CN=chef.wrotethebook.com/ [email protected] RELAYCtrl-D#makemap hash access < access
Given the access database entry just shown, a site that presents a certificate signed by /C=US/ST=Maryland/L=Gaithersburg/O=WroteTheBook/CN=chef.wrotethebook.com/[email protected] is granted relaying privileges. /C=US/ST=Maryland/L=Gaithersburg/O=WroteTheBook/CN=chef.wrotethebook.com/Email= [email protected] is the complete DN of the private CA created in Recipe 8.1. Therefore, any host with a certificate signed by our private CA is allowed to relay mail.
A DN can contain almost any character. Several characters, however, have special meaning to sendmail and others are difficult to enter into the access database. For these reasons, the DN stored in the access database uses a special format for storing nonprintable characters, the space, the tab, <, >, (, ), “, and +. These characters are stored as their hexadecimal values preceded by a plus. For example, a space becomes +20, a ( becomes +25.
After adding the CERTISSUER: entry to the
access database, rerun the test shown earlier in
this section. The RCPT To: command now produces
the following result:
>>> RCPT To:<[email protected]>
250 2.1.5 <[email protected]>... Recipient ok
The client is now granted relaying privileges because a CA that is trusted to authorize relaying signed the client’s certificate.
See Also
Recipe 8.4 covers the STARTTLS sendmail configuration used as the basis for this recipe. The private CA mentioned in the discussion of this recipe is covered in Recipe 8.1. Chapter 3 discusses the traditional techniques used to grant relaying privileges, including the access database. The content of a certificate, including the Issuer field, is covered in this chapter’s Introduction. The sendmail book discusses using the access database for STARTTLS in Section 10.10.8.
8.6. Relaying Based on the Certificate Subject
Problem
You want to grant relaying privileges to STARTTLS clients based on the client’s identity, as specified by the client’s certificate.
Solution
sendmail must be compiled with STARTTLS support, and OpenSSL must be installed. See Recipe 1.6 and Recipe 1.7 and Introduction to this chapter for more information.
Create an access database entry using a
CERTISSUER: tag followed by the DN of the trusted
certificate authority to identify the CA that signed the
client’s certificate. The return value of the
CERTISSUER: entry must be the keyword
SUBJECT. Next, define each client that is to be
granted relaying privileges using a CERTSUBJECT:
entry in the access database. The key field of
these entries begins with the CERTSUBJECT: tag
followed by the DN of the client. The return value is the keyword
RELAY.
Add the access_db feature to the STARTTLS sendmail configuration. Here are sample configuration lines:
dnl Point to the CA certificate directory
define(`confCACERT_PATH', `/etc/mail/certs')
dnl Point to the root CA's certificate
define(`confCACERT', `/etc/mail/certs/cacert.pem')
dnl Point to the certificate used for inbound connections
define(`confSERVER_CERT', `/etc/mail/certs/cert.pem')
dnl Point to the private key used for inbound connections
define(`confSERVER_KEY', `/etc/mail/certs/key.pem')
dnl Point to the certificate used for outbound connections
define(`confCLIENT_CERT', `/etc/mail/certs/cert.pem')
dnl Point to the private key used for outbound connections
define(`confCLIENT_KEY', `/etc/mail/certs/key.pem')
dnl Enable the access database
FEATURE(`access_db')
Following the example from Recipe 1.8, rebuild the sendmail.cf file. Install the new configuration, and restart sendmail.
Discussion
Successfully establishing a STARTTLS session does not, by itself, authorize relaying. (See Recipe 8.5 for a test that illustrates this.) However, the authentication data provided by STARTTLS can be used to control relaying via the access database. Here are access database entries that authorize relaying based on the value in the subject field of the client’s certificate:
CERTISSUER:/C=US/ST=Maryland/L=Gaithersburg/O=WroteTheBook/CN=chef.wrotethebook.com/
SUBJECT
CERTSUBJECT:/C=US/ST=Maryland/L=Gaithersburg/O=WroteTheBook/CN=rodent.wrotethebook.
com/     RELAY
CERTSUBJECT:/C=US/ST=Maryland/L=Gaithersburg/O=WroteTheBook/CN=crab.wrotethebook.com/
RELAY
This example checks both the Issuer field and the Subject field from
the certificate presented by the client. These values are matched
against the access database by the
Local_Relay_Auth ruleset, but only if the
${verify} macro contains the string
OK, which indicates that the certificate was
successfully verified by sendmail. Both fields are looked up because,
before the subject of a certificate can be trusted, the CA that signs
and verifies the certificate must be trusted.
If ${verify} returns OK, the
Local_Relay_Auth ruleset looks for a
CERTISSUER: entry containing the distinguished
name from the Issuer field of the certificate. If a match is found
and the action is RELAY, relaying is authorized
for any system with a certificate signed by the specified CA, as
described in Recipe 8.5. If a match is found
and the action is SUBJECT, a second
access database lookup is performed. This time,
the ruleset looks for a CERTSUBJECT: entry
containing the DN from the Subject field of the certificate. If it is
found, and it contains the action RELAY, relaying
is permitted for the specified client. If it is not found, normal
processing continues. Relaying can still be granted to the client
through any of the basic methods described in Chapter 3. STARTTLS provides an additional method of
granting relaying privileges; it does not invalidate the other
traditional methods.
A distinguished name may contain characters that require special formatting before the DN is entered in the access database. See the Discussion of Recipe Recipe 8.5 for information on this topic.
See Also
The m4 configuration lines in this recipe are identical to those used in Recipe 8.5. Both use the access database and both are full STARTTLS configurations. See Recipe 8.5 for additional information. Chapter 3 discusses the traditional techniques used to grant relaying privileges, including the access database. The content of a certificate, including the Issuer and Subject fields, is covered in this chapter’s Introduction. The sendmail book discusses using the access database for STARTTLS in Section 10.10.8.
8.7. Requiring Outbound Encryption
Problem
To prevent mail bound for particular hosts from being sent in the clear, you have been asked to configure sendmail to only send mail to the specified hosts when the connection is satisfactorily encrypted.
Solution
OpenSSL and STARTTLS support are prerequisites. See Introduction and Recipe 8.4 for additional details on these basic components.
Specify the level of encryption
required for outbound
connections using a TLS_Srv: entry in the
access database. The key field of each entry is
the tag TLS_Srv: followed by the domain name or IP
address of the remote TLS server to which the local host will
connect. The return value should contain the keyword
ENCR: followed by the number of bits of encryption
required when connecting to the specified remote host.
Create a sendmail configuration that supports STARTTLS and the
access database. Here are sample STARTTLS
defines and an access_db
FEATURE macro:
dnl Point to the CA certificate directory
define(`confCACERT_PATH', `/etc/mail/certs')
dnl Point to the root CA's certificate
define(`confCACERT', `/etc/mail/certs/cacert.pem')
dnl Point to the certificate used for inbound connections
define(`confSERVER_CERT', `/etc/mail/certs/cert.pem')
dnl Point to the private key used for inbound connections
define(`confSERVER_KEY', `/etc/mail/certs/key.pem')
dnl Point to the certificate used for outbound connections
define(`confCLIENT_CERT', `/etc/mail/certs/cert.pem')
dnl Point to the private key used for outbound connections
define(`confCLIENT_KEY', `/etc/mail/certs/key.pem')
dnl Enable the access database
FEATURE(`access_db')
Rebuild and install the sendmail.cf file, then restart sendmail. See Recipe 1.8 as an example.
Discussion
Most mail is sent as clear text because the vast majority of systems do not use TLS. Even when STARTTLS is configured, a host sends outbound mail without regard to the level of encryption used. If you require encryption for mail sent to a specific site, you must tell sendmail about that requirement. The access database provides the means for informing sendmail of this requirement.
The TLS_Srv: entry defines the STARTTLS
requirements for outbound connections. The
format of the entry is:
TLS_Srv:name requirement
TLS_Srv: is the required tag.
name is the name of the remote TLS server,
which can be defined by domain name or IP address. If the
name field is blank, the entry applies to
all outbound mail connections. Because most sendmail systems send
mail to a wide variety of remote systems, some of which have STARTTLS
and some of which do not, the name field is almost never blank.
requirement is the keyword that tells
sendmail what is required of this TLS connection.
The ENCR: keyword
in
the requirement field tells sendmail that
encryption is required. The keyword is followed by the minimum number
of encryption bits that must be used. Here is a sample
access database entry:
TLS_Srv:chef.wrotethebook.com ENCR:168
This entry tells sendmail that when a connection is made to chef.wrotethebook.com, the connection must be encrypted with at least 168-bit encryption.
168-bits is the default level of encryption used on our sample
STARTTLS connection. You can check the level of encryption used on
your link by sending a test message and looking at the
Received: header in the message. For example:
Received: from rodent.wrotethebook.com (rodent.wrotethebook.com
    [192.168.0.3])
        by chef.wrotethebook.com (8.12.9/8.12.9) with ESMTP id
    h13GqDl5001443
        (version=TLSv1/SSLv3 cipher=EDH-RSA-DES-CBC3-SHA bits=168 verify=OK)
        for <[email protected]>; Mon, 3 Feb 2003 11:52:14 -0500
This header tells you that 168-bits encryption is used
(bits=168). If the TLS_Srv:
entry shown above was installed on rodent, mail
would flow to chef because the link between the
two systems has a sufficient level of encryption. However, if the
link between the two systems did not meet the minimum standard of
encryption, the client would abort the connection before sending the
mail, as this test demonstrates:
#sendmail -Am -v -tTo: [email protected] From: [email protected] Subject: Test ENCR:168 with no TLS linkCtrl-D[email protected]... Connecting to chef.wrotethebook.com. via esmtp... 220 chef.wrotethebook.com ESMTP Sendmail 8.12.9/8.12.9; Fri, 22 Aug 2003 12:01:37 - 0400 >>> EHLO rodent.wrotethebook.com 250-chef.wrotethebook.com Hello rodent.wrotethebook.com [192.168.0.3], pleased to meet you 250-ENHANCEDSTATUSCODES 250-PIPELINING 250-EXPN 250-VERB 250-8BITMIME 250-SIZE 250-DSN 250-ETRN 250-AUTH DIGEST-MD5 CRAM-MD5 250-DELIVERBY 250 HELP >>> QUIT 221 2.0.0 chef.wrotethebook.com closing connection [email protected]... Deferred: 403 4.7.0 encryption too weak 0 less than 168 Closing connection to chef.wrotethebook.com.
In this case, the server fails to offer STARTTLS, while the client’s access database requires 168-bit encryption on this link. The client terminates the connection with an “encryption too weak” error message. The message displays the number of encryption bits used by the server (0 in this case because TLS did not start) and the number required by the client (168 in this example). The SMTP response code of this error message is 403, and the DSN code is 4.7.0. Each code starts with a 4, which indicates that this is a temporary failure. The keyword “Deferred” in the message indicates that sendmail will attempt to deliver this message again during the next queue run.
Treating a STARTTLS failure as
a
temporary failure, which is the default, is generally correct.
Normally, a server is identified in a TLS_Srv:
entry only when the server actually offers STARTTLS. If the server
fails to successfully create a TLS connection with the client, the
failure is probably temporary. However, it is up to you to decide
whether the failure should be considered temporary. The requirement
field in a TLS_Srv: entry can be preceded by the
string TEMP+ to select a temporary failure, which
is the default, or by the string PERM+ to select a
permanent error. For example, assume the access
database on rodent contained the following
TLS_Srv: entry:
TLS_Srv:chef.wrotethebook.com PERM+ENCR:168
If chef.wrotethebook.com does not offer at least 168-bit encryption, the client terminates the session and returns the mail to the sender. No more attempts are made to deliver the mail. The sender sees the following error in the returned message:
----- The following addresses had permanent fatal errors -----
[email protected]
    (reason: 503 5.7.0 encryption too weak 0 less than 168)
Use the define
TLS_PERM_ERR
as an alternative to adding
PERM+ to the requirement field. The following line
added to the sendmail configuration changes the default from a
temporary failure to a permanent failure:
define(`TLS_PERM_ERR')
With this setting, individual actions must be flagged as temporary
failures using TEMP+.
The search for TLS_Srv:
access database entries occurs in the
tls_server ruleset, which is called by the client
when the client is ready to issue the STARTTLS
command. The tls_server ruleset is called with the
value returned by ${verify} in its workspace. The
tls_server ruleset makes three attempts to find a
TLS_Srv: match. It first uses ruleset
D to find a TLS_Srv: entry that
matches the hostname returned by ${server_name}.
If no match is found, it then uses ruleset A to
find a TLS_Srv: entry that matches the value
returned by ${server_addr}. If there is still no
match, it looks for a TLS_Srv: entry with a blank
name field. These searches process all possible matches for a given
domain name and IP address. For example, for a connection to
foo.bar.example.com with IP address
192.168.23.45, the following lookups would happen, in the order
listed, until a match was found:
TLS_Srv:foo.bar.example.com
TLS_Srv:bar.example.com
TLS_Srv:example.com
TLS_Srv:com
TLS_Srv:192.168.23.45
TLS_Srv:192.168.23
TLS_Srv:192.168
TLS_Srv:192
TLS_Srv:
The ruleset TLS_connection is called and passed
anything returned by the access database
lookups. It is TLS_connection that processes the
ENCR: requirement field and compares the number of
bits from that field to the number of bits returned by
${cipher_bits}. If the macro
${cipher_bits} is less than the value from the
requirement field, an error message is displayed and the connection
ends.
The m4 macro LOCAL_TLS_SERVER
allows you to add custom sendmail.cf rewrite
rules to the beginning of the tls_server process.
Put the LOCAL_TLS_SERVER macro at the end of the
master configuration file and list the custom rewrite rules after the
macro.
See Also
Recipe 8.8 and Recipe 8.9
cover related access database entries. In
particular, VERIFY: is an alternative action
keyword that can
be used to implement this recipe.
See Recipe 8.9 for details on the
VERIFY: keyword. Recipe 8.5 and Recipe 8.6 also describe
how the access database is used with STARTTLS.
The basic STARTTLS recipe upon which this recipe is built is covered
in Recipe 8.4. The
sendmail book covers the use of the
access database with STARTTLS in Section
10.10.8.
8.8. Requiring Inbound Encryption
Problem
You have been asked to configure sendmail to require that the connection is satisfactorily encrypted before accepting mail from specified hosts.
Solution
All configurations require OpenSSL, as described in Introduction. If your system does not have a basic setup, begin there.
Specify the level of encryption required for inbound
connections using a
TLS_Clt: entry in the access
database. The key field of each entry is the tag
TLS_Clt: followed by the domain name or IP address
of the remote TLS client that will initiate the connection. The
return value should contain the keyword ENCR:
followed by the number of bits of encryption required before
accepting a connection from the specified remote host.
Add the STARTTLS defines and the access_db feature to the sendmail configuration. Here are sample additions to the configuration:
dnl Point to the CA certificate directory
define(`confCACERT_PATH', `/etc/mail/certs')
dnl Point to the root CA's certificate
define(`confCACERT', `/etc/mail/certs/cacert.pem')
dnl Point to the certificate used for inbound connections
define(`confSERVER_CERT', `/etc/mail/certs/cert.pem')
dnl Point to the private key used for inbound connections
define(`confSERVER_KEY', `/etc/mail/certs/key.pem')
dnl Point to the certificate used for outbound connections
define(`confCLIENT_CERT', `/etc/mail/certs/cert.pem')
dnl Point to the private key used for outbound connections
define(`confCLIENT_KEY', `/etc/mail/certs/key.pem')
dnl Enable the access database
FEATURE(`access_db')
Follow the example in Recipe 1.8 to build the new sendmail.cf file, install it, and restart sendmail.
Discussion
The TLS_Clt: access database
entry uses the same format as the TLS_Srv: entry
covered in the Discussion of Recipe 8.7. All
of the fields described for the TLS_Srv:
entry—name,
requirement, TEMP+, and
PERM+—are used in exactly the same way for
the TLS_CLT: entry. The difference is that the
TLS_Clt: entry is used by the server to check for
any special requirements before accepting mail from the client. The
name field of the
TLS_Clt: entry defines the domain name or IP
address of the remote TLS client. When the name or address of a
client matches a TLS_Clt: entry, the
requirement field of the entry is used to
define the conditions imposed on the client before mail is accepted.
A sample TLS_Clt: entry is:
TLS_Clt:rodent.wrotethebook.com ENCR:168
This entry tells sendmail that a connection from rodent.wrotethebook.com must be encrypted with at least 168-bit encryption. If it isn’t, mail from the client is rejected, as this test from the client rodent shows:
#sendmail -Am -v -tTo: [email protected] From: [email protected] Subject: Test the TLS_Clt: entryCtrl-D[email protected]... Connecting to chef.wrotethebook.com. via esmtp... 220 chef.wrotethebook.com ESMTP Sendmail 8.12.9/8.12.9; Fri, 22 Aug 2003 12:01:37 - 0400 >>> EHLO rodent.wrotethebook.com 250-chef.wrotethebook.com Hello rodent.wrotethebook.com [192.168.0.3], pleased to meet you 250-ENHANCEDSTATUSCODES 250-PIPELINING 250-EXPN 250-VERB 250-8BITMIME 250-SIZE 250-DSN 250-ETRN 250-AUTH DIGEST-MD5 CRAM-MD5 250-STARTTLS 250-DELIVERBY 250 HELP >>> STARTTLS 220 2.0.0 Ready to start TLS >>> EHLO rodent.wrotethebook.com 250-chef.wrotethebook.com Hello rodent.wrotethebook.com [192.168.0.3], pleased to meet you 250 ENHANCEDSTATUSCODES 250-PIPELINING 250-EXPN 250-VERB 250-8BITMIME 250-SIZE 250-DSN 250-ETRN 250-AUTH DIGEST-MD5 CRAM-MD5 250-DELIVERBY 250 HELP >>> MAIL From:<[email protected]> 403 4.7.0 encryption too weak 56 less than 168 [email protected]... Deferred: 403 4.7.0 encryption too weak 56 less than 168 Closing connection to chef.wrotethebook.com. >>> QUIT 221 2.0.0 chef.wrotethebook.com closing connection
In this test, the error message “encryption too
weak” is in response to the
client’s MAIL
From: command. The server checks the
access database TLS_Clt:
entries in the tls_client ruleset. That ruleset is
called at two different points in the SMTP protocol exchange. First,
it is called when the STARTTLS command is
received, and it is called again when the MAIL
From command is received. When the
tls_client ruleset is called, it is passed the
value returned by ${verify}, the literal
$|, and either of the keywords
STARTTLS or MAIL.
The tls_client ruleset is very similar to the
tls_server ruleset described in Recipe 8.7. tls_client first uses
ruleset D to look for a
TLS_Clt: entry that matches the value found in
${client_name}. If no match is found, it uses
ruleset A to look for a
TLS_Clt: entry that matches the address in the
${client_addr} macro. If still no match is found,
tls_client looks for a TLS_Clt:
entry with a blank name field. tls_client would do
the following lookups for a connection from a client named
foo.bar.example.com that had the IP address
192.168.23.45, until a match was found:
TLS_Clt:foo.bar.example.com
TLS_Clt:bar.example.com
TLS_Clt:example.com
TLS_Clt:com
TLS_Clt:192.168.23.45
TLS_Clt:192.168.23
TLS_Clt:192.168
TLS_Clt:192
TLS_Clt:
tls_client then calls
TLS_connection and passes that ruleset anything it
has obtained from the access database. The
TLS_connection ruleset checks to see if the
connection meets the requirements defined by the
TLS_Clt: record.
The m4 macro LOCAL_TLS_CLIENT
provides a hook into the tls_client ruleset. Use
the macro to add custom sendmail.cf rewrite
rules to the beginning of the tls_client process.
See Also
Recipe 8.7 and Recipe 8.9
cover
related access
database entries. In particular, VERIFY: is an
alternative action keyword that can be used to implement this recipe.
See Recipe 8.9 for details on the
VERIFY: keyword. Recipe 8.5 and Recipe 8.6 also describe
how the access database is used with STARTTLS.
The STARTTLS recipe upon which this recipe is built is covered in
Recipe 8.4. The
sendmail book covers the use of the
access database with STARTTLS in Section
10.10.8.
8.9. Requiring a Verified Certificate
Problem
You have been asked to configure sendmail to exchange mail with a specified host only when the certificate provided by that host is verified.
Solution
The system must have OpenSSL installed and sendmail compiled with STARTTLS support before attempting to implement this recipe. See this chapter’s Introduction and Chapter 1 for more information about OpenSSL and about recompiling sendmail.
Create an access database entry for each host
that is required to provide a verified certificate. Use the
TLS_Clt: tag if the remote host initiates the
connection into the local host, or use the
TLS_Srv: tag if the local host initiates the
connection to the remote host. Use the VERIFY
keyword in the return field to require a validated certificate from
the remote system. Add a colon and a numeric value after the
VERIFY keyword to require a level of encryption in
addition to the verified certificate.
Create a STARTTLS sendmail configuration that includes the access_db feature. Here are sample lines that might be added to the sendmail configuration:
dnl Point to the CA certificate directory
define(`confCACERT_PATH', `/etc/mail/certs')
dnl Point to the root CA's certificate
define(`confCACERT', `/etc/mail/certs/cacert.pem')
dnl Point to the certificate used for inbound connections
define(`confSERVER_CERT', `/etc/mail/certs/cert.pem')
dnl Point to the private key used for inbound connections
define(`confSERVER_KEY', `/etc/mail/certs/key.pem')
dnl Point to the certificate used for outbound connections
define(`confCLIENT_CERT', `/etc/mail/certs/cert.pem')
dnl Point to the private key used for outbound connections
define(`confCLIENT_KEY', `/etc/mail/certs/key.pem')
dnl Enable the access database
FEATURE(`access_db')
Rebuild the sendmail.cf file, copy the new sendmail.cf file to /etc/mail, and restart sendmail, as shown in Recipe 1.8.
Discussion
When both end points are properly configured to support STARTTLS,
sendmail uses TLS to encrypt the mail transport even if the end
points do not present verified certificates. In this context, a
verified certificate is one signed by a CA that sendmail trusts. If
sendmail can verify the signature on the certificate, sendmail sets
the ${verify} macro to OK. When
a certificate is received that cannot be verified,
${verify} is set to one of several possible
values, all of which are covered in Introduction of this chapter.
For example, NO is one of the values indicating
that the certificate was not verified. Yet TLS is still used to
encrypt the link even when ${VERIFY} is set to
NO, as can be seen in the
Received: header shown below:
Return-Path: <[email protected]>
Received: from horseshoe.wrotethebook.com (horseshoe.wrotethebook.com [192.168.0.2])
        by chef.wrotethebook.com (8.12.9/8.12.9) with ESMTP id h14HeQAd001228
        (version=TLSv1/SSLv3 cipher=EDH-RSA-DES-CBC3-SHA bits=168 verify=NO)
        for <[email protected]>; Tue, 4 Feb 2003 12:40:27 -0500
Received: (from root@localhost)
        by horseshoe.wrotethebook.com (8.12.9/8.12.9) id h14Hnn91001180;
        Tue, 4 Feb 2003 12:49:49 -0500
Date: Tue, 4 Feb 2003 12:49:49 -0500
Message-Id: <[email protected]>
To: [email protected]
From: [email protected]
Subject: Test self-signed certificate
The first Received: header shows that the link was
encrypted with 168-bit encryption, and that no certificate was
verified for horseshoe.wrotethebook.com. The
implications of this are two-fold:
First, it is possible to use STARTTLS without recourse to a certificate authority if the only thing you want to do is encrypt the link.
Second, optional configuration is required to limit STARTTLS connections to those system with verifiable certificates.
The VERIFY requirement is used with
TLS_Clt: or TLS_Srv: to require
a verified certificate. When VERIFY is specified,
the current value stored in the ${verify} macro
must be OK. Otherwise, the connection is rejected.
Here are some example access database entries:
TLS_Clt:crab.wrotethebook.com          VERIFY
TLS_Srv:smtp.wrotethebook.com          VERIFY:168
TLS_Clt:horseshoe.wrotethebook.com     VERIFY:168
The first access database entry only accepts
inbound mail from crab.wrotethebook.com if the
certificate crab presents is verified. The
TLS_Clt: entries are processed by the
tls_client ruleset. See Recipe 8.8 for a description of that ruleset.
The second access database entry tells sendmail
that an outbound connection made to the server
smtp.wrotethebook.com must use 168-bit
encryption and that the certificate presented by the server must be
verified. If either of these conditions is not met, the connection is
terminated. The TLS_Srv: entry is processed by the
tls_server ruleset covered in Recipe 8.7.
The last entry requires 168-bit encryption and a verified certificate
for the TLS client horseshoe.wrotethebook.com.
If chef.wrotethebook.com had been configured
with that entry, the mail that created the
Received: header shown at the beginning of this
discussion would not have been accepted. As the
Received: header made clear,
horseshoe used 168-bit encryption, but it did
not present a verifiable certificate. A test run from
horseshoe shows the impact of adding this
TLS_Clt: entry to the configuration of the
receiving host:
#sendmail -Am -v -tTo: [email protected] From: [email protected] Subject: Test VERIFY:168Ctrl-D[email protected]... Connecting to chef.wrotethebook.com. via esmtp... 220 chef.wrotethebook.com ESMTP Sendmail 8.12.9/8.12.9; Fri, 22 Aug 2003 12:01:37 - 0400 >>> EHLO horseshoe.wrotethebook.com 250-chef.wrotethebook.com Hello horseshoe.wrotethebook.com [192.168.0.2], pleased to meet you 250-ENHANCEDSTATUSCODES 250-PIPELINING 250-EXPN 250-VERB 250-8BITMIME 250-SIZE 250-DSN 250-ETRN 250-AUTH DIGEST-MD5 CRAM-MD5 250-STARTTLS 250-DELIVERBY 250 HELP >>> STARTTLS 220 2.0.0 Ready to start TLS >>> EHLO horseshoe.wrotethebook.com 250-chef.wrotethebook.com Hello horseshoe.wrotethebook.com [192.168.0.2], pleased to meet you 250 ENHANCEDSTATUSCODES 250-PIPELINING 250-EXPN 250-VERB 250-8BITMIME 250-SIZE 250-DSN 250-ETRN 250-AUTH DIGEST-MD5 CRAM-MD5 250-DELIVERBY 250 HELP >>> MAIL From:<[email protected]> 403 4.7.0 not authenticated [email protected]... Deferred: 403 4.7.0 not authenticated Closing connection to chef.wrotethebook.com. >>> QUIT 221 2.0.0 chef.wrotethebook.com closing connection
The STARTTLS command is issued and accepted. The
second EHLO command indicates the successful start
of the encrypted session. However, the response to the
MAIL
From: command is the error
“not authenticated” because a
TLS_Clt: entry in the access
database on chef required a certificate signed
by a trusted certificate authority.
Notice that the response codes 403 and 4.7.0 are used on the error
message. The 4 at the start of each code indicates that this is a
temporary failure. In response to these temporary failures, the
client will queue the message and attempt to deliver it during
subsequent queue runs. By default, errors generated by a
VERIFY requirement are temporary errors. Use
PERM+ to make the error a permanent failure in
order to prevent the remote system from resending the message at each
queue run. For example:
TLS_Clt:horseshoe.wrotethebook.com PERM+VERIFY:168
See Recipe 8.7 for more information on
PERM+, TEMP+, and the define
TLS_PERM_ERR, all of which control whether TLS
errors are permanent or temporary.
The test shown above points out the difference between encryption and authentication. Encryption can be used even if the end points have not been authenticated. Therefore, special privileges, such as relaying, cannot be extended on the basis of the level of encryption used. Special privileges require authentication. Happily, TLS can provide both encryption and authentication when they are needed.
See Also
Recipe 8.7 and Recipe 8.8
provide additional examples of the
TLS_Clt: and TLS_Srv:
access database entries. Recipe 8.5 and Recipe 8.6 describe
other ways the access database is used with
STARTTLS. This recipe contains m4 commands
described in Recipe 8.4. The
sendmail book covers the use of the
access database with STARTTLS in Section
10.10.8.
8.10. Requiring TLS for a Recipient
Problem
You have been asked to ensure that encryption and authentication are used for mail addressed to specific recipients.
Solution
Install OpenSSL and recompile sendmail with STARTTLS support as described in the Introduction and in Recipe 1.6 and Recipe 1.7.
Use TLS_Rcpt: access database
entries to define those recipients that require TLS security and to
specify the level of security required. The key field of each entry
contains the tag TLS_Rcpt: and the full or partial
address of the recipient. The return value defines the level of
security required, and it can be either the keyword
ENCR:, followed by the number of bits of
encryption required, or the keyword VERIFY,
optionally followed by a number of bits of encryption.
Add the access_db feature and the STARTTLS defines to the sendmail configuration. Here are sample lines that could be added to the configuration:
dnl Point to the CA certificate directory
define(`confCACERT_PATH', `/etc/mail/certs')
dnl Point to the root CA's certificate
define(`confCACERT', `/etc/mail/certs/cacert.pem')
dnl Point to the certificate used for inbound connections
define(`confSERVER_CERT', `/etc/mail/certs/cert.pem')
dnl Point to the private key used for inbound connections
define(`confSERVER_KEY', `/etc/mail/certs/key.pem')
dnl Point to the certificate used for outbound connections
define(`confCLIENT_CERT', `/etc/mail/certs/cert.pem')
dnl Point to the private key used for outbound connections
define(`confCLIENT_KEY', `/etc/mail/certs/key.pem')
dnl Enable the access database
FEATURE(`access_db')
Rebuild the sendmail.cf file, copy the new sendmail.cf file to /etc/mail, and restart sendmail. See Recipe Recipe 1.8 for an example.
Discussion
The TLS_Clt: and TLS_Srv:
access database entries used in Recipe 8.7, Recipe 8.8, and Recipe 8.9 enforce minimum TLS security requirements
based on the name or address of the remote host. sendmail checks for
${client_name} and
${client_addr} in TLS_CLT:
entries for inbound connections, and for
${server_name} and
${server_addr} in TLS_Srv:
entries for outbound connections. These entries ensure that
connections between the specified remote hosts and local host are
secured, but these entries do not guarantee that mail addressed to a
specific user will be secure. There is no guarantee because mail can
reach recipients over multiple paths—some of which may be
secured and others may not. Look at some sample MX records:
wrotethebook.com.     IN MX     10  chef.wrotethebook.com.
wrotethebook.com.     IN MX     20  rodent.wrotethebook.com.
wrotethebook.com.     IN MX     30  mail.example.com.
Given these three MX records, mail bound for
[email protected] could go over a connection
to chef, rodent, or
mail.example.com. Assume that
chef and rodent have
STARTTLS support but that mail.example.com does
not. Mail sent from our system to
[email protected] would be encrypted if the
delivery connection was made to chef or
rodent, but the mail would be sent as clear text
if the connection was made to mail.example.com.
We don’t run mail.example.com,
so we can’t change the way it is
configured—what we can do is ensure that mail sent to
[email protected] only goes via an adequately
encrypted connection. The following TLS_Rcpt:
entry ensures that mail is only sent to
[email protected] if the remote host has
presented a verified certificate and the link is using 168-bit
encryption:
TLS_Rcpt:[email protected] VERIFY:168
The basic format of the TLS_Rcpt: entry is:
TLS_Rcpt:recipientrequirements+suffix++suffix
The string TLS_Rcpt: is the required tag for this
database record. recipient is the full or
partial email address of the recipient. The recipient address can be:
A full address in the format
user@host.domain. This format matches a specific user on a specific host.TLS_Rcpt:[email protected]is an example.A hostname in the format
host.domain; e.g.,TLS_Rcpt:crab.wrotethebook.com. Any user on the specified host is matched.A domain name to match every user on every host in the specified domain. For example,
TLS_Rcpt:wrotethebook.comwould match every recipient in the wrotethebook.com domain.A username written in the form
user@; e.g.,TLS_Rcpt:craig@. This format matches any recipient with the specified username on any host in any domain.A blank field, which matches every possible recipient address. This format is used to define a default security requirement for all outbound mail.
The requirements field defines the minimum
security requirements that must be met before mail is sent to the
recipient. The keyword ENCR or
VERIFY can be used in the
requirements field to require a level of
encryption or a verified certificate. For example
ENCR:168 requires a minimum of 168-bit encryption,
although it does not require a verified certificate from the remote
server. The VERIFY keyword does require a verified
certificate and optionally can be combined with a numeric value to
also require a level of encryption. For example,
VERIFY:168 requires a verified certificate from
the remote server and 168-bit encryption on the link. Recipe 8.7, Recipe 8.8, and Recipe 8.9 provide examples of the
ENCR and VERIFY keywords. The
sample TLS_Rcpt: entry just shown uses
VERIFY:168 to require authentication and
encryption.
The impact of the sample entry is seen when mail addressed to [email protected] is routed to the backup MX server mail.example.com:
#sendmail -Am -v -tTo: [email protected] From: [email protected] Subject: Test TLS_Rcpt:Ctrl-D[email protected]... Connecting to mail.example.com. via esmtp... 220 mail.example.com ESMTP Sendmail 8.12.9/8.12.9; Wed, 5 Feb 2003 15:33:02 -0500 >>> EHLO wrotethebook.net 250-mail.example.com Hello IDENT:24znrK/hAUFBK67n3St2d8DU/5bqb70s@chef [192.168.10. 8], pleased to meet you 250-ENHANCEDSTATUSCODES 250-PIPELINING 250-EXPN 250-VERB 250-8BITMIME 250-SIZE 250-DSN 250-ETRN 250-AUTH GSSAPI DIGEST-MD5 CRAM-MD5 250-DELIVERBY 250 HELP >>> MAIL From:<[email protected]> SIZE=92 [email protected] 250 2.1.0 <[email protected]>... Sender ok [email protected]... Deferred >>> RSET 250 2.0.0 Reset state Closing connection to mail.example.com. >>> QUIT 221 2.0.0 mail.example.com closing connection
The backup MX server mail.example.com does not
offer the STARTTLS service in its response to the
EHLO command. Therefore, the client does not issue
a STARTTLS command. Instead, the client issues the
MAIL
From: command. The client
then checks for a TLS_Rcpt: entry in the
access database, finds it, and terminates the
session with the message:
[email protected] ... Deferred
This message indicates that the mail has been queued and will be sent
again during the next queue run, which means that sendmail is
treating this delivery problem as a temporary error. By default, most
TLS connection problems are treated as temporary failures. You can
change by using the TLS_PERM_ERR define in the
master configuration file, or you can override the default for a
specific TLS_Rcpt: entry by adding
PERM+ to the entry. For example, the following
entry would make the failure shown above a permanent failure:
TLS_Rcpt:[email protected] PERM+VERIFY:168
However, it is not a good idea to make this a permanent failure.
Failures caused by TLS_Rcpt: entries should be
temporary failures. The failure happened because the connection went
to a backup MX server that doesn’t support STARTTLS.
When the mail is resent during the queue run, it will probably go to
the primary MX server, which does have STARTTLS, and therefore, the
mail will be successfully delivered. Making the failure permanent
undermines the error recovery potential inherent in the sendmail
queue process. It is more likely that you would use
TEMP+ to make the failure temporary if, for some
reason, the default for TLS failures had been set to permanent using
the TLS_PERM_ERR define. Recipe 8.7, Recipe 8.8, and Recipe 8.9 cover TLS_PERM_ERR,
PERM+, and TEMP+.
The other access database entries covered in
this chapter also use the ENCR:,
VERIFY:, PERM+, and
TEMP+ keywords. However, the
TLS_Rcpt: record has more options than these other
access entries. The
requirements field of the
TLS_Rcpt: entry can be followed by one or more
optional values. These options are called
suffixes because they are added to the
TLS_Rcpt: record after the ENCR
or VERIFY keyword. The first suffix is added after
a single plus sign (+), and subsequent suffixes
are added with two plus signs (++). The possible
suffixes are:
-
CN:name The
CNoption checks the common name (CN) of the subject from the certificate presented by the server. sendmail holds the CN of the subject in the macro${cn_subject}. Ifnameis provided, the value ofnamemust match the value stored in the${cn_subject}macro. Ifnameis left blank, the value returned by${cn_subject}must match the value returned by${server_name}. The macro${server_name}holds the hostname of the remote host to which the client is currently connected, as determined by a reverse domain lookup of the IP address used by TCP for the current connection.-
CS:name The
CSoption comparesnameagainst the value returned by${cert_subject}. The macro${cert_subject}holds the distinguished name from the Subject field of the certificate presented by the remote server. The DN andnamemust match.-
CI:name The
CIoption comparesnameagainst the value returned by${cert_issuer}. The macro${cert_issuer}holds the distinguished name from the Issuer field of the certificate presented by the remote server. The value in${cert_issuer}and the value in thenamefield must match.
Here is a sample TLS_Rcpt: entry with multiple
suffixes:[4]
TLS_Rcpt:[email protected] VERIFY:168+CN++CI:/C=US/ST=Maryland/L=Gaithersburg/
O=WroteTheBook/CN=chef.wrotethebook.com/
This TLS_Rcpt: entry requires 168-bit encryption
and a verified certificate from the remote host. The common name of
the subject of the certificate must be the hostname of the server at
the other end of the current connection, and the certificate must be
signed by the private CA created on
chef.wrotethebook.com in Recipe 8.1.
The various options available for the TLS_Rcpt:
entry make it possible to handle most potential situations. Yet, it
is also possible to create a custom ruleset to do your own
TLS_Rcpt: processing using the
Local_tls_rcpt ruleset hook.
See Also
Recipe 8.7, Recipe 8.8, and Recipe 8.9 show examples of
related access database entries, and Recipe 8.5
and Recipe 8.6 describe other ways the access database is used with STARTTLS. The sendmail
book covers ${cn_subject} in Section 21.9.24, ${server_name} in 21.9.84, ${cert_subject} in 21.9.15, ${cert_issuer} in 21.9.13,
and TLS_Rcpt: in 10.10.8.3.
8.11. Refusing STARTTLS Service
Problem
By default, a sendmail system configured to run STARTTLS
issues the STARTTLS command to any remote host
that advertises STARTTLS in its response to the
EHLO command. You have been asked to prevent
sendmail from using the STARTTLS protocol extension when
communicating with selected remote hosts.
Solution
Make sure your system meets the basic OpenSSL and STARTTLS configuration requirements described in this chapter’s Introduction and in Chapter 1.
Add Try_TLS: entries to the
access database to identify the remote sites for
which STARTTLS should be disabled. The format of the
Try_TLS: record is:
Try_TLS:name NO
Try_TLS: is the required tag value.
name is the hostname, domain name, or IP
address of the remote site. NO is the required
return value.
Add the access_db feature and the STARTTLS defines to the sendmail configuration:
dnl Point to the CA certificate directory
define(`confCACERT_PATH', `/etc/mail/certs')
dnl Point to the root CA's certificate
define(`confCACERT', `/etc/mail/certs/cacert.pem')
dnl Point to the certificate used for inbound connections
define(`confSERVER_CERT', `/etc/mail/certs/cert.pem')
dnl Point to the private key used for inbound connections
define(`confSERVER_KEY', `/etc/mail/certs/key.pem')
dnl Point to the certificate used for outbound connections
define(`confCLIENT_CERT', `/etc/mail/certs/cert.pem')
dnl Point to the private key used for outbound connections
define(`confCLIENT_KEY', `/etc/mail/certs/key.pem')
dnl Enable the access database
FEATURE(`access_db')
Using the guidance in Recipe 1.8, rebuild the sendmail.cf file, copy the new sendmail.cf file to /etc/mail, and restart sendmail.
Discussion
Here are sample Try_TLS: entries that prevent
STARTTLS from being used with two different remote hosts:
Try_TLS:example.com NOTry_TLS:server.wrotethebook.org NO
Given these Try_TLS: entries, TLS is not used when
connecting to the TLS server
server.wrotethebook.org or when connecting to
any STARTTLS server in the example.com domain.
Try_TLS: records are processed by the
try_tls ruleset, which is called by the client
just before the client issues the STARTTLS
command. try_tls first uses ruleset
D to look for a Try_TLS: record
that contains the hostname or the domain name returned by
${server_name}. If no match is found, it uses the
A ruleset to look for a
Try_TLS: record that contains the IP address
returned by ${server_addr}. If still no match is
found, the STARTTLS command is issued. If a match
is found that returns the value NO, the connection
is terminated with a permanent failure.
The LOCAL_TRY_TLS macro provides a hook into the
try_tls ruleset for your own custom rewrite rules.
Try_TLS: entries only apply to outbound
connections, which are a client function. See Recipe 8.12 for an example of using the
SRV_Features: entry to control the TLS server
functions offered on inbound connections.
See Also
Recipe 8.4 explains the STARTTLS defines
used
in this configuration. Recipe 8.5 to Recipe 8.10 show examples of using the
access database with STARTTLS. The
sendmail book covers
${server_addr} in Section 21.9.83,
${server_name} in 21.9.84, and
Try_TLS: records in 10.10.8.4.
8.12. Selectively Advertising STARTTLS
Problem
You have configured STARTTLS but do not want to encrypt the link for every remote host that is also configured for STARTTLS. You want to configure sendmail to only offer STARTTLS to selected hosts.
Solution
Make sure the system meets the basic OpenSSL and STARTTLS configuration requirements described in Introduction and in Chapter 1.
Create Srv_Features: access
database entries for all hosts to which STARTTLS should be
advertised. The key field of each entry begins with the tag
Srv_Features:, which is followed by the domain
name, hostname, or IP address that identifies the connecting host.
The return value of each entry is the letter s.
Add the access_db feature to the STARTTLS
sendmail configuration. Here is the required
FEATURE macro and sample defines:
dnl Point to the CA certificate directory
define(`confCACERT_PATH', `/etc/mail/certs')
dnl Point to the root CA's certificate
define(`confCACERT', `/etc/mail/certs/cacert.pem')
dnl Point to the certificate used for inbound connections
define(`confSERVER_CERT', `/etc/mail/certs/cert.pem')
dnl Point to the private key used for inbound connections
define(`confSERVER_KEY', `/etc/mail/certs/key.pem')
dnl Point to the certificate used for outbound connections
define(`confCLIENT_CERT', `/etc/mail/certs/cert.pem')
dnl Point to the private key used for outbound connections
define(`confCLIENT_KEY', `/etc/mail/certs/key.pem')
dnl Enable the access database
FEATURE(`access_db')
Following the instructions in Recipe 1.8, rebuild the sendmail.cf file, copy the new sendmail.cf file to /etc/mail, and restart sendmail.
Discussion
Use the Srv_Features: access
database entry to control the extended SMTP features offered to
connecting hosts. The return value of a
Srv_Features: entry is one or more single
character flags, some of which indicate whether an extended service
should be advertised. (When more than one flag is used, the
individual flags are separated by whitespace.) Lowercase flags enable
SMTP extensions and uppercase flags disable extensions. The
s flag selectively advertises STARTTLS, and the
S flag selectively blocks advertising STARTTLS.
These are the flags of particular interest for this recipe.[5]
Assume that you want to limit advertising STARTTLS to only those hosts in the wrotethebook.com domain. You could do that by adding the following two entries to the access database:
Srv_Features:wrotethebook.com             s
Srv_Features:                             S
In this case, STARTTLS is advertised to the hosts in the
wrotethebook.com domain as directed by the
s flag. The S flag in the
second entry prevents STARTTLS from being advertised to any other
host. A blank name field in a Srv_Features: entry
indicates that the entry applies to every host for which there is not
a more specific Srv_Features: entry. In effect,
the second entry creates a default policy for advertising STARTTLS.
This second entry is necessary because the normal default is for
sendmail to advertise STARTTLS when STARTTLS is configured. In the
absence of an applicable Srv_Features: entry, the
default sendmail behavior applies.
Alternatives
Changing the default sendmail behavior with a
DAEMON_OPTIONS macro is an alternative to using
the second Srv_Features: entry described above.
You could add a DAEMON_OPTIONS macro that
specifies the M=S modifier to the sendmail
configuration. For example, adding the following lines to the
configuration prevents sendmail from advertising STARTTLS to any
connecting host:
dnl Do not advertise STARTTLS
DAEMON_OPTIONS(`Name=MTA, M=S')
After changing the default, you could then override the default for
the hosts in the wrotethebook.com using a single
Srv_Features: entry:
Srv_Features:wrotethebook.com s
This alternative approach works, but I prefer the first approach of putting both policies in the access database. I think that putting both policies in one place makes it easier for others to understand exactly what the configuration is doing.
The examples in this section assume that you want to limit
advertising to selected hosts. The opposite may be true. You may wish
to advertise STARTTLS to most hosts and only block advertising to
specific hosts with which you are having trouble. In that case, the
specific Srv_Features: entries would use the
S flag. No default
Srv_Features: entry would be required because the
normal sendmail default is to advertise STARTTLS.
See Also
Recipe 8.4 describes the basic STARTTLS
configuration that needs to be done before this
recipe is implemented. Recipe 7.9 and Recipe
Recipe 8.13 provide other examples of using the
Srv_Features: record. Recipe 8.5 through Recipe 8.13 show how
the access database is used with STARTTLS. The
sendmail book covers the
Srv_Features: entry in Section 19.9.4.
8.13. Requesting Client Certificates
Problem
By default, STARTTLS does not require a TLS client to present a certificate. You want to configure sendmail to request certificates from selected TLS clients.
Solution
Make sure the system meets the basic OpenSSL and STARTTLS configuration requirements described in Introduction and in Chapter 1.
Create Srv_Features: access
database entries for all clients that will be required to present a
certificate. The key field of each entry is the tag
Srv_Features: followed by the domain name,
hostname, or IP address of the selected client. The return value of
each entry is the letter v.
Add the access_db feature to the STARTTLS
sendmail configuration. Here is the required
FEATURE macro and sample defines:
dnl Point to the CA certificate directory
define(`confCACERT_PATH', `/etc/mail/certs')
dnl Point to the root CA's certificate
define(`confCACERT', `/etc/mail/certs/cacert.pem')
dnl Point to the certificate used for inbound connections
define(`confSERVER_CERT', `/etc/mail/certs/cert.pem')
dnl Point to the private key used for inbound connections
define(`confSERVER_KEY', `/etc/mail/certs/key.pem')
dnl Point to the certificate used for outbound connections
define(`confCLIENT_CERT', `/etc/mail/certs/cert.pem')
dnl Point to the private key used for outbound connections
define(`confCLIENT_KEY', `/etc/mail/certs/key.pem')
dnl Enable the access database
FEATURE(`access_db')
Following the instructions in Recipe 1.8, rebuild the sendmail.cf file, copy the new sendmail.cf file to /etc/mail, and restart sendmail.
Discussion
Srv_Features: entries control the way in which a
server interacts with its clients. See Recipe 8.12 and Recipe 7.9 for
more general information about the Srv_Features:
entry.
Use the v return value on a
Srv_Features: entry to request the TLS
client’s certificate. Use the V
return value to specifically prevent sendmail from asking for the
client’s certificate.
Adding the following entry to the access database requires a certificate from all hosts connecting to the local host from the dialin.wrotethebook.com domain:
Srv_Features:dialin.wrotethebook.com v
By itself, the Srv_Features: entry does not do
anything with the client certificate. It merely requests that the
client present a certificate, which can then be used for special
purposes such as authorizing relaying. Using the certificate for a
special purpose requires additional configuration as shown in other
recipes in this chapter.
See Also
Recipe 8.4 describes the STARTTLS defines
used in this configuration. Recipe 7.9
provides other examples of using the Srv_Features:
record. Recipe 8.5, Recipe 8.6, and Recipe 8.9 use client
certificates to grant relaying privileges. The
sendmail book covers the
Srv_Features: entry in Section 19.9.4.
[1] For the SMTP connection, the TLS client is the system initiating the connection, and the TLS server is the system to which the connection is being made.
[2] The CA script is found in the misc subdirectory of the OpenSSL ssl directory. On our sample Red Hat Linux system, the full directory path is /usr/share/ssl/misc; on some other systems it is /usr/local/ssl/misc.
[3] Because of PIPELINING, which the EHLO
response shows is offered on this system, some SMTP commands are sent
together to save on TCP roundtrip times. For this reason, the
response to the RCPT
To:
command follows the DATA command in this example.
[4] This is one long line with no line breaks.
[5] All of the flags are described in Table 7-2, which is shown in the Discussion section of Recipe 7.9.