Adding a Toolbox Bitmap
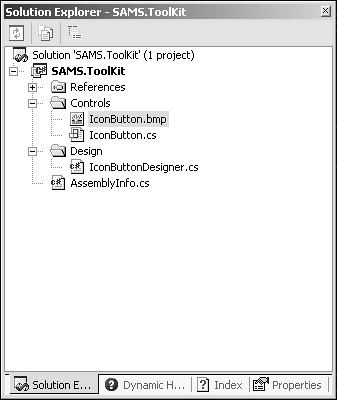
Before this chapter ends, I'd like to add a Toolbox bitmap for the IconButton. A Toolbox bitmap is the 16×16 image that appears in the Toolbox tab for the IconButton. Adding a bitmap for a control is a simple task, to say the least. All that needs to be done is to add a bitmap with the same name as the control to the project. Figure 3.7 shows the Solution with the IconButton.bmp file added in the Controls folder of the Solution.
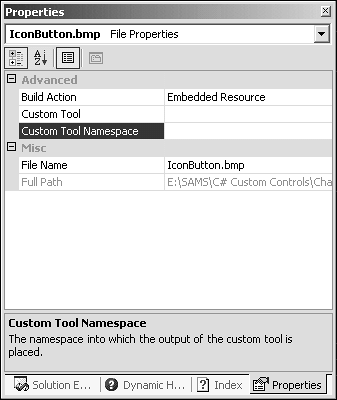
The bitmap must reside in the same namespace as the control and be compiled as an embedded resource. The Toolbox uses this as the default search for locating the associated Toolbox image to associate with the control. In the case of the IconButton, this means adding the bitmap to the Controls folder of the Solution. To enable the bitmap as an embedded resource, right-click the bitmap file and select the Properties menu item. From the Properties page, set the Build Action to Embedded Resource, as shown in Figure 3.8.
The bitmap that will act as the Toolbox bitmap for the control must also have the following properties:
Height of 16
Width of 16
16 colors
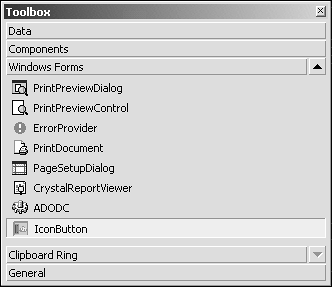
With these conditions satisfied, the new bitmap image will appear next to the name of the IconButton control when loaded in the Toolbox. Figure 3.9 shows the Toolbox with the IconButton bitmap enabled.
Again, the Toolbox will search the assembly manifest for an embedded bitmap with the same qualified name as the control. If found, the bitmap will be used as a visual representation of the control within the Toolbox.


