In the last chapter, we saw some basics about the Burp Suite dashboard, target, and engagement tools. Now that we have seen the basics of intercepting requests and interpreting the summary on the dashboard, we will move ahead with using the Intruder tool. Intruder has advanced fuzzing capabilities that can be used in various attack scenarios.
Introduction to Intruder
Before we get into the details of various options within Intruder, it’s important to understand what Intruder is and how it can be helpful in web application security testing. Intruder is part of Burp Suite, which can be used effectively for fuzzing and performing a brute force attack.
There might be an application with a login page wherein the user needs to enter credentials to proceed further. From a security testing perspective, it would be worthwhile to test this login page for default credentials, weak passwords, or lockout mechanisms. This is where Intruder can come in handy. Given a list of usernames and passwords, Intruder can try all those combinations to see if any of them match.
We can also consider another scenario wherein we have an interesting request that we wish to investigate further to check if it’s vulnerable to SQL injection or cross-site scripting. Again, Intruder can help with this. We can simply point Intruder to the URL and parameter we wish to test and feed it with a list of SQL injection or cross- site scripting payloads. It will then try and insert all the payloads we provided into the parameter we want to test and get us the responses. Once this is done, we need to check the responses to see if any of the payload actually resulted in exploitation of the vulnerability.
- 1.
A URL and a parameter to test
- 2.
List of payloads to be submitted to the parameter
- 1.Right-click the request you wish to send and click on ‘Send to Intruder’ as shown in Figure 5-1.
 Figure 5-1
Send request to Intruder
- 2.
Select the request you want to send and press the hotkey combination ‘Ctrl + I’.
Now that we have sent the request to Intruder, let’s see what options need to be configured further.
Target Tab
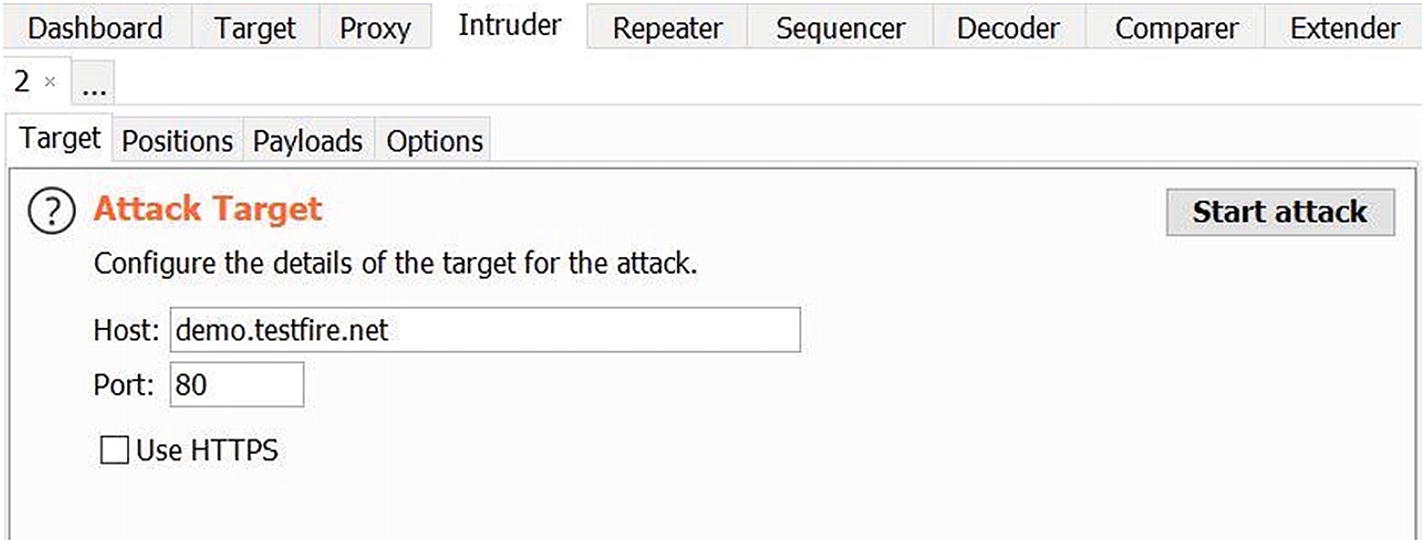
Configuring the attack target in Intruder
There’s also an option to use HTTPS in case the target URL is using a secure communication channel.
Positions

Configuring the positions in Intruder
- 1.
Add $ – This option is used to add a new insertion point. Simply point the cursor to the start and end of the insertion point and click on ‘Add $’.
- 2.
Clear $ – This option will simply remove all the insertion points that were either selected manually or automatically.
- 3.
Auto $ – This option will scan the request and try to automatically set insertion points marking them with the ‘$’ sign.
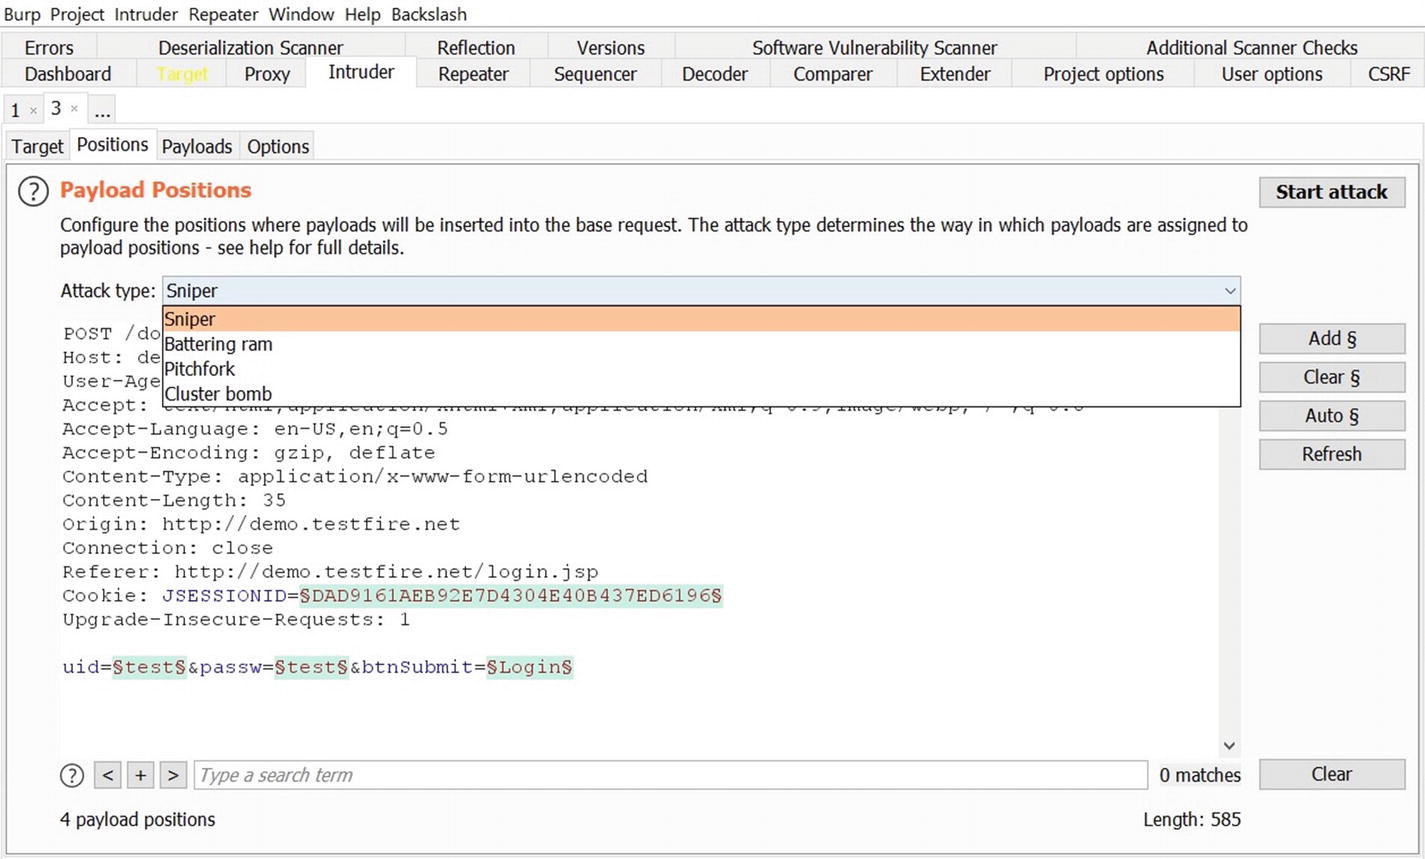
Selecting the attack type in Intruder
- 1.
Sniper – This type of attack uses a single set of payloads. In this case Intruder inserts payloads into each of the insertion points at once and then iterates through it.
- 2.
Battering ram – This type of attack uses a single set of payloads. In this case Intruder iterates through payloads by inserting the same payload at all insertion points at once.
- 3.
Pitchfork – This type of attack uses multiple sets of payloads. In this case Intruder uses different payload for each of the insertion points.
- 4.
Cluster bomb – This type of attack uses multiple sets of payloads. For each of the defined insertion points, there’s a different payload set. Intruder iterates through each of the payload sets and all permutations of payload combinations are then tested. Due to the number of possible permutations and combinations in the case of a cluster bomb, a large number of requests would be generated.

Attack type and positions in Intruder
Once the payload positions are configured and type of attack is selected, we can move ahead to configuring the actual payloads.
Payloads

Selecting payloads in Intruder
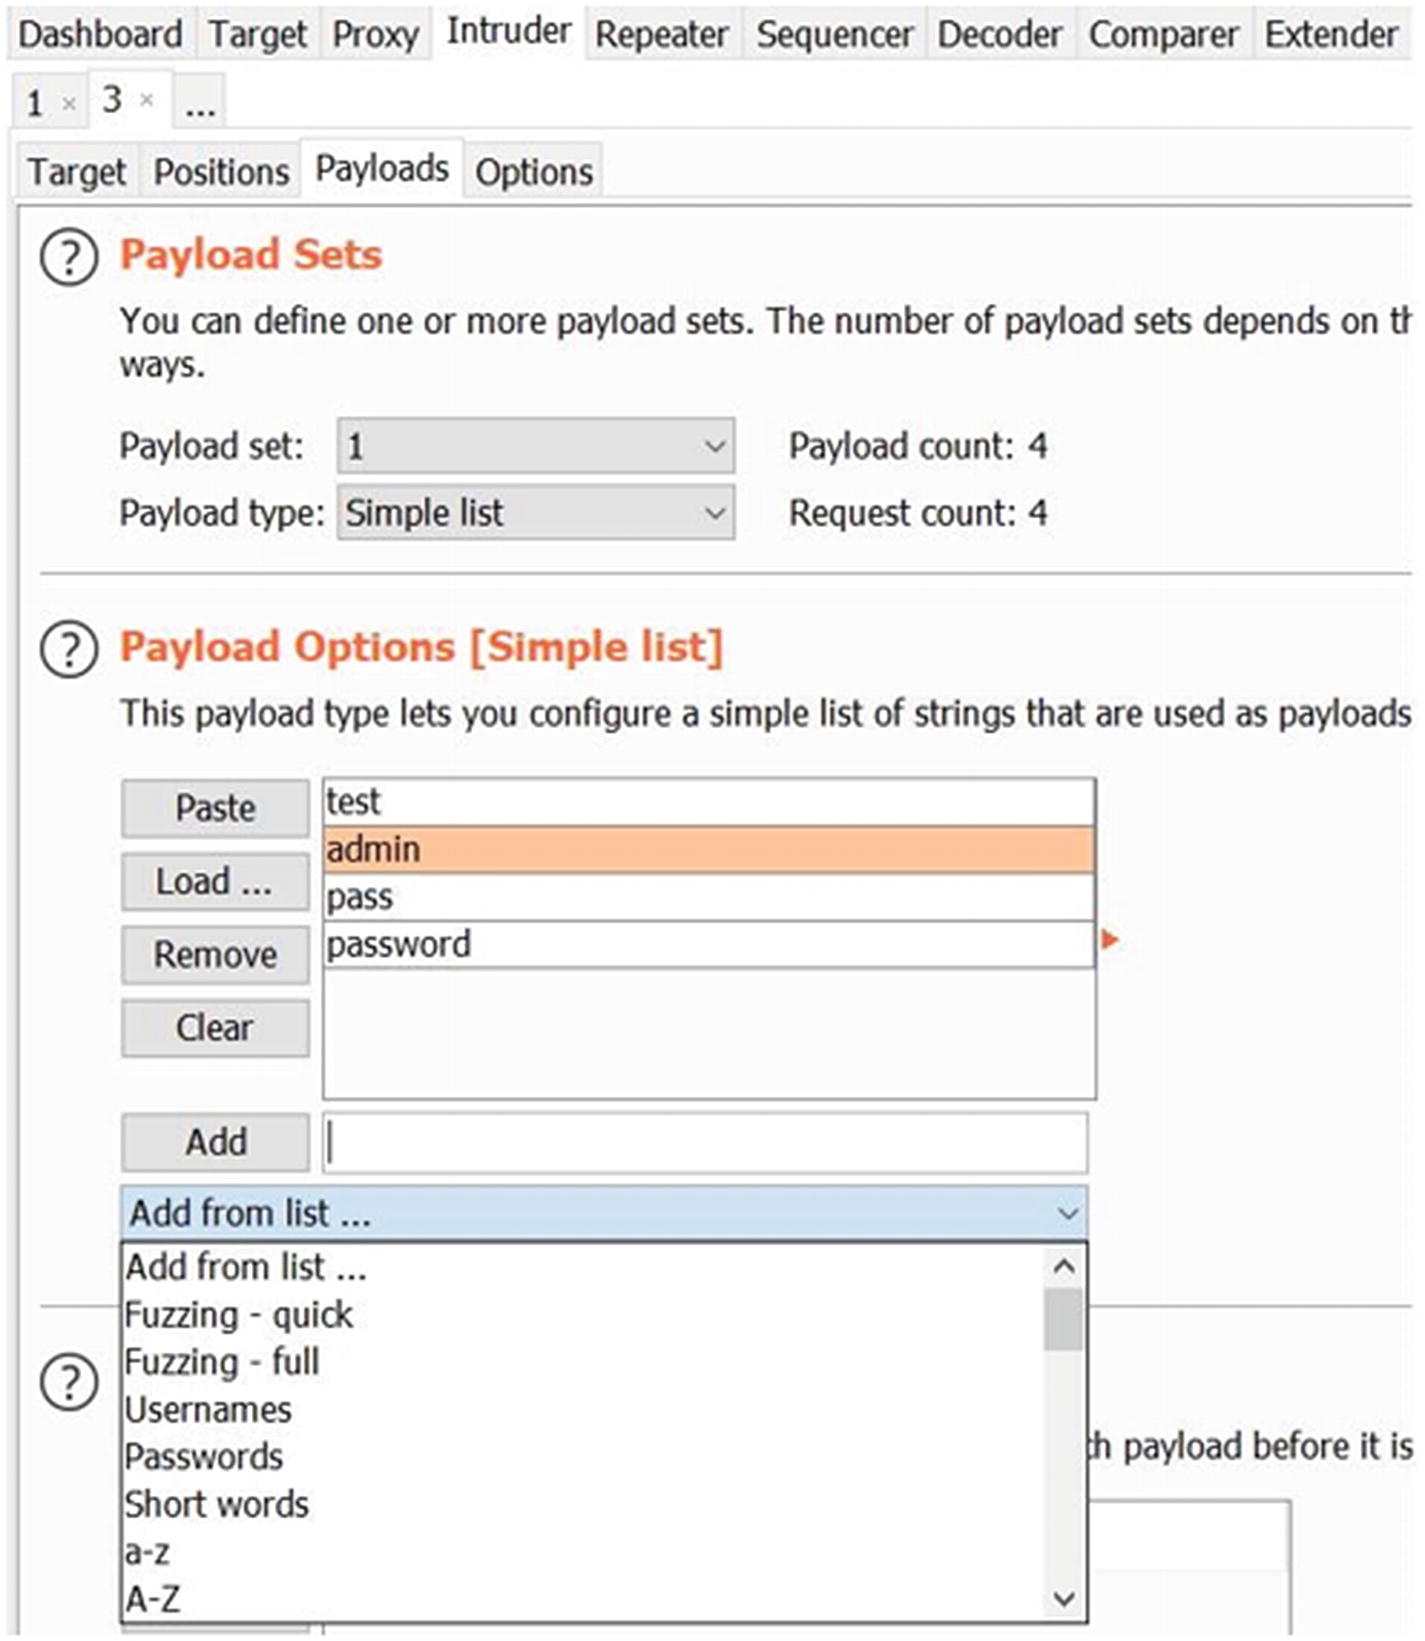
Selecting Intruder payloads from various options
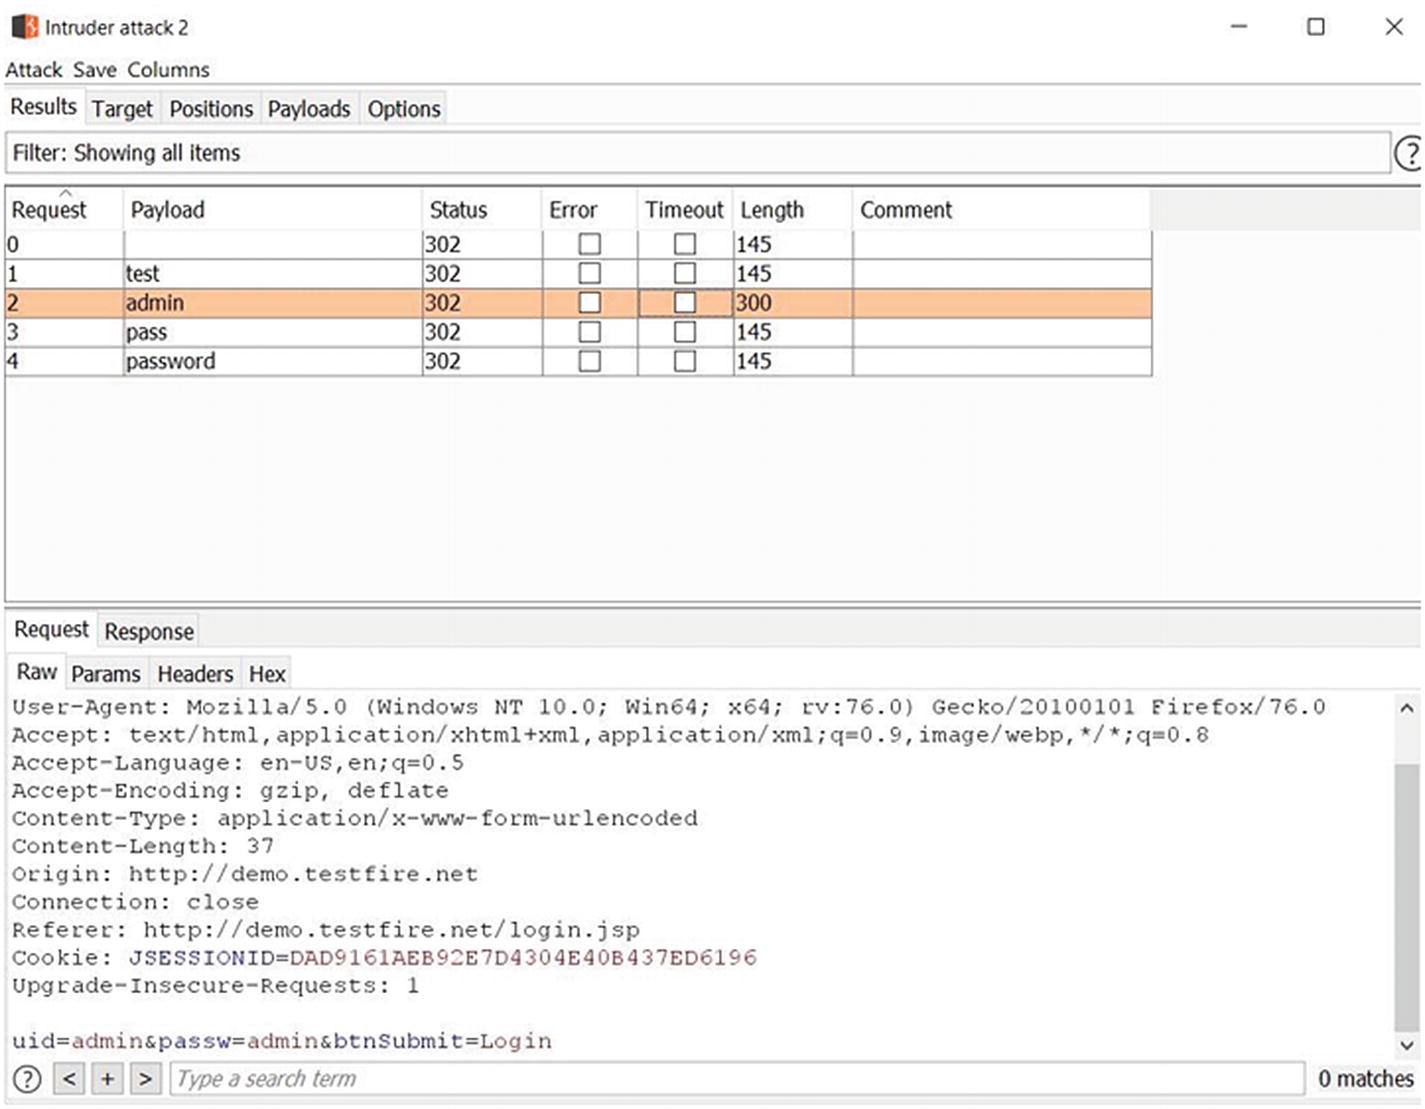
Intruder attack results
From Figure 5-8, we can see that Intruder sent five requests each with a different payload. Upon observing and comparing the content length, we can notice that for payload ‘admin’ the response was different. Hence it could be the password for the admin user we are trying to log in. We can then easily verify this by manually logging into the target application.
Options

Intruder configuration options

Extracting relevant data from Intruder results
Summary
In this chapter we learned about using the Intruder tool to perform fuzzing and brute force attacks. We started off the chapter by learning how to send requests to Intruder, configuring positions, payloads, and finally launching the attack and interpreting the results. We also saw some of the configurable options for Intruder.
In the next chapter we’ll see some additional useful tools within the Burp Suite like Repeater, Comparer, Decoder, and Sequencer.
Exercises
- 1.
Use Intruder to detect cross-site scripting vulnerability in any of the vulnerable applications.
- 2.
Use Intruder to detect SQL injection vulnerability in any of the vulnerable applications.