
Chapter 2: Cross-Platform Setup
One of the major improvements Microsoft talked about when launching .NET Core was the possibility of running .NET code on platforms other than Windows. With each iteration, the cross-platform story has been improved upon, and in addition to making sure the code can run on other operating systems, great improvements have been made in enabling Linux to run on Windows as well. In the context of running web applications, Linux is a great host operating system for doing so, and in this chapter, we will go through how you can get started with .NET across platforms. You will learn how to leverage the .NET framework and how to get set up and started on a Windows computer, as well as on Linux and macOS. We'll also see how to troubleshoot various Linux on Windows scenarios, including Windows Subsystem for Linux version 2 (WSL2). By the end of the chapter, you'll have your system ready for cross-platform development.
We will cover the following topics:
- Leveraging the .NET framework
- Getting started on Windows, Linux, and macOS
- Debugging Linux on Windows with Visual Studio 2019
Technical requirements
This chapter is about running code on different operating systems, so if you want to test all the options, you will need several devices:
- The code for Windows and Linux will work on a Windows computer.
- The code for macOS requires a Mac system.
- The code for Windows can run on a Mac if you use Fusion/Parallels or Bootcamp.
In addition to the devices, you will also need the following:
- Visual Studio Code, which is available for Windows, Linux, and macOS
- Visual Studio 2019, which is available for Windows and macOS
Please visit the following link to check the CiA videos: https://bit.ly/3qDiqYY
Check out the source code for this chapter at: https://github.com/PacktPublishing/ASP.NET-Core-5-for-Beginners/tree/master/Chapter%2002
Leveraging the .NET framework
Starting with a bit of trivia, there was a time when Microsoft played very well with other operating systems. When Windows 3.0 was developed, Microsoft collaborated with IBM in developing an operating system called OS/2. Windows ran on top of MS-DOS, so it was not technically an operating system like it is today. In contrast, OS/2 was a complete operating system, without requiring you to go through DOS first. The nifty thing about OS/2 was that it included binaries from Windows, so it was able to run Windows applications on a non-MS operating system. Not only that, but since OS/2 had a different model of operating and more advanced (at the time) memory management, it was able to run Windows apps better than Windows itself. Instead of the entire computer locking up when an application crashed, you just terminated the app before you continued what you were doing.
The partnership was not without its problems, both culturally and technologically. The two companies had their differences, so it did not last. Microsoft moved on to build the Windows NT platform for the professional market and Windows 95 for the consumer market, and OS/2 died out on its own. From that point in time, Microsoft was not a name you used in the same sentence as the term cross-platform, and every bit of effort went into building the Windows ecosystem.
.NET was not present from the beginning of Windows, and it had its own growing pains over the years, which we covered in the previous chapter.
Fast forward to modern times, and Microsoft will be more than happy to tell you how great Linux runs on their cloud computing platform and will provide you with everything you need in order to make .NET code run on the Linux operating system. It took 20 years to turn the ship around, but it certainly is a different path being taken these days. Let's first see why we should go cross-platform and when we shouldn't go cross-platform.
Why cross-platform?
When we use the term cross-platform, we may actually be referring to different things.
You have the .NET 5 SDK that you need to develop .NET applications. The fact that this works on macOS means that developers do not need a Windows computer to develop software for Windows, and since Macbooks are popular in the tech community, this broadens the potential developer audience for .NET.
You also have the .NET runtime that is required for running .NET applications. The fact that this works on Linux means that you are not forced to run your applications on Windows, and for servers this is a big thing. With a classic Windows Server with a UI running Internet Information Services, the operating system alone takes up multiple gigabytes of space. A trimmed down Linux installation, with a command line, could be as little as 50 megabytes. If you want to run cloud-native apps, this is a major win.
Why not cross-platform?
OS/2 was an interesting experiment, but even if the partnership had remained amiable, it would probably have been complicated in the long run to enable this type of cross-platform solution. We explained in the first chapter how there are differences between managed and native code, and the approach IBM used was basically bringing in Windows to provide native capabilities. .NET was not invented at the time, and other frameworks also did not necessarily have great cross-platform features. Over time, this would not be a sustainable approach. Imagine keeping up with patches—a security flaw in Windows would require IBM to update their operating system and maintain compatibility through extensive testing and validation.
The short version of this explanation: if you rely on native/unmanaged code, cross-platform can be painful.
Native and unmanaged code is still required for some applications, and then cross-platform might not be the best option for those situations. For instance, in the early days of iPhones, there was no flashlight app, but some clever people figured out that they could interact with the camera and use the flash as a flashlight. This was before Xamarin was a viable option, but it is likely this would have been outside the scope of .NET managed code to implement it.
If you want to squeeze every last CPU cycle out of the device the code runs on, then collected memory objects (that are garbage) might throw you off, because you cannot reliably predict them. If you can handle the overhead of managing memory yourself, you may want to go with a lower-level language for full optimization. A traditional example of this is games where early 3D titles had critical sections written in assembly code, as well as algorithmic tweaks to math operations that you simply cannot control when using a library. On the flip side, this didn't just affect cross-platform; the developer also had to account for which generation of CPU your machine ran, for certain instructions in the code.
Combining cross-platform and single-platform code
You might think that it sounds hard to write an entire game if you had to keep track of the actual hardware and not rely on libraries. That is correct. It was hard, and most developers used a combination of languages to create their games, since less critical parts certainly could be implemented in more developer-friendly languages.
This leads to the question of whether this can be done with .NET as well. The answer is that yes, it is possible through a feature called Platform Invocation Services, or P/Invoke for short. This is a mechanism for escaping the managed .NET runtime. You call into APIs and services that are exposed through interfaces that are native to the platform, or components implemented in languages other than the .NET family. For instance, you could call into a driver written for a specific piece of hardware that's not supported by .NET.
While Microsoft can make sure the .NET runtime works across platforms, it isn't possible to guarantee this when you step outside the .NET ecosystem. So, you might have a .NET application that's a mix between a cross-platform and single-platform. It is possible to develop strategies for handling this, but this level of cross-platform implementation is outside the scope of this book. We will, however, explore a similar concept in the coverage of Blazor, where you can perform a so-called JavaScript interop to step outside what .NET provides.
.NET cross-platform availability
So, when we say cross-platform, do we mean every platform out there? No, not really, but there are quite a range of options:
- Windows x86/x64/ARM: ARM is not widely available from OEMS, but Microsoft has the Surface Pro X device that runs Windows on ARM. Note that not all the regular Windows apps are available on this platform, so even though there are emulation options, your mileage may vary.
- macOS
- Linux
- iOS (through Xamarin)
- Android (through Xamarin)
Note that while macOS is suitable for developing .NET web applications, it is not really an option for running the apps for other environments, even though there is technically nothing stopping you. Web applications are, by nature, implied to have a server that runs the backend code. Apple does not provide hardware for server use cases—their devices are designed to be clients.
ARM-based macs
Apple has announced that they will transition to using CPUs that they designed, instead of CPUs from Intel. This architecture is not compatible with the current build of .NET for macOS. .NET does not require Intel CPUs or a specific CPU architecture (as evidenced by Windows for the ARM architecture), but the runtimes would still need to be updated.
At the time of writing this book, it is not known what Apple is planning for future devices, and it is not known what steps Microsoft will take to ensure that .NET runs on these devices. For the purposes of this book, we have used Intel-based Mac devices, and we cannot speculate as to what will happen in the future at this time.
What cross-platform does not do for you
The fact that .NET supports cross-platform does not mean you have to implement an application that will work on all the operating systems. If you want to use Windows to develop an application that will only work on Linux, that is OK. However, you should be aware that cross-platform support does not guarantee that all the code you write will work across all the platforms.
For instance, if your application saves text to the filesystem, you might attempt to write a text file to c:WebAppHelloWorld.txt. This type of reference to a file is a Windows operating system artifact. There will be no warning when writing this code and .NET will not prevent its compilation either. As long as the app runs on Windows, everything should be good.
If the app is running on Linux, however, you will get a runtime exception, because Linux does not understand that type of filesystem. Linux would want you to reference the file as /mnt/c/webapp/HelloWorld.txt. (Different distributions have different conventions for the actual file hierarchy.) If you have good exception handling, the app might get around this gracefully, but if not, it will simply stop running and leave you with a bad cross-platform experience.
We will revisit how these challenges can be tackled later in this chapter, after we have covered the basics of getting things running on multi-platform.
Getting started on Windows, Linux, and macOS
The first step toward the cross-platform journey is to get the basics working across the platforms we've mentioned—Windows, Linux, and macOS. We will walk through this in the following sections, to make sure you are on track with this part of the multiplatform story.
Windows
We touched upon getting started with .NET 5 on Windows in the previous chapter, so you should already have a functioning setup for this platform if you followed that guide. Hence, we will not repeat those instructions here.
Linux
Linux is a popular operating system for server workloads, and it powers a large number of the virtual machines that run in Azure. It is not as popular as Windows for the average end user on their desktop, but for a developer, there are a number of benefits to using Linux.
When developing microservices that run in containers, Linux is a good choice since, in many cases, you will be able to run trimmed-down images. Containers is not a topic for this chapter—you can look forward to Chapter 8, Containers, for that, but Linux is a part of the cross-platform story for .NET, even without containers.
You can install Linux directly on your computer, and you can install everything you need for .NET development, but here we will show you how to develop on Linux, using Windows, through Windows Subsystem for Linux.
Windows Subsystem for Linux (WSL)
Linux is great for development, because many of the tools needed for a programmer are part of the operating system. However, for general office use that involves applications, such as Outlook and Word, Windows is generally a better choice for most people. The natural follow-up to this is that it would be great if you could have both Linux and Windows at the same time.
Windows has supported virtualization in different forms for a long time, and because Linux runs on the same hardware as Windows (as well as being available for free in many cases), it has been a common option to run a virtual machine with Linux, if you need it. However, the point of virtual machines is having something separate from the host machine. Thus, even minor things, such as getting files into and out of the Linux virtual machine, has been a less than smooth experience.
In 2016, Microsoft brought the Linux operating system closer to being a part of Windows by introducing Windows Subsystem for Linux (WSL), where you could install special builds of selected distributions into Windows 10. This was further improved with WSL2, which was introduced with Windows 10 2004, where Linux can be made an integrated part of Windows. (The current release of Windows 10 is named 20204 to signify that the release was first released in the year 2020 and the fourth month, April.)
Let's install WSL2 before we proceed with running code on Linux.
Note that this is the install procedure as of the May 2020 version of Windows 10. Things may change in future versions.
Your computer will need to be capable of running Hyper-V and Windows 10 2004 (or later). Most modern computers will be able to run Hyper-V, but if your developer machine is virtualized, then there may be issues enabling WSL2.
To install WSL2, perform the following steps:
- Open Command Prompt as an admin.
- Run the following command to install WSL:
dism.exe /online /enable-feature /featurename:Microsoft-Windows-Subsystem-Linux /all /norestart
- Enable Virtual Machine Platform by using the following command:
dism.exe /online /enable-feature /featurename:VirtualMachinePlatform /all /norestart
- Reboot your computer.
- Download the latest WSL2 kernel from https://wslstorestorage.blob.core.windows.net/wslblob/wsl_update_x64.msi.
- Run the installer, as shown in Figure 2.1:

Figure 2.1 – WSL2 kernel installer
- Make WSL2 your default version by using the following command:
wsl –-set-default-version 2
- Download a Linux distribution from the Microsoft Store. For this book, we have used Ubuntu 20.04 LTS (see Figure 2.2):

Figure 2.2 – Ubuntu 20.04 LTS in the Microsoft Store
- Click Launch to start Linux for the first time:

Figure 2.3 – Setting the username and password for Linux
- Define a username and password for your Linux installation (see Figure 2.3). (This is not related to your Windows credentials and can be something different.) You should now find yourself in a regular Linux shell.
- Since this operating system lives its own life, it is suggested to start by updating to the latest patches by running sudo apt update && sudo apt upgrade, as shown in Figure 2.4:
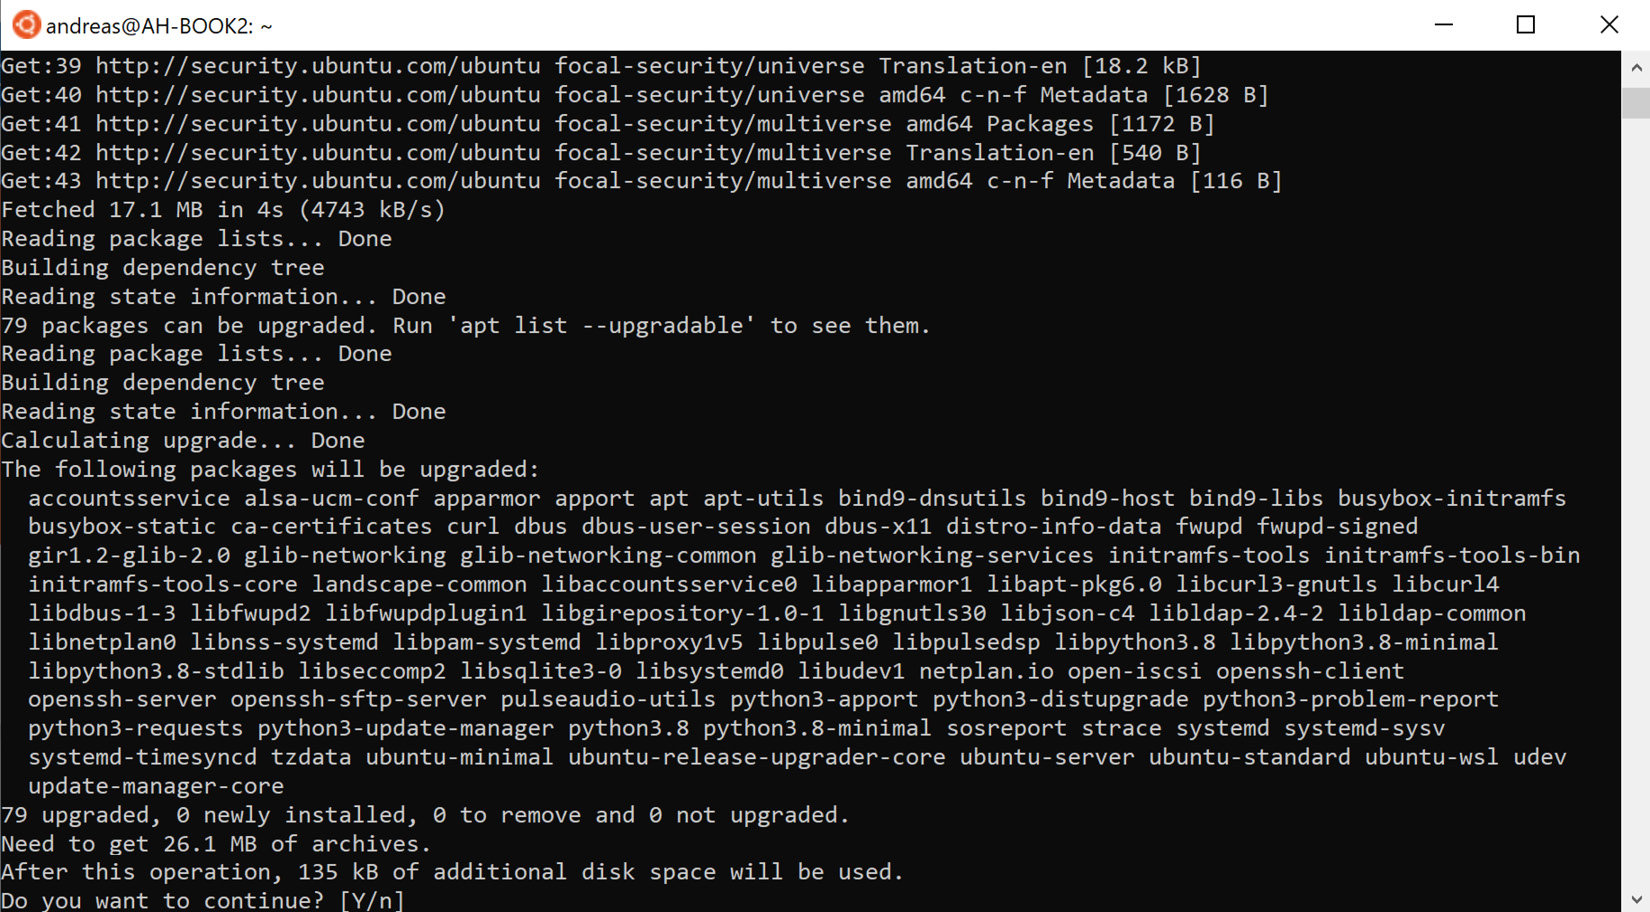
Figure 2.4 – Updating your Linux distribution
- Press Y to continue, and you should be good to go.
Windows should also have automatically configured integration with your non-Linux hard drive partition. So, if you open Windows Explorer, you should find Tux (the Linux mascot) there:

Figure 2.5 – Linux integration in Windows Explorer
You can also browse the Linux filesystem from Windows and copy files to and from your Linux partition (see Figure 2.6):
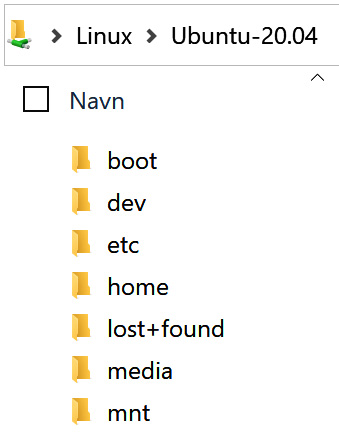
Figure 2.6 – Linux filesystem in Windows Explorer
Note that, under the hood, the Linux filesystem is treated differently to the Windows filesystem, so only place files that you intend to run inside Linux in these folders, and vice versa. If you have applications that run inside Linux, these should not be placed in the Windows partition. It will not cause corruption to do so, but the performance might be degraded.
The Ubuntu installer automatically started up a command line, but if you followed the instructions in the previous chapter for setting up Windows Terminal, Ubuntu 20.04 should have been added automatically. This book uses Windows Terminal going forward in this chapter, but both options should work.
Installing .NET on Linux
We recommend you install .NET on Ubuntu by using APT:
- Run the following commands to add Microsoft's repositories:
wget https://packages.microsoft.com/config/ubuntu/20.04/packages-microsoft-prod.deb -O packages-microsoft-prod.deb
sudo dpkg -i packages-microsoft-prod.deb
- Install the SDK:
sudo apt-get update;
sudo apt-get install -y apt-transport-https &&
sudo apt-get update &&
sudo apt-get install -y dotnet-sdk-5.0
Note
There are a couple of different ways to install .NET on Linux, and things may change over time. If you experience issues while installing .NET, check the instructions online at https://docs.microsoft.com/en-us/dotnet/core/install/linux-ubuntu.
Everything should now be in place for creating and running a .NET application. It is time to test the theory in practice:
- Create a new directory and change into it:
mkdir LinuxHelloWorld && cd LinuxHelloWorld
- Linux running in WSL2 does not support a graphical UI yet, so we need to do the editing via non-graphical utilities:
sudo vi View/Home/Index.cshtml
- Vi is not exactly intuitive, but press Insert and edit the code to look like this:
@{
ViewData["Title"] = "LinuxHelloWorld";
}
<div class="text-center">
<h1 class="display-4">Running on @Environment. OSVersion</h1>
</div>
- To save and exit, press Esc followed by :wq, and then hit Enter.
- Test the app with sudo dotnet run. You should see the output indicate that it is running. See Figure 2.7:
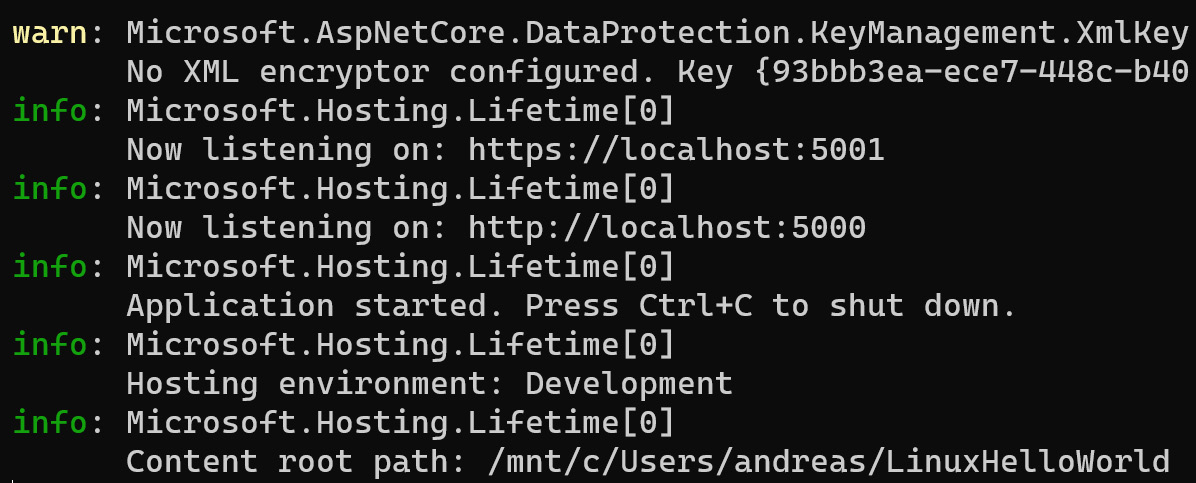
Figure 2.7 – Using dotnet run on Linux
- You can test this with some more cross-platform magic. You do not have a browser running on this Ubuntu. You most likely do have one in Windows 10, so you can open that and browse to https://locahost:5001. See Figure 2.8 for an example of browsing a web app that's running on Linux:
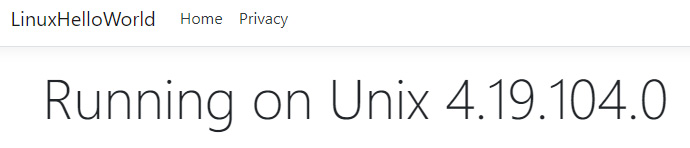
Figure 2.8 – Browsing a web app that's running on Linux
- Return to the Linux shell and terminate the running app with Ctrl+C.
We saw that the vi utility was sufficient for the minor edits that we made to the code, but not everyone will want to go all-in on Vi as an editor for writing C# code.
Vi "exit strategy"
If you are new to Vi, it can be confusing, because it works differently to most text editors that you might be used to in the Windows world. You might end up being unsure about what you have actually edited, or how to correct it. The exit strategy (if you feel like a mistake was made) is to quit Vi without saving the changes. This is done by pressing the Esc key, pressing : (the colon) (you should see it appear in the lower-left corner), and then typing q! (include the exclamation mark), followed by Enter. You can then re-attempt editing with a clean slate.
Fortunately, there is another option here as well. In the previous chapter, we showed you how useful Visual Studio Code is, so if you haven't already installed it, please do so. We will step through how to use Visual Studio Code (VS Code) as the editor for your code on Linux:
- Open Visual Studio Code (in Windows 10).
- Install the Remote – WSL extension from within VS Code. See Figure 2.9:

Figure 2.9 – Visual Studio Code Remote WSL extension
- Go back to your Linux shell in WSL and type code . (including the punctuation mark).
- After an initial bit of setup work, Visual Studio Code will load in Windows 10. You will observe that there's an indicator in the lower-left corner referring to WSL. See Figure 2.10:
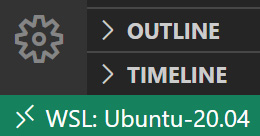
Figure 2.10 – Visual Studio Code connected to WSL
- If you have the C# Extension installed in VS Code, you can go to the debug pane (at the bottom). See Figure 2.11:
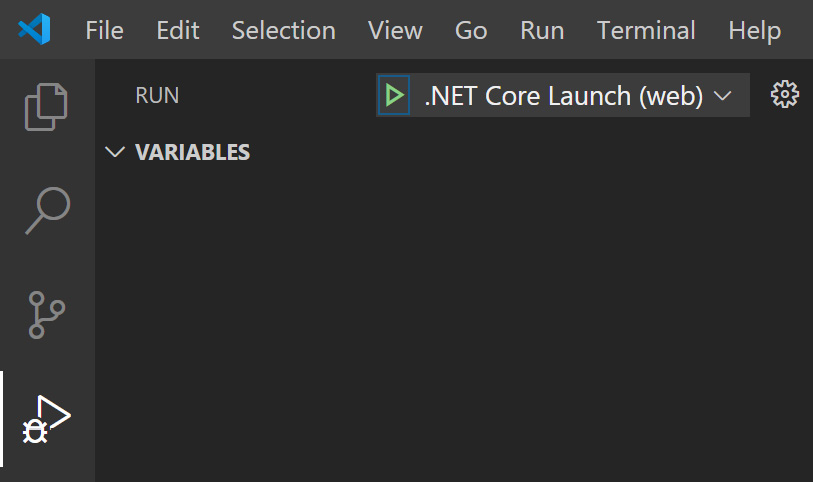
Figure 2.11 – .NET Debug tab for Linux
- Click the little green arrow to start the debugger. When things have finished building, you should see the same output as before with the LinuxHelloWorld app running in the browser. (VS Code launches the browser for you.) If you take a look in the Terminal window, you will see the application starting in WSL. See Figure 2.12:

Figure 2.12 – Visual Studio Code terminal output
This session is separate to the one you are running in the Windows Terminal shell, so you can work in parallel there if you like.
Now you can develop code in Windows, which executes on Linux running on Windows. This can take a little while to digest, but the takeaway from this section is that the cross-platform story for Linux is powerful.
If you have an Apple device (that's running macOS) available, then you can bring that out now. Next, we take a look at the mac story for .NET.
macOS
There are two main tools you can use for developing a .NET application on a Mac. You can either use Visual Studio for Mac or Visual Studio Code. We will take a look at using Visual Studio Code (VS Code) first. You can download it from https://code.visualstudio.com/.
After installing Visual Studio Code, we recommend that you make it accessible from the shell, so that you can start it from the Terminal.
To make VS Code accessible, perform the following steps:
- Launch Visual Studio Code.
- Open the command palette (Shift+cmd+P) and type shell command, as shown in Figure 2.13:

Figure 2.13 – The shell command installer
- You will also want to make sure the C# extension is installed for VS Code. See Figure 2.14:

Figure 2.14 – Visual Studio C# extension
Once this is done, you can install .NET by going to https://dotnet.microsoft.com/download?initial-os=macos.
- Open the installer, and you will be greeted with a wizard for installing .NET. See Figure 2.15:
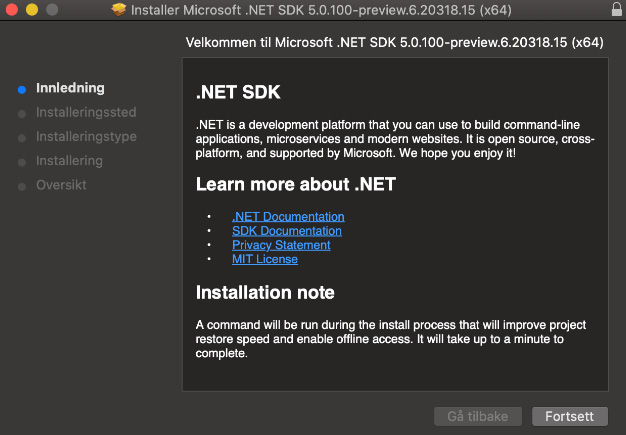
Figure 2.15 – The .NET installer for macOS
Unless you want to modify where the installation is stored, you can click through it by choosing the Next option.
- To verify the .NET version on macOS, open the Terminal and run dotnet –version. See Figure 2.16:
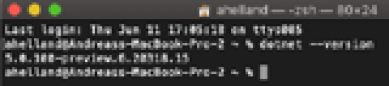
Figure 2.16 – Verifying the .NET version on macOS
- You also need to generate certificates to run with HTTPS. This is done with the sudo dotnet dev-certs https –-trust command, as shown in Figure 2.17:
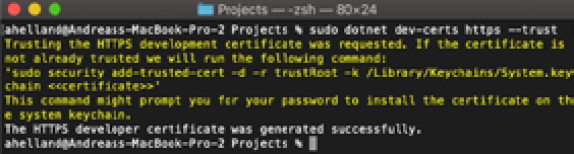
Figure 2.17 – Generating and installing developer certificates on macOS
- Create a folder (mkdir webapp) and change into it (cd webapp).
- Run dotnet new mvc to generate a simple web app. Then, run code . to open it in Visual Studio Code.
- You might see a notification in the lower-right corner about missing assets. See Figure 2.18:

Figure 2.18 – Missing assets in Visual Studio Code
You should click Yes to add the assets.
- VS Code shows the file structure on the left-hand side of the UI. See Figure 2.19:
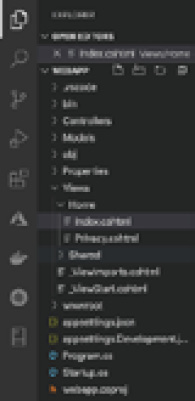
Figure 2.19 – The file structure in Visual Studio Code for Mac
- Open Index.cshtml and make a minor edit to the contents:
@{
ViewData["Title"] = "LinuxHelloWorld";
}
<div class="text-center">
<h1 class="display-4">Running on @Environment. OSVersion</h1>
</div>
- To set a breakpoint, click next to the line number (6).
- There is a separate debug section:

Figure 2.20 – Visual Studio Code debug pane on macOS
- Click the little green arrow to start your program. It should start up your browser, which should look like the following figure:

Figure 2.21 – Browsing a web app that's running on macOS
You will notice that it does not say Mac or Apple, but for starters, the main concern you solved was that you managed to get .NET working. That completes your installation of VS Code on a Mac.
As mentioned, you can install a more complete version of Visual Studio on macOS as well.
Visual Studio 2019 for Mac
Visual Studio Code is not a bad experience. However, Visual Studio 2019 is available on macOS, so you might prefer that.
In general, there is a more "Mac-ish" feel over it. (The look, feel, and interactions have been built to feel similar to the overall Mac experience.) The file hierarchy is in the left pane, as shown in Figure 2.22:
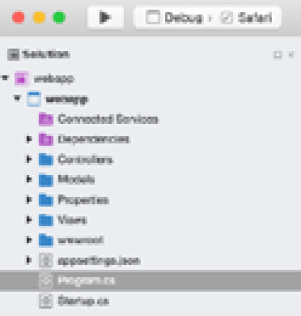
Figure 2.22 – Visual Studio 2019 for Mac file hierarchy
In the middle of Visual Studio, the main pane has a slightly different look to its Windows counterpart (see Figure 2.23):
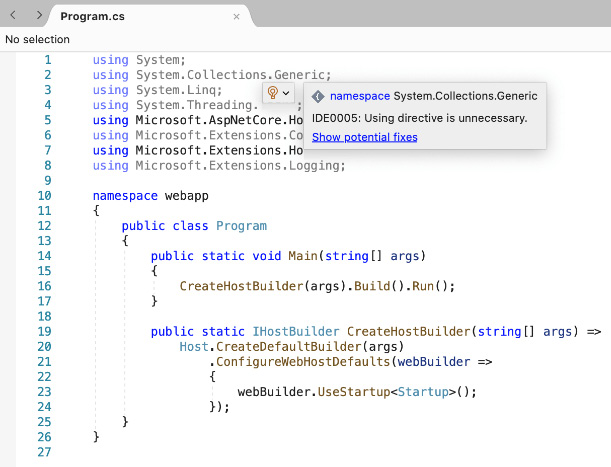
Figure 2.23 – Visual Studio 2019 for Mac main pane
As with the Windows experience, there are more options in Visual Studio 2019 (VS 2019) than Visual Studio Code. Thus, for web app development, it is mostly a matter of which tool you prefer, with some more knobs and dials in VS 2019 than VS Code, while the basic functionality is present in both. For VS 2019, Visual Studio Community for Mac is the free version.
Visual Studio for Mac was originally based on Xamarin Studio for Mac. If you are into mobile development for Apple's platforms, it might be a better choice to use the full version of Visual Studio rather than Visual Studio Code. We will revisit this topic later in this chapter, in the Cross-platform for mobile devices section.
A word on cross-platform and containers
Containers is a hot topic these days, and they will be covered in detail in Chapter 9, Containers. However, we should explain the relationship between containers and cross-platform.
The previous sections showed us running code directly on a platform. The Linux version ran on Ubuntu, and the macOS version ran on a Macbook. For more advanced use cases, you might want to containerize your code, but this does not mean you can freely mix and match the technologies.
A container is comparable to a virtual machine lite, and it depends on the host it is running on. This means that a Linux container needs to run on a Linux host. Running a Windows Server 2019 container requires a Windows Server 2019 host. This extends across Windows Server versions as well—a Windows Server 2016 host will run Windows Server 2016 containers and will not support Windows Server 2019 containers. A Linux container on Windows 10 is not covered by cross-platform compatibility.
However, WSL2 can function as a Linux host. Thus, you can run a Linux container on top of WSL and achieve a cross-platform container development story. We'll expand on this in Chapter 9, Containers.
With the right hardware, you can use Windows with Hyper-V and have a Linux virtual machine as a Linux host for running Linux-based containers on top.
It's no wonder you might get confused with all the layers of virtualization involved in this.
Making your code cross-platform
When beginning to build a cross-platform solution, you need to make sure that the Hello World web app runs on more than Windows. However, there is more to enjoying the benefits of these platforms. Let's look both at how Microsoft supplies built-in mechanisms and what you can do yourself.
Background worker services
In an ASP.NET web app, a lot of the things happening in the user interface are event-driven. For instance, in the previous chapter, we showed you some of the new features in C# 9, including an example class for US cities, which consists of a name and a zip code. Thus, if you extended that to an ASP.NET application, you might build a web page that includes a textbox for entering a zip code and a button for looking up the corresponding city name.
Zip codes are fairly static and not something that change every week. However, you might still want to make sure that your database is up to date, and so you could choose to perform a synchronization with the US Postal Service's master database (for example). This would not be driven by an end user clicking in the UI, but it would happen by itself in the background.
.NET has a template that would be suitable for this worker, which generates a console app that you can extend with such functionality. The default behavior is printing the current datetime, which is sufficient for our purposes, but you can make it more advanced on your own.
In order to do this, you first need to open up the command line, create a new directory, and change into this directory. Once you're done, perform the following steps to create a new solution:
- Run dotnet new worker.
- Run dotnet add package Microsoft.Extensions.Hosting.WindowsServices.
- Run dotnet add package Microsoft.Extensions.Hosting.Systemd.
- Run dotnet run: which looks like this:

Figure 2.24 – Using dotnet run for a worker service
- Run code . to load the project in Visual Studio Code.
This works nicely, but there is a missing piece. The project currently runs as a console app, meaning that it must be started and run in a console window. This is not suitable for a website, where it's supposed to be done completely in the background.
In Windows, this is done by installing the app as a Windows service (see Figure 2.25):
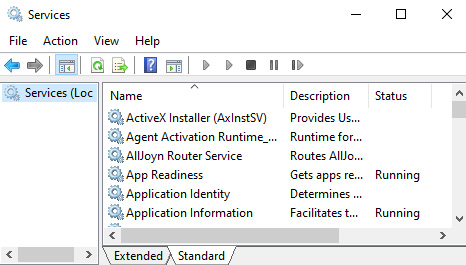
Figure 2.25 – Windows Services
It is probably not surprising that this does not sound like it's cross-platform.
Linux has a similar construct called systemd, so on an operating system level, you're not blocked. In Linux, services are implemented through the systemd daemon, which is supported by .NET.
WSL and systemd
Note that at the time of writing this book, systemd is not supported by Windows Subsystem for Linux. This means that in order to fully test this code on Linux, you will need either a Linux virtual machine running locally or an instance of a Linux virtual machine running in Azure.
In other words, we need to modify our application to support two operating system concepts. This sounds complicated, but in reality, it's fairly simple.
Going back to Visual Studio Code, open up Program.cs and make some minor changes, so it looks like this:
using Microsoft.Extensions.DependencyInjection;
using Microsoft.Extensions.Hosting;
namespace Chapter_02_Workers
{
public class Program
{
public static void Main(string[] args)
{
CreateHostBuilder(args).Build().Run();
}
public static IHostBuilder CreateHostBuilder(string[] args) =>
Host.CreateDefaultBuilder(args)
.UseWindowsService()
.UseSystemd()
.ConfigureServices((hostContext, services) =>
{
services.AddHostedService<Worker>();
});
}
}
The two important pieces here are UseWindowsService and UseSystemd. The .NET runtime is able to understand whether it is executing on Windows or Linux, and then it will use the corresponding version. It will ignore the other one, so you do not need to have additional logic on your behalf to figure out which one to use.
Running the previous code will produce the same output as before, so you will not immediately notice a change. It is important to understand that while the preceding code will make the code cross-platform, it will not automatically install itself as a Windows service or systemd daemon.
To get a Windows service installed on your developer machine, run the following commands in a command-line window:
- dotnet publish –configuration Release
- sc create dotnetService binPath = c:codefoo.exe (where foo.exe is the file generated by the previous command)
- sc start dotnetService
This should see you through development purposes, but it might not work when moving the code to a different environment that's not running on your local developer machine. It might be a more elaborate process to set up the service in these cases, so if you need to do that, there is an alternative configuration process. There are instructions in the appendix for this chapter on how to set up the services.
For Linux, the instructions are as follows:
- Run sudo nano /etc/systemd/system/dotnetd.service to create a service.
- Make sure the contents are similar to this:
[Unit]
Description=.NET Chapter 02 systemd daemon
[Service]
WorkingDirectory=/var/www/dotnetd
ExecStart=/usr/local/bin/dotnet /var/www/dotnetd/dotnetd.dll
Restart=always
# Restart service after 10 seconds if the dotnet service
# crashes.
RestartSec=10
KillSignal=SIGINT
SyslogIdentifier=dotnet-daemon
User=apache
Environment=ASPNETCORE_ENVIRONMENT=Production
[Install]
WantedBy=multi-user.target
- Enable the service: sudo systemctl enable kestrel-dotnetd.service.
- Start the service: sudo systemctl start kestrel-dotnetd.service.
- Verify that the service is running: sudo systemctl status kestrel-dotnetd.service.
The output will be similar to this:
kestrel-dotnetd.service - .NET Chapter 02 systemd daemon
Loaded: loaded (/etc/systemd/system/kestrel-dotnetd. service; enabled)
Active: active (running) since Thu 2020-10-18 04:09:35 CET; 35s ago
Main PID: 9021 (dotnet)
CGroup: /system.slice/kestrel-dotnetd.service
└─9021 /usr/local/bin/dotnet /var/www/ dotnetd/dotnetd.dll
This is a great example of how .NET can help you along the way, but not all use cases can be solved that easily. Next, we will walk through a more elaborate example of cross-platform functionality.
A more complicated cross-platform example
There are scenarios where you need to deal with cross-platform that have more bits and pieces to it than .NET can handle automatically. We've already mentioned how Linux would not understand c:WebAppHelloWorld.txt, so let's look at a slightly more complicated example.
Let's say we have a website where we depend on encrypting and/or signing strings of text. (This could be part of a larger identity system.) We recommend doing this by using certificates. We want this code to work both for Windows and Linux, and most methods for working with certificates should be entirely cross-platform compatible. However, Windows and Linux have different ways to work with certificates on the operating system level. More specifically, they are generated differently and accessed differently. We will implement both options.
To generate a certificate on Windows, perform the following steps:
- Open Windows Terminal with a PowerShell tab.
- Run the following command:
$cert = New-SelfSignedCertificate -Type Custom -Subject "CN=Chapter_2_Certificate" -TextExtension @("2.5.29.37={text}1.3.6.1.5.5.7.3.3") -KeyUsage DigitalSignature -KeyAlgorithm RSA -KeyLength 2048 -NotAfter (Get-Date).AddYears(2) -CertStoreLocation "Cert:CurrentUserMy" $cert.Thumbprint
- Take a note of the thumbprint, because we need it in the code. See Figure 2.26:
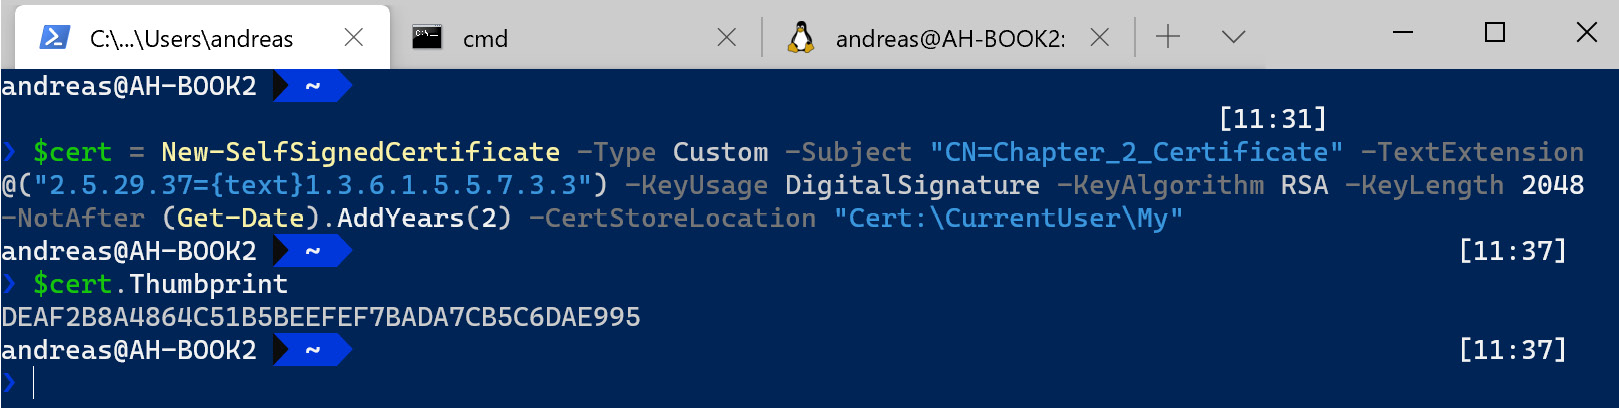
Figure 2.26 – Generating a certificate on Windows
You can also verify the presence of the certificate in the User Certificate store in Windows 10 (see Figure 2.27). (It can be located by starting to type certificate on the search bar in Windows.):

Figure 2.27 – The User Certificate store in Windows 10
To generate a certificate on Linux, perform the following steps:
- Open Windows Terminal with an Ubuntu 20.04 tab.
- Run the following commands:
openssl req -x509 -newkey rsa:4096 -keyout myKey.pem -out cert.pem -days 365 -nodes
openssl pkcs12 -export -out keyStore.p12 -inkey myKey.pem -in cert.pem
openssl x509 -in cert.pem -noout -fingerprint
You will need to provide some values when generating the certificate, but for the purposes of this chapter, these values do not need to adhere to any actual data.
Do not enter a password when prompted—just press Enter to set a blank/null password.
- Take a note of the thumbprint, as we will need it afterward.
You may notice that the thumbprint looks different in Windows and Linux. Windows uses the format 12AB…, whereas Linux outputs 12:AB:… instead. This is purely a matter of visual representation. Linux prints in a more readable format, but the actual thumbprint is not formatted differently. If you remove the colons from the Linux version, you will see that the number of characters is the same as the Windows version (as shown in Figure 2.28):
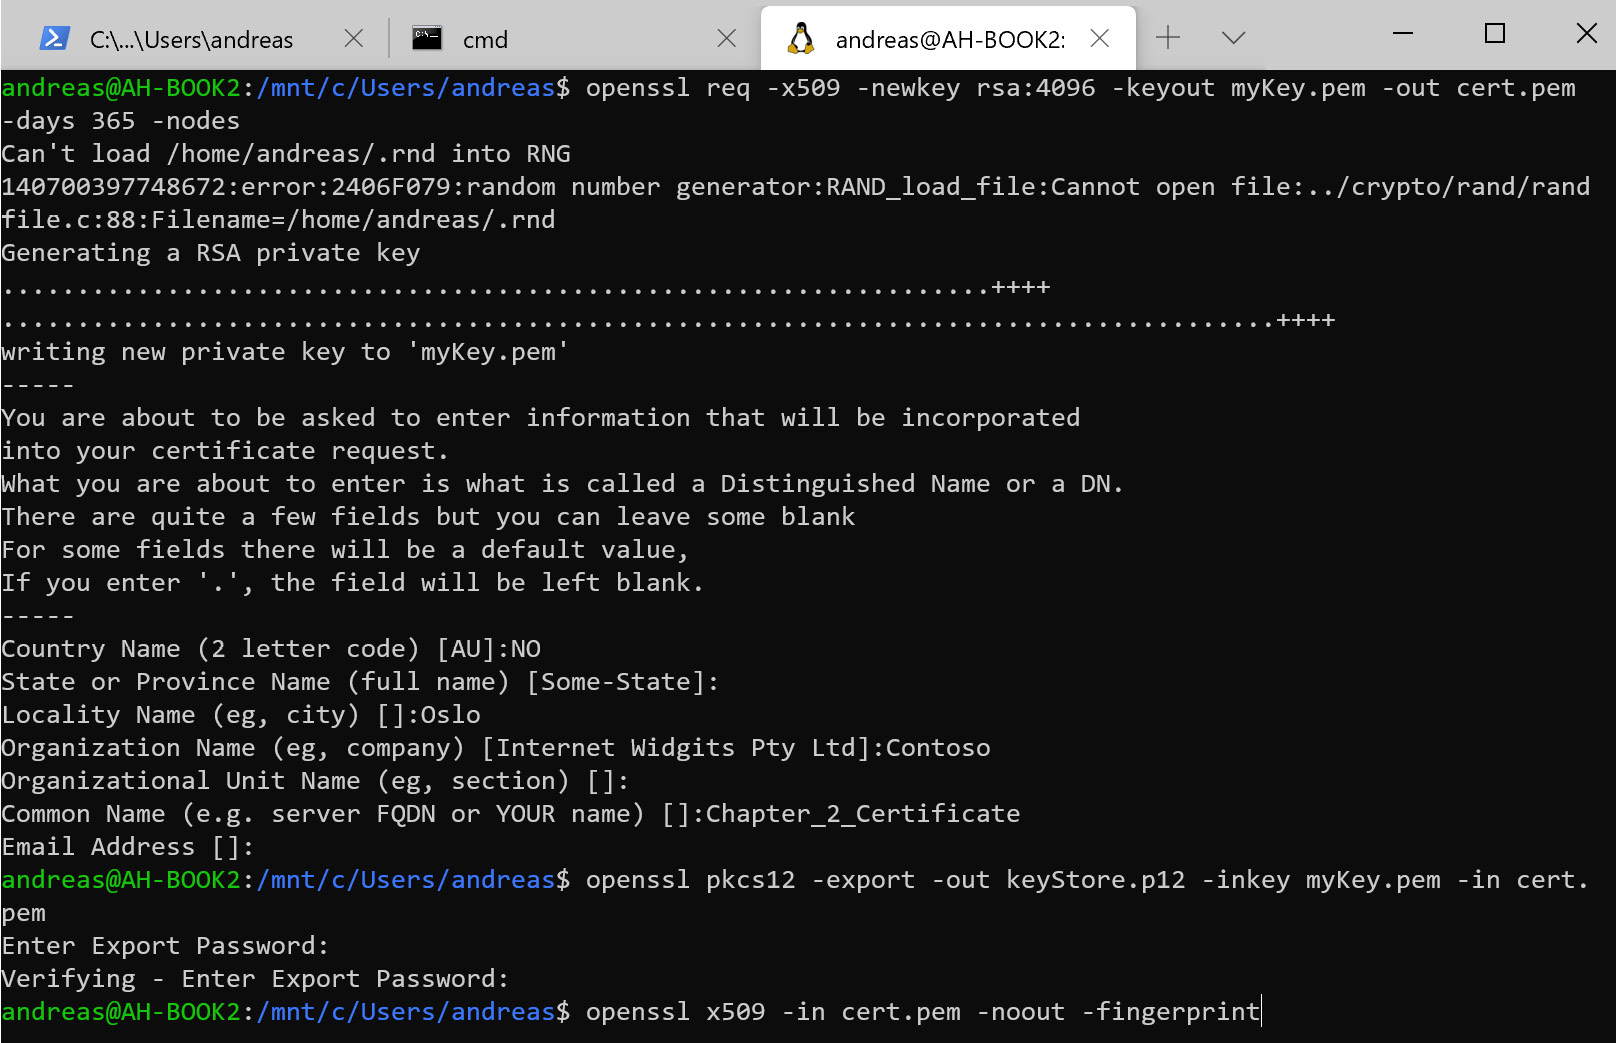
Figure 2.28 – Generating a certificate on Linux
With the certificates in place for both Windows and Ubuntu, we will create a web app that will use it. So as not to complicate matters, this code just loads the certificate and prints out the thumbprint and the common name to verify that the code is able to read (and use) certificates. The steps to create an app that work with certificates are as follows:
- Open Windows Terminal and create a new directory: C:CodeBookChapter_02_Certificates.
- Change into the directory and run dotnet new mvc.
- Run dotnet add package Microsoft.IdentityModel.Tokens.
- Start Visual Studio Code with code ..
- Open HomeController.cs.
- Add the following two using lines at the top:
using System.Security.Cryptography.X509Certificates;
using Microsoft.IdentityModel.Tokens;
- Edit the controller to look like this (some parts are omitted for readability):
public class HomeController : Controller
{
private readonly ILogger<HomeController> _logger;
private static Lazy<X509SigningCredentials> SigningCredentials;
public HomeController(ILogger<HomeController> logger)
{
_logger = logger;
}
public IActionResult Index()
{
var SigningCertThumbprint = "WindowsThumbprint";
SigningCredentials = new Lazy<X509SigningCredentials>(() =>
{
X509Store certStore = new X509Store(StoreName.My, StoreLocation.CurrentUser);
certStore.Open(OpenFlags.ReadOnly);
X509Certificate2Collection certCollection = certStore.Certificates.Find(
X509FindType.FindByThumbprint,
SigningCertThumbprint,
false);
// Get the first cert with the thumbprint
if (certCollection.Count > 0)
{
return new
X509SigningCredentials(certCollection[0]);
}
throw new Exception("Certificate not found");
});
var myCert = SigningCredentials.Value;
ViewBag.myCertThumbprint = myCert.Certificate.Thumbprint.ToString()
ViewBag.myCertSubject = myCert.Certificate.SubjectName.Name.ToString();;
return View();
}
…
The important bit here is that the controller attempts to use .NET libraries that are specific for reaching into the certificate store of Windows (compatible with Windows 10 and Windows Server). The certificates are loaded into an array. We specified a thumbprint that should be unique to only one certificate. If you have the incorrect thumbprint defined, or for some reason the app cannot access the certificate store, an error will be thrown that no certificate could be found.
If a certificate is found, then the values are read. The thumbprint and subject name attributes are stored in the ViewBag for easy retrieval in the view.
- Edit the Index.cshtml file to look like this:
@{
ViewData["Title"] = "Home Page";
}
<div class="text-center">
<h1 class="display-4">Certificate info</h1>
<p>Certificate thumbprint: @ViewBag. myCertThumbprint</p>
<p>Certificate subject: @ViewBag.myCertSubject</p>
</div>
- Run the app. You will see the certificate info, as shown in Figure 2.29:

Figure 2.29 – Output for the Windows certificate
The next logical step would be to switch to Linux, execute dotnet run, and refresh the browser. Sadly, this will give you an error, as shown in Figure 2.30:
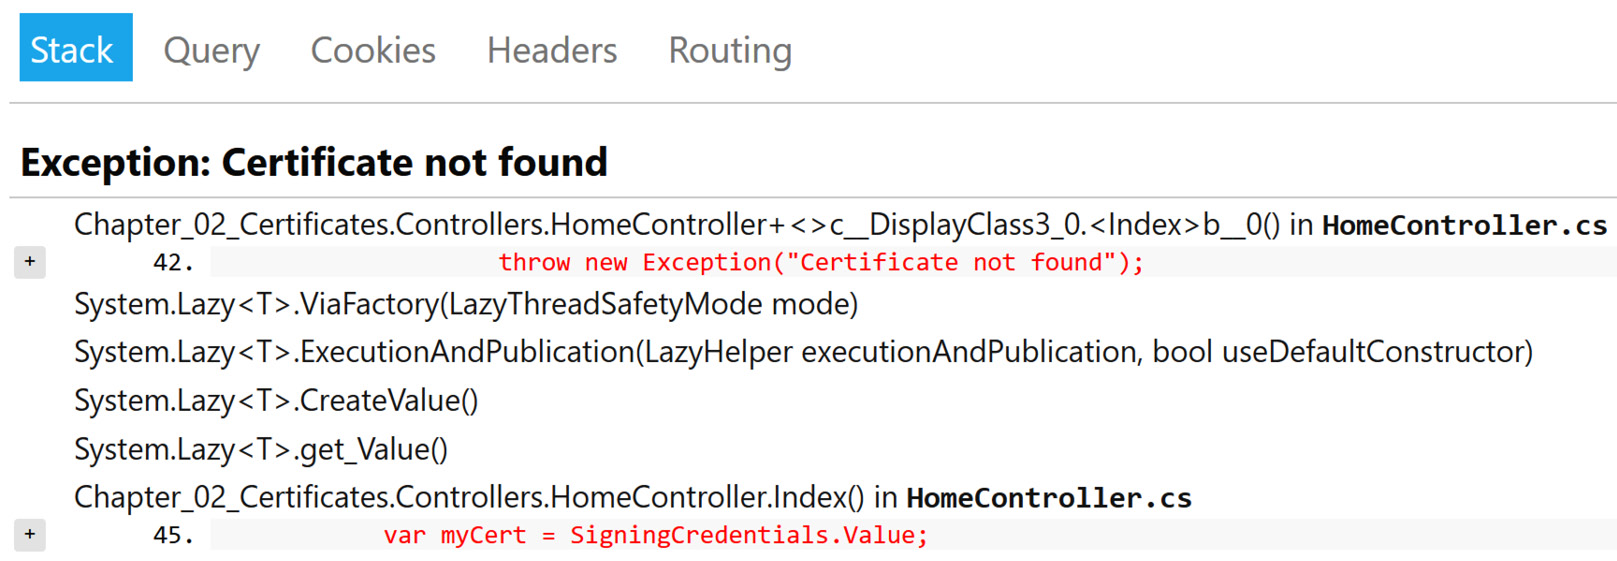
Figure 2.30 – Error using Windows Certificate on Linux
There are two reasons why this fails:
- We didn't change the thumbprint.
- We tried looking up the certificate through the Windows Certificate store.
We will fix this, but first we need to prepare the certificate in Linux. When we previously generated the certificates in Linux, we were in the home directory (if you were in a different directory, replace it accordingly in the instructions).
By executing ls -l, we see that there are a couple of files for the certificate. See Figure 2.31:

Figure 2.31 – Listing certificate files in Linux
We want to make this friendlier for our code, as well as deployment purposes. Rename the certificate, as per the following steps:
- Rename the .p12 file, using mv keyStore.p12 LinuxThumbprint.p12.
- Rename the cert.pem file, using mv cert.pem LinuxThumbprint.pem.
- These files should be moved to a more appropriate location. For the purposes of this chapter, that would be the directory where our code exists:
mv LinuxThumbprint.p12/mnt/c/Code/Book/Chapter_02_Certificates/LinuxThumbprint.p12
mv LinuxThumbprint.cert /mnt/c/Code/Book/Chapter_02_Certificates/LinuxThumbprint.cert
This means our code will be able to easily locate the certificate files.
Integrating certificates for apps that are deployed to the cloud
A word of advice here. This approach works, as long as we manage the life cycle of the certificates inside the code's life cycle. It is not the best solution for cloud deployments where you often manage the certificates separately.
Azure recommends storing private certificates (.p12 files) in /var/ssl/private, if you run your app in Azure App Services and store the certificates in Azure Key Vault.
Now that the certificates are in place, we can fix our code. Perform the following steps:
- Return to Visual Studio Code (you can still edit in Windows if you like) and open HomeController.cs.
- Change the code here:
var SigningCertThumbprint = "WindowsThumbprint";
To the following:
var SigningCertThumbprint = "LinuxThumbprint";
- Comment out the current certificate loading:
/*
SigningCredentials = new Lazy<X509SigningCredentials>(() =>
…
throw new Exception("Certificate not found");
});
*/
var myCert = SigningCredentials.Value;
- Insert the following code instead:
public IActionResult Index()
{
/*
Windows Certificate Loading
*/
var SigningCertThumbprint = "LinuxThumbprint";
var bytes = System.IO.File.ReadAllBytes( $"{SigningCertThumbprint}.p12");
var cert = new X509Certificate2(bytes);
SigningCredentials = new Lazy<X509SigningCredentials>(() =>
{
if (cert != null)
{
return new X509SigningCredentials(cert);
}
throw new Exception("Certificate not found");
});
var myCert = SigningCredentials.Value;
The purpose of this code is the same as the Windows version. It reads the certificate and writes two of the attributes into the ViewBag for rendering. Where it differs from the code that handles Windows is that Linux does not have a certificate store. The code simply attempts to locate a file and read the byte values. If the file does not exist, or the contents cannot be converted to a certificate, then an error is thrown about how the certificate was not found.
- Run the app.
Opening the browser, you should see a similar view, but with other values as shown in the following screenshot:
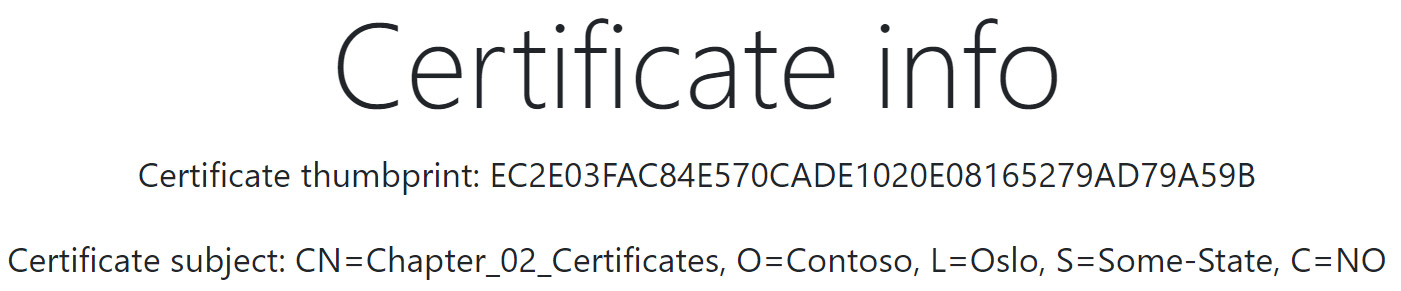
Figure 2.32 – Output for the Linux certificate
If you want to have a true cross-platform application, you can go the extra mile and add checks for which platform the code runs on. Add a few checks:
public IActionResult Index()
{
//Windows
if (Environment.OSVersion.Platform.ToString() == "Win32NT")
{
//Windows logic
...
}
//Linux
if (Environment.OSVersion.Platform.ToString() == "Unix")
{
//Linux logic
...
}
var myCert = SigningCredentials.Value;
ViewBag.myCertThumbprint = myCert.Certificate.Thumbprint.ToString();
ViewBag.myCertSubject = myCert.Certificate.SubjectName.Name.ToString();
return View();
}
This illustrates that there might be some extra work involved in building cross-platform apps, other than just making sure you run .NET 5. However, it is possible and might be worth it. With the example shown here, it means that you can have developers doing their work primarily on Windows and still deploy to Linux hosts in production (provided you test for these edge cases).
Self-contained .NET apps
The discussion so far in this chapter has revolved around making sure everything works across different platforms. There are, however, times when you do not have that need, and you might want to be more specific as to what you will support.
Two examples where this may apply are as follows:
- You create a web app that is to be deployed on Windows servers. You do not control these servers, and the operations team that own the servers have not deployed the .NET 5 runtime yet. Unfortunately, their update schedule does not coincide with your planned release.
- You have a temperature sensor that is connected to a Raspberry Pi, and a .NET application is responsible for sending the data to Azure, for building a graph over time. Compiling the application on the device is not an option.
Both these use cases can be solved by creating self-contained .NET apps. If an application is self-contained, this means it has everything it needs to run without installing the .NET runtime.
Generating files for Windows Server
For a case where you don't control the operating system on a Windows server, it means you can deploy .NET 5 applications, even if the server only has .NET Core 3.1 installed, or even if there is no .NET runtime at all.
To generate files for this, run the dotnet publish -r win-x64 command. The files generated can be copied to the server and executed without complaints about the .NET runtime.
Generating files for the Raspberry Pi
For the Raspberry Pi, even though your developer machine runs Windows 10, you can compile for a different operating system. (This is known as cross-compilation.) The resulting bits can be copied to the device and run immediately.
To generate these files, run the dotnet publish -r linux-arm64 command.
If you want to generate files for other platforms, there is a list of valid identifiers you can use, which you can find at https://docs.microsoft.com/en-us/dotnet/core/rid-catalog.
A drawback of this approach is that the application is larger, since there are no shared components. If your server/device only runs one application, then this might not be an issue, but if you have 20 different .NET apps that are all self-contained, then there is a lot of overhead. This might not be an issue with rack servers that have plenty of storage, but for a Raspberry Pi, this might be a concern.
It is hard to put exact numbers on this. The .NET team continually iterates on improving everything regarding size, whether it is self-contained or not. After testing with the certificate reading sample application (in the previous section), we established the amounts given in the following figure:
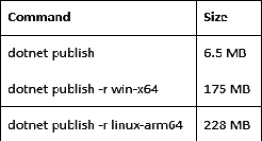
Figure 2.33 – Size comparison of the dotnet publish commands
You will probably not see the exact same numbers when testing on your machine, but it gives a general idea of the difference in size. It is possible to trim the output, but even then, it is clear that using self-contained apps is not a space saver on a per-app basis.
For a storage-constrained device that has the .NET runtime already installed, you may want to employ a strategy that combines the best of two strategies. You make it runtime-dependent and platform-specific. This means that you create one file with the cross-platform components and a different file with the components that are specific for the target platform.
You can do this by running the dotnet publish –r linux-arm64 –-self-contained false command.
Cross-platform for mobile devices
Developing mobile apps is not covered in this book, and you are not likely to deploy web applications to mobile devices either. It is, however, a part of the cross-platform discussion, so a brief look is warranted.
We covered the history of the different .NET frameworks in the previous chapter and touched upon the fact that support for running .NET code on mobile devices was not originally a Microsoft initiative. In other words, although you could use C# for creating mobile apps, it was not officially part of the .NET technology stack. Since Microsoft bought Xamarin, it has become official, and significant effort has been made in making the tools integrated with .NET and Visual Studio.
We already asked why you should consider cross-platform capabilities in general, but the question can also be repeated for with mobile devices. Apple provides tooling and frameworks for iOS, and Google provides tooling and frameworks for Android, so why would you use .NET?
To answer this, you should look at a couple of aspects.
First, what kind of application are you writing? Is it a fairly generic data entry line-of-business app, or is it highly optimized for the Apple or Android ecosystem? There will always be some gap between what Xamarin supports and what the native tooling supports (just like it is for .NET in Windows), and sometimes Xamarin will not cover what you need.
What skill set do your developers have, and how many developers are on your team? Xamarin is great if you are proficient in C#, since you don't have to learn a new language. If, however, you have a strong Java background, it is probably easier to get started with Kotlin for creating Android apps.
If your development team is large enough to support having dedicated iOS developers, there's nothing wrong with them using Apple's Xcode either.
Even though there are bonuses, such as reusing code across platforms, you should reflect on these things before starting a new mobile app project, but for the purposes of learning, you are, of course, encouraged to take a look at how it works.
To install Xamarin, you will need to check Mobile development with .NET in Visual Studio Installer. When you click on this topic in Visual Studio Installer, it should look like Figure 2.34. (You can do this either during the initial installation or by reopening it later to modify your installation.):

Figure 2.34 – Enabling Mobile development for Visual Studio
This will install the necessary bits for both Android and iOS.
For Android, you can choose to install an Android emulator and get going fairly quickly.
For iOS, there are some extra hurdles. You can develop an application for iOS on a Windows machine, but to build and publish your code, you need a device with macOS. Visual Studio supports connecting to a Mac remotely to do this task, so that you don't need to use the Mac as the developer experience. However, that is one more thing to sort out, especially if you are a one-man development team. You can share a Mac among developers on a team, and you can also pay for "Macs in the cloud."
Creating a HelloWorld iOS application
For this reason, in order to create an iOS app, it is easier to step back to your Mac and start Visual Studio 2019 for Mac. Perform the following steps:
- Create a new solution and choose iOS-App-Single View App.
- Fill in the app name, the organization identifier, which devices to support (iPhone, iPad, or both), and the operating system level required. See Figure 2.35:
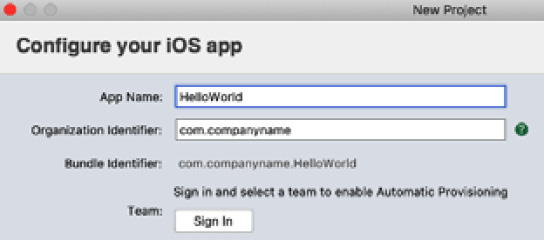
Figure 2.35 – Configuring your iOS app
- Fill in the solution name, as shown in Figure 2.36:
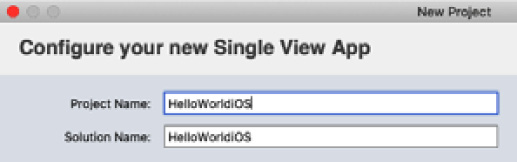
Figure 2.36 – Configuring the Single View app
- Open LaunchScreen.storyboard and add a label with a short message. See Figure 2.37:
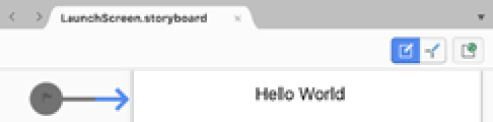
Figure 2.37 – Creating a launch screen label for an iOS app
- You can also take a look the Main.cs file, to make sure everything is in order:
using UIKit;
namespace HelloWorldiOS
{
public class Application
{
// This is the main entry point of the application.
static void Main(string[] args)
{
// if you want to use a different Application
// Delegate class
// from "AppDelegate" you can specify it here.
UIApplication.Main(args, null, "AppDelegate");
}
}
- Click the Play icon to start debugging. An emulator will be loaded, as shown in Figure 2.38:
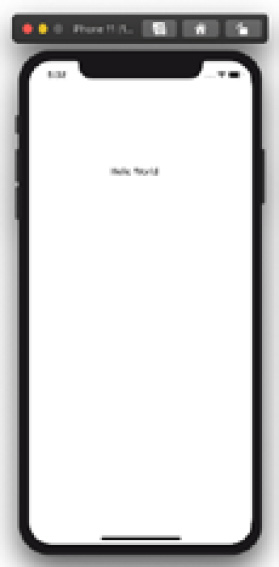
Figure 2.38 – Launching the HelloWorldiOS app
For this to work, you should already have downloaded and installed Xcode on your Mac.
To continue covering the cross-platform mobile experience, let's create something similar on Android.
Creating a HelloWorld Android app
Go back to Windows, and once you have ensured that you have the necessary components installed for Visual Studio, you can follow these steps to create an Android app:
- Create a new HelloWorldAndroid project in Visual Studio by using the Mobile App template. See Figure 2.39:
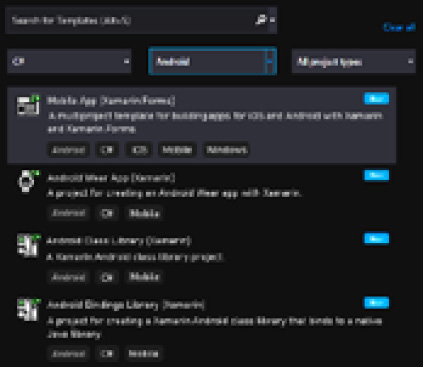
Figure 2.39 – Creating an Android app
- Choose a name for the project, as shown in Figure 2.40:
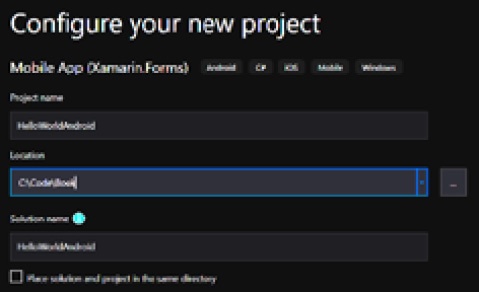
Figure 2.40 – Configuring your Android project
- Select a new UI template, as shown in Figure 2.41:

Figure 2.41 – Setting up a UI template
- You can also take a look the MainActivity.cs file (parts omitted for readability) to make sure that everything is ready:
using System;
using Android.App;
using Android.OS;
using Android.Runtime;
using Android.Support.Design.Widget;
using Android.Support.V7.App;
using Android.Views;
using Android.Widget;
namespace AndroidApp
{
[Activity(Label = "@string/app_name", Theme = "@style/AppTheme.NoActionBar", MainLauncher = true)]
public class MainActivity : AppCompatActivity
{
protected override void OnCreate(Bundle savedInstanceState)
{
base.OnCreate(savedInstanceState);
Xamarin.Essentials.Platform.Init(this, savedInstanceState);
SetContentView(Resource.Layout.activity_main);
Android.Support.V7.Widget.Toolbar toolbar = FindViewById<Android.Support.V7.Widget.Toolbar> (Resource.Id.toolbar);
SetSupportActionBar(toolbar);
FloatingActionButton fab = FindViewById<FloatingActionButton>(Resource. Id.fab);
fab.Click += FabOnClick;
}
public override bool OnCreateOptionsMenu(IMenu menu)
{
…
}
public override bool OnOptionsItemSelected(IMenuItem
item)
{
…
}
private void FabOnClick(object sender, EventArgs eventArgs)
{
…
}
…
}
}
- Run the app through the debugger, as shown in Figure 2.42:
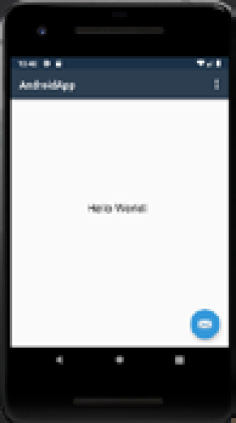
Figure 2.42 – Launching the HelloWorldAndroid app
After taking a look at the code for both iOS and Android, we can see that it is recognizable as C# code, but the boilerplate code does not look like what is generated when you use the web app template. This highlights another important point, with regard to cross-platform on mobile. If you're interested in Italian sports cars, saving up money to be able to buy a Ferrari might be a good start, but having a Ferrari does not mean you are able to drive it at maximum speed. You will be able to perform basic tasks by knowing how to drive a car in general, but it takes training to drive at high speeds (if you want to do it safely). It's the same with mobile devices—there are nuances from the platform that you need to learn before you have performant code.
.NET is not able to fix the non-coding issues for a platform either. Apple for instance, has fairly strict rules for what they allow apps running on their devices to do. So, if you want to minimize the odds of rejection, when publishing on the App Store, you have some guidelines to read through first.
This is not to discourage you from creating mobile apps or from using .NET for this purpose, but rather we want to highlight how cross-platform can still be complicated, even with the assistance .NET gives you.
Even if you have not been able to test everything that we covered here, you can always refer back to these instructions if you find yourself having more devices for development purposes. While we covered a lot of testing and experimentation, there are some details we did not go into, such as how to debug code that's running on Linux, when you're not using the combination of Visual Studio Code and WSL2. So, next, we will set up things for those use cases where the debugging process requires some extra steps to get working.
Debugging Linux on Windows with Visual Studio 2019
Earlier in this chapter, we created a worker that could run as a worker service, and we ran it through the Remote extension in Visual Studio Code. There are, however, cases where you either cannot do everything you need through Visual Studio Code, or where the Linux host is not even running on the same machine that you will debug from.
This doesn't prevent you from debugging the code running in Linux, but there are an extra couple of hoops to jump through. We will look at using Visual Studio 2019 and connecting over SSH, which is a common protocol for remote connections to a Linux system.
We can still test using WSL2, so in this case we will still connect to our local machine. It is possible to do a similar setup for other Linux distributions. The following instructions are for enabling SSH on the Ubuntu 20.04 that we have already set up:
- Enable the SSH serve by running the following code:
sudo apt-get install openssh-server unzip curl
- Edit sshd_config to allow a password login as following:
sudo vi /etc/ssh/sshd_config
- Find the line PasswordAuthentication no and change it to #PasswordAuthentication no. (Press Insert to allow editing.)
- Exit vi by pressing Esc, followed by entering :wq.
- Start the ssh service:
sudo service ssh restart
- To check the IP address of the Ubuntu installation that we are using, use the command ip addr. This is the one found attached to inet. In Figure 2.43, it is 172.28.88.220:
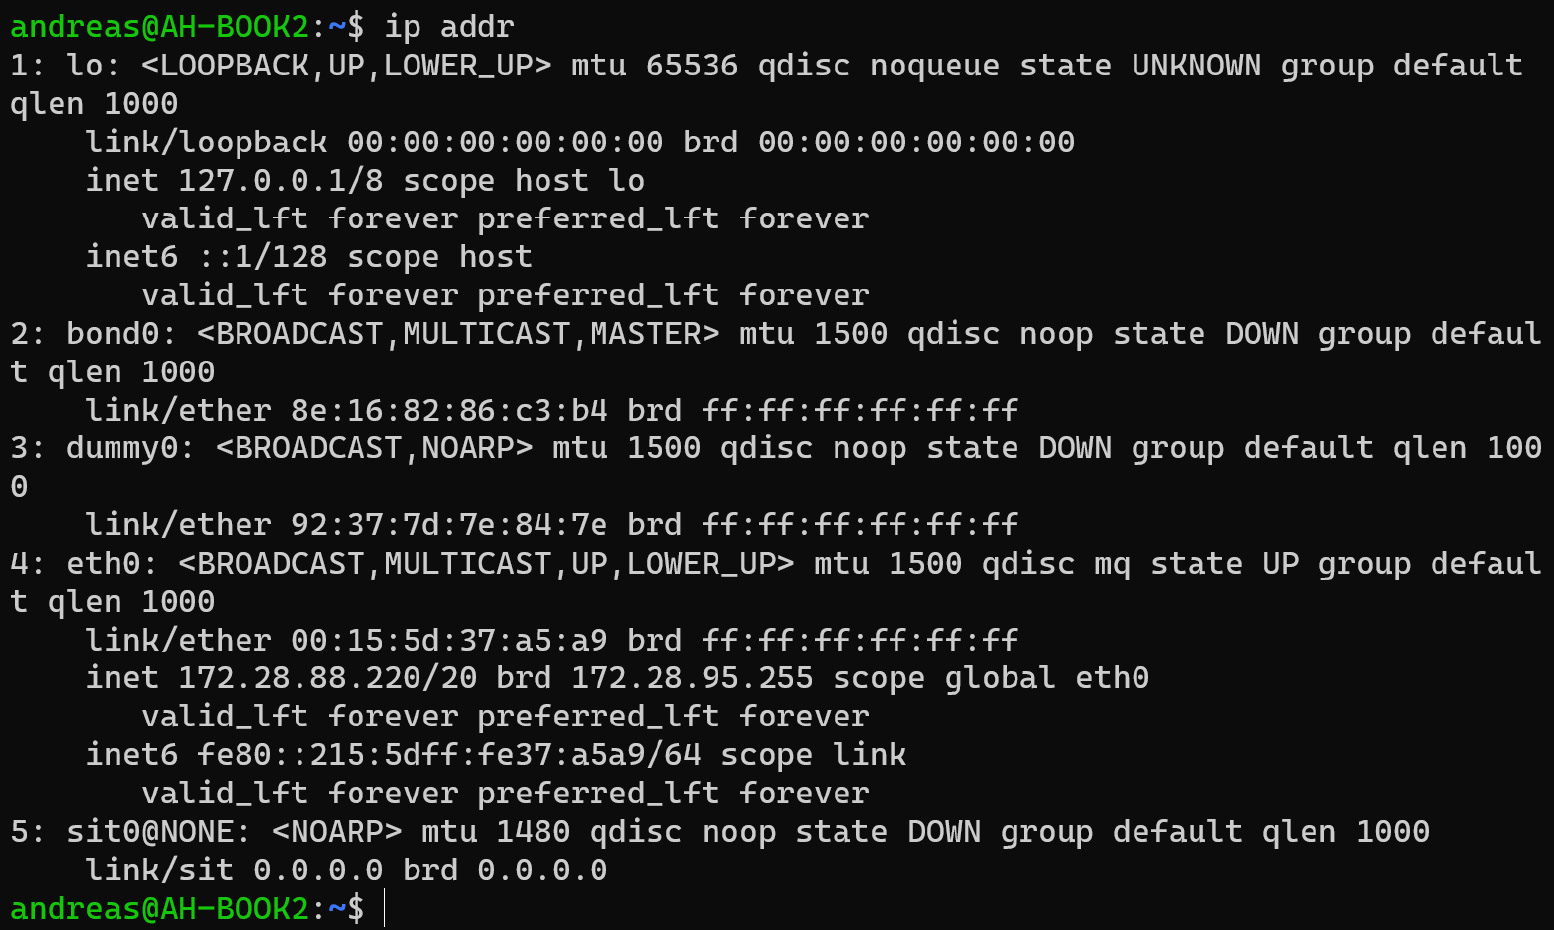
Figure 2.43 – Verifying the IP address in WSL2
- Test that you can connect to the SSH server with the Windows 10 SSH client. See Figure 2.44. The SSH client is an optional feature in Windows, so make sure you have installed it. Then, enter the following command, either from PowerShell or from the command line:
ssh user@ipaddress
Here's how the output looks like:

Figure 2.44 – Testing the Windows SSH client
Notice that the first line in the screenshot shows a Windows prompt (C:), whereas the last line shows an Ubuntu shell (andreas@AH-BOOK).
Once this is in place, you can open Visual Studio 2019 and connect to our code:
- To start the app you want to debug, open the Linux instance in Windows Terminal and run dotnet run inside the correct folder—in our example, /mnt/c/Code/Book/Chapter_02_Workers.
- Make sure it runs without any issues, and then open the same solution in Visual Studio 2019.
- Press Ctrl+Alt+P to open the Attach Process window.
- Select SSH as the Connection type.
- Connect to the same SSH server as when we were testing it. Connect to user@ipaddress. Refer to Figure 2.45 as an example of the username and IP address:

Figure 2.45 – Attach to Process dialog
- You will be prompted to enter your password as well, and if things work you should see a list of running processes. See the following screenshot:
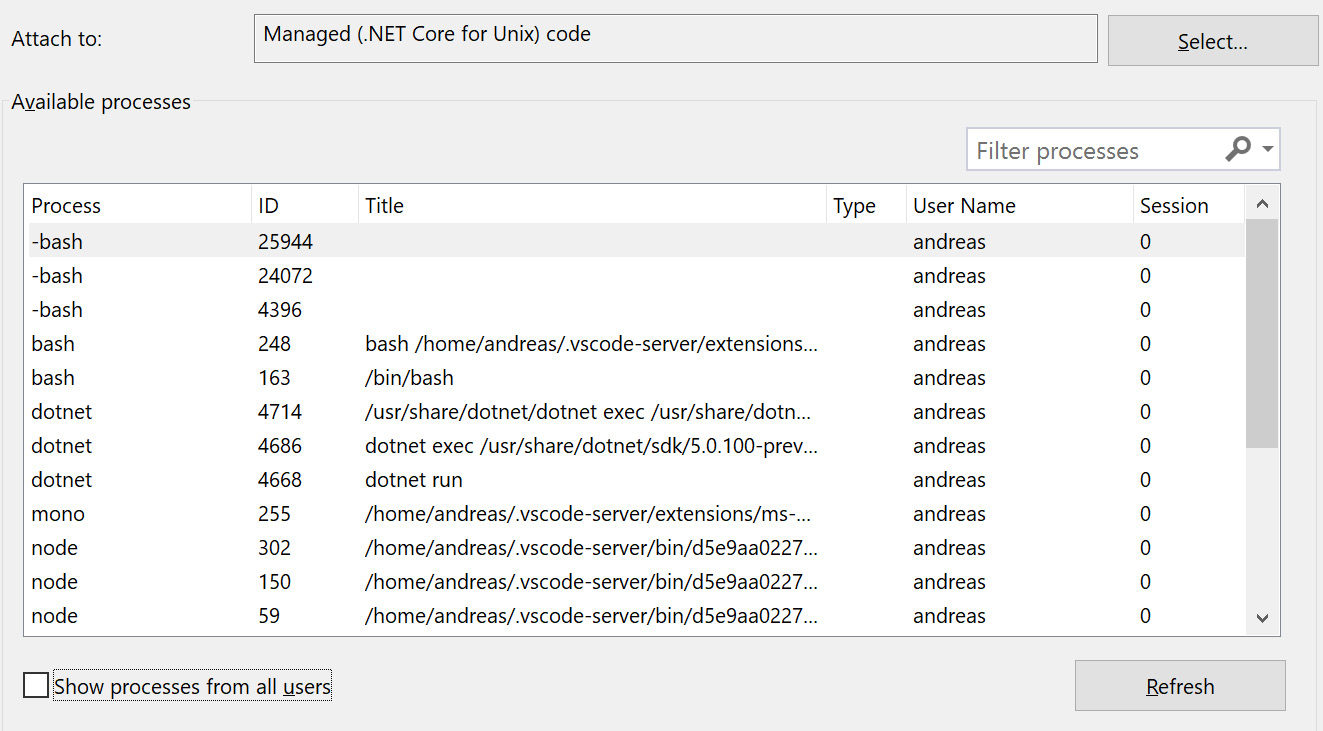
Figure 2.46 – Running processes on the remote host
- Locate dotnet run and click Attach.
- If everything went to plan, you should be able to hit breakpoints, read variables, output, and so on, directly from Visual Studio 2019 on Windows.
Windows Firewall
The first time you open the remote debug dropdown (after opening the Attach to Process window), you will be prompted to allow the connections through the Windows Firewall. Accept this to allow the debugger to establish connectivity.
In this case, the Linux instance was running on WSL2, but Visual Studio 2019 does not recognize this as a special case, so it doesn't matter if you attach to a different host. This may not be as simple as Visual Studio Code, but it is useful for the use cases where you need to do more complicated things.
We have gone through cross-platform .NET in many combinations, and this wraps up the current chapter.
Summary
We saw in this chapter that cross-platform can be a complicated topic, but we covered the basic use cases with simple web apps for Linux and macOS, as well as more advanced cross-platform web apps supporting both Linux and Windows at the same time.
Web apps may very well need supporting apps in the background, so we also took a look at creating backend worker services. For these apps, .NET provides behind-the-scenes magic for handling Windows and Linux services for enabling cross-platform services. There were some extra steps involved in installing the application as a service, and we went over how to install these apps as services in the operating system.
Mobile apps for iOS and Android devices are popular, and although they are not the focus of this book, we explored how to get up and running on both of those platforms with the cross-platform capabilities of .NET. We also explained some of the quirks involved in the process.
Rounding off the chapter, we took a look at how you can enable more advanced Linux debugging use cases by demonstrating how Visual Studio 2019 running on Windows can connect to a remote Linux system over SSH. You are now ready to run your code on the platforms that you have at your disposal. If you run into problems with the code, you should also have an idea of how to look into debugging those issues.
In the next chapter, we will go deeper into best practices for the C# language when we explore dependency injection.
Questions
- On which operating systems can you run .NET 5?
- What is Windows Subsystem for Linux?
- What is a self-contained .NET app?
- When is a time where a cross-platform implementation (with .NET) could become complicated?
Appendix
Earlier in this chapter, we showed you how to install a Windows service on your development machine. This approach was a simplified method that might not work for environments outside your machine. So, here is a more advanced way of configuring an app as a Windows service.
Installing your app as a Windows service – the advanced method
For production use, it is likely that permissions are more fine-grained and locked down. Perform the following steps instead to set up an app as a service:
- Log on to the Windows server where you will deploy the service.
- Open a PowerShell prompt, and run the following command: New-LocalUser -Name dotnetworker.
- You need to grant permissions to the service account you just created in order to enable it to start the services. Follow these steps:
a. Open the Local Security Policy editor by running secpol.msc.
b. Expand the Local Policies node and select User Rights Assignment.
c. Open the Login as a service policy.
d. Select Add User or Group.
e. Provide the name of the service account (dotnetworker) using either of the following approaches.
f. Type the user account ({DOMAIN OR COMPUTER NAMEUSER}) in the object name field and select OK to add the user to the policy.
g. Select Advanced. Select Find Now. Select the user account from the list. Select OK. Select OK again to add the user to the policy.
h. Select OK or Apply to accept the changes.
- Copy the files to the server, such as C:dotnetworker.
- Run the following PowerShell cmdlets:
$acl = Get-Acl "C:dotnetworker"
$aclRuleArgs = dotnetworker, "Read,Write,ReadAndExecute", "ContainerInherit,ObjectInherit", "None", "Allow"
$accessRule = New-Object System.Security.AccessControl.FileSystemAccessRule($aclRuleArgs)
$acl.SetAccessRule($accessRule)
$acl | Set-Acl "C:dotnetworker"
New-Service -Name DotnetWorker -BinaryPathName C:dotnetworkerdotnetworker.exe -Credential {SERVERNAMEdotnetworker} -Description ".NET Worker Service" -DisplayName ".NET Worker Service" -StartupType Automatic
Wait a couple of seconds, and it should have started.