Adobe Muse CC Classroom in a Book Update (2014.2 release)
This “What’s new” guide provides a hands-on tour of the most important features and improvements of the Adobe Muse CC 2014.2 release, and is intended as additional material for the existing Adobe Muse CC Classroom in a Book® (2014 release). As you follow the material in this update, you will be working on a new lesson file, supplied with this update.
To access the Adobe Muse CC Classroom in a Book Update (2014.2 release) lesson files:
1. Return to your Account page at www.peachpit.com, then click the Lesson & Update Files tab. This is the same place where you downloaded your original lesson files and this update.
2. Find the Muse CC Classroom in a Book area on this page and download the zip archive containing the update lesson files, MuseCC_2014.2.zip.
3. When the download is complete, double-click the archive to decompress it.
The Adobe Muse CC 2014.2 release introduces several new features including self-hosted web fonts, bulleted and numbered lists, and more. Here is an overview of the new and enhanced features found in the Adobe Muse update:
• SVG support: SVG files can now be placed (File > Place), copied, or imported into your Muse site.
• Synchronized text: You can now add text to multiple pages within the same layout or across layouts (such as Phone and Desktop) and tag that text. Any text that is tagged with the same tag using the new Content panel is updated across all instances of the tag. This makes it much easier to edit text across layouts, for instance.
• Self-hosted web fonts: You can now use self-hosted web fonts, those purchased and downloaded from font foundries or services, within your Adobe Muse site design. With self-hosted web fonts, you have the ability to access a wider array of fonts than previously found in Muse.
• Bulleted and numbered lists: You can easily create multi-level bulleted and numbered lists using the new Bullets panel. You can also richly format a bulleted or numbered list using custom bullet characters and glyphs. Bullet styles are supported for efficiency and design consistency across a site.
• Preventing spam using reCAPTCHA: You can now enable Google reCAPTCHA on contact forms to prevent spam and protect your site against Internet bots. You can enable reCAPTCHA on both simple and detailed contact forms irrespective of whether the site is hosted with Adobe or a third-party service.
reCAPTCHA displays distorted text and images that are easily recognizable by a human, but indistinguishable by a machine. A site visitor has to provide the distorted text or text within the image to be able to submit the form.
• Other enhancements: There are many other enhancements to Muse in this release, including form enhancements, find and replace, support for right-to-left languages, and image task shortcuts.
SVG support
In the Adobe Muse CC 2014.2 release, you can now place, paste, and import SVG (.svg) files into your Muse site. SVG (Scalable Vector Graphics) is a vector file format that is infinitely scalable and great for logos, icons, and more. SVG files are also supported when using the HiDPI (2x) option (for high resolution displays) and will not be scaled when placed into your design with HiDPI (2x) selected in the Site Settings (File > Site Settings) (other raster images will be scaled at 50%).
Since not all browsers support SVG files (think Internet Explorer 8 and earlier), Muse also creates a .PNG “fallback” that will take the place of the SVG file in the design on browsers that need it.
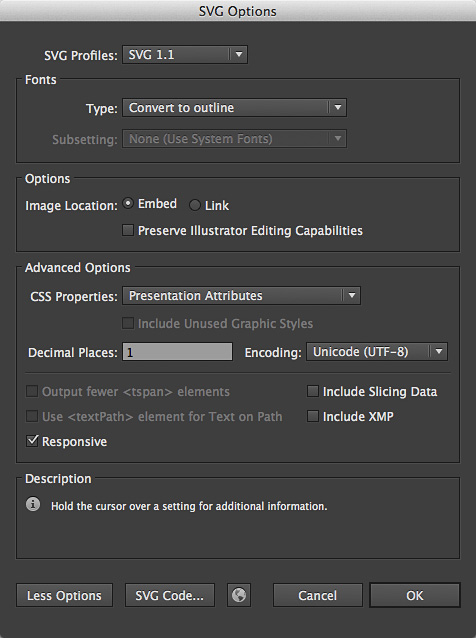
You can easily create SVG files in Adobe Illustrator by opening the artwork you wish to save as SVG and saving it on its own artboard. Then choose File > Save As and pick the SVG option (not compressed). There are many options to look at in the SVG Options dialog box that appears when you save as SVG in Illustrator, but most you can leave alone. If you are using text (a font) in the artwork, choose Convert To Outline from the Type menu to ensure that the text looks like it did in Illustrator.
After saving the SVG file from Illustrator, you can then place it into your Muse site. We’ve supplied both the .AI (Illustrator) file and the final .SVG file so you can either save the SVG yourself if you have Illustrator, or simply place the SVG we supplied.
Next, you’ll open a Muse site we supplied, and then place (File > Place) and SVG file in the design.
1. Choose File > Open. Navigate to the MuseCC_2014.2 folder. Select the file named “SPC_start.muse” and click Open.
For this website of a fictitious company that sells real estate, we have created pages that you will be editing and adding content to.
2. In Plan mode, double-click the “A-Master” page thumbnail to open that page in Design mode.
3. Choose View > Fit Page In Window and then choose View > Zoom Out a few times so that you can see the header content with the navigation bar.
4. Open the Layers panel (Window > Layers) and select the “Master content” layer.
5. Choose File > Place to place the SVG logo. In the Import dialog box, select the logo-white.svg file and click Open.
6. Click to place the SVG logo on the page. With the Selection tool selected, drag it into the left side of the header.
Notice that the logo is the width it was in Illustrator. That’s because Muse applies width and height properties to the SVG in the HTML and CSS that it generates. You can scale the SVG as much as you like without it looking bad, either.
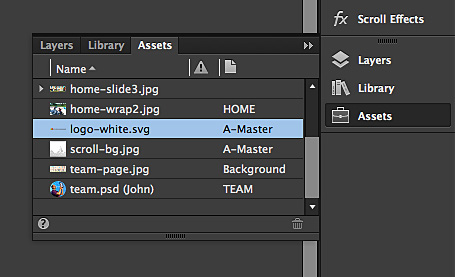
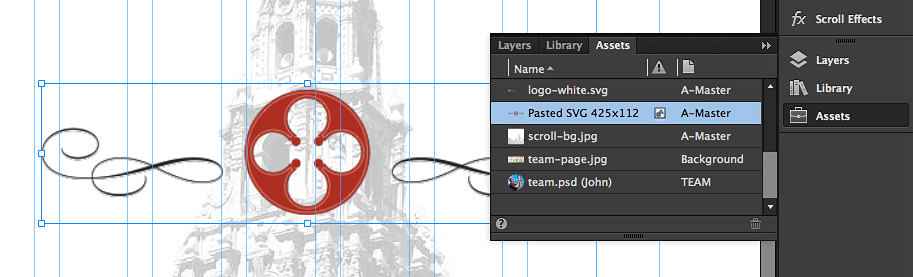
7. Open the Assets panel (Window > Assets) and notice the “logo-white.svg” listed in the panel on the A-Master page.
Aside from placing an SVG file, you can also copy and paste from Adobe Illustrator CC into your Muse site. Copying content from Illustrator is useful when you only want to use part of your artwork in Illustrator. When artwork is copied from Illustrator and pasted into Muse, the artwork is converted to SVG and placed on the clipboard for Adobe Muse to use. Adobe Muse embeds the SVG into your Muse site. The artwork can then be scaled and positioned as needed.
The following is an example of artwork that has been copied from Illustrator and pasted into Muse.
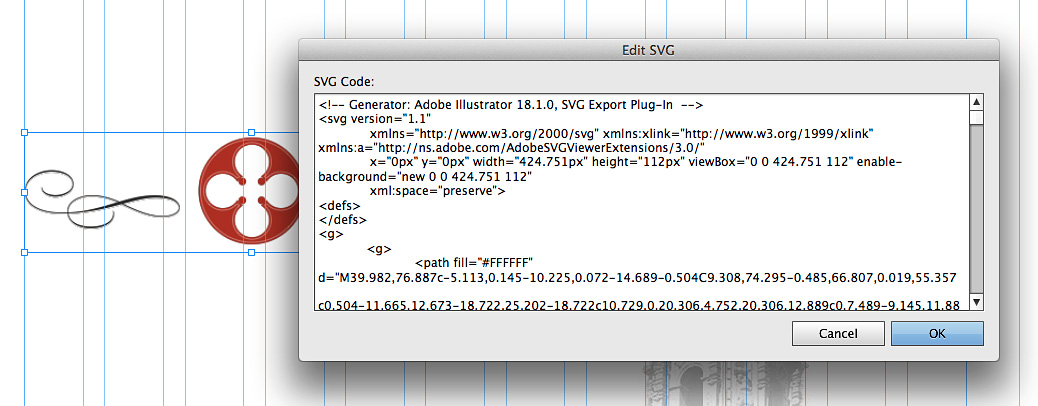
If you paste artwork from Illustrator into Muse, you can also edit the SVG code that is created (and embedded) when you paste. By right-clicking pasted SVG content in Muse, you can choose Edit SVG. In the Edit SVG dialog box, you can then edit the SVG code.
Note
Not everything in your Illustrator artwork will translate into SVG. For instance, drop shadows and blending modes—most of the time—do not appear in the artwork placed as SVG or pasted in Muse.
8. Choose File > Close Page to return to Plan mode.
9. Choose File > Save Site.
Synchronized text
Another great new feature in the Adobe Muse CC 2014.2 release is synchronized text using the Content panel. This welcome new feature makes it easy to share text across pages and/or layouts within a Muse site. Text frames can be tagged with a content tag, and text frames with the same content tag applied can then all be updated by editing the text within one of them.
Next, you will start a Phone layout and synchronize text between the Desktop and Phone layouts.
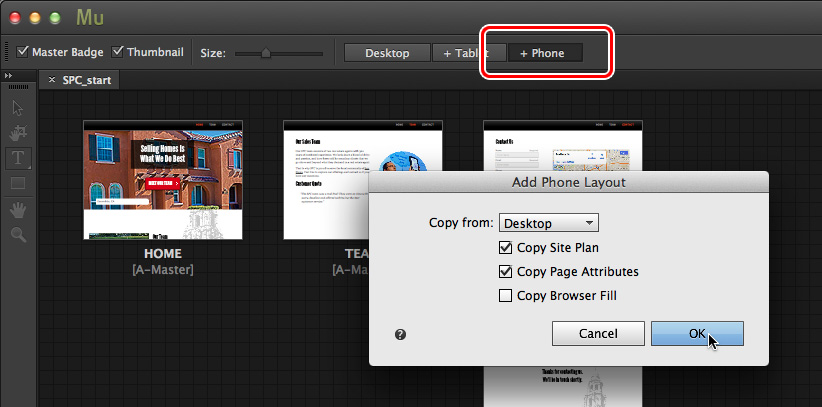
1. In Plan mode (View > Plan Mode), click the +Phone button to create an alternate layout for phones (circled in the following figure).
2. In the Add Phone Layout dialog box, choose Desktop from the Copy From menu. This copies the site map and page attributes (by default) from the Desktop layout. Click OK to create the Phone layout.
3. Open the Phone HOME page by double-clicking the thumbnail in the site map.
4. With the HOME page open in Design mode, choose Page > Go To Matching Page > Desktop.
This is an easy way to open the same page in an alternate layout like Desktop.
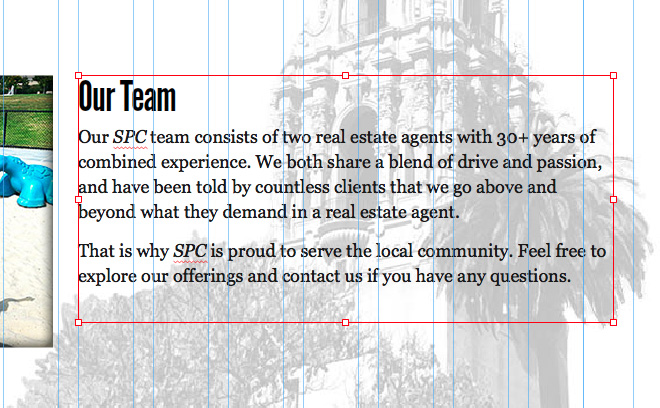
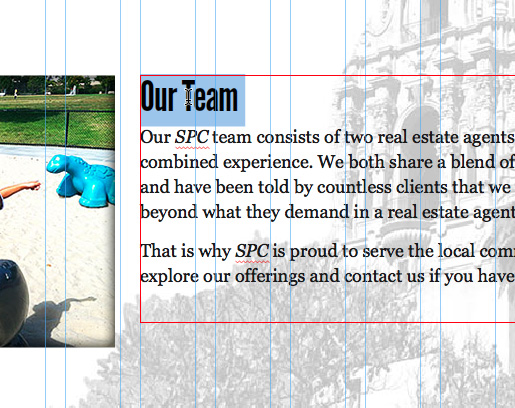
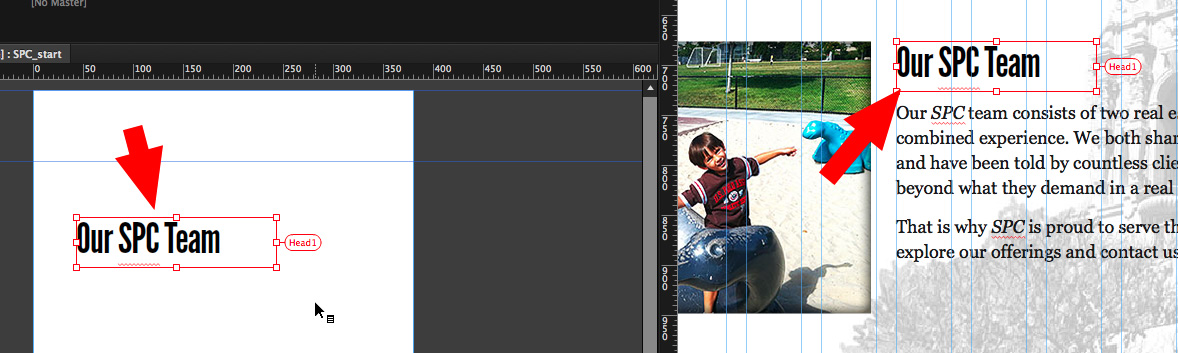
5. With the Selection tool selected, scroll down below the larger slideshow on the page and click the text frame that contains the heading text, “Our Team,” to select it.
Tagging text
In order to update text across pages and/or alternate layouts in your Muse site, you need to “tag” the text frame first, and each text frame can only be tagged with one tag. This can be done with the Content panel, where you can organize tags in collections. Later, you can change or remove a tag that is applied to a text frame.
1. Choose Window > Content to open the Content panel.
The Content panel is where you can create content tags that can be applied to a text frame. If you tag a text frame, the text frame cannot contain text with “mixed” formatting—multiple paragraph styles, character styles, etc. It’s best practice to split up text into multiple text frames, each containing its own formatting. So, for instance, if you have a heading and some body text, the heading text would be in its own frame and the rest of the body text would be in another.
2. Select the Text tool and click three times within the “Our Team” heading text to select it. Choose Edit > Cut.
3. Choose Edit > Deselect All.
4. Choose Edit > Paste to paste the text into a new text frame.
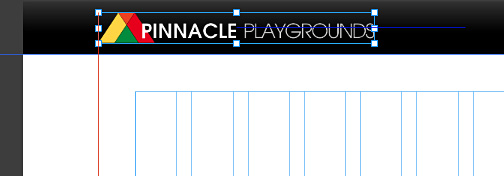
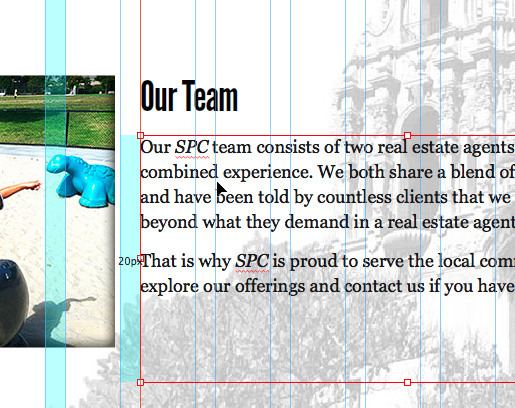
5. Select the Selection tool and drag the body text frame (that begins with “Our SPC team consists of…”) down to make room for the heading text. Drag the heading text frame above the body text frame and align its top with the image to the left. See the figure for positioning help.
Now that the text is split between two text frames, you will tag the heading text and copy it to the same page (HOME) in the Phone alternate layout.
6. With the Selection tool selected, click to select the “Our Team” heading text frame.
7. In the Content panel, click the Add Content Tag plus sign (+) below Collection.
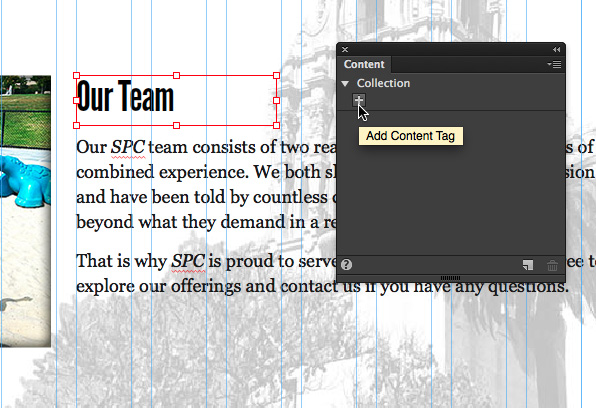
8. In the dialog box that appears, click OK.
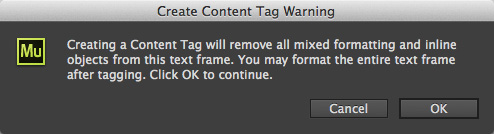
The dialog box will appear if any of the text has a style applied (paragraph or character) or mixed formatting (maybe some of the text is bold).
9. Change the name of the tag to Head1 and click Enter or Return to accept it.
Tip
To rename a tag, either double-click the tag name or right-click and choose Rename.
10. Leave the text frame selected and choose Window > Paragraph Styles. In the Paragraph Styles panel, click the Heading style name to apply the formatting to all of the text within the text frame.
Now that the text frame is tagged, you can copy it to another page within the same layout (Desktop) or to an alternate layout (like Phone).
11. Choose Window > Arrange > Tile to tile all of the tabs. This way, you’ll be able to see the HOME page for the Desktop layout and the Phone layout.
12. With the Selection tool selected, drag the “Our Team” text frame from the HOME [Desktop] page to the HOME [Phone] page.
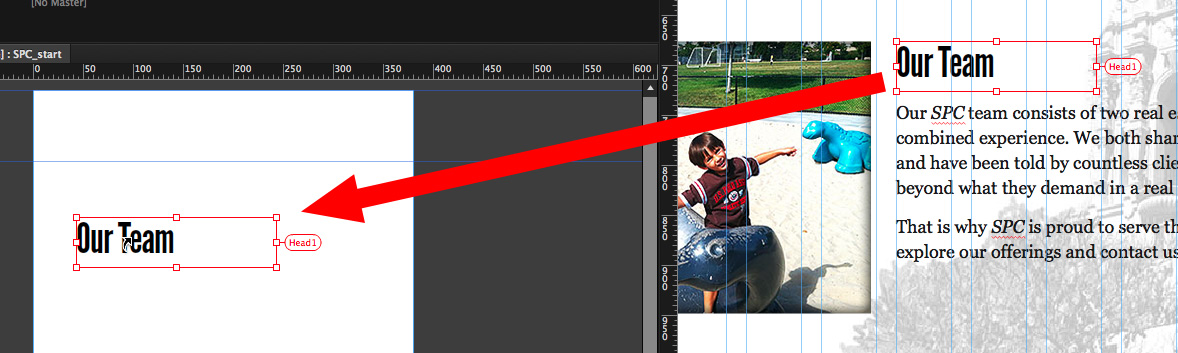
By dragging between pages that are tiled, the content is copied from one page to another.
13. In the HOME [Phone] layout, select the Text tool and add the word “SPC” so the text “Our SPC Team” appears in the text frame.
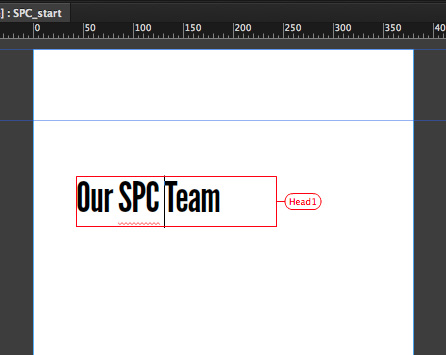
You can change the text in any of the tagged text frames and the rest will update.
14. Select the Selection tool to see the text update in the HOME [Desktop] layout.
If you were to make changes to the formatting for one of the tagged text frames, the other(s) would not update. The text formatting is not affected when the text is updated across frames. That’s why we use paragraph styles to format the text. You can easily update a paragraph style and all of the text with that style applied will update.
Untagging and applying tags to text
After tagging a text frame, you may find later that you don’t want it to update along with text frames that have the same tag applied. You can easily “untag” a text frame, and that’s what you’ll do next.
1. With the Selection tool selected, right-click on the “Our SPC Team” text frame on the HOME [Phone] page. Choose “Untag Selection.”
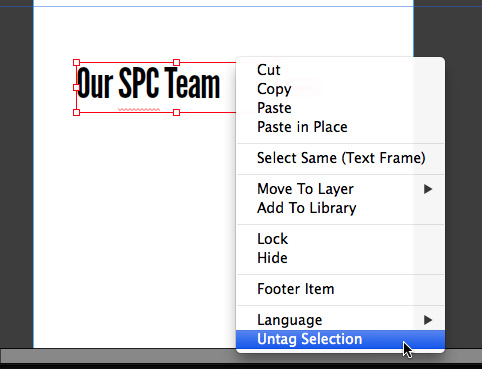
The text frame is now no longer tagged with the “Head1” tag and will not update if text in any frame with the “Head1” tag is edited.
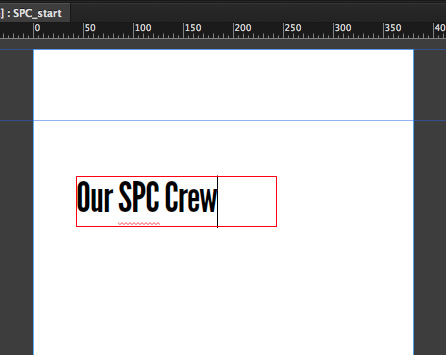
Next, you will re-tag the same text frame with the Head1 tag, but first you’ll add a bit of text to it.
2. Double-click the text frame on the HOME [Phone] layout to switch to the Text tool. Select the “Our SPC Team” text and type Our SPC Crew.
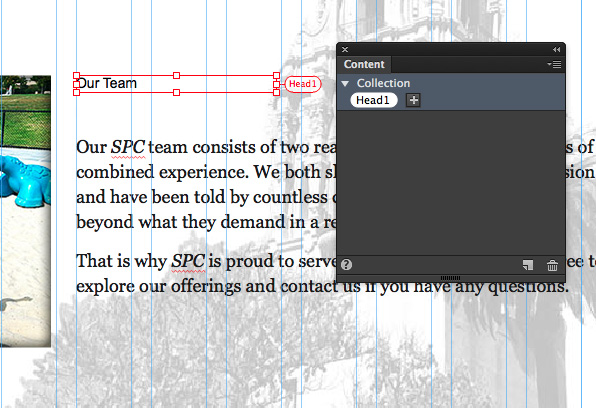
3. In the Content panel, click the “Head1” tag to apply it to the text frame (circled in the figure).
4. In the Apply Content Tag Warning dialog box that appears, click OK.
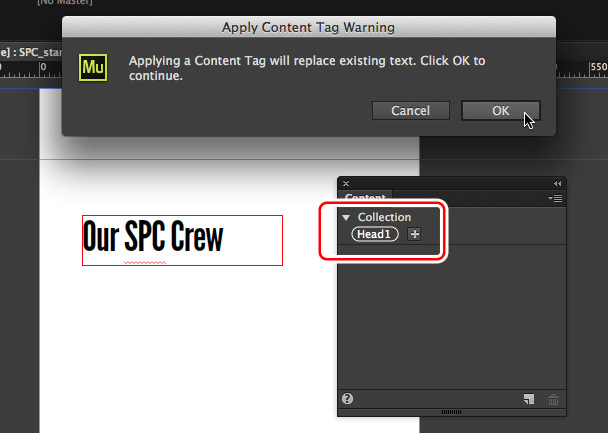
The text in the text frame is replaced with the “Our SPC Team” text. The text that comes into the text frame takes on the formatting of the text frame as well.
When working with the Content panel to tag text frames, you can also create a “collection” that helps you to keep similar tags together.
5. Choose Window > Arrange > Consolidate All By Site.
6. Close all open pages and return to Plan mode.
Self-hosted web fonts
You can now use self-hosted web fonts, which you purchase and download from third-party font foundries or services, within your Adobe Muse site design. With self-hosted web fonts, you have the ability to access a wider array of fonts than previously found in Muse.
In this section, you will be taken through the steps required for using hosted fonts in your Muse designs. We are not able to supply a font for you to use since they are licensed when purchased, but you will see how it works.
1. In Plan mode, click the Desktop button above the site map to switch to the Desktop site map, if necessary. Double-click the “HOME” page thumbnail to open that page in Design mode.
2. Choose View > Fit Page In Window.
In order to add web fonts from your computer to use on your Muse sites, you will need to supply the following web font formats in order to render the font across all browsers:
• Web Open Font Format (.woff)
• Embedded OpenType (.eot)
• Scalable Vector Graphics (.svg). This format is needed for older Android devices.
These font files should be supplied by the third-party foundry or service that you purchased the web font from.
When you purchase a web font, ensure that you download and install properly licensed desktop fonts. The desktop font will appear in the font family menu and is used within Muse for designing the site content. Adobe Muse supports the following font formats:
• True Type Font (.ttf)
• Open Type Font (.otf)
• True Type Collections (.ttc)
• Mac Data Fork Fonts (.dfont)
• Mac Resource Fork TrueType Suitcases
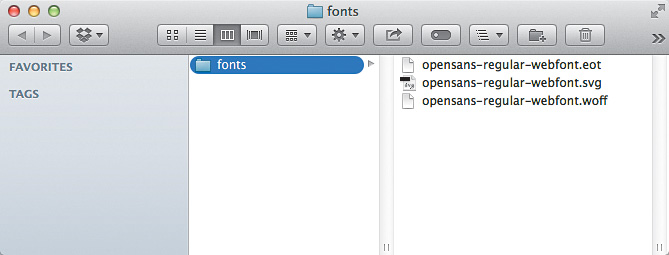
Before you begin this section, make sure to place the web fonts in an accessible folder on your hard drive. If you move the fonts folder later, Muse will need to find it again.
3. Choose File > Add/Remove Web Fonts.
The Add Web Fonts dialog box will appear. You can also access this dialog box by selecting +Add Web Fonts in the Web Fonts section of the Font menu of the Control panel or Text panel.
4. In the Add Web Fonts dialog box, click the Self-Hosted Web Fonts tab to access the options.
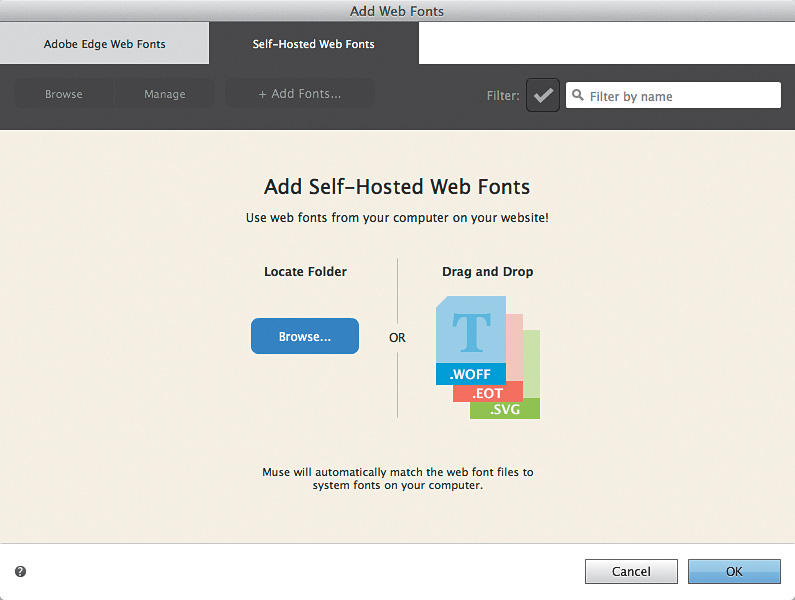
You will either browse to the folder that contains the web fonts or drag them onto the Add Web Fonts dialog box to use them in Muse. Muse will automatically match the web font files to a local desktop font on your computer.
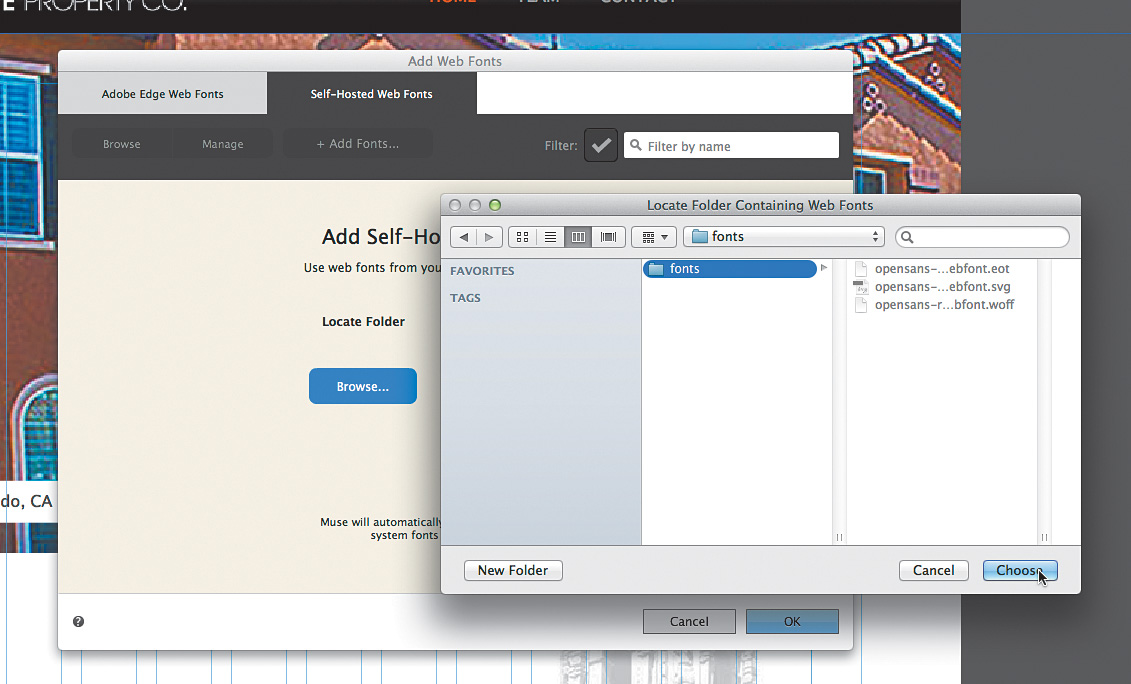
5. Click the Browse button to browse for the web fonts folder you have purchased and downloaded from a third-party font foundry or service. Navigate to the folder and click OK.
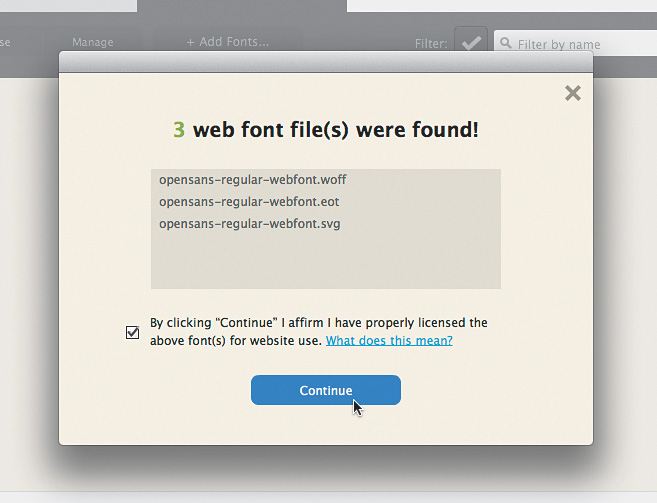
Muse will look within the folder to find the required web font formats and open a dialog box confirming that it has found them. You can include a series of web fonts in a single folder and add them at one time. Muse also automatically matches the web fonts it found to their corresponding system font.
6. Select the “By clicking ‘Continue…’” option to ensure that the font is properly licensed. Click Continue.
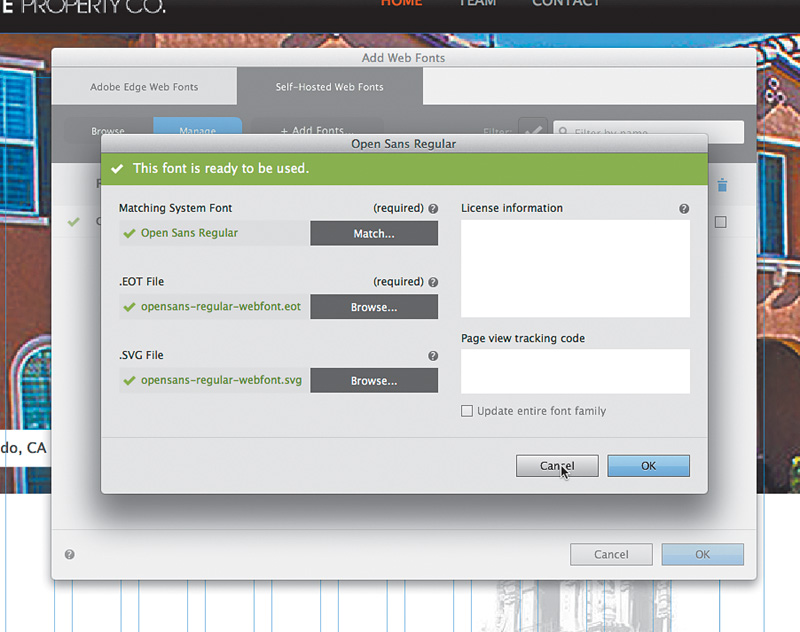
The font(s) will appear in a list in the Add Web Fonts dialog box in Manage mode. The Manage mode displays a list of all self-hosted web fonts with a matching desktop font. The newest font added appears at the top of the list, and so do fonts with missing font files or without a desktop match.
7. Click the wrench icon to see more options for the web font.
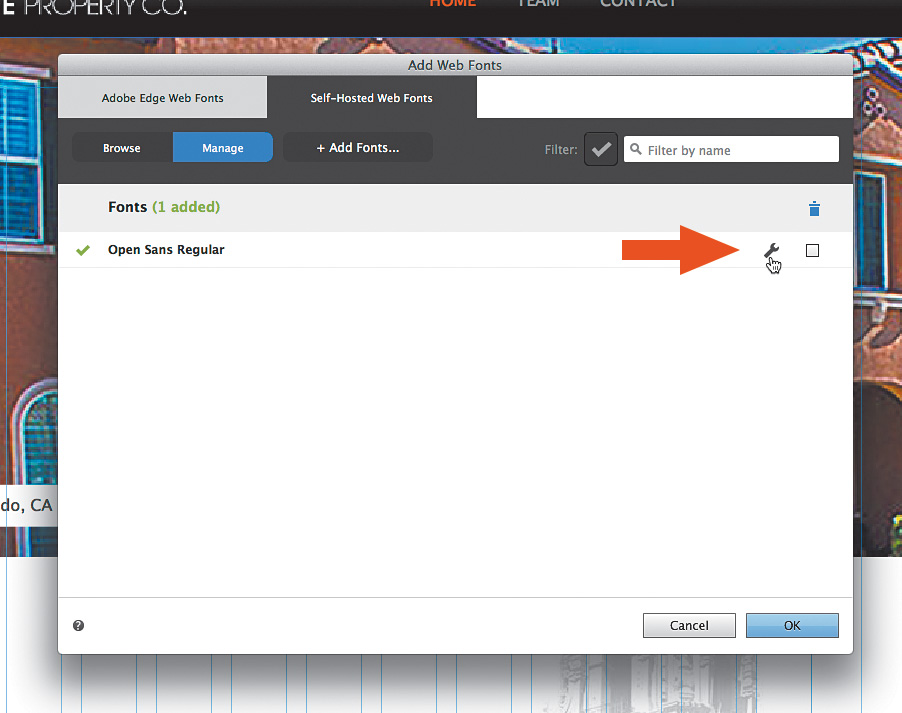
If the font is ready to be used and a matching system font has been found for use within Muse, you will see a success message at the top of the dialog box. Sometimes, Muse may fail to match a web font with its corresponding desktop font automatically. In this case, you are required to explicitly specify a match for the web font by clicking the Match button in the dialog box you currently have open. You can also replace the system font or web fonts, provide license information, or enter page view tracking code.
8. Click OK to return to the Add Web Fonts dialog box.
Tip
To delete a web font, you can select the Delete column to the far right in the Add Web Fonts dialog box and click OK.
To add more fonts, you can click the +Add Fonts button in the Add Web Fonts dialog box. You can also search your web fonts in the search field.
9. Click OK in the Add Web Fonts dialog box to be able to use the font within Muse. Click OK in the Web Fonts Notification dialog box.
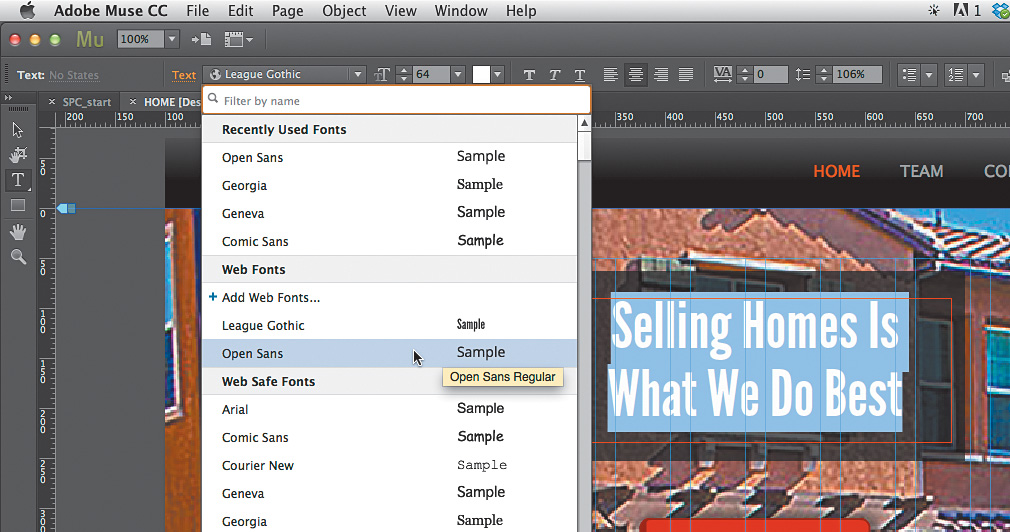
10. Select the Text tool and select the “Selling Homes Is What We Do Best” text.
11. Click the Font menu and select the font from the Web Fonts category. You may want to adjust the font size, leading, etc. in the Text panel or Control panel as well.
Tip
Clicking +Add Web Fonts in the Font menu will also open the Add Web Fonts dialog box and allow you to manage, delete, and add new self-hosted web fonts.
12. Choose File > Save and then File > Close Page to return to Plan mode.
Bulleted and numbered lists
Muse now has the ability to add bulleted and numbered lists to your pages using either the Control panel or the new Bullets panel. The formatting from these lists can also be saved for later use with a new panel called Bullet Styles.
Applying a numbered list
First, you will add some text to the TEAM page and apply a numbered list to the text; then edit the formatting.
1. In Plan mode, double-click the TEAM thumbnail to open the page in Design mode.
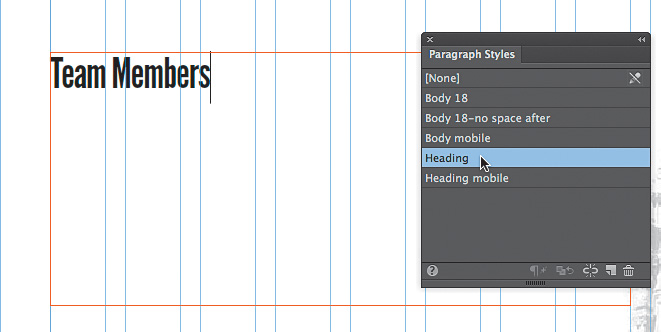
2. Select the Text tool and draw a text frame beneath the existing text frame. With the cursor in the new text frame, type Team Members.

3. Open the Paragraph Styles panel (Window > Paragraph Styles), and with the cursor in the “Team Members” text, Option-click (Mac OS) or Alt-click (Windows) the Heading style to apply the formatting.
Note
We dragged the Paragraph Styles panel closer to the text in the figure.
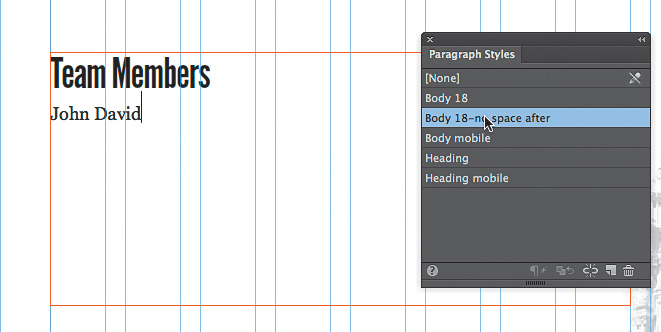
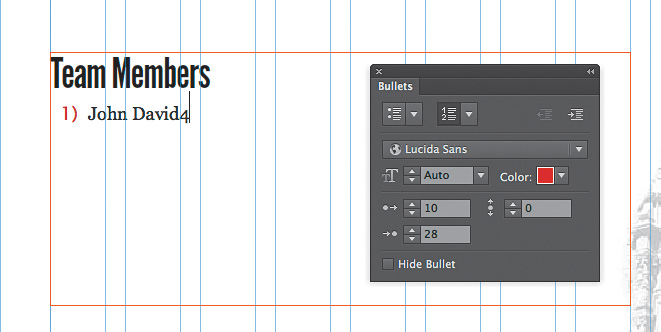
4. Make sure the cursor is at the end of the “Team Members” text, and press Enter or Return and type John David.
5. In the Paragraph Styles panel, Option-click (Mac OS) or Alt-click (Windows) the style named “Body 18-no space after.” This will apply basic body styling to the text.
6. Choose Window > Bullets to open the Bullets panel. With the cursor in the “John David” paragraph (or with the paragraph selected), click the Numbers button to apply a numbered list to the text, starting at 1.
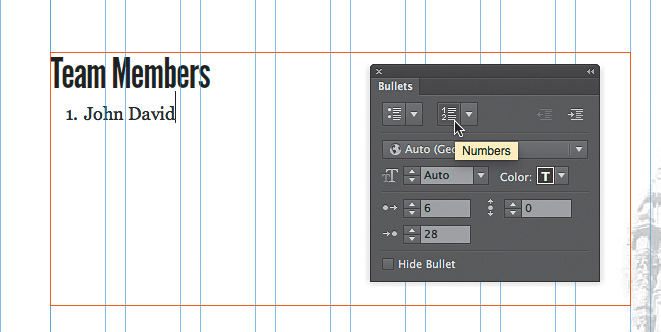
You can apply a bulleted or numbered list either in the Control panel or in the Bullets panel, but you will find more formatting options for your lists in the Bullets panel.
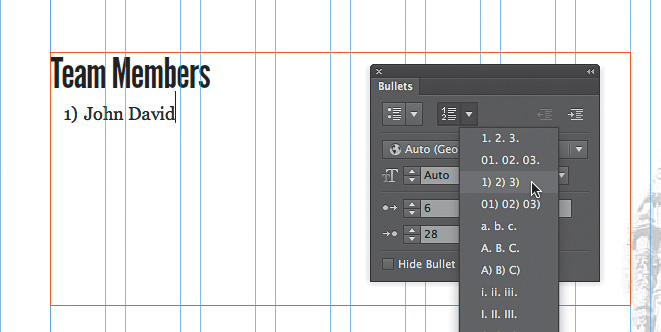
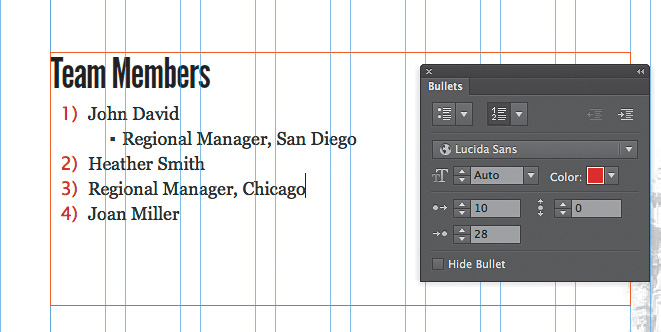
7. With the cursor still in the “John David” text, in the Bullets panel, change the following options:
• Click the arrow to the right of the Numbers button and choose the “1) 2) 3)” style to change the appearance of the number on the page.
Bulleted and numbered lists each have a series of formatting options.
• Choose Lucida Sans from the Web Safe Fonts category in the Font menu to change the font of the number and “)” character.
Notice that you cannot select a system font since the bullet or number won’t be converted to an image.
• Size Of Bullets: auto (the default setting)
• Click the Color option and change the color values to R: 209, G: 23, B: 45
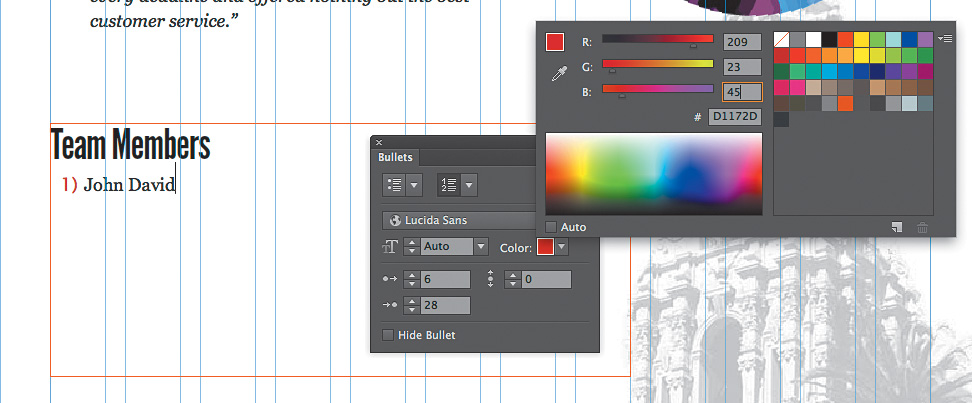
• Gap Between Text And Right Edge Of Bullets: 10
Leave the remaining options at their default settings.
8. With the Text tool still selected, insert the cursor after the “John David” text and press Enter or Return to create a new paragraph. Type Heather Smith. Press Enter or Return and type Joan Miller.

Each paragraph after the “John David” paragraph will also have the bullet formatting (numbers 1, 2, and 3). By selecting a paragraph with a list applied (such as our numbered list), editing the formatting options in the Bullets panel will change all list items at once.
Applying a bulleted list
Next, you will add some text to the TEAM page and apply a bulleted list that is subset to the numbered list.
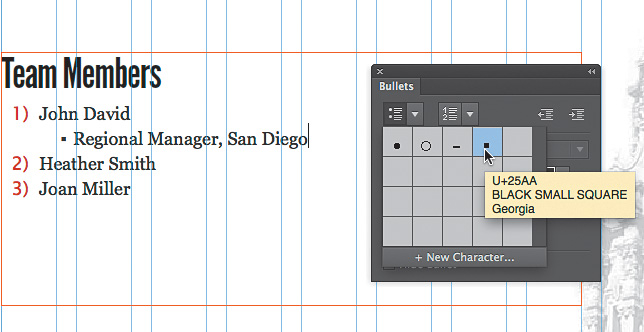
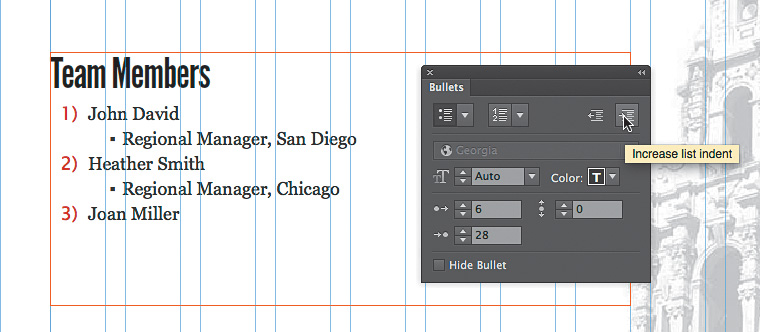
1. With the Text tool still selected, insert the cursor after the “John David” text, press Enter or Return, and type Regional Manager, San Diego.
Notice that the new text has a numbered list applied as well.
2. With the cursor in the new text you just typed, click the Increase List Indent button in the Bullets panel.
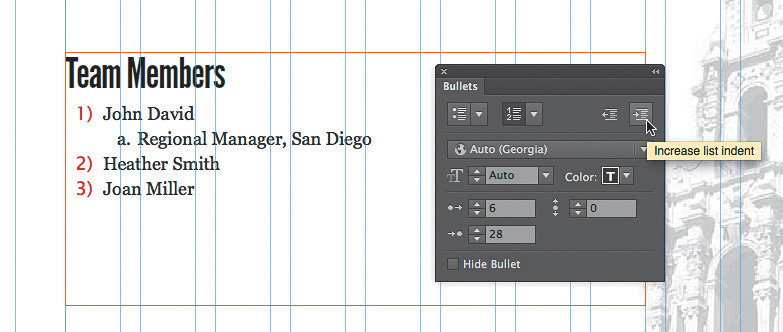
Clicking the Increase List Indent button tells Muse to create a new list that is subset under the original numbered list. If you were to simply change the list to a bulleted list without clicking the Increase List Indent button, all items on the same level would become bullets.
3. Click the Bullets button in the Bullets panel or Control panel to apply a bulleted list to the text.
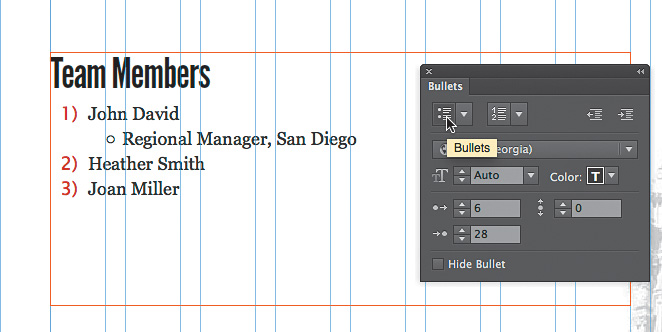
Next, you will change the type of bullet for the list.
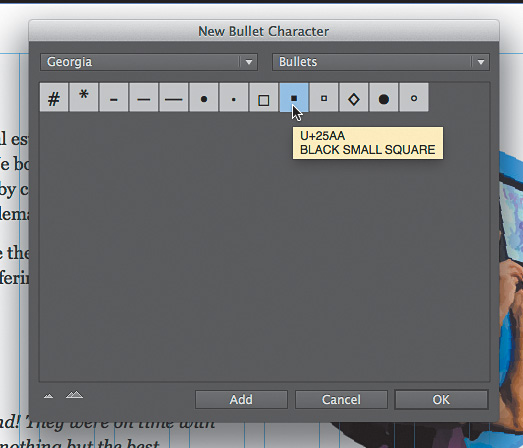
4. Click the arrow to the right of the Bullets button in the Bullets panel or Control panel and click + New Character to open the New Bullet Character dialog box where you can choose a new character.
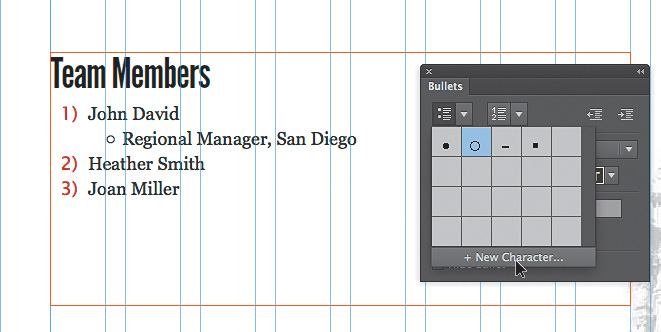
5. Ensure that the font “Georgia” is selected (or you can choose another font) and that the “Bullets” option is selected to the right of the font to filter the characters so that only the bullets are showing in the list. Click the small black square (![]() ) in the list and click OK.
) in the list and click OK.
Clicking the Add button in the New Bullet Character dialog box allows you to add more than one bullet character to the listing in the Bullets panel. In the Bullets panel, the new character will be selected in the character list and will be changed on the page.
6. Make sure that the small black square bullet is selected in the bullet character list and press the Escape key to hide the list and return to the Bullets panel.
Note
You may need to click on the arrow to the right of the Bullets button in the Bullets panel to see the list of bullet characters again.
7. Insert the cursor after the text “Heather Smith” and press Enter or Return to create a new paragraph. Type Regional Manager, Chicago and notice that the new text does not look like the bulleted list you just formatted.
Next, you will save the formatting from the bulleted list applied to the “Regional Manager, San Diego” text as a bullet style and apply it to other text.
Working with bullet styles
In Muse, you can save bulleted list formatting as a bullet style using the Bullet Styles panel. This can be very useful for applying similar formatting to lists, as well as making it easier to update the list formatting later. One interesting thing to note about Muse bullet styles is that the style applies formatting to an entire list within a text frame. If you have a list with multiple levels, the formatting from each level is saved within the style.
Note
Text formatting such as font size, font family, color, etc. are not saved in a bullet style; only formatting associated with the list is saved.
1. With the cursor still in the “Regional Manager, Chicago” text, choose Window > Bullet Styles to open the Bullet Styles panel.
2. In the Bullet Styles panel, click the Create A New Style button at the bottom of the panel (circled in the next figure) to create a new style from the text that the cursor is in.
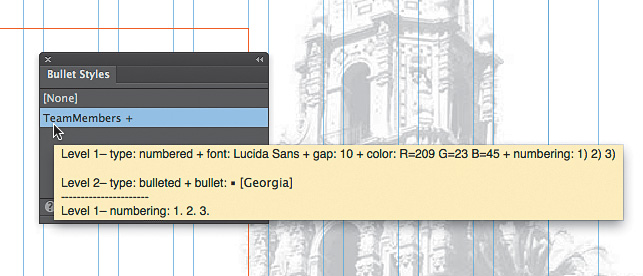
3. Double-click the new “Bullet Style” style name in the Bullet Styles panel.
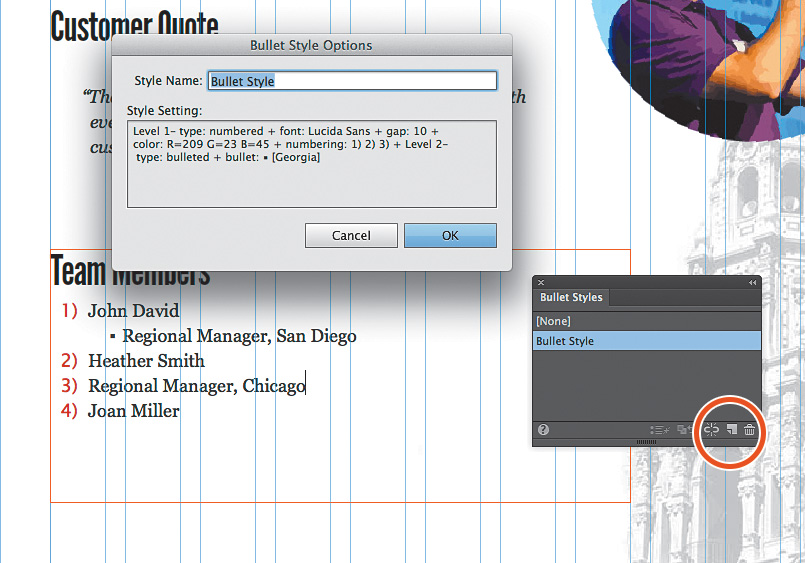
Notice the Style Setting area in the Bullet Style Options panel, which shows a “Level 1” and a “Level 2.” Since you created a numbered list (level 1) and the indented bulleted list (level 2), both sets of formatting options were saved in the list styling. This way, you can have a list in a text frame and apply the bullet style to the list and it will affect the entire list, including all levels.
4. Change the name to TeamMembers and click OK.
5. Insert the cursor in any of the text that is in the list (numbered or bulleted) and notice that the TeamMembers style in the Bullet Styles panel is applied.
6. Insert the cursor in the “Regional Manager, Chicago” text. Open the Bullets panel and click the Increase List Indent button to change the list type to a bullet for the “Regional Manager, Chicago” text.
By increasing the list indent, the paragraph takes the formatting for the level 2 list in the TeamMembers style.
Next, you will update the bullet style.
7. Insert the cursor in the “Joan Miller” text (or any of the numbered list paragraphs).
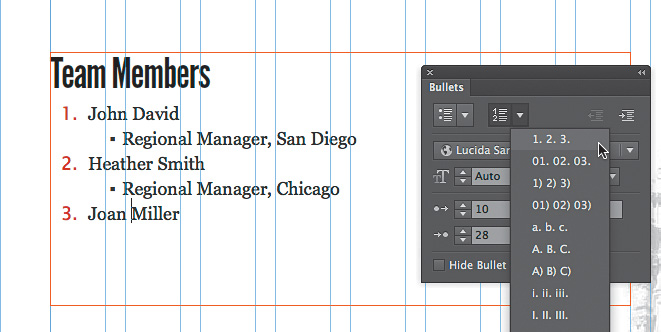
8. In the Bullets panel, click the arrow to the right of the Numbers button and choose the “1. 2. 3.” style to change the appearance of all numbers in the list.
9. In the Bullet Styles panel, notice the plus (+) to the right of the TeamMembers style name indicating that there is formatting on the text that is different from the bullet style (called a style override).
10. Click the Redefine Selected Style button at the bottom of the Bullet Styles panel to update the bullet style to match the new numbering appearance.
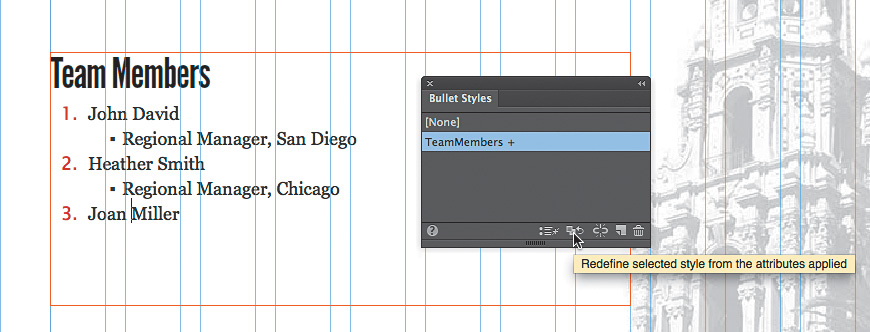
The text on the page will not change appearance after you redefine the bullet style, but any other lists in the Muse file with the style applied will be updated to match the new formatting change.
Tip
If you wanted to change the spacing between the bulleted list items, you can apply Space After formatting found in the Text panel.
11. Choose File > Save and then File > Close Page to return to Plan mode.
Preventing spam using reCAPTCHA
Muse now offers a Google reCAPTCHA for your forms to prevent spam and protect your site against Internet bots. You can enable reCAPTCHA on either the simple or detailed contact forms that are hosted with Adobe or a third-party service.
A reCAPTCHA displays distorted text and images that are easily recognizable by a human, but not a machine. A site visitor has to provide the distorted text or text within the image to be able to submit the form.
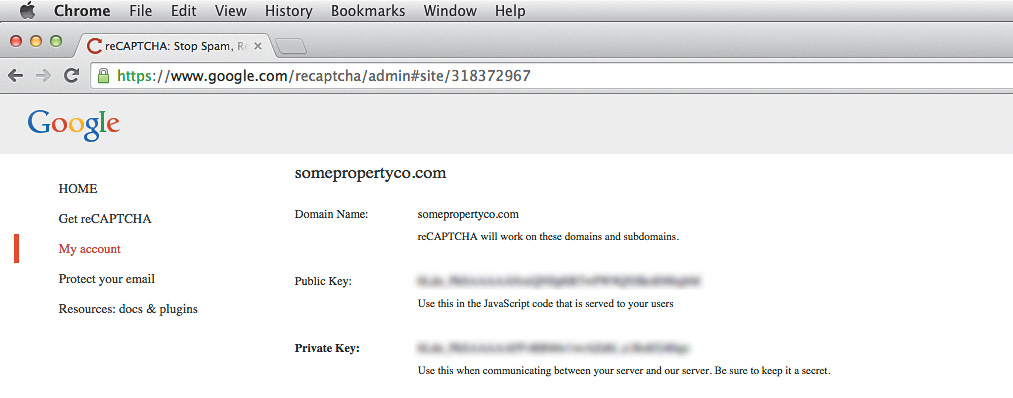
In order to use the reCAPTCHA feature, you will need to generate public and private keys unique to your website domain. These keys have to be copied into specific fields within Adobe Muse to fully enable reCAPTCHA on your website. To generate keys, you can visit: www.google.com/recaptcha/intro/index.html.
1. Double-click the CONTACT page thumbnail in Plan mode to open the page in Design mode.
2. Select the Selection tool and click the Muse form that is already on the page. Click the options arrow off the upper-right corner of the form to show the Options menu.
3. Select the reCAPTCHA option.
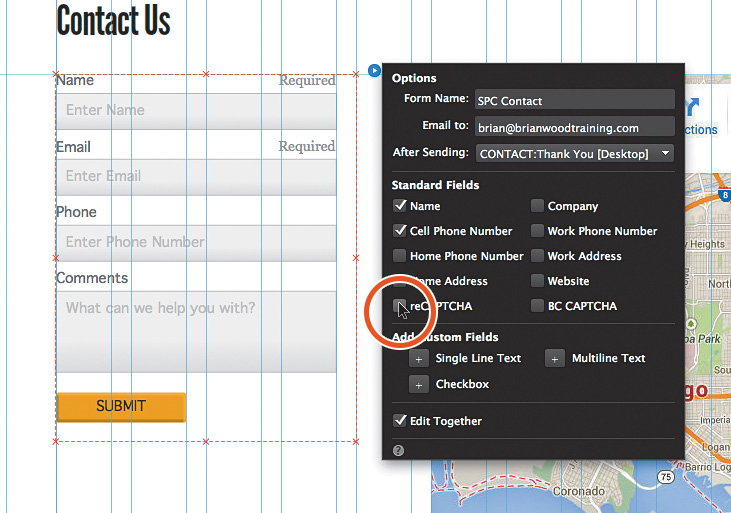
The form options menu will close and the reCAPTCHA will be added to the form and the reCAPTCHA options will appear. This is where you can adjust the reCAPTCHA settings and also enter your public and private keys.
Like I mentioned at the beginning, you will need to sign up for reCAPTCHA (it’s currently free) and obtain “keys” from the site: www.google.com/recaptcha/intro/index.html
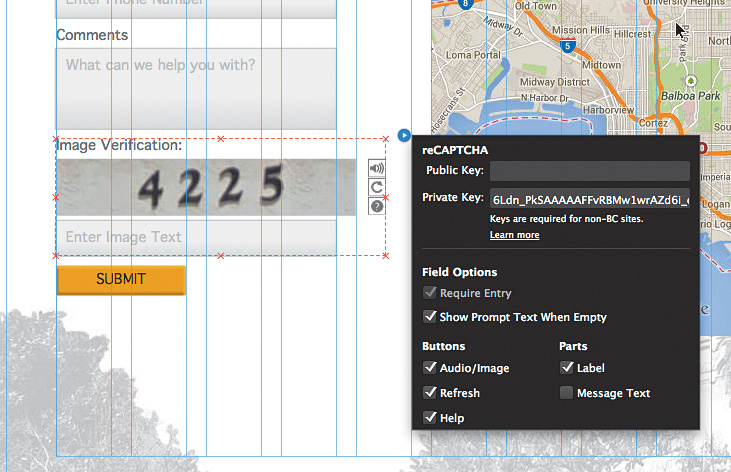
An example of a reCAPTCHA for the somepropertyco.com site.
4. Enter your private and public keys obtained from the www.google.com/recaptcha/intro/index.html website.
The settings in the reCAPTCHA options allow you to add and remove options like the label or reCAPTCHA options like Audio/Image, Refresh, and Help.
5. Press the Escape key to hide the reCAPTCHA options.
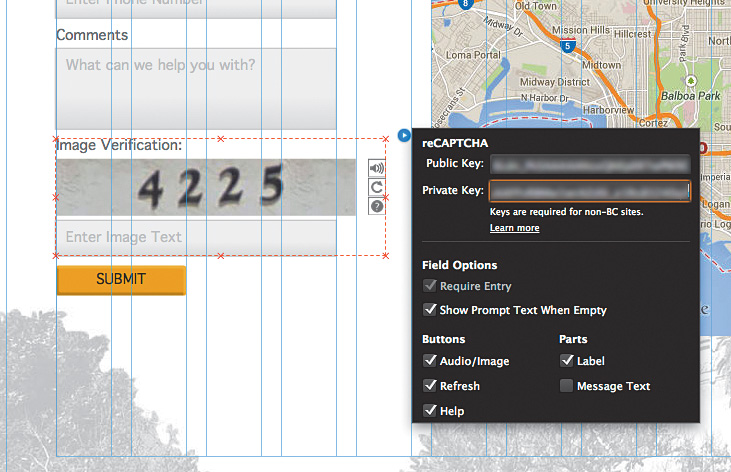
Like other form fields, you can adjust the position of each element within the reCAPTCHA. You can also edit the field associated with the reCAPTCHA, but you cannot edit the size of the image.
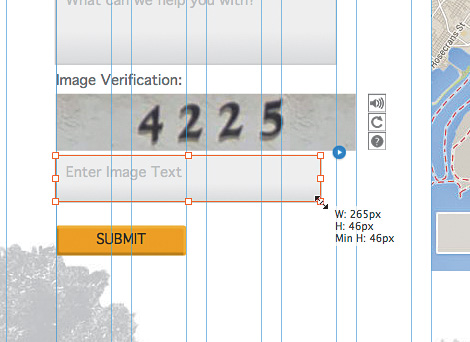
An example of resizing one of the reCAPTCHA elements.
6. Choose File > Save and then choose File > Close Site.
Other enhancements
Aside from the new features and enhancements we’ve already seen, there is a host of other new features and improvements that warrant at least a mention. Here is a listing of those features.
Form enhancements
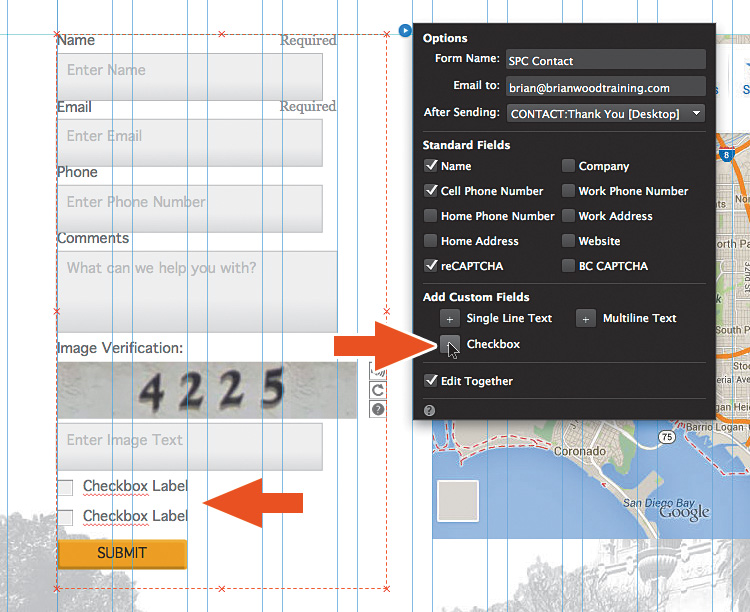
There are several new features related to forms within Muse, including secure server-side validation for forms and checkbox elements. Muse now supports server-side validation to prevent spam or fishy submissions. Earlier, a malicious user could bypass the client-side JavaScript validation, and submit large amounts of spam. You can now also add checkboxes to contact forms. You can also make it a mandatory field, which is useful for forms related to license agreements and sign-ups. Muse also allows you to set a default value (selected or deselected) and to style the checkbox using object states.
Support for right-to-left languages
Create sites, specific pages, or text containers using right-to-left languages, such as Arabic and Hebrew. Text boxes and other elements such as social widgets default to the selected language. In order to change the language preference, choose File > Site Properties and select the Content tab. You can then choose the language from the Language menu.
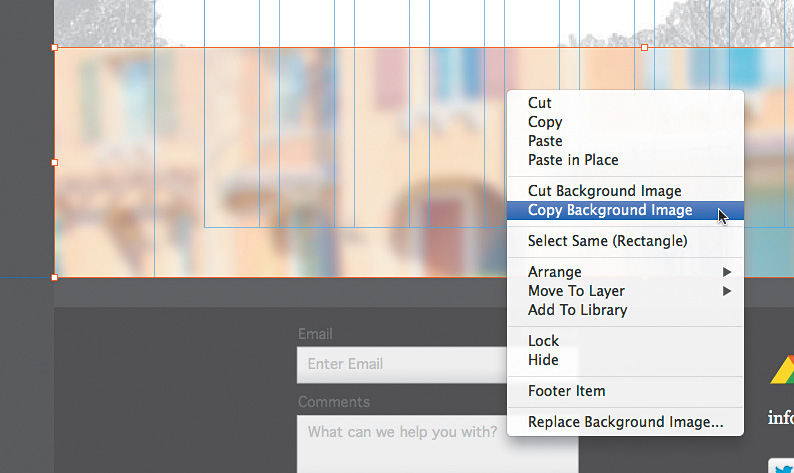
Image task shortcuts
You can right-click images to access common image-related tasks, such as replacing an image, replacing a background, and pasting an image in place.
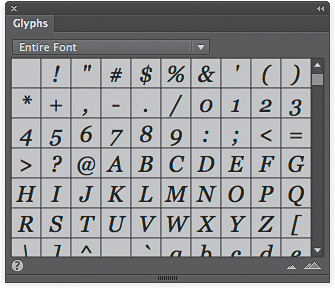
Glyphs panel
The Glyphs panel allows you to access full character sets for individual typefaces and easily add them to text containers. Using the Glyphs panel, you can insert special characters and symbols, including punctuation, math symbols, bullets, and more.
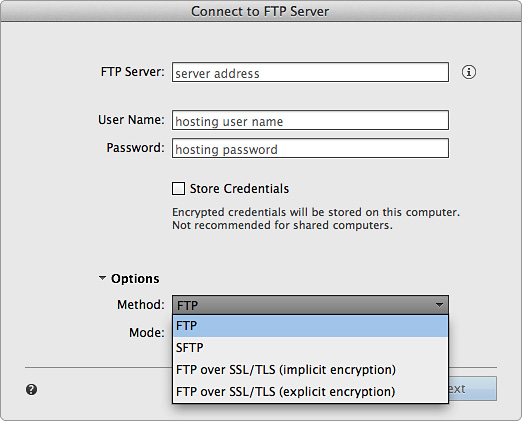
Secure FTP support
Publishing with Muse now includes SFTP and FTPS support, for hosting with third-party hosting providers. With Secure FTP, if you are uploading content on an open network—such as while working at a coffee shop—your credentials and password for your FTP client remain encrypted and private.
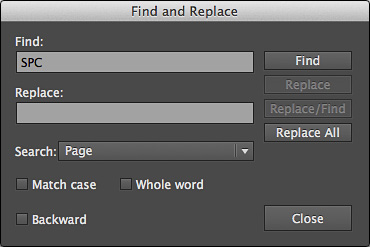
Find and Replace
Muse now offers a Find And Replace (Edit > Find And Replace) command similar to other Adobe applications.