
Hour 23. Pro Tips, Finishing Touches, and Next Steps
What You’ll Learn in This Hour
![]() Using
Using IntentServices and BroadcastReceivers
![]() Incorporating opensource projects
Incorporating opensource projects
Professional apps are responsive, pay attention to detail, and include elegant finishing touches. A sophisticated app might use specific Android sensors such as the accelerometer or features such as Near Field Communication (NFC) or Beam. This hour begins with a discussion on how to use an IntentService. Services are a fundamental part of Android, and an IntentService is a simplified implementation of a service. You can use IntentServices to create responsive apps. For finishing touches, you learn how to use Android animations and consider open source libraries that can help you make a slick-looking and responsive app. Finally, this hour covers Android sensors and other features that can be incredibly useful in specific apps.
Responsive Apps: Using IntentService
Sometimes, working in the background makes sense. You have done that with an AsyncTask, but an AsyncTask is tied to an activity, which can be limiting. An Android service is a background process that lives outside of an activity. Because a service lives outside of an activity, it lives outside of the activity life cycle. A service can keep running in the background even when an activity is destroyed. Whether you use an AsyncTask or a service, your goal is to move processing off of the user interface (UI) thread.
A service is created by extending the Service(android.app.Service). Like an activity, the service must also be defined within the AndroidManifest.xml file. A service has a life cycle that includes an onCreate() method. Other methods such as onStartCommand(), onBind(), and onDestroy() are part of the Service class.
An IntentService (android.app.IntentService) provides a simplified way to implement a service. An IntentService requires the use of a method called onHandleIntent().
By using an IntentService, you can initiate a background process that handles some work and that can occur while the user is still interacting with the application.
In this hour, you create an example that explicitly illustrates this concept and see what is meant by having a responsive app.
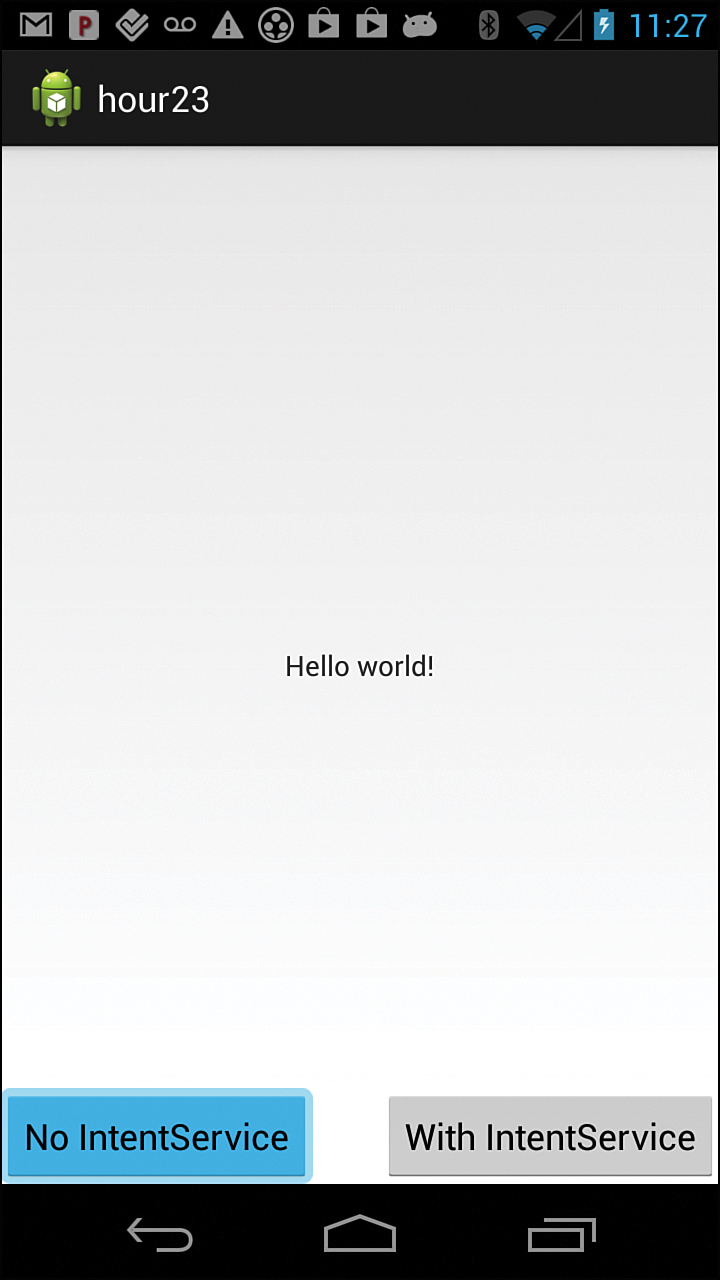
The Hour 23 project has a simple MainActivity.java class consisting of a layout with two buttons. One button has the label No IntentService and the other has the label With IntentService. In the example, the same code is run for each button, with one case using an IntentService and the other without using the IntentService.
To illustrate app responsiveness, the work done when the user clicks the button is for the app to sleep for 5 seconds. The 5-second delay that we implement simulates work being done in the app that makes the app unresponsive to user input.
When you do that without using an IntentService, the button turns blue and remains blue for 5 seconds. The user must wait for control. When you usethe IntentService, the button turns blue momentarily when the user clicks it, and then the IntentService launches, but the user has immediate control.
Figure 23.1 shows the No IntentService button as the user waits.
Defining an IntentService
As mentioned, to develop an IntentService, you must implement an onHandleIntent() method. An IntentService also requires an empty constructor.
Coding an IntentService
List 23.1 shows the entire FiveSecondService.java code from the Hour23 project.
The empty constructor is included in lines 6–8. The onHandleIntent() method appears in lines 9–16. The “work” done in this service is to call SystemClock.sleep() on line 11 to have the service sleep for five seconds.
Lines 12–16 of Listing 23.1 define a BroadcastReceiver. The BroadcastReceiver is used to broadcast that the work is complete. This hour includes more details later on using a BroadcastReceiver.
LISTING 23.1 FiveSecondService.java: A Complete IntentService
1: package com.bffmedia.hour23;
2: import android.app.IntentService;
3: import android.content.Intent;
4: import android.os.SystemClock;
5: public class FiveSecondService extends IntentService {
6: public FiveSecondService() {
7: super("FiveSecondService");
8: }
9: @Override
10: protected void onHandleIntent(Intent intent) {
11: SystemClock.sleep(5000);
12: Intent broadcastIntent = new Intent();
13: broadcastIntent.putExtra("message", "UPDATE: USING INTENT
SERVICE");
14: broadcastIntent.setAction("com.bffmedia.hour23.DELAY");
15: sendBroadcast(broadcastIntent);
16: }
17: }
Updating the Manifest for an IntentService
An IntentService must be defined in the AndroidManifest.xml file. The definition for a service is like that of an activity. In this case, the service is the FiveSecondService class and the AndroidManifest.xml includes the following:
<service
android:name="com.bffmedia.hour23.FiveSecondService">
</service>
Starting the IntentService from an Activity
In MainActivity.java, you define an IntentService button and use the onClick() method to initiate the service. On line 4 of Listing 23.2, an intent is defined. On line 5, the startService() starts the service.
Listing 23.2 shows the complete button definition, the OnClickListener(), and the implementation for calling the FiveSecondService.
LISTING 23.2 Starting an IntentService
1: runIntentServiceButton = (Button) findViewById(R.id.intentServiceButton);
2: runIntentServiceButton.setOnClickListener(new OnClickListener() {
3: public void onClick(View v) {
4: Intent delayIntent = new Intent(MainActivity.this, FiveSecondService.class);
5: startService(delayIntent);
6: }
7: });
That’s it. You’ve created the FiveSecondService and launched it from your activity. If you just wanted to launch a background service, you would be done. Ideally, you would want the background service to have a way to indicate that it has completed its task. You can do that using a BroadcastReceiver.
Adding a BroadcastReceiver
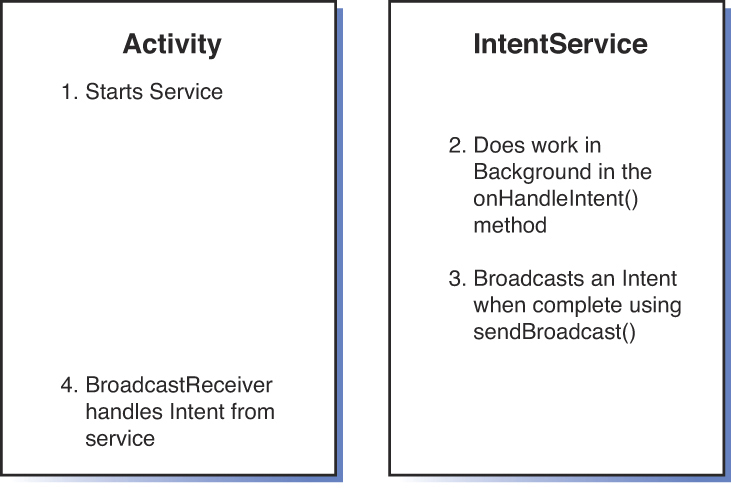
When the FiveSecondService onHandleIntent() method finishes, you want to relay that information to the MainActivity. To do that, the service will broadcast an intent using the sendBroadcast() method, and MainActivity will handle the intent with a BroadcastReceiver.
Figure 23.2 shows how this works generically.
The code in Listing 23.2 starts an IntentService in MainActivity.java. Listing 23.1 contains the complete FiveSecondService code and includes creating an intent and the call to the sendBroadcast() method. The setAction() method is called on the intent with the parameter "com.bffmedia.hour23.DELAY". That action identifies the intent. You add extra data to the intent with the putExtra() method:
Intent broadcastIntent = new Intent();
broadcastIntent.putExtra("message", "UPDATE: USING INTENT SERVICE");
broadcastIntent.setAction("com.bffmedia.hour23.DELAY");
sendBroadcast(broadcastIntent);
The remaining step is to implement a BroadcastReceiver in MainActivity.java.
You create a BroadcastReceiver class called DelayReceiver within MainActivity.java. The DelayReceiver will be passed the intent that was created in the service. That intent includes a message as extra data. You display that data in a TextView.
After you create a DelayReceiver, it must be registered in the activity onResume() method and unregistered in the activity onPause() method.
Listing 23.3 shows the DelayReceiver class.
LISTING 23.3 BroadcastReceiver Implementation (MainActivity.java)
1: public class DelayReceiver extends BroadcastReceiver {
2: @Override
3: public void onReceive(Context context, Intent intent) {
4: String message = intent.getExtras().getString("message");
5: mDisplay.setText("Finished " + message);
6: }
7: }
The DelayReceiver extends BroadcastReceiver and implements the onReceive() method, which is passed an Intent. Line 4 of Listing 23.3 gets a message string by reading the intent extra data. See line 13 of Listing 23.1 to see how this extra data was added to the intent.
The field mDisplay in line 5 is a TextView. The message extra data from the intent displays on the TextView.
To read the action associated with the event, you call intent.getAction(). That provides the action that was set in Listing 23.1.
You must also call the registerReceiver() and unregisterReceiver() methods.
You call the registerReceiver() method in the activity onResume() method. The field mDelayReceiver is of type DelayReceiver. The IntentFilter parameter passed to the registerReceiver() method filters based on the action associated with the intent. In this case, that action is “com.bffmedia.hour23.DELAY”:
registerReceiver(mDelayReceiver, new IntentFilter("com.bffmedia.hour23.DELAY"));
The BroadcastReceiver is unregistered in the activity onPause() method:
unregisterReceiver(mDelayReceiver);
Using an IntentService and a BroadcastReceiver in tandem is a powerful method to invoke a background task and have a notification sent when that task is complete.
Adding Animation
Using animation can convey meaning in an app and make an app feel more responsive. Animation can make an app more fun, but it has the potential to do more. For example, an animation can indicate to users that they need to swipe to unlock their screen.
Animations can get in the way, but if handled wisely, they can add depth to an app.
Several flavors of animation are available in Android. The ObjectAnimator (android.animation.ObjectAnimator) class is very powerful. It was introduced in Honeycomb (API Level 11).
ObjectAnimator provides the ability to animate an object like a button using common graphical transformations. You can translate, rotate, scale, and change the alpha value for an object.
The ViewPropertyAnimator (android.view.ViewPropertyAnimator) class was added in a later Honeycomb release (API Level 12). This class makes animating a single view easy.
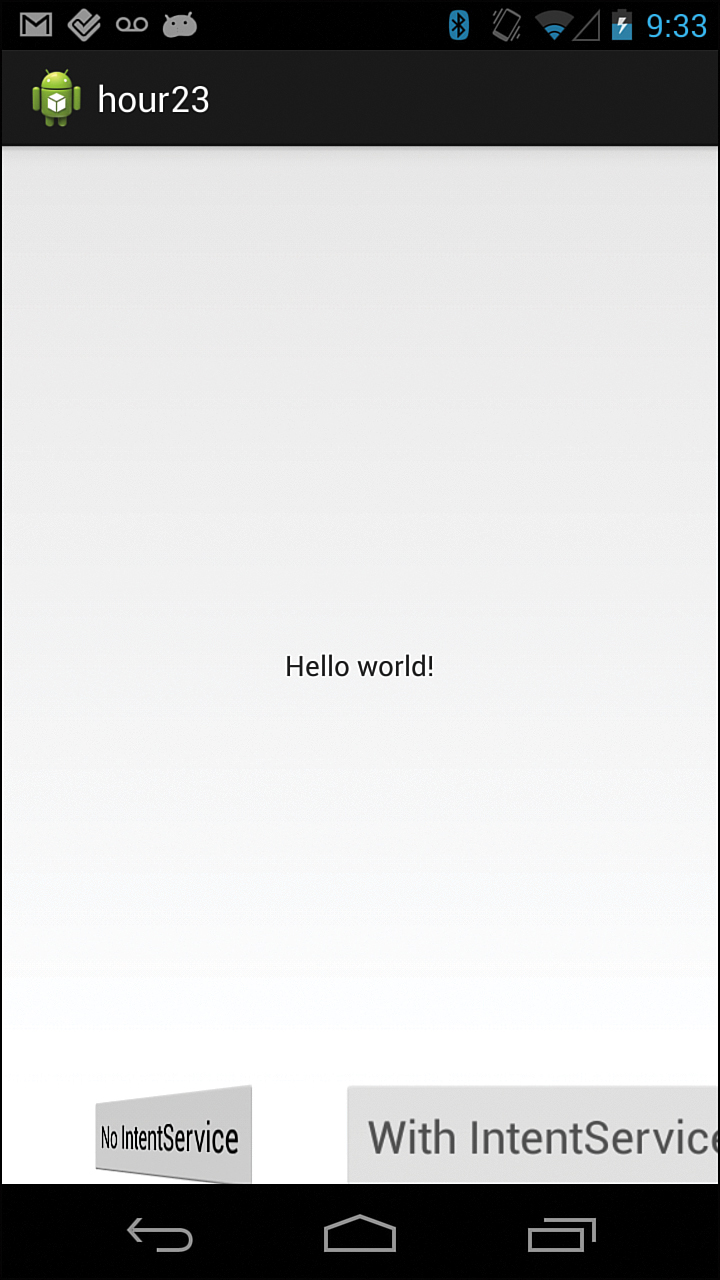
This section shows an example of both ObjectAnimator and ViewPropertyAnimator. When the Hour 23 app starts, you will animate both the “No IntentService” and the “With IntentService” buttons.
You define the doNotRunIntentServiceButton in the MainActivity onCreate() method and add ViewPropertyAnimator. This button will rotate for two seconds:
Button doNotRunIntentServiceButton = (Button) findViewById(R.
id.noIntentServiceButton);
animate(doNotRunIntentServiceButton).setDuration(2000).rotationYBy(720);
Listing 23.4 shows the code to animate the runIntentServiceButton using ObjectAnimator and an AnimatorSet. This code is in the onResume() method of MainActivity.java. The AnimatorSet holds a set of animations and is defined on line 1. The three animation commands are on lines 3 through 6. The scale instructions indicate that the view should grow to 1.5 times the initial size and then return to the original size. Similarly, the alpha command fades the view and then has it return to the original state. Taken together, these commands grow and fade the button before returning it to its original size.
LISTING 23.4 Using ObjectAnimator
1: AnimatorSet set = new AnimatorSet();
2: set.playTogether(
3: ObjectAnimator.ofFloat(runIntentServiceButton, "scaleX", 1, 1.5f,1),
4: ObjectAnimator.ofFloat(runIntentServiceButton, "scaleY", 1, 1.5f,1),
5: ObjectAnimator.ofFloat(runIntentServiceButton, "alpha", 1, 0.25f, 1)
6: );
7: set.setDuration(5 * 1000).start();
Figure 23.3 shows one button mid-rotation and the other button as it scales to a larger size.
As mentioned, these animations are not available on Android before Honeycomb, but there is good news. An open source library called NineOldAndroids provides the ability to do these animations in earlier versions of Android. The support is not absolute, but where there is a similar animation available on the older version of Android, it is implemented in the library.
The library is available as source code and a jar file. If you download the jar file and are using Eclipse, you can import the file from the file systems into the libs folder. You then right-click on the file and add it to the build path. In IntelliJ or Android studio, the jar must be added to the build system.
You can find information on the NineOldAndroids project at http://nineoldandroids.com/.
The source is available on github at https://github.com/JakeWharton/NineOldAndroids/.
You can download the jar from https://github.com/JakeWharton/NineOldAndroids/downloads.
Using open source libraries can be an effective way to add new features or improve an app. The following sections consider several more open source libraries that you might find useful in Android development.
Using Open Source
The NineOldAndroids project, written by Jake Wharton, is one example of a helpful open source Android library. He has written several other helpful Android tools. He works on Android projects at Square, which has released several useful open source projects.
Using open source libraries is common for individual developers and many companies. Most open source code includes a specific license regarding usage. The projects reviewed in this hour are all released under the Apache 2.0 license. You can find more information about that license at http://www.apache.org/licenses/. The FAQ section includes an explanation of the license for non-lawyers.
In addition to the NineOldAndroids project, Jake Wharton has released ActionBarSherlock- and ViewPager-related projects, and Square has released an image library called Picasso. The following sections describe each of these briefly. These projects and other open source projects can help you make better apps.
ActionBarSherlock
ActionBarSherlock extends the compatibility package for Android to provide action bar support for earlier versions. ActionBarSherlock will use a native action bar if available or a custom implementation for versions of Android that do not include a native action bar.
When working with fragments, you will use a SherlockFragmentActivity.
For more information on ActionBarSherlock, see http://actionbarsherlock.com/.
ViewPageIndicator
This hour’s project works with the ViewPager to give an indicator regarding the current page. The ViewPageIndicator can make it clearer to the user that more pages are available to view.
The ViewPageIndicator provides a title for each page being displayed.
For more information on ViewPageIndicator, see http://viewpagerindicator.com/.
Picasso
Handling images in Android might not always be straightforward. You have worked with images and ImageViews in the Flickr app and in Hour 21. You know about downloading and caching images and the work required to scale an image to save memory.
The goal of Picasso is to handle working with images and ImageViews in an elegant way. It handles disk caching and memory caching of images and keeps overall memory usage to a minimum. Much of the “plumbing” of handling images is kept behind the scenes.
Loading an image from a URL using Picasso is done with one line:
Picasso.with(context).load("http://i.imgur.com/DvpvklR.png").into(imageView);
For more information on Picasso, see http://square.github.io/picasso/.
Using Open Source in an App
The Hour23OpenSource project uses ActionBarSherlock, ViewPageIndicator, NineOldAndroids, and Picasso.
The app shows Flickr images as the project did in Hour 16. In this app, you retrieve the 12 most recent images. The image data is retrieved in an IntentService called FlickrService. When the FlickrService completes, it broadcasts an intent that includes the photo data as extra data.
A TextView is animated for five seconds as the data is retrieved. When the BroadcastReceiver fires, the TextView is hidden.
A ViewPager is used to display each image. The ViewPageIndicator shows the title of each image based on the Flickr data. The ViewPager displays an ImageFragment. The ImageFragment includes an ImageView to display the FlickrPhoto. Picasso is used to display the image from Flickr in the ImageView.
Tip: Adding Jars and Resolving Conflicts
ActionBarSherlock and ViewPageIndicator are libraries that you can include in your app similar to how you included the Facebook library in Hour 22. The possibility exists that a conflict might occur between versions of the Android support library used in your project and in one of the open source libraries. To avoid conflicts, use the latest version of the support library. In Eclipse ADT, you do that by choosing Android Tools, Add Support Library on the project. You can import NineOldAndroids and Picasso as jar files. In Eclipse ADT, import the file into the lib directory and right-click. Choose Add to Build Path.
Digging Deeper into Android
Hopefully this is not a surprise, but 24 hours is not enough time to cover all the interesting and useful features of the Android platform and Android SDK. You’ve worked on many applications and features over the course of this book.
With the knowledge you have acquired thus far, you might find yourself thinking about your own application ideas. The rest of this hour covers some additional Android features that might help with your applications and point you in the right direction for using the features in your own application.
The Android developer documentation is a good starting point for further exploration of these topics: http://developer.android.com/.
Using Sensors
Using sensors can add interesting and unique features to your app. Android devices come with hardware and software sensors and not all devices will have all sensors. That means that one thing to know about sensors in general is that your app has to check to see whether they exist on a user’s device.
This snippet of code checks for the accelerometer sensor:
private SensorManagermSensorManager;
mSensorManager = (SensorManager) getSystemService(Context.SENSOR_SERVICE);
if (mSensorManager.getDefaultSensor(TYPE_ACCELEROMETER) != null){
// Sensor is available
} else {
// Sensor is not available
}
Working with sensors takes a common approach. Like many things in Android, when working with a sensor, you set up a listener and listen for changes produced by the sensor. There is a SensorEventListener (android.hardware.SensorEventListener) class for this purpose. A SensorEventListener implements the onSensorChanged() method to listen for SensorEvents (android.hardware.SensorEvent). From the SensorEvent, you can determine the sensor that generated the event and data associated with the event.
The following are some of the device sensors that the Android SDK supports:
![]() Accelerometer—Measures acceleration in three dimensions.
Accelerometer—Measures acceleration in three dimensions.
![]() Light sensor—Measures ambient brightness.
Light sensor—Measures ambient brightness.
![]() Magnetic field sensor—Measures earth’s magnetic field in three dimensions.
Magnetic field sensor—Measures earth’s magnetic field in three dimensions.
![]() Orientation sensor—Measures a device’s orientation.
Orientation sensor—Measures a device’s orientation.
![]() Temperature sensor—Measures ambient temperature.
Temperature sensor—Measures ambient temperature.
![]() Proximity sensor—Measures whether there is something near the screen of the device.
Proximity sensor—Measures whether there is something near the screen of the device.
Handling User Gestures
You already know how to listen for click events. You can also handle gestures, such as flings, scrolls, and taps, by using the GestureDetector class (android.view.GestureDetector). You can use the GestureDetector class by implementing the onTouchEvent() method within an activity.
The following are some of the gestures an application can watch for and handle:
![]()
onDown—Occurs when the user first presses the touch screen.
![]()
onShowPress—Occurs after the user first presses the touch screen but before the user lifts up or moves around on the screen.
![]()
onSingleTapUp—Occurs when the user lifts up from the touch screen as part of a single-tap event.
![]()
onSingleTapConfirmed—Called when a single-tap event occurs.
![]()
onDoubleTap—Called when a double-tap event occurs.
![]()
onDoubleTapEvent—Called when an event within a double-tap gesture occurs, including any down, move, or up action.
![]()
onLongPress—Similar to onSingleTapUp but called if the user has held his or her finger down just long enough to not be a standard click but also didn’t move the finger.
![]()
onScroll—Called after the user has pressed and then moved his or her finger in a steady motion and lifted up.
![]()
onFling—Called after the user has pressed and then moved his or her finger in an accelerating motion just before lifting it.
In addition, the android.gesture package enables an application to recognize arbitrary gestures, as well as store, load, and draw them. This means almost any symbol a user can draw could be turned into a gesture with a specific meaning.
Using Styles and Themes
The Android SDK provides two powerful mechanisms for designing consistent user interfaces that are easy to maintain: styles and themes.
A style is a grouping of common view attribute settings that you can apply to any number of view controls. For example, you might want all view controls in your application, such as TextView and EditText controls, to use the same text color, font, and size. You could create a style that defines these three attributes and apply it to each TextView and EditText control within your application layouts.
A theme is a collection of one or more styles. Whereas you apply a style to a specific control, such as a TextView control, you apply a theme to all View objects within a specified activity. Applying a theme to a set of view objects all at once simplifies making the user interface look consistent; it can be a great way to define color schemes and other common view attribute settings across an application. You can specify a theme programmatically by calling the activity class’s setTheme() method. You can also apply themes to a specific activity in the Android manifest file.
Designing Custom View and ViewGroup Controls
You are already familiar with many of the user interface controls, such as Layout and View controls, that are available in the Android SDK. You can also create custom controls. To do so, you start with the appropriate View (or ViewGroup) control from the android.view package and implement the specific functionality needed for your control or layout.
You can use custom View controls in XML layout files, or you can inflate them programmatically at runtime. You can create new types of controls, or you can extend the functionality of existing controls, such as TextView or Button controls.
The Facebook LoginButton is an example of a custom view, but often custom views are simple extensions of basic views.
Converting Text to Speech
The Android platform includes a TTS engine (android.speech.tts) that enables devices to perform speech synthesis. You can use the TTS engine to have your applications “read” text to the user. You might have seen this feature used frequently with Location-Based Services (LBS) applications that allow for hands-free directions.
Converting Speech to Text
You can enhance an application with speech recognition support by using the speech recognition framework (android.speech.RecognizerIntent). You use this intent to record speech and send it to a recognition server for processing, so this feature is not really practical for devices that don’t have a reasonable network connection.
Using the OpenGL ES Graphics API
For more advanced graphics, Android uses the popular OpenGL ES graphics API. OpenGL ES 1.0 has been supported since Android 1.0. Beginning with Android 2.2, the OpenGL ES 2.0 API is supported. In Android 4.3, OpenGL ES 3.0 support was added. Applications can use Android’s OpenGL ES support to draw, animate, light, shade, and texture graphical objects in three dimensions.
Bluetooth
Bluetooth support was included on Android 2.0. With Android 4.3, Android has added support for Bluetooth low energy (LE). Bluetooth low energy makes it possible to build Android apps that communicate with Bluetooth low energy peripheral devices. For example, a phone that includes Bluetooth low energy support that is running Android 4.3 could support an app that interacts with a pedometer.
Android 4.3 introduced the BluetoothManager (android.bluetooth.BluetoothManager) class to help an app handle Bluetooth management.
More on Bluetooth on Android can be found here: http://developer.android.com/reference/android/bluetooth/package-summary.html
NFC and Beam
Most Android phones have Near Field Communication (NFC) capability. That means that they have the ability to communicate in short messages from an NFC tag when the phone is very close to the tag. NFC is a set of short-range wireless technologies.
A set of NFC intents is defined in Android. When a tag is read, these intents will be fired. The idea is to create an app that filters for these intents and launches when an NFC tag is read. The details of NFC tags and the relationship between the tags and the application that is launched can get complicated. NFC concepts are covered in the Android developer documentation.
Android Beam is a technology for peer-to-peer NFC communication, which means that two Android devices can communicate through NFC using this technology.
Presentation Class for External Display
The Presentation (android.app.Presentation) class was introduced in API Level 17 (Jelly Bean 4.2.2). The Presentation class is used to present content on an external display. You use it in conjunction with the DisplayManager (android.hardware.display.DisplayManager) class or the MediaRouter (android.media.MediaRouter) class.
The Presentation class extends Dialog (android.app.dialog). Presentation class is a dialog that displays on an external device.
The Presentation class provides the capability for an app to present content on one device and to control it with another. A video could play on a TV and associated content could display on a tablet. It opens up new opportunities for multi-screen apps.
Android 4.2.2 also supports Miracast, a wireless display standard. A Miracast display is treated as another external screen, so you can use the Presentation class with Miracast.
Summary
In this hour, you learned about more advanced features of the Android platform including IntentServices and BroadcastReceivers. You considered how to enhance your apps using open source libraries and animations. In addition, this hour reviewed Android features such assensors, gestures, 3D graphics, NFC, and using external displays.
Q&A
Q. With the contents of this hour, have we covered everything available in Android?
A. No, this book has covered much of the Android system and includes topics such as the use of SQLite, ContentProviders, and more that are commonly used in Android, but it is not an encyclopedic view of Android. The goal of this hour was to cover features that are often used in production-level Android apps and to be a guide to new topics.
Q. What happens when new features are added in Android?
A. New features provide new opportunities for developers. Often we need to develop an app for as many people as possible, but developing an app with new capabilities that relies on the latest Android features might provide a good opportunity to create an app that gets noticed and used. In practical terms, developers have learned several patterns that are helpful. Your app should be able to detect new features programmatically. Often new features can be initiated by intents or used with listeners. You might have to learn the new feature, but your approach to implementing the feature in your app will often follow the Android way.
Workshop
Quiz
1. What does the ViewPageIndicator do?
2. How can an IntentService communicate with an activity?
3. What class in Jelly Bean would be used with a device that supports Miracast?
Answers
1. The ViewPageIndicator works with the ViewPager from the support library. It puts titles or other indicators on the pages that are being viewed.
2. An IntentService can send an intent using sendBroadcast(). The activity will have implemented a BroadcastReceiver to detect the intent.
3. Miracast is a wireless display standard. It can be used with the Presentation class to show an external display.
Exercise
The Hour23Opensource project used an IntentService and BroadcastReceiver to receive photo information from Flickr. Review the source code for that application and for the Flickr application developed in Hour 16. Make a new app based on the Hour 16 app that uses the Picasso library. In that app, replace the AsyncTask that is used to retrieve data with an IntentService and BroadcastReceiver.