
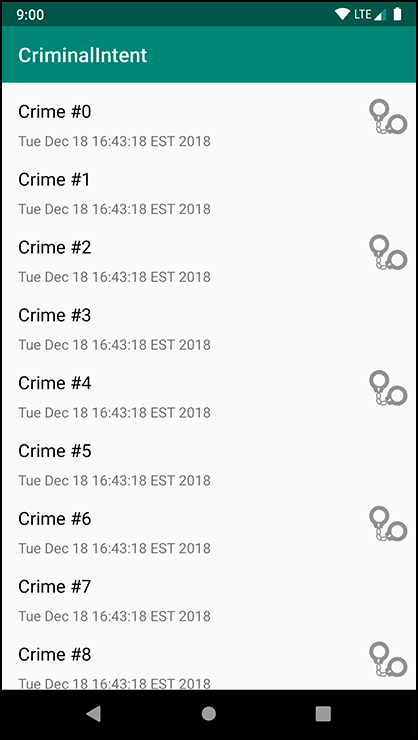
In this chapter, you will learn more about layouts and widgets while adding some style to your list items in the RecyclerView. You will also learn how to use the graphical layout editor to arrange widgets within a ConstraintLayout. Figure 10.1 shows what CrimeListFragment’s view will look like once you chisel down your existing app to build up your masterpiece.
In previous chapters you used nested layout hierarchies to arrange your widgets. For example, the layout/activity_main.xml file you created for GeoQuiz in Chapter 1 nested a LinearLayout within another LinearLayout. This nesting is hard for you as a developer to read and edit. Worse, nesting can degrade your app’s performance. Nested layouts can take a long time for the Android OS to measure and lay out, meaning your users might experience a delay before they see your views onscreen.
Flat, or non-nested, layouts are quicker for the OS to measure and lay out. And this is one of the areas where ConstraintLayout really shines. You can create beautifully intricate layouts without using nesting.
Before you dive in to ConstraintLayout, you must do a little legwork and learn a little background. You will need a copy of that fancy handcuff image from Figure 10.1 in your project. Open the solutions file (www.bignerdranch.com/solutions/AndroidProgramming4e.zip) and the 09_LayoutsAndWidgets/CriminalIntent/app/src/main/res directory. Copy each density version of ic_solved.png into the appropriate drawable folder in your project.